The “Playground” within the docassemble web application is a testing ground for interviews. It allows you to write YAML in one or more “files” and then run an interview with one click.
Components of the Playground page
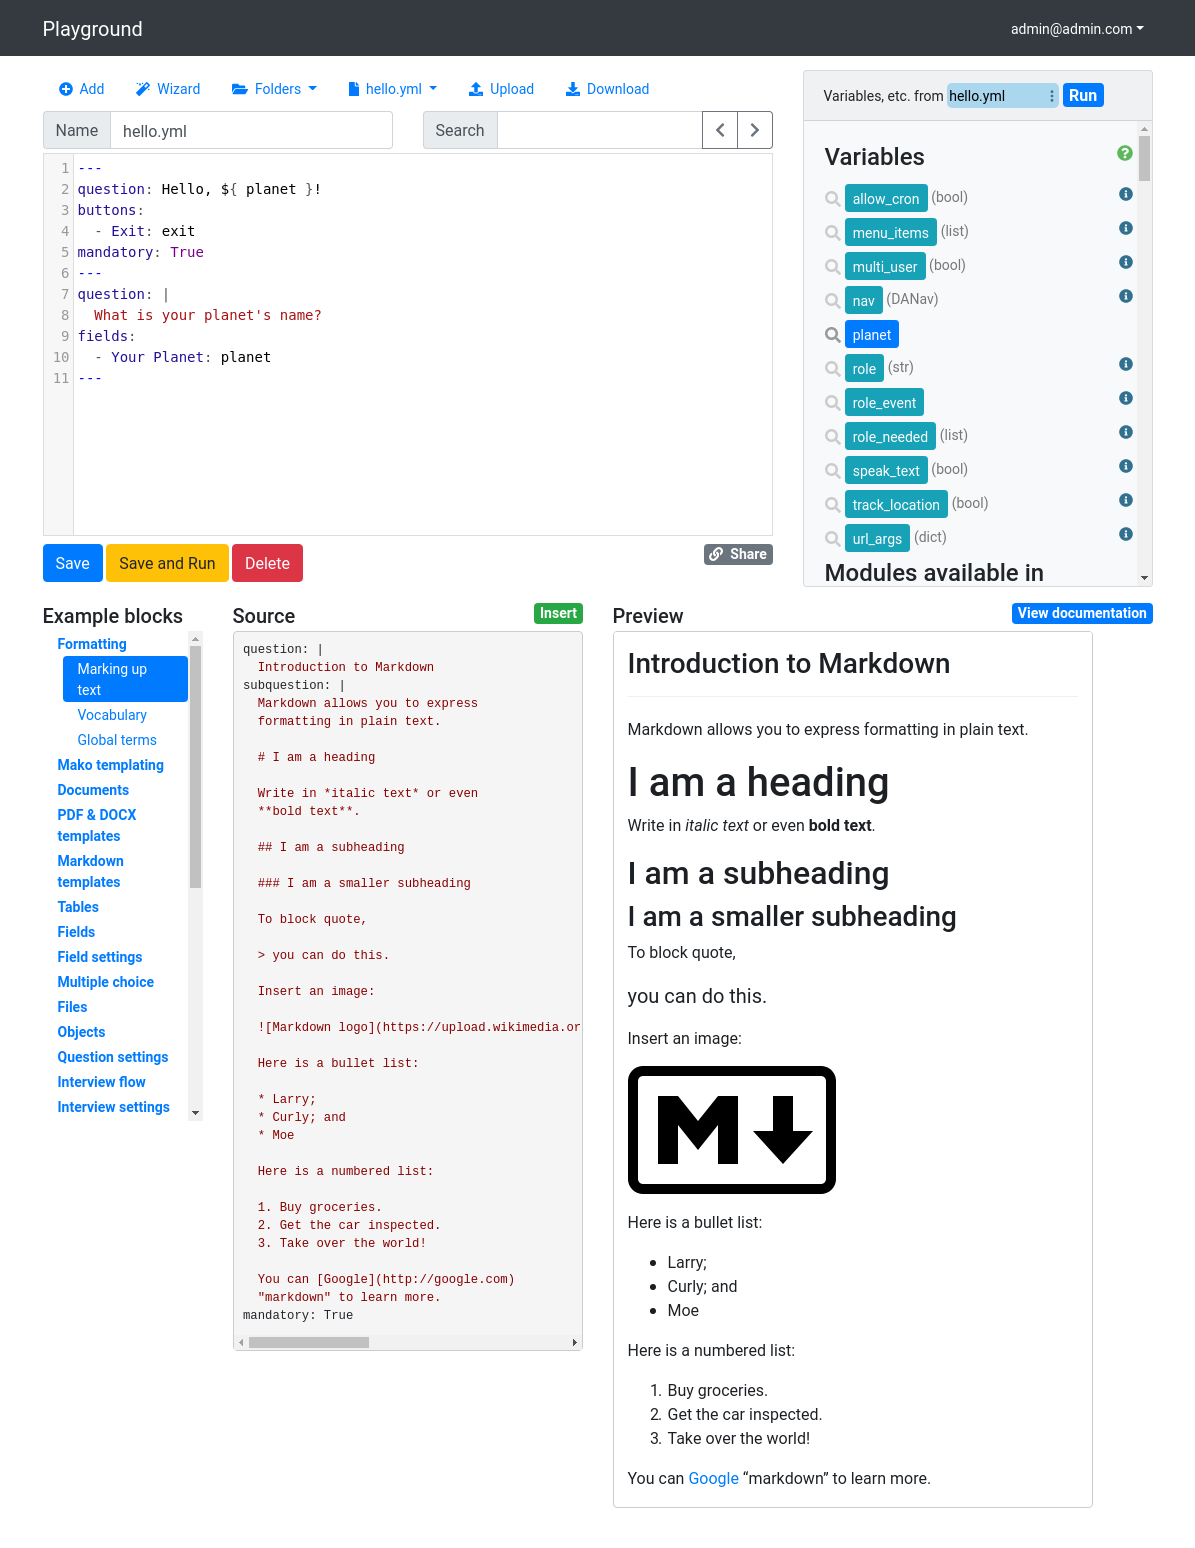
The YAML text editor
The main area of the Playground consists of an in-browser text editor with which you can edit YAML interview files.
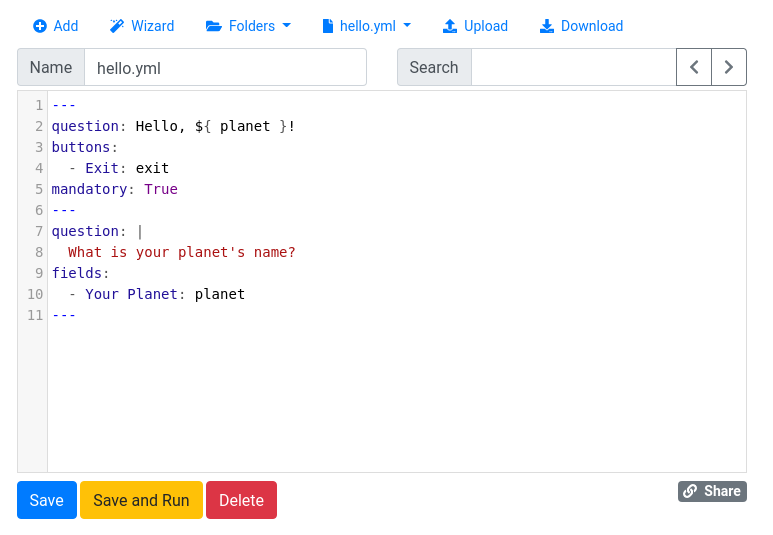
When using the editor, you can press the F11 key to enter full-screen mode. Press the Esc key to exit full-screen mode.
To create a new YAML file, click the icon.
To upload a YAML file, click Upload. The filename of the file you upload will be used as the name of the file in the Playground. If a file exists with the same name, it will be overwritten.
To download the YAML file that is currently displayed, click Download. Note that if there are unsaved changes, the changes will not be reflected in the downloaded file; you would need to press the Save button first in order to download the changed file.
You can use multiple files to organize parts of a single interview. For example, if you have a file called “interview.yml” and a file called “questions.yml,” you can incorporate one into the other by reference.
For example, suppose your “interview.yml” file contains:
---
include:
  - questions.yml
---
mandatory: True
code:
  say_hello
---
and suppose your “questions.yml” file contains:
---
sets: say_hello
question: |
  Hello, world!
---
If you run the “interview.yml” file, you will go to an interview that says
“Hello, world!” The “interview.yml” interview knew how to ask say_hello
because it incorporated the “questions.yml” file by reference.
If you write more than one interview, you might want to put all of your questions into a separate YAML file (e.g. “questions.yml”) so that you can easily re-use the questions in different contexts. Your main interview files will consist only of “mandatory” code blocks. Improvements you make to the questions will be available automatically to all interviews.
Inserting names into the editor
You can also insert names into the text editor by clicking the button for the name in the list in the Variables, etc. area of the Playground.
When you are using the text editor, you can start typing a name and then press Ctrl-space to autocomplete the name. This can help if you have long variable names in your interview and you can’t remember their literal spelling, or you can’t remember the name of a function.
The Templates folder
Within your Playground there are five “folders” where you can upload, download, and/or create various resources related to the development of your interviews. These include:
- Templates for storing Markdown and PDF templates that are used in documents and interview questions.
- Static files for images, Javascript, CSS, and other auxillary files that your interview uses.
- Sources for YAML files containing translations of text into other languages, as well as for training data for the machine learning function of docassemble.
- Modules for Python code that extends the features of your interview. You can also embed Python code directly into your interviews, but your interviews will be more readable if you keep its embedded Python code limited to if/then/else statements.
- Packages for bundling your interviews into packages for installation on a production server or other means of distribution.
The first of these is the Templates folder. If you create
documents, you might want to use separate document templates. In a
typical docassemble package, these templates are files in the
data/templates subdirectory. In the Playground, they are stored in
the “Templates” folder. For more information about the different
types of template files that can be provided as options to the
attachments specifier, see documents.
For example, you can write Markdown text in a separate text file
called small_claims_complaint.md in the Templates folder and then
incorporate that text by reference by including the line content
file: small_claims_complaint.md within an attachments specifier.
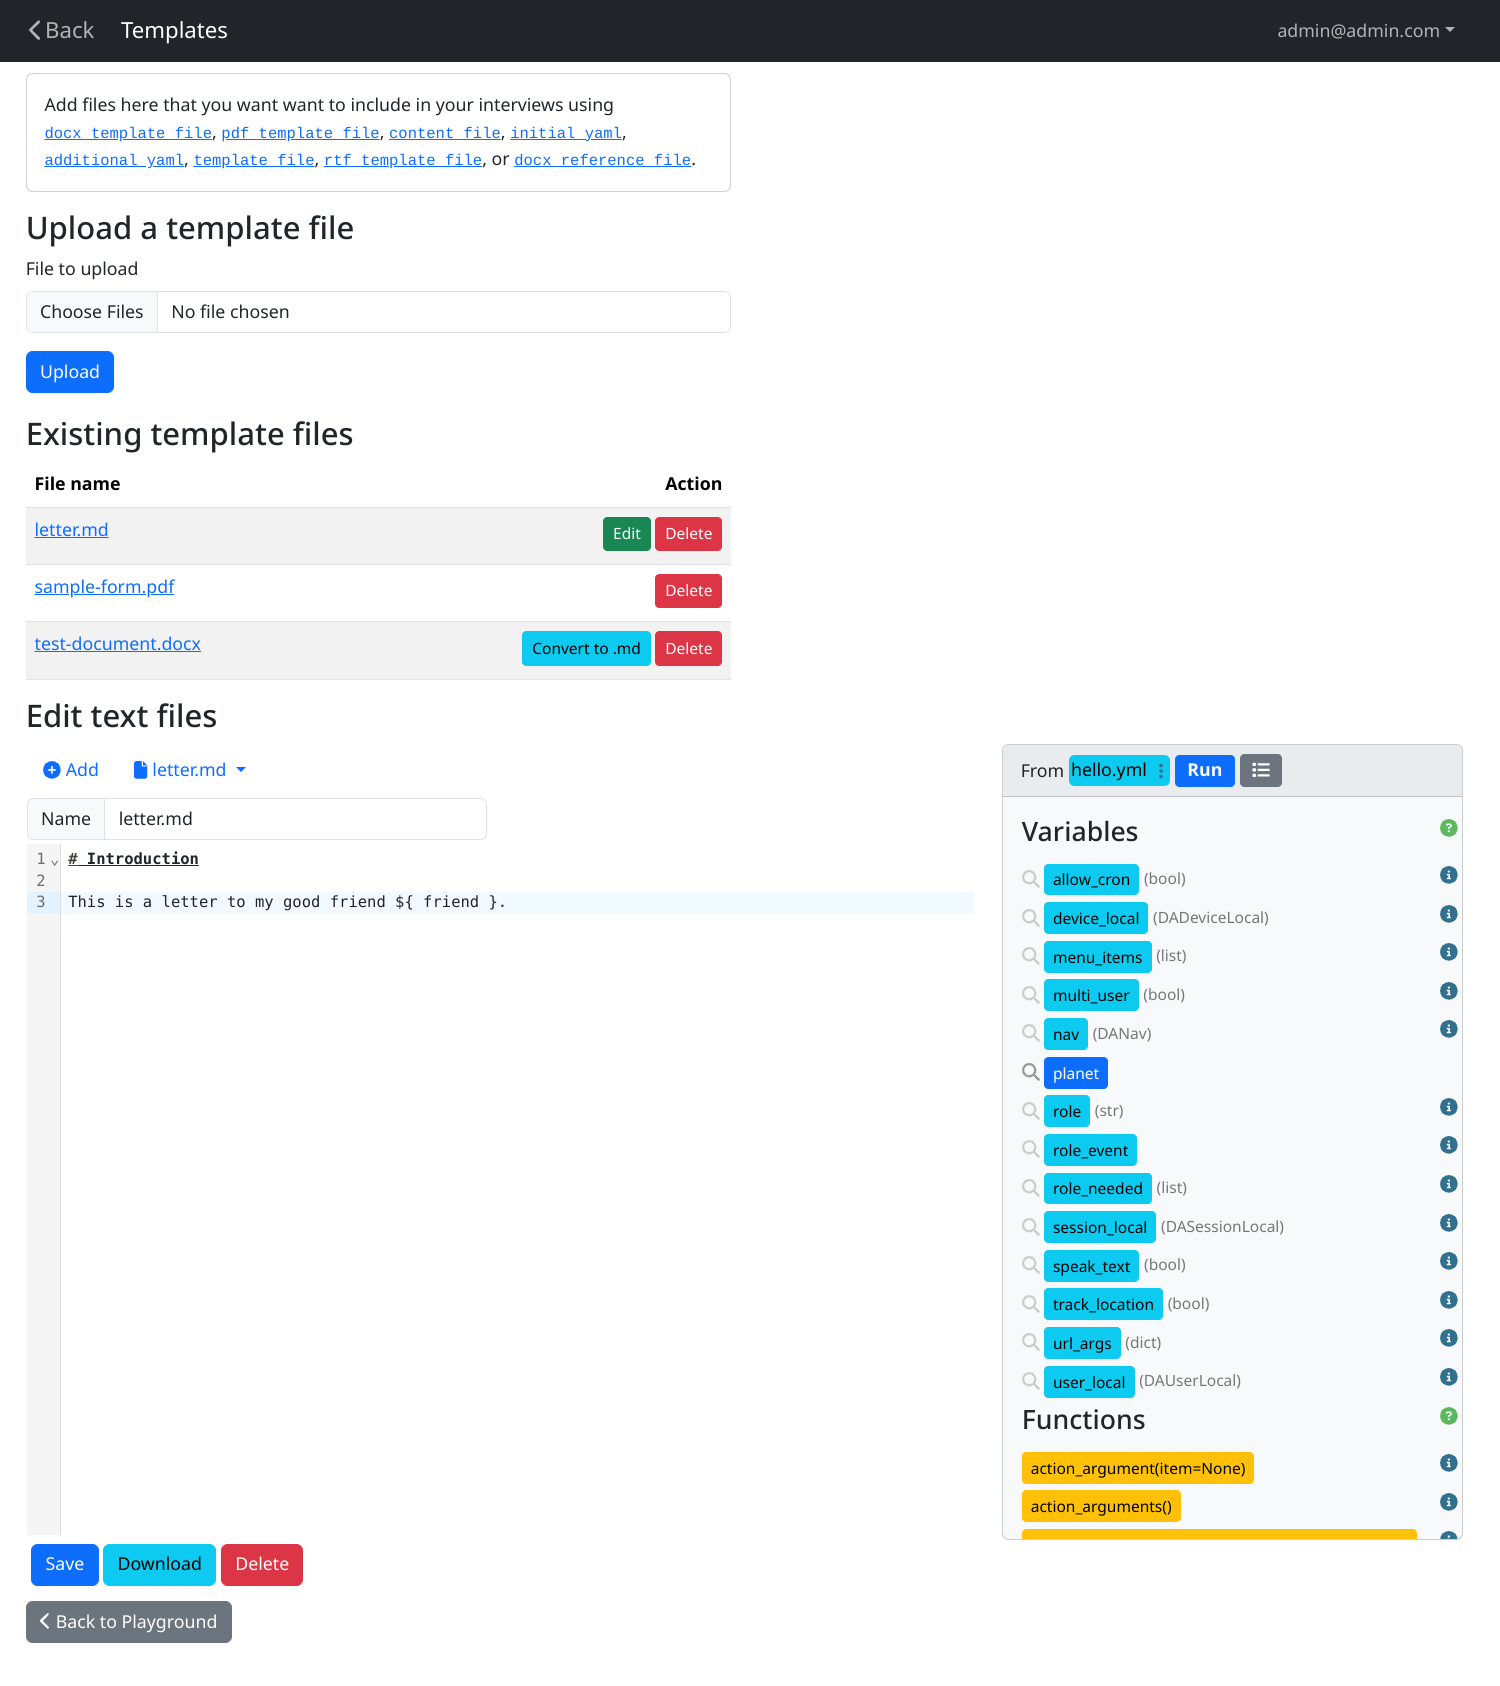
When you edit a Markdown file in the Templates folder, the “Variables, etc.” sidebar is shown, so that you can have access to the list of variables in any of your interview files.
In the Templates folder, you can upload files. Markdown and YAML
files can be edited. From the Templates screen, you can convert
uploaded files from Microsoft Word format (.docx, .doc, or
.rtf) or OpenDocument format (odt) to Markdown (.md) format,
so that you can include the text in your documents.
The Static folder
If your interviews include images or sound, you can bundle image and
audio files with your interview’s docassemble package by
including them within the data/static subdirectory. In the
Playground, these files are located within the “Static” folder.
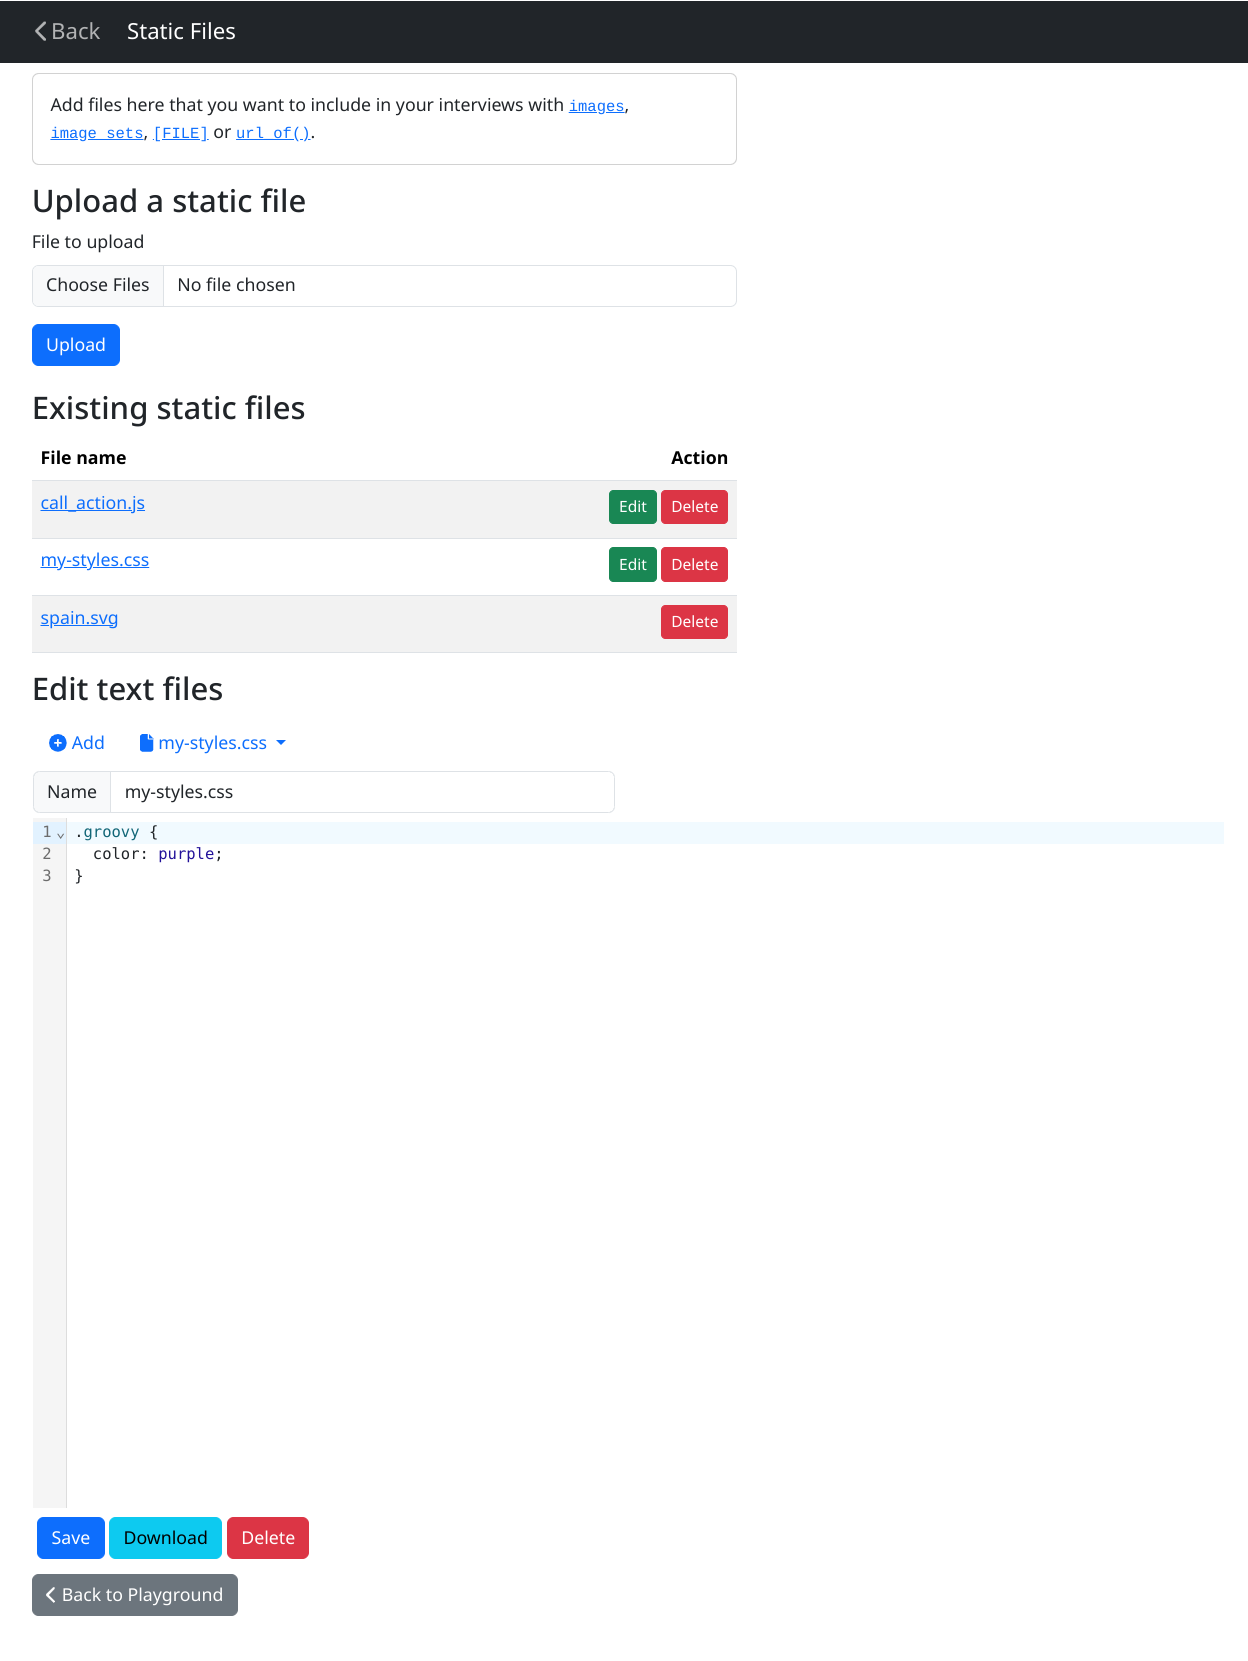
In this area, you can upload files or write files of your own. For example, you might want to write your own Javascript files here, or upload images that you want to include in interview questions.
The Sources folder
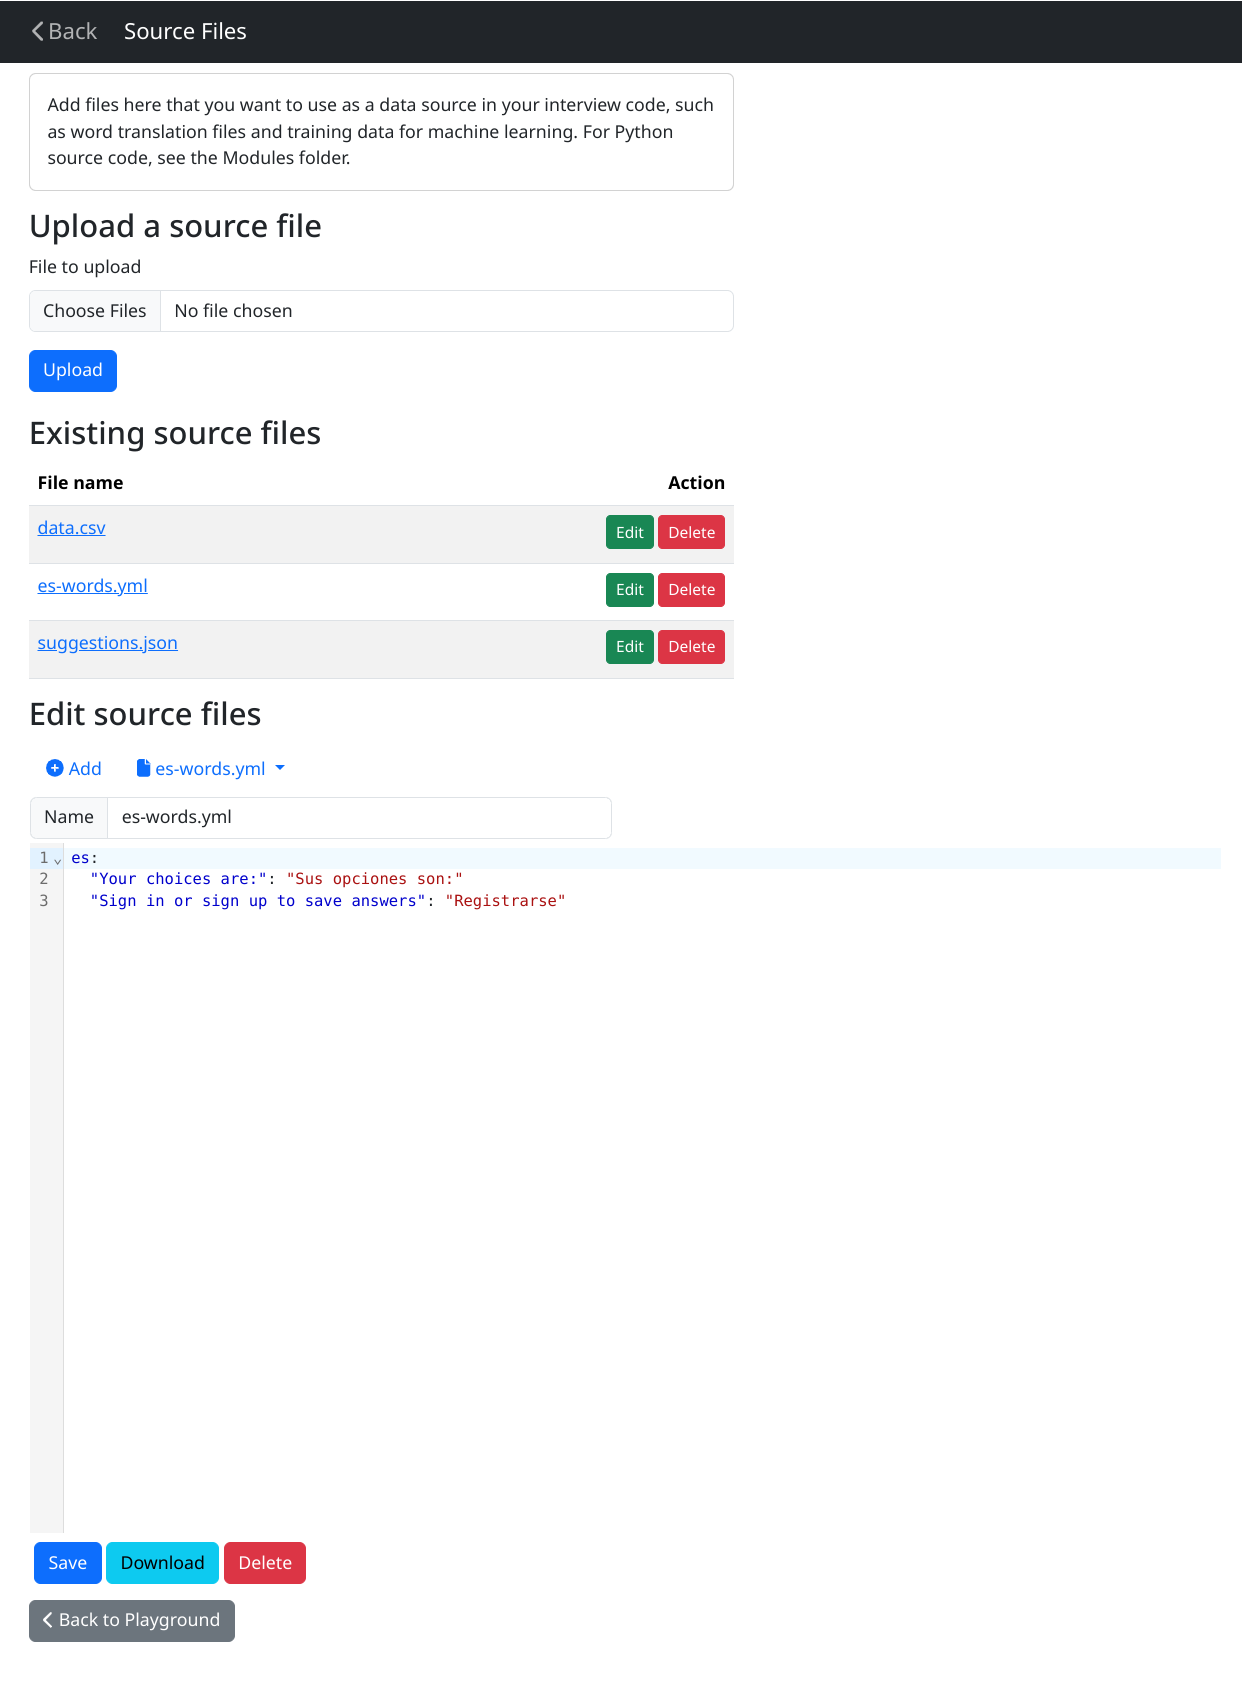
This is where you can store data files for use by your interviews, including:
- Translation files for the
word()function, which you can include using thewordsdirective in the configuration. - Training data for the machine learning function.
The Modules folder
If your interviews contain any complicated Python code, or you want to
create your own classes, you should create a Python module and import
its names into your interview. In a docassemble package, these
are located in the main directory (the directory that contains the
data subdirectory). In the Playground, these files are located
within the “Modules” folder. In this area, you can write your own
Python classes and functions.
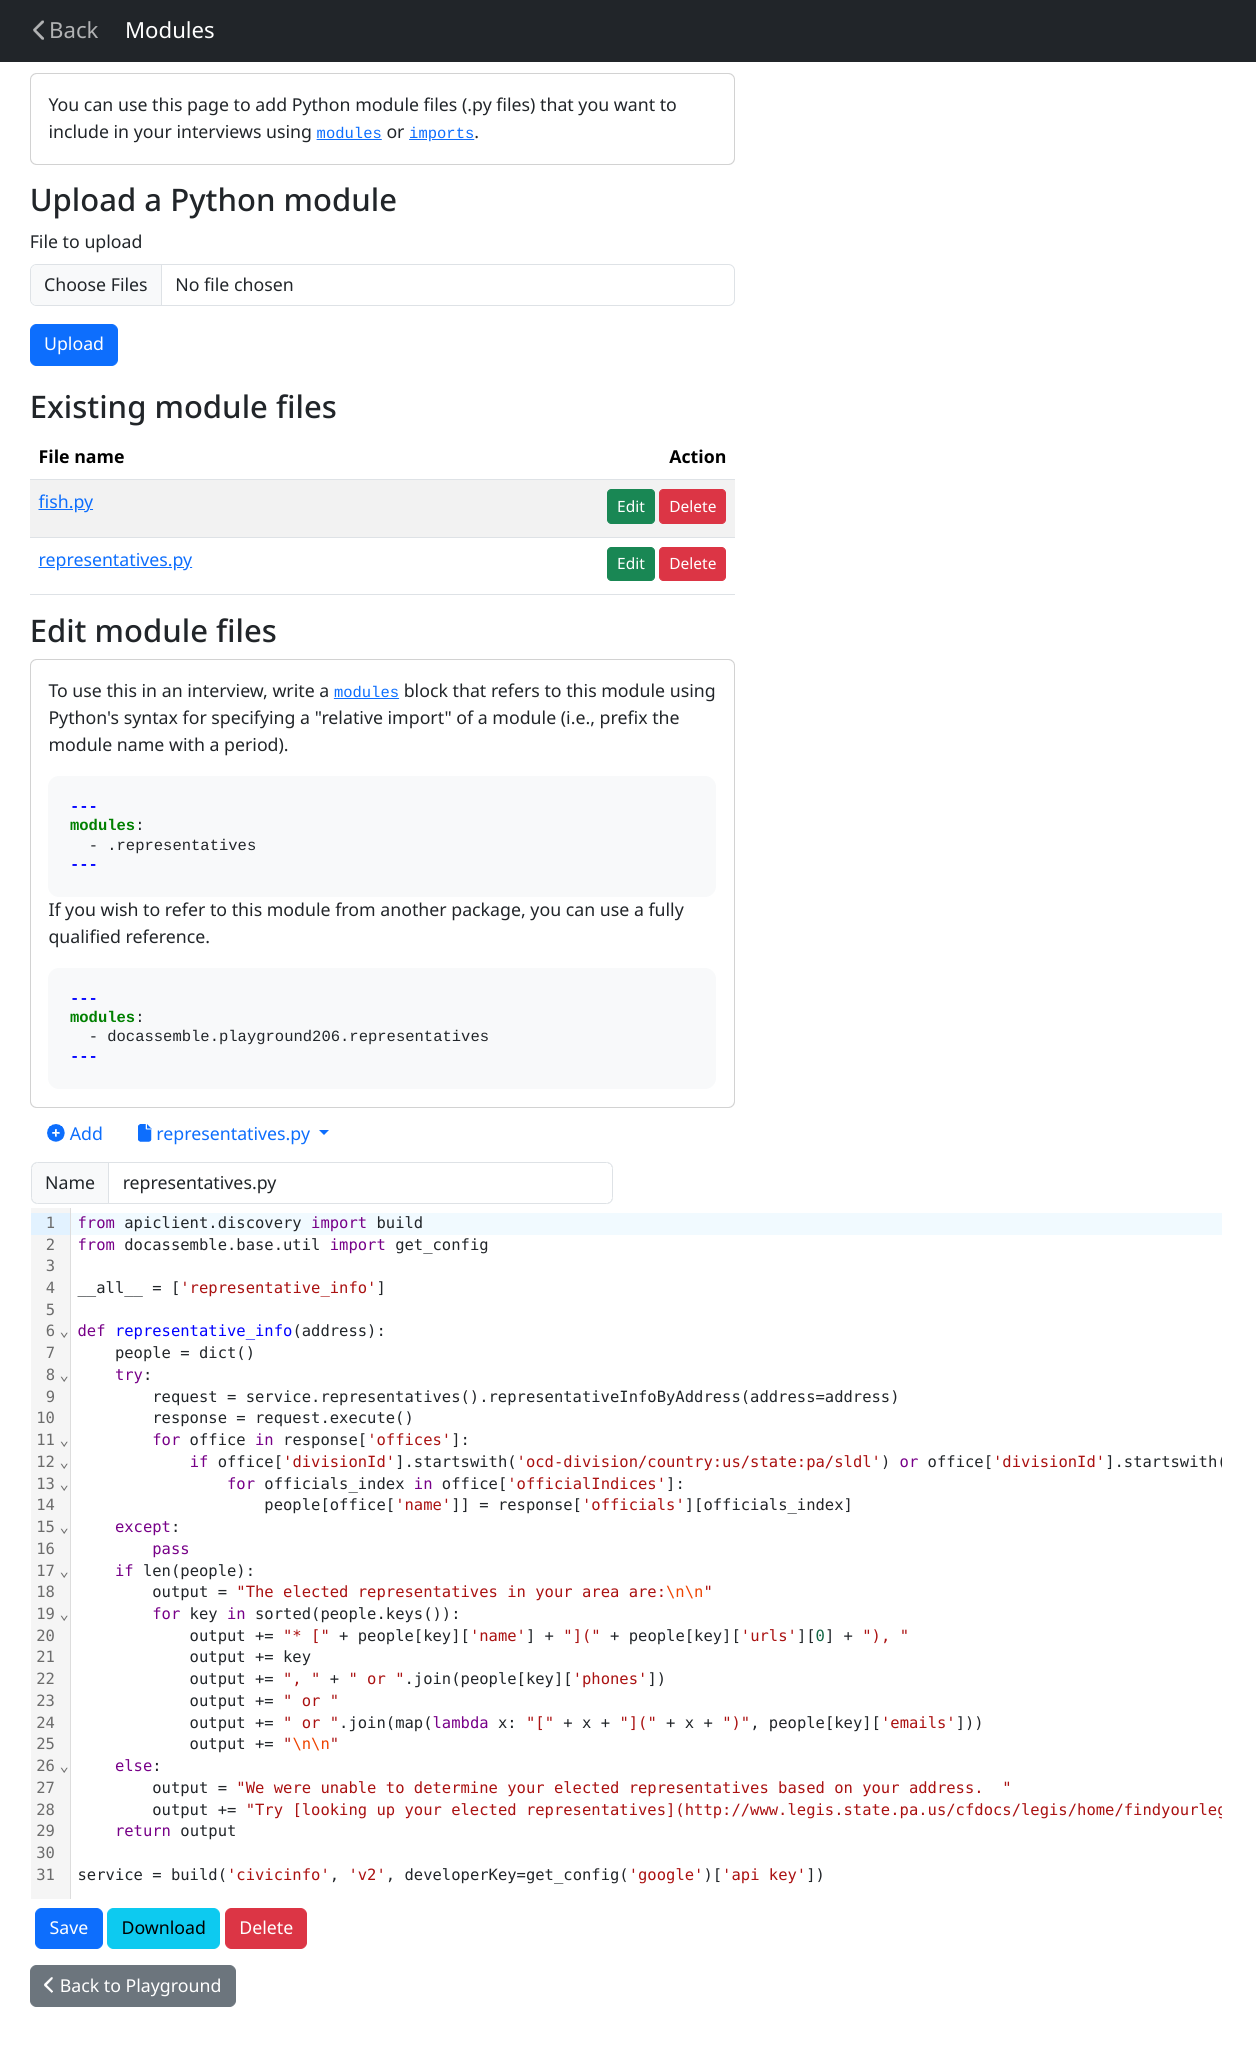
The best way to incorporate your module into your interview is to use
Python’s notation for “relative imports.” For example, if your module
file is called fruit.py, you would import the module’s resources by
writing a modules block:
---
modules:
  - .fruit
---
This notation will work both in the Playground and when the interview is bundled as a Python module.
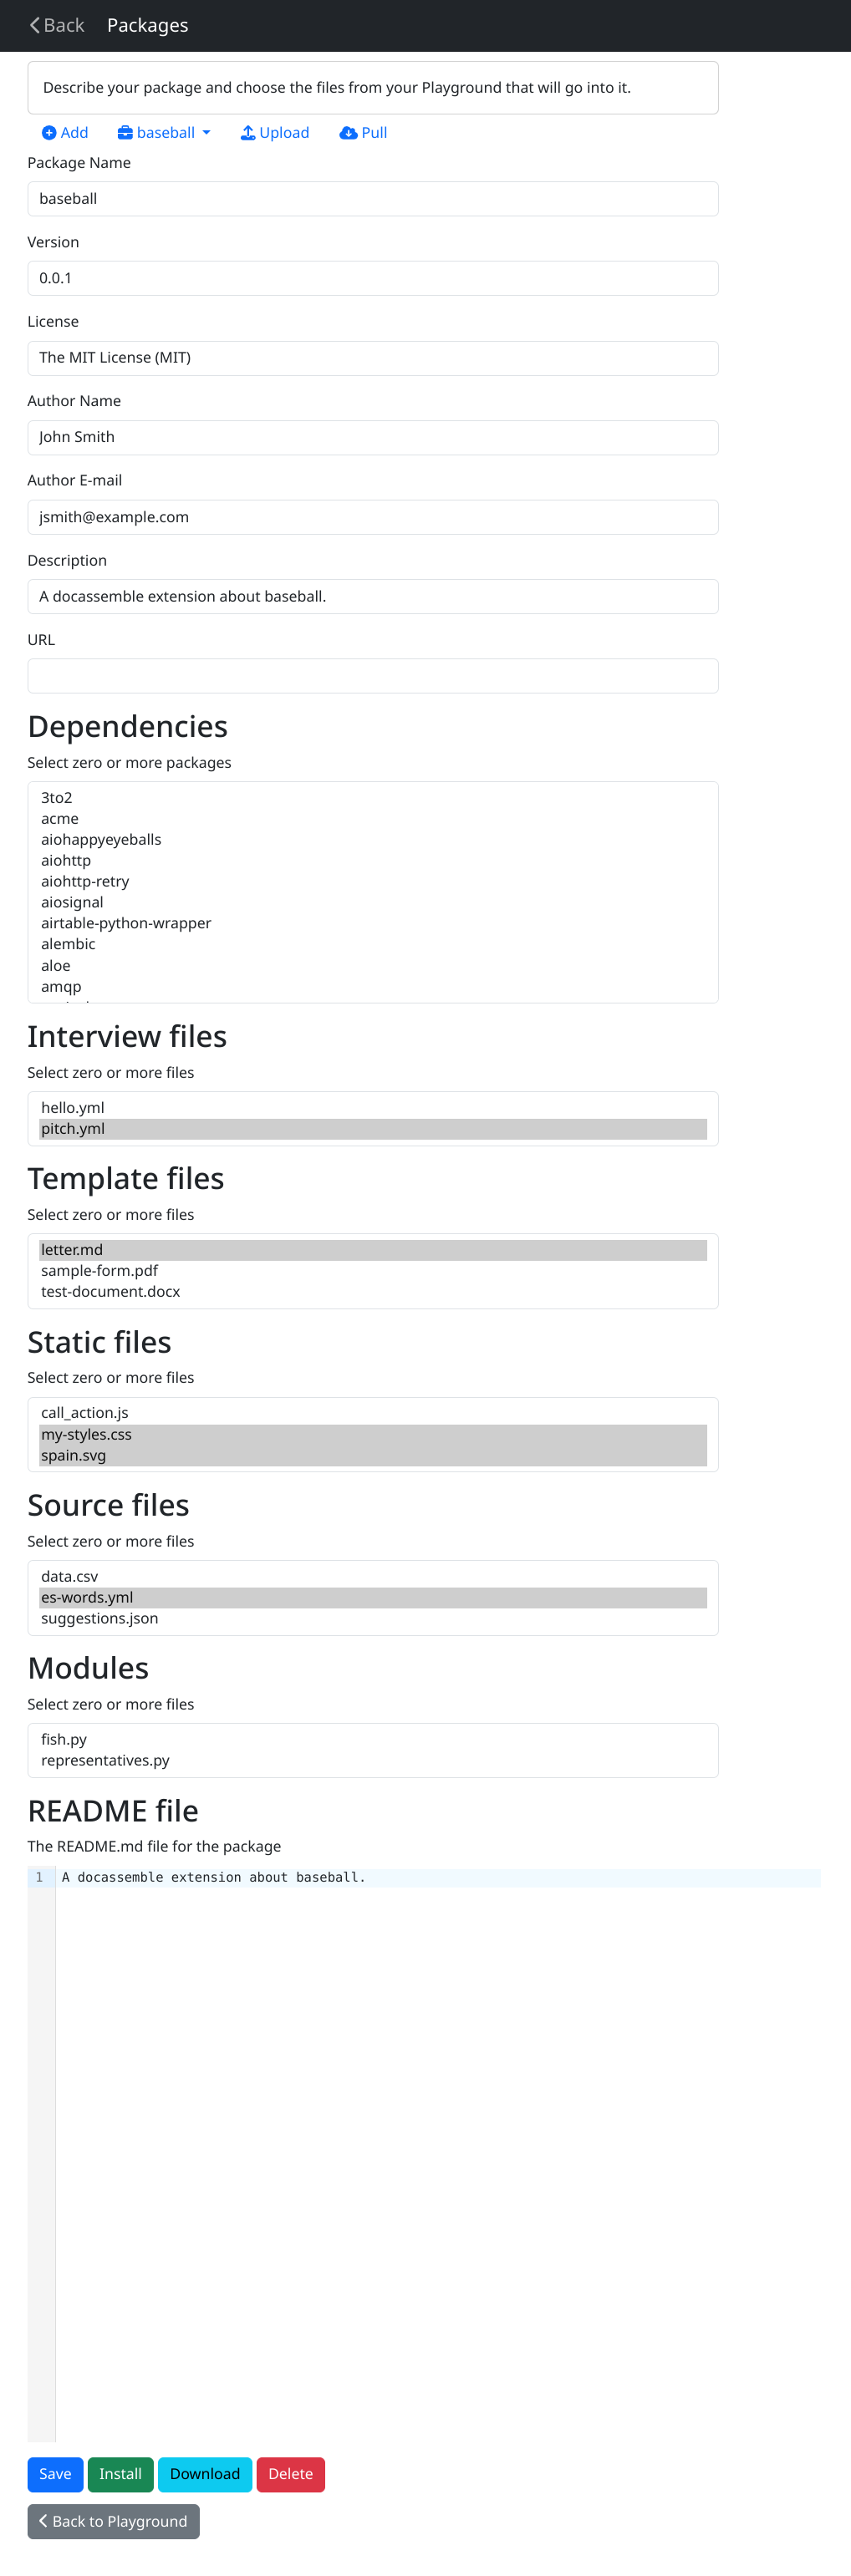
The Packages folder
The Packages area allows you to bundle the interview files, templates, static files, and/or modules from your Playground into a Python package that can be downloaded as a ZIP file, installed on the server, or published to PyPI.
You can keep track of one or more packages in the Packages folder. Each package has its own tab. To create a new package, click “ Add.”
To view a different package, select it from the pull-down menu.
To download the current package as a Zip file, click “ Download.”
If you have an existing package that was created using
docassemble, you can upload its contents into the Playground by
clicking “ Upload” and uploading a ZIP file. The ZIP
file should contain a single directory called, for example,
docassemble-packagename, and this directory needs to contain the
setup.py file and a docassemble directory. If the directory
structure is different, docassemble may not be able to read your
ZIP file. Note: this will work as expected if all of your modules are
in the folder docassemble-packagename/docassemble/packagename, and
templates are in the folder
docassemble-packagename/docassemble/packagename/data/templates, etc.
If you created subfolders within these folders, docassemble will
not know where to put your files.
If there is a package on GitHub or PyPI and you would like to bring the contents of that package into your Playground, click “ Pull.” This imports package files in much the same way as the Upload feature does, and has the same limitations.
To “Pull” a private GitHub repository, set up GitHub integration and use the SSH name of
the GitHub repository. For example, if your private repository is
called docassemble-familylaw, and your GitHub username is called
jsmith, use [email protected]:jsmith/docassemble-familylaw.git as the
GitHub URL. Alternatively, you can use a GitHub URL that embeds an
OAuth code.
Packages are defined with the following elements:
- Package Name: By necessity, all docassemble packages are
subpackages of the
docassemblenamespace package. If the Package Name is “bankruptcy,” the actual Python package will be known asdocassemble.bankruptcy. - Version: The version number you indicate here will be the version number of your Python package.
- License: This is the name of the software license that will be associated with your
Python package. The default license is “The MIT License (MIT),”
which is the license under which docassemble is distributed.
This is probably what you want to use. However, if you want to take
greater control over your intellectual property, you can indicate a
different license. If you choose the MIT License, the content of
the license will be included in the package, but if you choose
another, you will need to edit the
LICENSEfile manually. - Description: This is a short description of your package (no more than 255 characters).
- URL: This is a URL indicating where information about your software can be found.
- Dependencies: From the list of Python packages installed on the system, indicate the ones that are required for your package to operate. When your package is installed on another system, these packages will be installed first.
- Interview files: From the interview files defined in your Playground, indicate which ones should be included in your package.
- Template files: From the template files defined in your Playground, indicate which ones should be included in your package.
- Static files: From the static files defined in your Playground, indicate which ones should be included in your package.
- Source files: From the source files defined in your Playground, indicate which ones should be included in your package.
- Modules: From the modules defined in your Playground, indicate which ones should be included in your package.
- README file: This is a text box into which
you can type the contents of the
README.mdfile that will be included in your package. If you leave this blank, theREADME.mdfile will list the package name, package description, and author.
The page also gives a report about whether the package exists on PyPI or whether it exists as a repository in your GitHub account.
At the bottom of the page, you can press one of the following buttons:
- Save: Saves the package definition and does nothing more.
- Install: Saves the package definition, creates a ZIP file containing the package, and installs that ZIP file on the server.
- PyPI: Publishes the package on PyPI so that other people can install it. This will not be displayed unless you have set up the PyPI configuration.
- GitHub: Publishes the package on GitHub so that you can manage versions of your package, and also so that other people can install it. This will not be displayed unless you have set up the GitHub configuration. For more information about how the GitHub button works, see Publishing on GitHub.
- Delete: Deletes the package definition. If you installed the package on the system, it does not uninstall the package.
When you press Save, Install, PyPI, or GitHub, docassemble creates a Python package from the information on this page, but it also uses information about you, such as your name and e-mail address, to indicate the author of the package. To change the author information that is included in the package, edit your profile.
If the references to PyPI and GitHub do not appear for you, an administrator on your system will need to enable these features. See sharing packages on PyPI setting up GitHub integration for more information.
For more information on managing Python packages within docassemble, see packages.
The Variables, etc. area
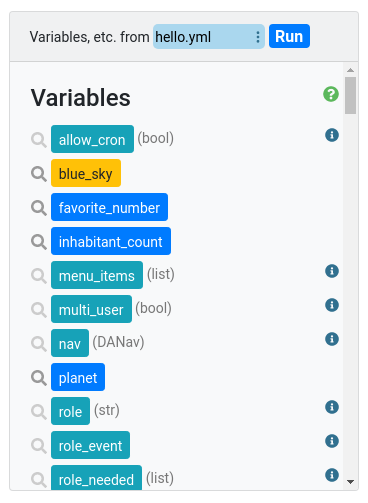
The “Variables, etc.” area is a coding aid. It contains a list of variables and other names that are available for use in your interview. Clicking on one of the names will insert the name into the text editor. You may find this helpful if you are not sure of the exact spelling of a variable or a function.
In addition, if you start typing a name and then press Ctrl-Space, the editor will attempt to auto-complete the name for you. If there are multiple possibilities, you can choose the name from the list.
The list is updated when the page loads, or when you press “Save” or “Save and Run.”
The area lists the following types of names (which are color-coded):
- Undefined names: names that are mentioned in your interview, but do not appear to have blocks that define them. This is based on code parsing, so sometimes there are false positives.
- Variables: variables that are mentioned in your questions and code
blocks, or that have been included in the Python namespace through a
modulesblock. Variables in light blue are docassemble’s special variables. Variables in orange are variables that exist in the interview but may not be in use – at least, docassemble’s automatic process was not able to detect that the variables were used. This can be helpful for removing obsolete questions from your interview. - Functions: functions that are available because they have been
included in the Python namespace through a
modulesblock. - Classes: classes that are available because they have been
included in the Python namespace through a
modulesblock. - Modules defined: modules that are available because they have been
included in the Python namespace through a
importsblock. - Modules available in Playground: modules that are available to be
included with
modulesorimportsbecause they exist in the modules folder of the Playground. - Templates: template files available in the Templates folder of the Playground.
- Static files: static files available in the Static folder of the Playground.
- Decorations: decorations defined with
imagesorimage setsthat are available for inclusion withdecorationor emoji markup.
By default, the “Variables, etc.” area shows variables for the YAML
file you are currently editing. However, if the YAML file you are
editing is a component of an interview, the information in the
“Variables, etc.” will not be complete. At the top of the “Variables,
etc.” area, you can select a different file that should be used for
purposes of populating the “Variables, etc.” section. Usually the
file you want to select here is the “top level” file for your
interview, which includes the file you are editing.
Meaning of icons
- Clicking
 next to a variable name
will search the text editor for the variable name.
next to a variable name
will search the text editor for the variable name. - Clicking
 shows a pop-up containing
information about the item and a link to the item’s documentation.
shows a pop-up containing
information about the item and a link to the item’s documentation. - Clicking
 reveals the methods of an object.
 - Clicking
 next to a category name
shows information about that category.
next to a category name
shows information about that category.
The buttons

The “Save” button will save the interview and do nothing more.
The “Save and Run” button will save the interview and run the interview in another window.
The “Delete” button will remove the interview from the Playground.
To give a link to the interview to someone else, right-click on the “ Share” button and copy the URL to your clipboard.
Note that users do not need to log in to be able to run interviews using these links. If you want to protect your interviews during development, you can add an initial block like this, which will stop anyone other than a developer or administrator from using the interview:
metadata:
  required privileges:
    - admin
    - developer
Note that the “Playground” is a development platform. If you are going to put an interview into production, put it into a package. You can create a package in the packages area. If you share a link to a Playground interviews with someone, that person should understand that the interview might change at any moment, or produce an error. The Playground is a development environment. If you want to share a link that will be stable, install a package and share a link to the interview in that package.
If you look at the URL available from the “Share” link, you will see
that it points to the /interview endpoint on your server and
includes an i parameter. The i parameter (i for “interview”)
refers to the name of your YAML file. It will be something like
docassemble.playground1:myinterview.yml where 1 is your user ID.
If your interview is in a “project” inside your Playground, and the
project is called testing, the name of the interview will be
something like docassemble.playground1testing:myinterview.yml. If
you you put your interview into a package called
docassemble.missouri, the i parameter will be something like
docassemble.missouri:data/questions/myinterview.yml. The
data/questions refers to a subdirectory inside of the
docassemble.missouri package.
The examples area

The part of the page below the text editor is an interactive area where you can browse example blocks that demonstrate various features of docassemble. You can use these examples as models or to remind you of what the valid docassemble syntax is. You can also insert blocks directly into the text editor.
The area consists of three parts:
- The “Example blocks” part is a list, in outline form, of example blocks that you can view.
- The “Preview” part is a screenshot demonstrating what the example block does. If you click on the preview, an example interview containing the example block will open in another tab. There is a “View documentation” button that will open the page of the docassemble documentation pertaining to the concept illustrated in the example.
- The “Source” part contains the text of the example block. You can click “Insert” to copy it into the text editor. You can click “Show context of example” to see the other blocks that are necessary for the example block to run as part of a working interview. This working interview is what you will run when you click the “Preview” screenshot.
Switching Projects
By default, your Playground is like the “desktop” on a computer; it is a single area where a variety of different files can be stored. As you “play,” you will accumulate a variety of files, some of which might be from short-lived experiments and others of which might be bundled into a package. You can give yourself a “blank slate” in your Playground by creating a “Project.”
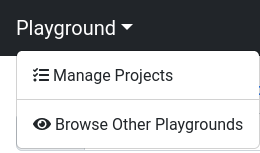
To manage your projects, click “Playground ” in the upper left corner .
![]()
This will open a menu listing the projects that are enabled on your site.
![]()
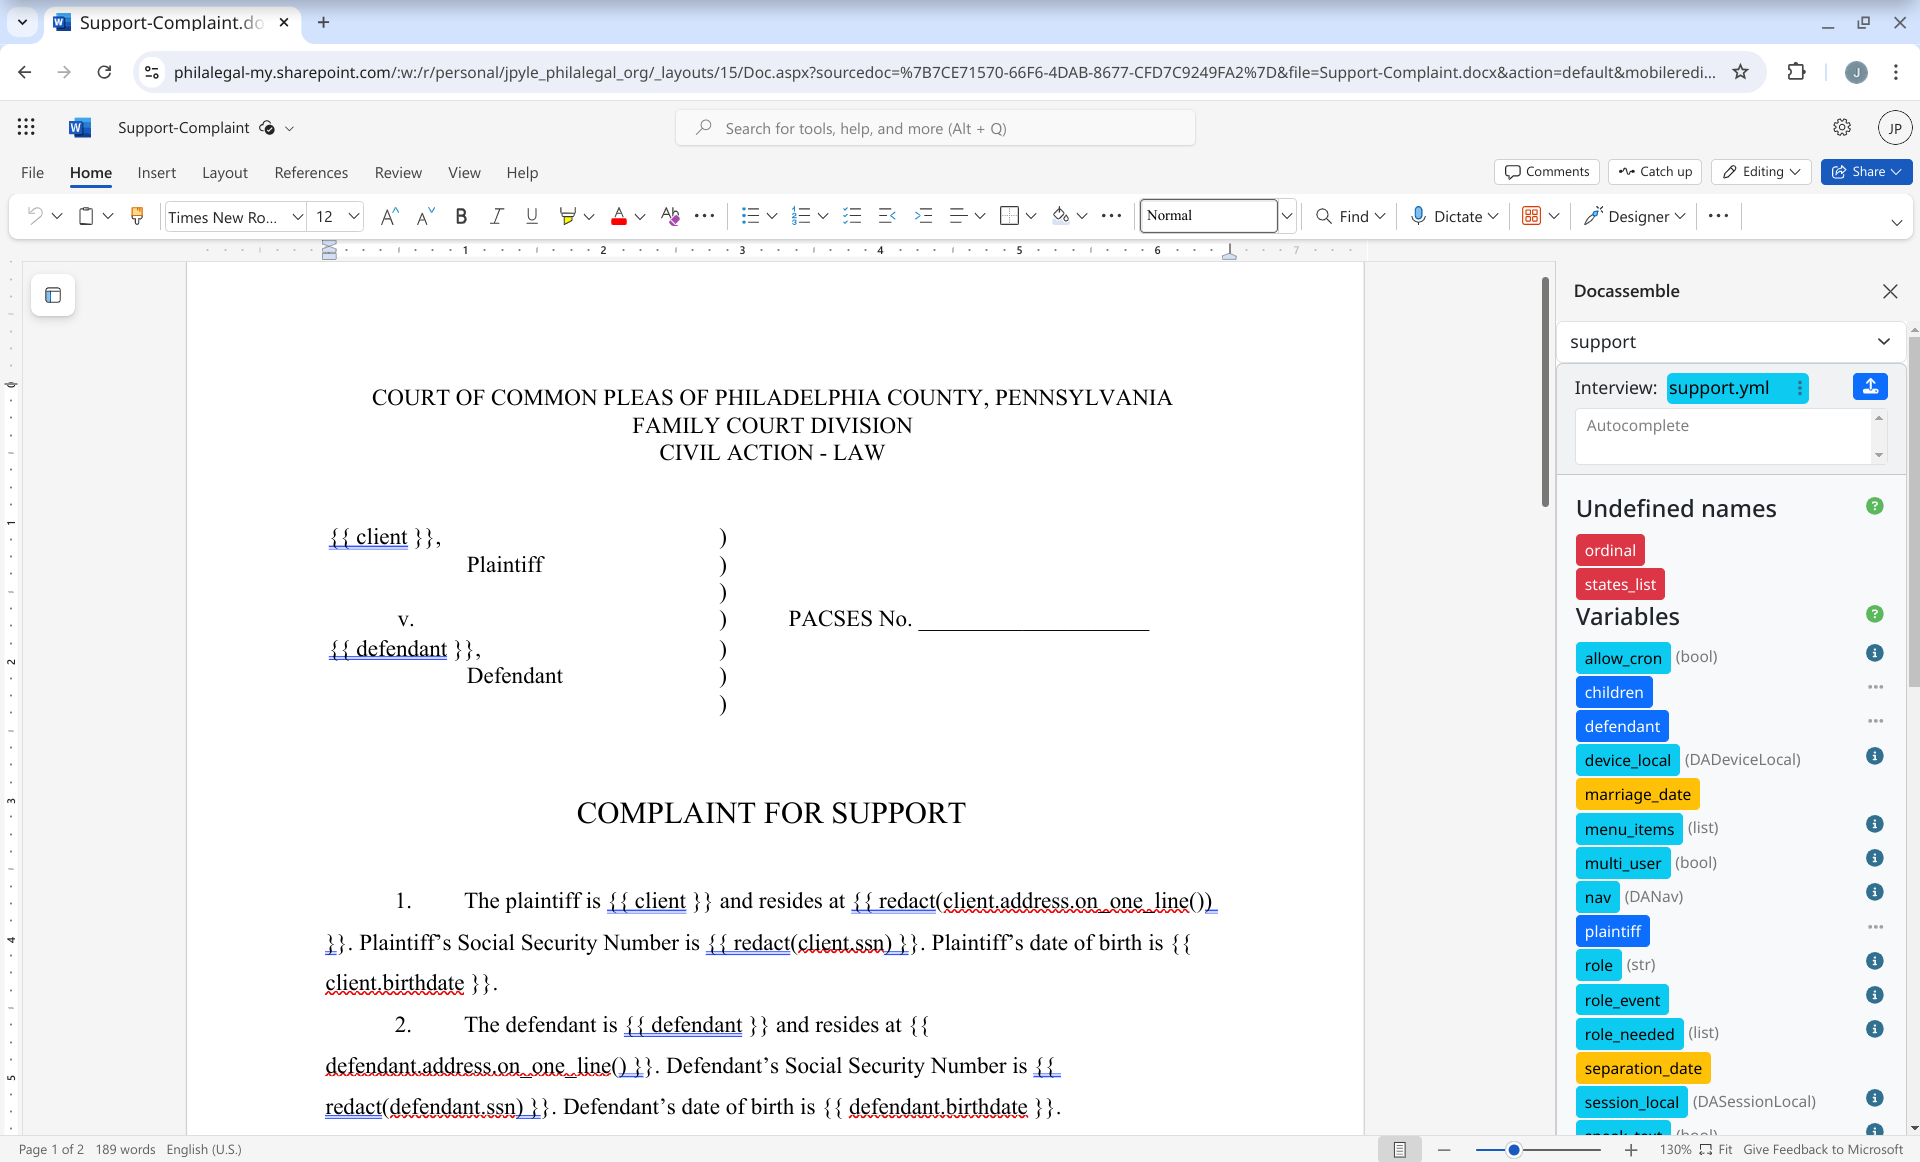
This control will allow you to switch among your projects. For example, if you click “custody,” you will be taken to your “custody” project. The contents of the Playground and all of the folders will be different. You can tell which project is active by looking the title of the page:
![]()
At first, your only project will be the “Default Playground” project, so you will only see “Manage Projects” on the projects menu. If you click “Manage Projects,” you will be taken to the Projects page.
On this page, you can “Add a New Project,” rename existing projects, delete existing projects, or choose a new active project.
When adding or renaming a project, note that project names can only consist of alphanumeric characters, and cannot begin with a digit.
Viewing other users’ Playgrounds
If enable sharing playgrounds is set to true in the
Configuration, then any user with admin or developer privileges
can enter the Playground of any other user with admin or developer
privileges.
By default, enable sharing playgrounds is set to false and this
feature is not available.
The Wizard
If you are new to docassemble, a good way to learn is by using the “Wizard” to construct a document assembly interview. To launch the wizard, click the “Wizard” button.

The Wizard allows you to upload one or more documents in Microsoft Word format in which you have indicated with double curly brackets the areas where the interview needs to “fill in the blanks.”
For example, your Word file could include:
Your phone number is {{ phone number }} and you live in {{ city }}.
Along the way, the Wizard will show you what blocks it is adding to the interview it is generating.
When you are done specifying the elements of your interview, the Wizard allows you to download the assembled interview as a package.
Google Drive integration
The files in the Playground and its folders can synchronize with your Google Drive account.
You might want to use this feature if you want to use the Playground for testing but:
- You want to use a full-featured text editor like Emacs, Notepad++, or Sublime Text to edit your YAML and Markdown files.
- You make frequent changes to DOCX or PDF file templates, and you find it cumbersome to have to manually upload the documents each time you make a change.
With the Google Drive feature, a situation like this is possible:
- Your docassemble development server is in the cloud.
- You have a laptop with the Google Drive app installed, so that the contents of your Google Drive are always in sync with a folder on your laptop’s hard drive.
- Inside that folder on your hard drive, in a subfolder “docassemble/templates,” there are various Microsoft Word files that you use for document templates in your interviews.
- When you use Microsoft Word to edit a file and you click “save,” the Google Drive app will automatically upload the new version of the file to Google’s servers.
- Then, in your web browser, you can press a button in the Playground that will cause docassemble to download the new version of the Word file from Google’s servers and save it in the Templates folder.
- Now, when you click “Save and Run” to test your interview, the updated version of your document will be used.
The synchronization also works the other way; for example, if you upload a file to the Static folder in the web browser and then press the “sync” button, a copy will appear in your laptop in a few seconds. Or if you edit an interview YAML file and press “Save” and then press the “sync” button, your changes will appear in the file on your laptop in a few seconds.
Google Drive synchronization requires setup. See Google Drive setup
in the installation section and googledrive in the
configuration section for instructions.
Once those steps have been completed, anyone with a developer or administrator account can go to their Profile from the menu and click “Google Drive Sychronization.” From this page, you can select an existing folder in your Google Drive that will be used for synchronization. Initially, you should choose the option “docassemble” and click “Save.” This will create a folder in the root of your Google Drive called “docassemble” containing the following subfolders:
- “questions” (corresponding to the question file editor above)
- “templates” (corresponding to the Templates folder above)
- “static” (corresponding to the Static files folder above)
- “sources” (corresponding to the Sources folder above)
- “modules” (corresponding to the Modules folder above)
Now, when you go to the Playground, you will see a button that looks like this:

When you go into a “folder,” you will see a button that looks like this:

Pressing any of these buttons will trigger a synchronization process.

Pressing the “Sync and Run” button is like “Save and Run” except it triggers a synchronization process and then starts an interview in another tab.
The synchronization process moves files between Google Drive and the Playground depending on which files were more recently modified, or which files are missing in one place and present in the other. The process always applies to all folders, not just the folder currently being viewed.
Note that the synchronization is not triggered automatically; you need to press the button when you want files to be synchronized.
If you delete a file using the Playground, the corresponding file in Google Drive will be moved to the “trash.” This happens immediately; you do not need to press the synchronization button.
If you delete a file using Google Drive and then press the synchronization button, the corresponding file in the Playground will be deleted, but only if the deleted file is still in the “trash” in Google Drive.
If you go into Google Drive, “trash” a file, “empty the trash,” and then synchronize, the file will still exist in the Playground.
If you change a file in the Playground, then change the corresponding file in Google Drive, and then press the synchronization button, the file will be copied from Google Drive to the Playground. Whichever file has the later modification time will take precedence.
If you go into Google Drive and move a file out of the “templates” folder into the “static” folder, when you synchronize, the file will appear in the Static folder of the Playground, but it will not disappear from the Templates folder of the Playground.
Note that this synchronization feature does not work with Google Docs; it will not convert a Google Docs file to a DOCX file, for example.
Keep in mind that Google Drive is not instantaneous. If you make changes to a file on your hard drive, it may take several seconds for the file to upload to Google Drive. So if you click the “Sync” too quickly, the changes to your file may not be seen. Likewise, when docassemble makes changes to a file in the Google cloud, it may take several seconds for that change to be reflected in your local files.
Many problems can happen during a two-way synchronization process, so it is important to be patient, to give the system time to do its work, and to avoid doing things that could confuse the system. For example, if you press the “Sync” button but then you become impatient and you close the browser window before the synchronization process completes, you may find your files in an inconsistent state. If you have a file open for editing locally but then you make changes to the same file in the web interface and press Sync, Google Drive might not be able to copy the modified file to your local drive.
OneDrive integration
OneDrive integration works just like Google Drive integration feature described in the previous section, except it works with Microsoft’s OneDrive.
An advantage of OneDrive is that you can use Word Online to edit a
DOCX file for a document assembly template, and store it in the
“templates” folder of your OneDrive, and then use it with docx
template file from an interview in your Playground. The editing of
both the YAML file and the Word file can all take place within the
same web browser.
To enable OneDrive integration on your server, follow the OneDrive
setup instructions in the installation section. See onedrive
in the configuration for instructions.
As with Google Drive integration, be careful not to go too fast when using the OneDrive integration. For example, if you use Word Online to edit a document, note that after you stop editing, the top of the screen says “Saving…” and after a few moments this becomes “Saved.” If you go into the Playground and press “Sync” while the Word document is still in the process of being saved, you might not get the results you expect.
Microsoft Word sidebar
If you use docx template file and you edit your templates using
Microsoft Word, you can install a sidebar into Microsoft Word that
functions much like the Variables, etc. area of the
Playground.
To enable the sidebar in Microsoft Word, first go to Utilities and download the XML manifest file. This small data file represents an “add-in” for Microsoft Word.
The sidebar works both in Word Online and in the desktop version of Word, using this XML file.
The way that you enable the add-in is different whether you are using Word Online or the desktop version, but in both cases, the sidebar is web-based. (The desktop version of Word runs an embedded version of Internet Explorer in order to display the sidebar.) If you upgrade your server, this will also upgrade the functionality of the sidebar. You should not need to change the manifest file unless you change the location of your server.
Installing the sidebar in Word Online
To use the Playground sidebar in Word Online, you can “side load” the add-in following Microsoft’s instructions.
If you are an Office 365 administrator for an organization, you can install the add-in and make it available to the users in your organization. Go to the Admin “app,” also known as the “Microsoft 365 admin center.” Under “Settings,” select “Services & add-ins.” Click “+ Deploy Add-In.” It should take you to a dialog box where you can upload an XML file. Select “I have the manifest file (.xml) on this device,” click “Browse,” and then select the XML manifest file that you downloaded from your docassemble server.
Once the add-in is installed, you can open a Word file. To show the sidebar, go to the “Insert” menu and select “Office Add-ins.” The Office Add-ins dialog box has four tabs. If your add-in installed correctly, you should be able to find the “Docassemble Playground” add-in under one of these tabs. Select it and click the “Add” button.
Unfortunately, Word does not remember what add-ins you were using from one session to another, so every time you open the Word file, you will need to go to the “Insert” menu to activate the Playground sidebar.
Installing the sidebar in the desktop version of Word
Save the XML manifest file to a folder on a network drive.
In Word, go to File -> Options -> Trust Center -> Trust Center Settings -> Trusted Add-in Catalogs. Under “Catalog url,” type in the address of the folder on the network drive, and click “Add catalog.” Then press ok.
Once the add-in is installed, you can open a Word file. To show the sidebar, go to the “Insert” menu and select “My Add-ins.” Under the “Shared Folder” tab, select “Docassemble Playground,” and click “Insert.”
Unfortunately, Word does not remember what add-ins you were using from one session to another, so every time you open the Word file, you will need to go to the “Insert” menu to activate the Playground sidebar.
Using XML manifest files other than your own
It is possible to run a Word sidebar without using an XML manifest file that you create using Utilities. You might do this if you use an XML manifest file created by someone else, or if you install an add-in using the Microsoft Office “Store.”
If you run a sidebar from a source other than your server, you will
need to set the office addin url directive in your Configuration
in order to give the other server permission to access the
Playground.
Using the Playground sidebar
The Word sidebar behaves much like the Variables, etc.
area. There is an upload button  in the
upper-right-hand corner that will upload the document you are editing
to the Templates folder of the Playground. After the upload, it
will refresh the sidebar. This can be helpful because if the
interview you are working on uses the DOCX template you are editing,
the variables that you are referencing in the DOCX file will be
reflected in the sidebar.
in the
upper-right-hand corner that will upload the document you are editing
to the Templates folder of the Playground. After the upload, it
will refresh the sidebar. This can be helpful because if the
interview you are working on uses the DOCX template you are editing,
the variables that you are referencing in the DOCX file will be
reflected in the sidebar.
Autocomplete
If you are using Word Online, the sidebar supports an “autocomplete” feature. As you are typing, the sidebar looks at what you are typing. If it sees that you are writing a Jinja2 expression, it will offer auto-complete suggestions in the white box in the sidebar. You can click one of the choices in the white box to complete the name. To make the white box bigger, click the scrollbar. The values offered by the “autocomplete” feature are the same as the buttons listed under Variables, etc. in the Playground (some built-in Python functions are also available).
Assistance with using Jinja2
If you scroll to the bottom of the sidebar, you will see a brief explanation of Jinja2, the templating language that is used in DOCX template files.
Recovering from infinite loops
If you accidentially write code that gets into an infinite loop, the only way to stop the code is to terminate the process in which the code is running. In a production web server environment, this could impact other users because the process may be running multiple threads for different users, only one of which is stuck in an infinite loop. Unfortunately, it is not possible in Python to terminate a specific thread.
Restarting the web server will terminate the process.
If you are running the Docker implementation of docassemble, a
watchdog runs in the background (docassemble.webapp.watchdog),
looks for uWSGI processes that appear to be stuck, and terminates
them after 60-90 seconds.
If the interview with the infinite loop is in the Playground, and the
code with the infinite loop runs at the beginning of the interview,
the editing screen will not load at all. This is due to the fact that
the Playground page’s Variables, etc. feature needs to
run the interview in order to figure out what variables are in use.
To get around this, you need to edit the URL that accesses the
interview. If your interview is myinterview.yml, the URL that edits
the interview will be something like
https://dev.example.com/playground?file=myinterview.ymlYou will need to add &debug=1 to the end:
https://dev.example.com/playground?file=myinterview.yml&debug=1Then the editing screen will load.