What is a function?
A function is a piece of code that takes one or more pieces of input and returns something as output or does something behind the scenes. For example:
question: |
  The word ${ color } becomes
  ${ capitalize(color) } when
  passed through the
  `capitalize()` function.
mandatory: TrueFunctions allow you to do a lot of different things in
docassemble. This section explains the standard docassemble
functions. If you know how to write Python code, you can write your
own functions and include them in your interview using a modules
block.
These functions are available automatically in docassemble
interviews (unless you set suppress loading util). To use them in
a Python module, put a line like this at the top of your .py file to
indicate which functions you want to import:
from docassemble.base.util import send_email, quote_paragraphsAll of the functions described in this section are available from the
docassemble.base.util module.
Functions for working with variable values
defined()
As explained in how docassemble runs your code, if your code or templates refer to a variable that is not yet defined, docassemble will stop what it is doing to ask a question or run code in an attempt to obtain a definition for that variable.
If you need to check to see if a variable has been defined yet without
triggering the process of defining it, you can use defined().
The defined() function takes as its argument the name of a variable.
question: Summary
subquestion: |
  Your favorite fruit is
  ${ favorite_fruit }.

  % if defined('favorite_vegetable'):
  Your favorite vegetable
  is ${ favorite_vegetable }.
  % else:
  I do not know your favorite
  vegetable.
  % endif
mandatory: TrueIt is essential that you use quotation marks around the name of the variable. If you don’t, it is as if you are referring to the variable.
You should only use defined() in situations where it is absolutely
necessary. Your interview logic should be based on the values of
real variables, not the defined-ness of a variable. For example,
suppose you have an interview like this:
question: Are you married?
yesno: married
---
question: |
  Key dates
fields:
  - "Birth date": date_of_birth
  - "Marriage date": date_of_marriage
    datatype: date
    show if:
      code: married
You might be tempted to write something like this in a DOCX template:
{% if defined(‘date_of_marriage’) %}Plaintiff is married and was married on {{ date_of_marriage }}.{% endif %}
This will work if your interview does not allow the user to go back
and edit answers. But if you allow the user to edit answers, what if
the user initially answered “Yes” to “Are you married?” and filled out
“Marriage date,” but then went back and changed the answer to the
“Are you married?” question to “No”? Now the value of
date_of_marriage is obsolete, but it is still exists. Because the
logic of your document is based on the defined-ness of a variable,
rather than the true fact of whether the user is married, it contains
an error.
The solution is to always base your logic off of actual facts:
{% if married %}Plaintiff is married and was married on {{ date_of_marriage }}.{% endif %}
By analogy, suppose that a lawyer worked on a case and wrote on a notepad: “we are still within the statute of limitations period; ok to bring tort claim.” Then, some time later, the lawyer is drafting a complaint, and wonders if he can raise a tort claim. Would he look at his notepad and see the words “ok to bring tort claim” and then conclude that he can bring a tort claim? No, he would analyze the facts as they currently stand and evaluate whether it was ok to bring a tort claim. The fact that something was once written on a notepad is not legally significant. What is legally significant is reality.
So, the defined() function is available, but using it is not
advisable unless it is impossible to substitute real facts for your
conditional statement.
The defined() function accepts an optional keyword argument
prior. If you set prior=True, then on screens that loaded because
the user pressed the Back button, defined() will look in the previous
set of interview answers (the set that was deleted by pressing the
Back button) to see if the variable was defined.
value()
The value() function returns the value of a variable, where the name
of the variable is given as a string.
question: Summary
subquestion: |
  Your favorite fruit is
  ${ value('favorite_fruit') }.
mandatory: TrueThese two code blocks effectively do the exact same thing:
code: |
  answer = value('meaning_of_life')
---
---
code: |
answer = meaning_of_lifeNote that value(meaning_of_life) and value("meaning_of_life") are
entirely different. The first will treat the value of the
meaning_of_life variable as a variable name. So if you set
meaning_of_life = 'chocolate', then value(meaning_of_life) will
attempt to find the value of the variable chocolate.
The value() function accepts an optional keyword argument
prior. If you set prior=True, then on screens that loaded because
the user pressed the Back button, value() will look in the previous
set of interview answers (the set that was deleted by pressing the
Back button) for the value of the variable.
The value() function is relatively inefficient. If you can use
regular Python expressions instead of value(), you should do so.
value() can be particularly helpful when called from a function
within a module. However, if you can rewrite your code so that the
variable’s value is passed to the function, or is available as an
object attribute, you should do so.
define()
The define() function defines a variable. The first argument is the
name of the variable (as a string) and the second argument is the
value you want the variable to have. Running
define('meaning_of_life', 42) has the same effect as running
meaning_of_life = 42.
code: |
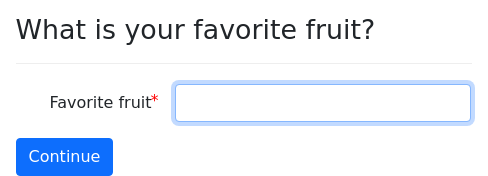
  define('favorite_fruit', 'apple')
---
question: Summary
subquestion: |
  Your favorite fruit is
  ${ favorite_fruit }.
mandatory: TrueNote that the second argument is the value itself. If you wanted to
do the equivalent of my_favorite_fruit = your_favorite_fruit, it
would be incorrect to do define('my_favorite_fruit',
'your_favorite_fruit'); you should instead do
define('my_favorite_fruit', your_favorite_fruit) or
define('my_favorite_fruit', value('your_favorite_fruit')).
undefine()
The undefine() function makes a variable undefined. The name
of the variable must be provided as a string. If the variable is not
defined to begin with, the function does not do anything.
undefine('favorite_fruit')This effectively does the same thing as the del statement in Python.
del favorite_fruitThe difference is that when using del, the variable must first
exist.
The undefine() function can be called with multiple variable names.
undefine('favorite_fruit', 'favorite_vegetable')Calling undefine in this way is faster than calling undefine()
multiple times.
invalidate()
The invalidate() function does what undefine() does, but it also
remembers the previous value and offers it as a default when a
question is asked again.
forget_result_of()
If you want a question with embedded blocks to be asked again,
or you want a mandatory block to run again, you need to run
forget_result_of() on the id of the block.
The forget_result_of() function takes one or more ids of blocks
as input and causes the results of those blocks to be forgotten. If
the id does not exist, or if the block has not yet been processed,
no error will be raised.
This example illustrates using forget_result_of() in conjunction
with del to ask a series of questions again, where some of the
questions contained embedded blocks.
id: favorite_food stage 2
question: |
  Ok, are any of these your favorite food?
choices:
  - Strawberries:
      code: |
        favorite_food = 'strawberries'
  - Grapes:
      code: |
        favorite_food = 'grapes'
  - Kiwi:
      code: |
        favorite_food = 'kiwi'
  - Something else: continue
---
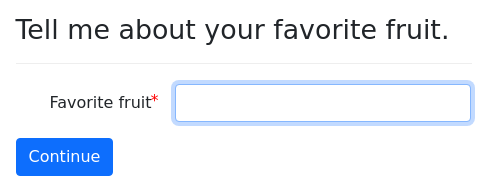
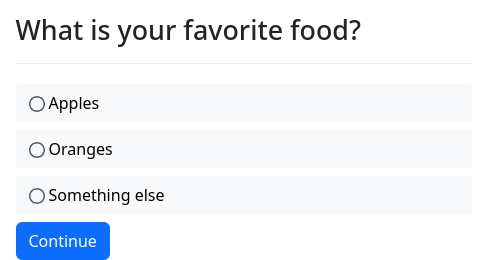
id: favorite_food stage 1
question: |
  What is your favorite food?
choices:
  - Apples:
      code: |
        favorite_food = 'apples'
  - Oranges:
      code: |
        favorite_food = 'oranges'
  - Something else: continue
---
event: reset_favorite_food
code: |
  del favorite_food
forget_result_of("favorite_food stage 1", "favorite_food stage 2")The forget_result_of() function can also be used to reset a
mandatory block so that it will be run again.
mandatory: True
code: |
  favorite_fruit = "apple"
  favorite_vegetable = "turnip"
id: initialize
---
mandatory: True
code: |
  while not results_correct:
    favorites_asked
    favorites_reported
    del results_correct
    del favorites_asked
    del favorites_reported
    forget_result_of('initialize')
    re_run_logic()
  final_screen
---
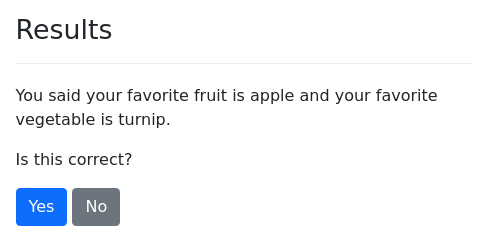
question: |
  Results
subquestion: |
  You said your favorite fruit is
  ${ favorite_fruit } and
  your favorite vegetable is
  ${ favorite_vegetable }.

  Is this correct?
yesno: results_correct
---
question: |
  What are your favorites?
fields:
  - Favorite fruit: favorite_fruit
  - Favorite vegetable: favorite_vegetable
continue button field: favorites_asked
---
question: |
  Your favorites
subquestion: |
  You said your favorite fruit is
  ${ favorite_fruit } and
  your favorite vegetable is
  ${ favorite_vegetable }.

  Press Continue to reset.
field: favorites_reported
---
event: final_screen
question: |
We are done.After resetting a mandatory block, you may want to call
re_run_logic(). Otherwise, the mandatory block will not have a
chance to run again until the next time the screen loads.
set_variables()
The set_variables() function is somewhat similar to define(),
except that instead of setting a particular variable name, it simply
updates the interview answers using a dictionary that you provide as
input, where the dictionary keys represent variable names and the
dictionary values represent values of those variables. For example,
if trustee is an Individual, and you do:
set_variables({'plaintiff': trustee, 'favorite_fruit': 'apple'})then this will have the same effect as doing:
plaintiff = trustee
favorite_fruit = 'apple'
set_variables() accepts an optional keyword parameter
process_objects, which can be set to True or False. The default
is False. If process_objects is True, then the dictionary will
be transformed from docassemble’s “serializable” representation of
objects (see the .as_serializable() method) into actual Python
objects. For example, suppose you run the following code:
my_json = """\
{
  "user": {
    "_class": "docassemble.base.util.Individual",
    "birthdate": "2000-04-01T00:00:00-05:00",
    "favorite_fruit": "apple",
    "instanceName": "user",
    "name": {
      "_class": "docassemble.base.util.IndividualName",
      "instanceName": "user.name",
      "uses_parts": true
    }
  }
}
"""
set_variables(json.loads(my_json), process_objects=True)
This will have the effect of defining user as an Individual
object, where user.name is an IndividualName object and
user.birthdate is a DADateTime object.
When process_objects is True, any dictionary with a _class item
is converted into a Python object of the class represented by
_class, and the other items of the dictionary are converted into
attributes of that object. In addition, if any string looks like a
date or time (e.g. 2022-01-01, 23:15:00), an attempt will be made
to convert it into a DADateTime or datetime.time object.
Note that docassemble’s “JSON representation” of objects is not a
full-featured object serialization method. It cannot do everything
that Python’s pickle can do. At most, process_objects=True can be
used to import basic docassemble data structures.
re_run_logic()
The re_run_logic() function causes code to stop executing and causes
the interview logic to be evaluated from the beginning. You might
want to use this in cases when, after you make changes to variables,
you want the initial and not-yet-completed mandatory blocks to
be re-run in light of the changes you made.
If you use this, be careful that you do not create an infinite loop.
When the blocks are re-run, the result should not be encountering the
re_run_logic() function again, but should be something else, like
asking the user a question.
For an example of this in action, see the code example in the
forget_result_of() subsection.
reconsider()
The reconsider() function is similar to the reconsider modifier
on a code block. Each argument to reconsider() needs to be a
variable name, as text. E.g., reconsider('number_of_fruit',
'number_of_vegetables').
When reconsider() is run, it will undefine the given variables and
then seek their definitions. However, it will only do this once
in a given assembly process (i.e., once each time a screen loads).
Thus, even if your code block executes multiple times in a given
assembly process, each variable will only be recomputed one time.
code: |
  number_of_pets = number_of_cats + number_of_dogs
---
question: |
  You have
  ${ nice_number(number_of_pets) }
  pets.
subquestion: |
  However, I do not think
  you have been totally honest.
field: interim_report
---
question: |
  Do you want a goldfish?
yesno: wants_goldfish
---
event: final_report
question: |
  You really have
  ${ nice_number(number_of_pets) }
  pets.
subquestion: |
  % if wants_goldfish:
  You would rather have a goldfish.
  % endif
---
mandatory: True
code: |
  interim_report
  ask_dogs_again
  reconsider('number_of_pets')
final_reportneed()
The need() function takes one or more variables as arguments and
causes docassemble to ask questions to define each of the
variables if the variables are not already defined. Note that with
need(), you do not put quotation marks around the variable name.
For example, this mandatory code block expresses interview logic
requiring that the user first be shown a splash screen and then be
asked questions necessary to get to the end of the interview.
mandatory: True
code: |
  need(user_shown_splash_screen, user_shown_final_screen)
This happens to be 100% equivalent to writing:
mandatory: True
code: |
  user_shown_splash_screen
  user_shown_final_screen
So the need() function does not “do” anything. However, writing
need() functions in your code probably makes your code more readable
because it helps you convey in “natural language” that your interview
“needs” these variables to be defined.
force_ask()
Usually, docassemble only asks a question when it encounters a
variable that is not defined. However, with the force_ask function,
you can cause such a condition to happen manually, even when a
variable is already defined.
In this example, we use force_ask to cause docassemble to ask a
question that has already been asked.
question: |
  Are you a communist?
yesno: user_is_communist
---
mandatory: True
code: |
  if user_is_communist and user_reconsidering_communism:
    user_reconsidering_communism = False
    force_ask('user_is_communist')
---
question: |
  I suggest you reconsider your
  answer.
field: user_reconsidering_communism
---
question: |
  % if user_is_communist:
  I am referring your case to
  Mr. McCarthy.
  % else:
  I am glad you are a true
  American.
  % endif
mandatory: TrueThis may be useful in particular circumstances. However,
force_ask() cannot be used with all types of questions. For
example, it cannot be relied upon to re-ask questions that:
- Use the
generic objectmodifier (and the special variablex) or iterators (i,j, etc.); - Contain embedded blocks.
The use of force_ask() is discouraged, unless you are an expert and
you know what you are doing. Usually, there is a more elegant way to
craft your interview logic than by using force_ask(). If the
question you want to ask is a single-variable question (field with
choices, field with buttons, yesno, noyes), you can use
reconsider(). If the question has fields, you can set a
continue button field. You might also find it useful to use the
undefine() and re_run_logic() functions.
Note that variable names given to force_ask must be in quotes. If
your variable is favorite_fruit, you need to write
force_ask('favorite_fruit'). If you write
force_ask(favorite_fruit), docassemble will assume that, for
example, apples is a variable in your interview.
force_ask() works by triggering the actions mechanism. This means
that in a multi-user interview, force_ask() only changes the current
question for the current user; each user has their own active
action, or list of active actions.
Note also that no code that comes after force_ask() will ever be
executed. Once the force_ask() function is called, the code stops
running, and the question indicated by the variable name will be
shown. That is why, in the example above, we set
user_reconsidering_communism to False before calling
force_ask(). The variable user_reconsidering_communism, which had
been set to True by the “I suggest you reconsider your answer”
question, is set to False before the call to force_ask so that the
mandatory code block does not get stuck in an infinite loop.
A different way to reask a question is to use the built-in Python
operator del. This makes the variable undefined. Instead of
writing:
mandatory: True
code: |
  if user_is_communist and user_reconsidering_communism:
    user_reconsidering_communism = False
force_ask('user_is_communist')we could have written:
mandatory: True
code: |
  if user_is_communist and user_reconsidering_communism:
    user_reconsidering_communism = False
del user_is_communistThis will also cause the user_is_communist question to be asked
again. This is more robust than using force_ask because the user
cannot get past the question simply by refeshing the screen.
The force_ask() function can also be given the names of variables
that refer to event blocks. The screen will be shown, but no
variable will be defined.
You can use force_ask() to ask a series of questions. Just list
each variable one after another.
mandatory: True
code: |
  favorite_fruit
  favorite_vegetable
  favorite_fungus
  told_to_review
  if not all_reviewed:
    all_reviewed = True
    force_ask('favorite_fruit', 'favorite_vegetable', 'favorite_fungus')
  final_screen
---
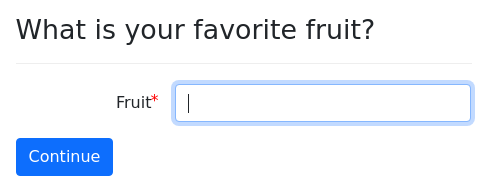
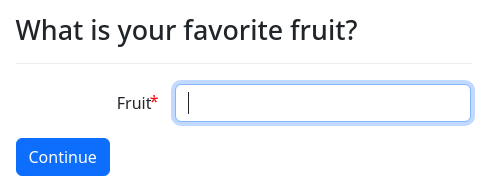
question: |
  What is your favorite fruit?
fields:
  - Favorite fruit: favorite_fruit
---
question: |
  What is your favorite vegetable?
fields:
  - Favorite vegetable: favorite_vegetable
---
question: |
  What is your favorite fungus?
fields:
  - Favorite: favorite_fungus
---
question: |
  Please verify your answers.
subquestion: |
  I will ask each question again.
  Make any changes that you think
  are necessary.
field: told_to_review
---
event: final_screen
question: |
  Thank you.
subquestion: |
  You like
  ${ favorite_fruit },
  ${ favorite_vegetable },
  and
  ${ favorite_fungus }.
---
code: |
all_reviewed = FalseThe second and subsequent arguments to force_ask() can specify
actions with arguments. If an argument to force_ask() is a
Python dictionary with keys action and arguments, the specified
action will be run. (Internally, docassemble uses the actions
mechanism to force the interview to ask these questions.)
If you give force_ask() the name of a variable that no question
can define, then force_ask() will quietly ignore it. Thus you can
use conditional logic within a force_ask() sequence by adding if
modifiers to each question that specify under what conditions the
question should be asked.
In addition to giving force_ask() variables and actions, you can
give it a dictionary containing a special command.
force_ask('favorite_fruit', {'recompute': 'dessert_cost'}, 'favorite_vegetable')force_ask('favorite_fruit', {'recompute': ['dessert_cost', 'breakfast_cost']}, 'favorite_vegetable')force_ask('favorite_fruit', {'recompute': ['dessert_cost', 'breakfast_cost']}, 'favorite_vegetable')force_ask('favorite_fruit', {'set': {'fruit_known': True}}, 'favorite_vegetable')force_ask('favorite_fruit', 'favorite_vegetable', {'set': [{'fruit_known': True}, {'vegetable_known': True}]})
For more information on how these data structures work, see the
subsection on customizing the display of review options.
force_ask() accepts the optional keyword parameter
forget_prior. If forget_prior is set to a true value, then any
pending actions will be forgotten. If forget_prior is not provided,
then force_ask() will simply add one or more actions to the “stack”
of pending actions.
Here is an example that demonstrates the effect of forget_prior.
mandatory: True
question: First page
subquestion: |
  [Go to second page](${ url_action('second_page') })
---
question: Second page
subquestion: |
  [Go to third page](${ url_action('third_page') })
continue button field: second_page
---
question: Third page
subquestion: |
  [Ask about food](${ url_action('food_preferences') })

  [Ask about food with forget prior](${ url_action('food_preferences_forget_prior') })
continue button field: third_page
---
#event: food_preferences
code: |
  favorite_fruit
  favorite_vegetable
  food_preferences = True
  #force_ask('favorite_fruit', 'favorite_vegetable')
---
event: food_preferences_forget_prior
code: |
  force_ask('favorite_fruit', 'favorite_vegetable', forget_prior=True)
---
question: |
  What is your favorite fruit?
fields:
  - Favorite fruit: favorite_fruit
---
question: |
  What is your favorite vegetable?
fields:
- Favorite vegetable: favorite_vegetableforce_ask() accepts the optional keyword parameter evaluate. If
evaluate is set to True, then the variable names given to
force_ask() will be evaluated to determine their intrinsic
names. For example, if you have:
objects:
  - plaintiffs: DAList.using(object_type=Individual)
  - defendants: DAList.using(object_type=Individual)
---
code: |
  if been_sued:
    user = defendants[0]
  else:
    user = plaintiffs[0]
---
mandatory: True
code: |
  user.name.first
Then if you do force_ask('user.name.first'), then docassemble
will look for a question that literally defines
user.name.first. However, if you actually want docassemble to
look for a question that defines plaintiffs[0].name.first or
defendants[0].name.first, then you can call
force_ask('user.name.first', evaluate=True). Then docassemble
will inspect user, then user.name, and it will find that the
.instanceName of user.name is, e.g., plaintiffs[0].name, and it
will look for a question that defines plaintiffs[0].name.first.
Instead of using evaluate, you could instead write
force_ask(user.name.attr_name('first')). This ensures that
force_ask() is called on the correct name for the attribute.
A function that is related to force_ask() is force_gather().
force_gather() cannot force the-reasking of a question to define a
variable that has already been defined, but it does not have the
limitations on question types that force_ask() has.
force_gather()
The force_gather() function is very similar to force_ask(),
except it affects the interview logic for all users of the interview,
not just the current user.
initial: True
code: |
  process_action()
---
event: gather_it
code: |
force_gather('favorite_food')Calling force_gather('favorite_food') means “until favorite_food
is defined, keep asking questions that offer to define
favorite_food, and satisfy any prerequisites that these questions
require.”
Normally, you will not need to use either force_ask() or
force_gather(); you can just mention the name of a variable in
your questions or code blocks, as part of your interview
logic, and docassemble will make sure that the variables get
defined. The force_ask() and force_gather() functions are
primarily useful when you are using actions to do things that are
outside the normal course of the interview logic.
dispatch()
The dispatch() function provides logic so that an interview can
present a menu system within a screen. For example:
mandatory: True
code: |
  dispatch('main_menu_selection')
  final_screen
---
question: |
  Main menu
field: main_menu_selection
buttons:
  - Fruit: fruit_menu
  - Vegetables: vegetable_menu
  - Rocks: rocks_page
  - Continue: Null
---
code: |
  fruit_menu = dispatch('fruit_menu_selection')
---
question: |
  Fruit menu
field: fruit_menu_selection
choices:
  - Apple: apple
  - Peach: peach
  - Back: Null
---
code: |
  vegetable_menu = dispatch('vegetable_menu_selection')
---
question: |
  Vegetable menu
field: vegetable_menu_selection
choices:
  - Turnip: turnip
  - Potato: potato
  - Back: Null
---
question: Rocks screen
field: rocks_page
---
question: Apples screen
subquestion: |
  % if likes_apples:
  You like apples.
  % endif
field: apple
---
question: |
  Do you like apples?
yesno: likes_apples
---
question: Peaches screen
subquestion: |
  You selected
  ${ main_menu_selection }
  on the main menu and
  ${ fruit_menu_selection }
  on the fruit menu.
field: peach
---
event: turnip
question: Turnip screen
subquestion: |
  You cannot go forward from
  the turnip screen.
---
question: Potato screen
field: potato
---
event: final_screen
question: |
Done with the interview.To make a menu, you need to add a few components to your interview:
- Some code that runs
dispatch()in order to launch the menu at a particular place in your interview logic. - A screen that shows the menu. This is typically a multiple-choice question in which each choice represents a screen that the user can visit.
- Screens corresponding to each choice. These can be standalone screens, or they can be sub-menus.
In the example above, the main menu is a multiple-choice question
that sets the variable main_menu_selection.
When the interview logic calls dispatch('main_menu_selection'), it
looks for a definition of the variable main_menu_selection. It
finds a multiple-choice question that offers to define
main_menu_selection. This question will set the variable
to one of four values:
fruit_menuvegetable_menurocks_pageNull
The first three values are the names of other variables in the
interview. Note that in the interview, fruit_menu and
vegetable_menu are variables defined by code blocks, and
rocks_page is defined by a question block. If the user selects
one of these choices, the interview will look for a definition of the
selected variable. This all done by the dispatch() function.
The last value, Null, is special; it ends the menu. (Note that
Null or null is a special value in YAML; it becomes None in
Python.) When the user selects “Continue,” the dispatch()
function will end. In this sample interview, the next step after the
menu is to show the final_screen. Thus, when the user selects
“Continue,” the user sees the final_screen question. If you want
the interview logic to be able to move past the dispatch() function,
you must include a Null option.
This sample interview features two sub-menus. You can tell this
because the variable fruit_menu is defined with:
fruit_menu = dispatch('fruit_menu_selection')and the variable vegetable_menu is defined with:
vegetable_menu = dispatch('vegetable_menu_selection')If the user selects “Fruit” from the main menu, the interview will
seek a definition of fruit_menu. This in turn leads to calling the
dispatch() function on 'fruit_menu_selection'. This leads to
seeking a definition of the variable fruit_menu_selection. If the
user selects the Null option on this menu, the user will go back to
the main menu.
If the user selects “Rocks” from the main menu, the interview will
seek a definition of rocks_page. In this case, the block that
offers to define rocks_page is a question with a “Continue”
button. When the user presses “Continue” on the “Rocks screen,” the
user will return to the menu.
Note that when the interview seeks definitions of variables and
displays screens, it will ask questions to satisfy prerequisites. For
example, when the user selects “Apple” from the “Fruit menu,” the
interview will seek the definition of apple, but in order to pose
the question that defines apple, it needs the definition of
likes_apples. So it will stop and ask “Do you like apples?” before
proceeding to the question that defines apple.
One very important thing to know about the dispatch() function is
that the variables it uses to navigate among the screens are
temporary. After the call to dispatch('main_menu_selection'), the
variables main_menu_selection, fruit_menu, fruit_menu_selection,
apple, rocks_page, etc., will all be undefined. However,
questions will be able to access these variables from within the
dispatch() function. For example, the “Peaches screen” successfully
accesses the values of main_menu_selection and
fruit_menu_selection.
If you want to gather information about what screens your user visited
or did not visit, you can use prerequisites to do so. Here is an
example that uses the need specifier to run a code block when a
user selects a menu item.
mandatory: True
code: |
  visited_apple = False
  visited_orange = False
---
mandatory: True
code: |
  dispatch('main_menu_selection')
  final_screen
---
question: |
  Main menu
field: main_menu_selection
buttons:
  - Apple: apple
  - Orange: orange
  - Continue: Null
---
question: Apple screen
field: apple
need: apple_tracked
---
code: |
  visited_apple = True
  apple_tracked = True
---
question: Orange screen
field: orange
need: orange_tracked
---
code: |
  visited_orange = True
  orange_tracked = True
---
event: final_screen
question: |
  All done.
subquestion: |
  % if visited_apple:
  You visited the apple menu.
  % endif

  % if visited_orange:
  You visited the orange menu.
% endifall_variables()
The all_variables() function returns all of the variables defined in
the interview session as a simplified Python dictionary.
mandatory: True
question: |
  Interview dictionary
subquestion: |
  The variables in the dictionary are:

`${ all_variables() }`The resulting Python dictionary is suitable for conversion to JSON
or other formats. Each object is converted to a Python
dictionary. Each datetime or DADateTime object is converted
to its isoformat(). Other objects are converted to None.
If you want the raw Python dictionary representing the variables
defined in the interview session, you can call
all_variables(simplify=False). The result is not suitable for
conversion to JSON. This raw Python dictionary will be linked to
the current interview answers, so that if you use the Python is
operator to test for equivalence between objects, you will see that
they are equivalent. Therefore, if you try to edit the output of
all_variables(simplify=False), you may be affecting the interview
variables in unwanted ways. If you want the result of
all_variables(simplify=False) to be a distinct copy of the interview
answers, call it using all_variables(simplify=False,
make_copy=True).
docassemble keeps a dictionary called _internal in the interview
variables and uses it for a variety of internal purposes. There is
also an object called nav that is used for tracking which sections
of an interview the user has visited. By default, _internal and
nav are not included in the output of all_variables(). If you
want _internal and nav to be included, set the optional keyword
parameter include_internal to True.
The all_variables() function also has three special behaviors:
all_variables(special='titles')will return a Python dictionary containing information set by themetadatainitial block and theset_parts()function.all_variables(special='metadata')will return a dictionary representing the “metadata” indicated in themetadatainitial blocks of the interview. (If multiple blocks exist, information is “layered” so that keys in later blocks overwrite keys in earlier blocks.) Unlike the'titles'option, the information returned here is not updated to take into account changes made programmatically by theset_parts()function.all_variables(special='tags')will return a Python set containing the current set of tags defined for the interview session.
Functions for special responses
message()
code: |
  message("The interview is over.", "Better luck next time!")
mandatory: TrueThe message() function causes docassemble to stop what it is
doing and present a screen to the user that contains a given message.
By default, the user will be offered an “exit” button and a “restart” button, but these choices can be configured.
The first argument is the title of the screen the user will see (the
question). The second argument, which is optional, indicates the
text that will follow the title (the subquestion).
The message() function also takes keyword arguments. The following
do the same thing:
message("This is the big part of the question", "This is the
smaller part of the question")
message(question="This is the big part of the question", subquestion="This is the smaller part of the question")
The optional keyword arguments influence the appearance of the screen:
message("Bye!", "See ya later", show_restart=False)will show the Exit button but not the Restart button.message("Bye!", "See ya later", show_exit=False)will show the Restart button but not the Exit button.message("Bye!", "See ya later", url="https://www.google.com"): clicking the Exit button will take the user to Google.message("Bye!", "See ya later", show_leave=True)will show a Leave button instead of the Exit button.message("Bye!", "See ya later", show_leave=True, show_exit=True, show_restart=False)will show a Leave button and an Exit button.message("Bye!", "See ya later", buttons=[{"Learn More": "exit", "url": "https://en.wikipedia.org/wiki/Spinning_wheel"}])will show a “Learn More” button that exits to Wikipedia.
response()
The response() command allows the interview developer to use code to
send a special HTTP response. Instead of seeing a new docassemble
screen, the user will see raw content as an HTTP response, or be
redirected to another web site. As soon as docassemble runs the
response() command, it stops what it is doing and returns the
response.
There are four different types of responses, which you can invoke by
using one of four keyword arguments: response, binaryresponse,
file, and url. There is also an optional keyword argument
content_type, which determines the setting of the Content-Type
header. (This is not used for url responses, though.) The
response() function accepts the optional keyword parameter
response_code. The default HTTP response code is 200 but you can
use response_code to set it to a different value.
The four response types are:
response: This is treated as text and encoded to UTF-8. For example, if you have some data in a dictionaryinfoand you want to return it in JSON format, you could doresponse(response=json.dumps(info), content_type='application/json'). If thecontent_typekeyword argument is omitted, the Content-Type header defaults totext/plain; charset=utf-8.binaryresponse: This is likeresponse, except that the data provided as thebinaryresponseis treated as binary bytes rather than text, and it is passed directly without any modification. You could use this to transmit images that are created using a software library like the Python Imaging Library. If thecontent_typekeyword argument is omitted, the Content-Type header defaults totext/plain; charset=utf-8.file: The contents of the specified file will be delivered in response to the HTTP request. You can supply one of two types of file designators: aDAFileobject (e.g., an assembled document or an uploaded file), or a reference to a file in a docassemble package (e.g.,'moon_stars.jpg'for a file in the static files folder of the current package, or'docassemble.demo:data/static/orange_picture.jpg'to refer to a file in another package).url: If you provide a URL, the web server will redirect the user’s browser to the provided URL.
Here is an example that demonstrates response:
mandatory: True
code: |
  data = {'fruit': 'apple', 'pieces': 2}
response(json.dumps(data), content_type="application/json")Here is an example that demonstrates the binaryresponse:
sets: all_done
code: |
  svg_image = """\
  <?xml version="1.0" encoding="UTF-8" standalone="no"?>
  <svg
     xmlns:dc="http://purl.org/dc/elements/1.1/"
     xmlns:cc="http://creativecommons.org/ns#"
     xmlns:rdf="http://www.w3.org/1999/02/22-rdf-syntax-ns#"
     xmlns:svg="http://www.w3.org/2000/svg"
     xmlns="http://www.w3.org/2000/svg"
     version="1.1"
     id="svg2"
     width="100"
     height="100">
    <circle
       id="circle4"
       fill="red"
       stroke-width="3"
       stroke="black"
       r="40"
       cy="50"
       cx="50" />
  </svg>
  """
response(binaryresponse=svg_image, content_type="image/svg+xml")The following example shows how you can make information entered into an interview available to a third-party application through a URL that returns data in JSON format.
objects:
  - user: Individual
---
mandatory: True
code: |
  multi_user = True
---
event: query_fruit
code: |
  data = {'fruit': favorite_fruit, 'pieces': number_of_pieces}
  json_response(data)
---
mandatory: True
question: |
  You currently have
  ${ nice_number(number_of_pieces) }
  ${ noun_plural('piece', number_of_pieces) }
  of
  ${ noun_singular(favorite_fruit) }.
subquestion: |
  Use
  [this link](${ interview_url_action('query_fruit') })
  to query the information from
  another application.

  You can also change the
  [fruit](${ url_action('favorite_fruit') })
  and the
[number of pieces](${ url_action('number_of_pieces') }).Note the following about this interview.
- We set
multi_usertoTruein order to disable server-side encrpytion. This allows an external application to access the interview without logging in as the user. - The
query_fruiteventcode will be run as an action when someone accesses the link created byinterview_url_action().
The response() command can be used to integrate a docassemble
interview with another application. For example, the other
application could call docassemble with a URL that includes an
interview file name (argument i) along with a number of
URL arguments. The interview would process the information passed
through the URLs, but would not ask any questions. It would instead
return an assembled document using response().
attachment:
  name: A file
  file: test_file
  variable name: the_file
  valid formats:
    - pdf
  content: |
    Hello, ${ url_args.get('name', 'you') }!
---
mandatory: True
code: |
  response(file=the_file.pdf)
Here is a link that runs this interview. Notice how the name “Fred” is embedded in the URL. The result is an immediate PDF document.
When you write code that runs in a scheduled task, you can use
response() to finish the scheduled task. In this context, you can
pass the optional keyword argument sleep with a number of seconds
that you want to pause after the task is finished. This can be useful
when your scheduled tasks would overwhelm your SQL server if
executed one after another without pauses.
json_response()
Calling json_response(data) is (basically) a shorthand for
response(binaryresponse=json.dumps(data).encode('utf-8'), content_type="application/json").
It takes a single positional argument and returns it as an HTTP response in JSON format.
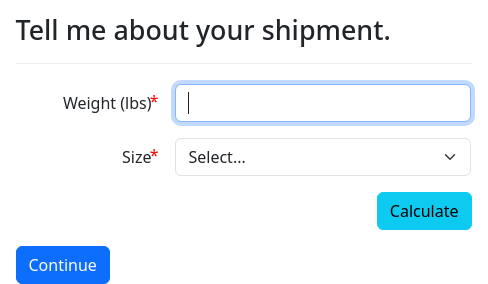
Here is an example of how json_response() can be used in combination
with the action_call() JavaScript function.
mandatory: True
question: |
  Tell me about your shipment.
fields:
  - Weight (lbs): weight
    datatype: number
  - Size: size
    choices:
      - Small box: 1
      - Medium box: 2
      - Large box: 3
  - html: |
      <button id="calcButton" class="btn btn-info float-end" type="button">Calculate</button>
      <span id="calcResults"></span>
script: |
  <script>
    $("#calcButton").on('click', function(){
      var theWeight = parseFloat(val('weight'))
      var theSize = parseInt(val('size'))
      if (theWeight && theSize){
        action_call('calc', {weight: theWeight, size: theSize}, function(data){
          $("#calcResults").html("That will cost $" + data.cost.toLocaleString('en-US') + ".");
        });
      }
    })
  </script>
---
event: calc
code: |
json_response({'cost': 4.44 + action_argument('weight') * 5.2 + action_argument('size') * 13.1})The json_response() function accepts the optional keyword parameter
response_code. The default response code is 200 but you can use
response_code to set it to a different value.
Another way to get JSON output from docassemble is to use the JSON interface, which provides a JSON representation of a docassemble screen. This can be useful if you are developing your own front end to docassemble.
variables_as_json()
The variables_as_json() function acts like response() in the
example above, except that is returns all of the variables in the
interview session dictionary in JSON format.
mandatory: True
code: |
  multi_user = True
---
event: query_variables
code: |
  variables_as_json()
---
mandatory: True
question: |
  You currently have
  ${ nice_number(number_of_pieces) }
  ${ noun_plural('piece', number_of_pieces) }
  of
  ${ noun_singular(favorite_fruit) }.
subquestion: |
  Use
  [this link](${ interview_url_action('query_variables') })
  to query the information from
  another application.

  You can also change the
  [fruit](${ url_action('favorite_fruit') })
  and the
[number of pieces](${ url_action('number_of_pieces') }).The variables_as_json() function simplifies the interview variables
in the same way that the all_variables() function does. Like
all_variables(), it takes an optional keyword argument
include_internal, which is False by default, but when True,
includes the internal variables _internal and nav in the output.
command()
mandatory: True
code: |
  command('exit', url=target_url)
---
question: |
  Where do you want to go?
field: target_url
buttons:
  - Stanford: "http://stanford.edu/"
- Harvard: "http://www.harvard.edu/"The command() function allows the interview developer to trigger an
exit from the interview using code, rather than having the user click
an exit, restart, leave or signin button.
The first argument to command() is one of the following:
'restart': deletes the user’s answers and puts them back at the start of the interview.'new_session': starts a new session for the same interview without deleting the user’s answers.'exit': deletes the user’s answers and redirects them to a web site'logout': logs the user out and redirects them to a web site.'exit_logout': deletes the user’s answers, logs the user out (if logged in) and redirects them to a web site.'leave': redirects the user to a web site without deleting the user’s answers.'signin': redirects the user to the sign-in screen.
The optional keyword argument url provides a URL to which the user
should be redirected. The value of exitpage will be used if no
url is provided.
Note that the special buttons perform a similar function to
command(). See also the starting an interview from the beginning
subsection for URL parameters that reset interview sessions.
The command() function can also be used to instruct the user’s web
browser to wait for a period of time and then reload the screen.
command('wait')As with the other command() options, calling command('wait')
causes code execution to stop on the server. (It raises an exception,
which is trapped.) The server returns a response to the web browser,
instructing the web browser to wait for four seconds and then query
the server again. The user will continue seeing the previous screen,
and a spinner will appear. If the user reloads the screen, or if the
interview logic calls command('wait') when the user first visits the
interview, the user will see a screen that says “Please wait . . .”
If you want the browser to query the server after a
different number of seconds, set the seconds parameter.
command('wait', sleep=10)If you want a message other than “Please wait . . .” you can set
question_text and subquestion_text:
command('wait', question_text='Processing . . .', subquestion_text='The computer is busy. Be patient.')Text transformation functions
from_b64_json()
Takes a string as input, converts the string from base-64, then parses the string as JSON, and returns the object represented by the JSON.
This is an advanced function that is used by software developers to integrate other systems with docassemble.
plain(), bold(), and italic()
The functions plain(), bold(), and italic() are useful when
including variables in a template.
For example, if you write:
subquestion: |
  * Your phone number: **${ phone_number }**
  * Your fax number: **${ fax_number }**
Then the values of the two variables will have bold face markup, but if one of them is empty, you will get asterisks instead of what you presumably wanted, which was no text at all.
- Your phone number: 202-555-2030
- Your fax number: ****
Instead, you can write:
subquestion: |
  * Your phone number: ${ bold(phone_number) }
  * Your fax number: ${ bold(fax_number) }
This leads to:
- Your phone number: 202-555-2030
- Your fax number:
Alternatively, you can pass an optional keyword argument, default,
if it should plug in something different when empty.
subquestion: |
  * Your phone number: ${ bold(phone_number, default='Not available') }
  * Your fax number: ${ bold(fax_number, default='Not available') }
This leads to:
- Your phone number: 202-555-2030
- Your fax number: Not available
Calling italic('apple') function returns _apple_.
The plain() function does not supply any formatting, but it
will substitute the default keyword argument.
space_to_underscore()
If user_name is John Wilkes Booth,
space_to_underscore(user_name) will return John_Wilkes_Booth.
This is useful if you do not want spaces in the filenames of your
attachments. This function will also do basic filename sanitization
to remove dangerous characters and command injection.
sets: user_done
question: Thanks!
subquestion: Here is your letter.
attachment:
  - name: A letter for ${ user_name }
    filename: Letter_for_${ space_to_underscore(user_name) }
    content file: letter.md
single_to_double_newlines()
Under the rules of Markdown, you need to insert two newlines to
break a paragraph. Sometimes you have text where one newline
represents a paragraph, but you want the single newlines to count as
paragraph breaks. The function single_to_double_newlines() will
convert the text for you.
mandatory: True
question: |
  Here is your first book.
attachment:
  name: Story of My Life
  filename: life_story
  content: |
    [BOLDCENTER] My Life Story

    ${ single_to_double_newlines(life_story) }

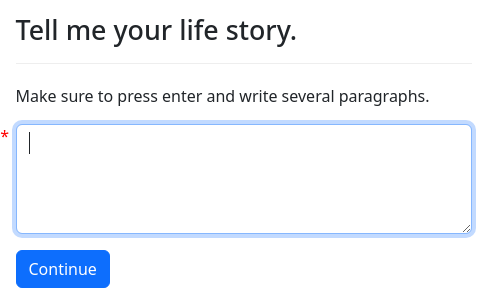
[CENTER] The End.single_paragraph()
single_paragraph(user_supplied_text) will replace any linebreaks in
user_supplied_text with spaces. This allows you to do things like:
question: Summary of your answers
subquestion: |
  When I asked you the meaning of life, you said:

  > ${ single_paragraph(meaning_of_life) }

field: ok_to_proceed
If you did not remove line breaks from the text, then if the
meaning_of_life contained two consecutive line breaks, only the
first paragraph of the answer would be indented.
verbatim()
If you are inserting user-supplied input into a document or onto the
screen, it is possible that the text may contain characters that will
result in undesired formatting changes. For example, the input may
contain Markdown codes, HTML codes, or LaTeX codes. To avoid the
effects of such characters, wrap the text with the verbatim()
function.
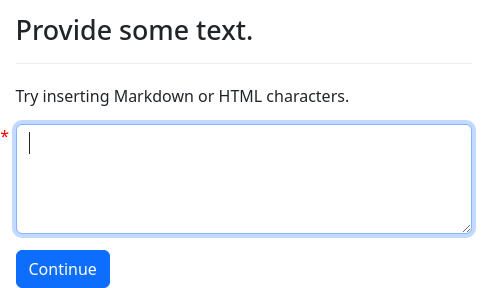
question: |
  Provide some text.
subquestion: |
  Try inserting Markdown or HTML characters.
fields:
  no label: user_input
  input type: area
---
mandatory: True
question: |
  This content should be devoid
  of formatting.
subquestion: |
  ${ verbatim(user_input) }
attachment:
  content: |
${ verbatim(user_input) }quote_paragraphs()
The quote_paragraphs() function adds Markdown to text so that it
appears as a quotation.
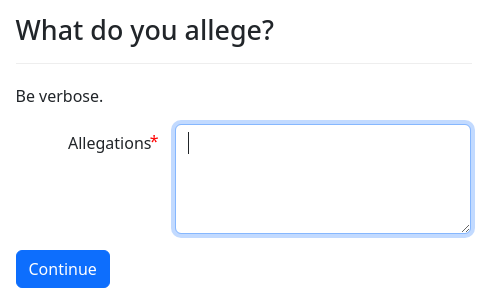
mandatory: True
question: |
  Your allegations
subquestion: |
  You allege that:

${ quote_paragraphs(allegations) }indent()
The indent() function adds four spaces to the beginning of each line
of the given Markdown to text. This needs to be used if you are
inserting a table or a paragraph of user text into the context of a
Markdown bullet-point or itemized list, and you want the text to be
part of an item. If you do not indent the text, the text will be
treated as a new paragraph that ends the list.
mandatory: True
question: |
  Your allegations
subquestion: |
  You allege that:

  1.  The sky is blue.

  2.  You have a house.

      Your house has a roof.

      Your roof is made up of many
      shingles.

  3.  You have a car.

  ${ indent(car_allegations) }

  4.  You have at least a high
      school education.
---
template: car_allegations
content: |
  Your car is black.

  Your car's gas tank is nearly empty.

  Your car goes from 0 to 60 fast enough
not to be rear-ended on the highway.fix_punctuation()
The fix_punctuation() function ensures that the given text ends with
a punctuation mark. It will add a . to the end of the text if no
punctuation is present at the end. To use a different punctuation
mark, set the optional keyword argument mark to the text you want to
use.
A call to fix_punctuation(reason) will return:
I have a valid claim.ifreasonisI have a valid claimI have a valid claim.ifreasonisI have a valid claim.I have a valid claim!ifreasonisI have a valid claim!I have a valid claim?ifreasonisI have a valid claim?
mandatory: true
question: |
  What to do in court.
subquestion: |
  Tell the court,
  "Please grant my petition.
  ${ fix_punctuation(rationale) }"
---
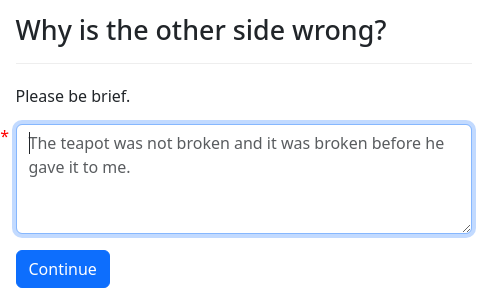
question: |
  Why is the other side wrong?
subquestion: |
  Please be brief.
fields:
  - no label: rationale
    input type: area
    hint: |
      The teapot was not broken
      and it was broken before he
gave it to me.redact()
The redact() function is used when preparing redacted and unredacted
versions of a document. For example, instead of referring to
client.ssn in a document, you can refer to redact(client.ssn).
Then, in the final document, a redaction mark will be included instead
of the client’s Social Security number. However, if the document is
assembled with redact: False, the Social Security number will be
included.
Here is an example of redact() being used when generating a PDF and
RTF file from Markdown:
template: petition_text
content: |
  Dear Judge,

  My name is ${ user }.
  I have a claim against
  the defendant.  A big one.

  My SSN is ${ redact(user.ssn) }.
  My phone number is
  ${ user.phone_number }.

  My home address is:

  ${ redact(user.address) }

  I demand ${ currency(money_claimed) }.

  Thank you.

  Sincerely,

  ${ user }
---
mandatory: True
question: |
  Here is your document.
subquestion: |
  You need to print both copies
  and file them in court.

  The unredacted version goes
  to the judge, and the redacted
  version will go in the public
  record.
attachments:
  - name: Unredacted petition
    filename: petition_unredacted
    redact: False
    valid formats:
      - pdf
      - rtf
      - docx
    content: |
      ${ petition_text }
  - name: Redacted petition
    filename: petition_redacted
    valid formats:
      - pdf
      - rtf
      - docx
    content: |
${ petition_text }Here is the same example, but with a docx template file named
redact_demo.docx:
mandatory: True
question: |
  Here is your document.
subquestion: |
  You need to print both copies
  and file them in court.

  The unredacted version goes
  to the judge, and the redacted
  version will go in the public
  record.
attachments:
  - name: Unredacted petition
    redact: False
    filename: petition_unredacted
    docx template file: redact_demo.docx
  - name: Redacted petition
    filename: petition_redacted
docx template file: redact_demo.docxHere is the same example, but with a pdf template file named
redact_demo.pdf:
mandatory: True
question: |
  Here is your document.
subquestion: |
  You need to print both copies
  and file them in court.

  The unredacted version goes
  to the judge, and the redacted
  version will go in the public
  record.
attachments:
  - name: Unredacted petition
    redact: False
    filename: petition_unredacted
    pdf template file: redact_demo.pdf
    field code:
      - today_date: today()
      - name: user
      - ssn: redact(user.ssn)
      - phone: user.phone_number
      - address: redact(user.address)
      - money: currency(money_claimed)
  - name: Redacted petition
    filename: petition_redacted
    pdf template file: redact_demo.pdf
    field code:
      - today_date: today()
      - name: user
      - ssn: redact(user.ssn)
      - phone: user.phone_number
      - address: redact(user.address)
- money: currency(money_claimed)The redact() function is intended to be called the markup of
documents, as demonstrated in the various examples above. It is only
in this context that the redact() function knows whether you have
set redact: False or not. The redact() function can be from other
contexts, but the result may not be what you want; for example, you
may see redactions even though you set redact: False. If you define
a variable ssn_text = redact(user.ssn), and the ssn_text variable
is already defined by the time docassemble gets around to
assembling a document with the redact option set to False, then
your “unredacted” document will contain a redacted Social Security
number.
Functions related to actions
Normally, when docassemble figures out what question to ask,
it simply evaluates the interview logic: it goes through the YAML
from top to bottom, and runs anything marked as initial or
mandatory (skipping over mandatory blocks that have already
been processed), and if it encounters an undefined variable, it seeks
a definition of that undefined variable by running blocks that offer
definitions of those variables.
Sometimes, however, you may want to direct docassemble to perform a specific task other than evaluating the current state of the interview logic. The mechanism for doing that is called the “actions” mechanism.
An “action” is similar to a function call in computer programming.
When you call a function, you might call cancel_application() or
submit_application(user, details). Running cancel_application()
just runs a function called cancel_application. Running
submit_application(user, details) runs a function called
submit_application, and passes user and details to the function;
these are referred to as the “arguments” of the function.
Here is some made-up code that illustrates how traditional functions work:
def cancel_application():
  central_authority = CentralAuth(hostname='central-authority.example.com')
  payload = {'type': 'cancel'}
  send(payload, central_authority)

def submit_application(user, details):
  central_authority = CentralAuth(hostname='central-authority.example.com')
  payload = {'type': 'submit', 'user': user, 'details': details}
  send(payload, central_authority)
In docassemble, an “action” consists of an action name and an
optional dictionary of arguments. When you call the action
cancel_application, docassemble will seek out a block in your
YAML that offers to define cancel_application, and will run that
block. To locate this block, it uses the same process that it uses
when it seeks a block that defines an undefined variable.
Here is how you would implement the functions above as “actions” in your interview YAML:
event: cancel_application
code: |
  send({'type': 'cancel'}, CentralAuth(hostname='central-authority.example.com'))
---
event: submit_application
code: |
  send({'type': 'submit', 'user': action_argument('user'), 'details': action_argument('details')}, CentralAuth(hostname='central-authority.example.com'))
Writing event: cancel_application means “this block advertises that
it defines cancel_application. You may have seen event used
before in a context like this:
mandatory: True
code: |
  intro_screen
  favorite_fruit
  final_screen
---
event: final_screen
question: Thank you for answering my questions today.
subquestion: |
  I like ${ favorite_fruit } as well.
When a variable name is referenced, its definition will be sought if
the variable is undefined, but if the variable is defined, it will
continue running the Python code. The final_screen question is
different, though, because it is a dead end; final_screen is a
variable name that will never actually get defined.
Likewise, a code block with event: cancel_application will not
actually define the variable cancel_application, but it will be
executed if docassemble seeks the variable cancel_application.
“Actions” are used in a variety of contexts in docassemble,
including the url_action() function, review screens, action
buttons, editable tables, the force_ask() function, the
url_action() JavaScript function, the action_perform()
JavaScript function, the action_call() JavaScript function, the
run_action_in_session() function, the POST method of
/api/session/action.
Regardless of how actions are called, they are always processed by the
process_action() function. The next section explains how actions
work when called with the url_action() function.
url_action() and process_action()
The url_action() function allows users to interact with
docassemble using hyperlinks embedded in questions.
url_action() returns a URL that, when clicked, will perform an
“action” within docassemble, such as running some code or asking a
question. Typically the URL will be part of a Markdown link inside
of a question, in a note within a set of fields, or it might be
the URL of an action_button_html().
The process_action() function processes “actions.” The
process_action() function is typically called for you,
behind-the-scenes, right before the interview logic is
evaluated. (However, you can call it explicitly if you want to control
exactly when (and if) it is called, and it is important to do so under
certain circumstances.)
Here is an example of using “action” URLs in an interview:
field: lucky_information_confirmed
question: |
  Please confirm the following information.
subquestion: |
  Your lucky number is ${ lucky_number }.
  [Increase](${ url_action('set_number_event', increment=1) })
  [Decrease](${ url_action('set_number_event', increment=-1) })

  Also, your lucky color is ${ lucky_color }.
  [Edit](${ url_action('lucky_color') })
---
event: set_number_event
code: |
  lucky_number += action_argument('increment')
---
code: |
lucky_number = 2When the user clicks on the “Edit” link generated by
url_action('lucky_color'), the interview will load as normal, much
as if the user reloaded the screen. However, before initial and
mandatory blocks are processed, docassemble runs the function
process_action(). The process_action() function checks to see if
any “actions” have been requested. If no actions have been requested,
process_action() returns without doing anything. In this case,
process_action() will see that the 'lucky_color' action has been
requested. As a result, the process_action() function will look for
a question or code block that defines
lucky_color. (Internally, it calls force_ask().) Since there is
a question in the interview that offers to define lucky_color,
that question will be asked.
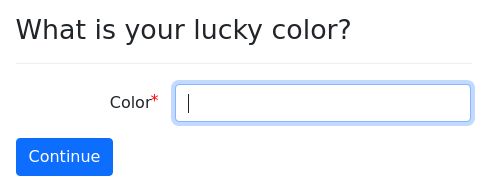
If the user refreshes the screen when the “What is your lucky color?”
question is showing, the user will arrive at the “What is your lucky
color?” question again. Docassemble remembers that the 'lucky_color'
action was pending, and the process_action() function will continue
sending the user to the “What is your lucky color?” question until the
user answers it. It does this even though the interview logic (the
mandatory block) does not require a definition of lucky_color. The
“action” is a diversion from the interview logic. When the user
answers the “What is your lucky color?” question, the action is
satisfied, and is no longer considered pending. process_action()
returns without forcing a question to be asked, the normal interview
logic is evaluated, and the “Please confirm the following information”
question is shown.
Even if the variable lucky_color is already defined, the
'lucky_color' action will always cause the “What is your lucky
color?” question to be shown. This makes “actions” useful for
allowing users to revisit questions they may have already answered.
When the user clicks on the link generated by
url_action('set_number_event', increment=1), the process_action()
function will look for a question or code block that defines
set_number_event. It will find the code block that was labeled
with event: set_number_event. (See Setting Variables for more
information about events.) It will then run that code block. The
Python code within that block uses action_argument() to retrieve
the value of increment that had been specified in as a parameter to
the url_action() function call.
By default, the process_action() function runs right before
docassemble starts processing your initial and mandatory
blocks. However, if you have a code block in your YAML that calls
process_action(), docassemble will refrain from running
process_action() prior to processing your initial and
mandatory blocks, and will instead rely on your interview logic to
call process_action(). A common reason to do this is when you have a
multi-lingual interview and you have an initial block that calls
set_language(); process_action() would otherwise run before the
language was initialized, and as a result questions might appear in
the wrong language.
mandatory: True
code: |
  multi_user = True
---
question: |
  Language/Idioma/Langue
field: user_local.language
choices:
  - English: en
  - Español: es
  - Français: fr
---
initial: True
code: |
  set_language(user_local.language)
  process_action()
Note that an initial block is just like a mandatory block
except that it always runs, even if it has already run to completion
in the interview session before. In this example, the mandatory
block runs first, and because it runs to completion, it will not run
again. The initial block will run every time the screen loads. This
is a multi-user interview, and the operative language will be set to
whatever language the current user speaks. (See user_local for
more information about that special object.)
Calling process_action() manually in an initial block can also be
useful for security purposes. You might want to ensure that actions
can only be carried out if the user is logged in:
initial: True
code: |
  if user_logged_in():
    process_action()
You can pass as many named parameters as you like to an “action.” For example:
question: Hello
subquestion: |
  You can set lots of information by
  [clicking this link](${ url_action('set_stuff', fish='trout', berry='strawberry', money=65433, actor='Will Smith')}).
---
event: set_stuff
code: |
  info = action_arguments()
  user_favorite_fish = info['fish']
  user_favorite_fruit = info['berry']
  if info['money'] > 300000:
    user_is_rich = True
  actor_to_hire = info['actor']
In this example, we use action_arguments() to retrieve all of the
arguments to url_action() as a Python dictionary.
You can think of “actions” as temporary diversions from the regular interview logic. When the action is over, the regular interview logic resumes. When the action is considered to be over depends on what the action refers to.
- If the action refers to a variable defined by a
question, the action will be over when the user answers thequestion. Thequestionwill be asked even if the variable is already defined. - If the action refers to the
eventname of aquestionblock, the action will be over when the user clicks acontinuebutton on thequestion. If thequestiondoes not have acontinuebutton, thequestionwill be a dead end and the action will never be over. - If the action refers to the
eventname of acodeblock, docassemble will run thecodeand it will consider the action to be over no matter what thecodeblock does. From within such acodeblock, you can callforce_ask()to cause additional actions to run. - If the action refers to a variable defined by a
codeblock, the code will be run in a more “persistent” manner thancodedesignated as anevent. If thecodestops running, for example because an undefined variable is encountered and aquestionneeds to be asked, theprocess_action()function will continue to run the action the next time the screen loads. When thecoderuns through to completion, docassemble will continue looking backward through the YAML for other blocks that offer to define the variable, and if it finds any, it will process those blocks according to these four rules.
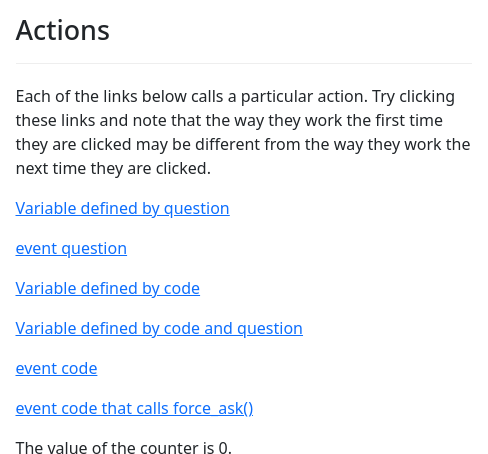
You can test out different types of actions in the following interview:
mandatory: True
question: Actions
subquestion: |
  Each of the links below calls a particular action. Try clicking
  these links and note that the way they work the first time they are
  clicked may be different from the way they work the next time they
  are clicked.

  [Variable defined by question](${ url_action('favorite_fruit') })

  [event question](${ url_action('fruit_info') })

  [Variable defined by code](${ url_action('vegetable_asked_about') })

  [Variable defined by code and question](${ url_action('legume_rationale') })

  [event code](${ url_action('increment_counter') })

  [event code that calls force_ask()](${ url_action('review_preferences') })

  The value of the counter is ${ counter }.
---
question: |
  What is your favorite fruit?
fields:
  - Favorite fruit: favorite_fruit
---
event: fruit_info
question: |
  Information about fruit
subquestion: |
  Fruits have seeds. Some fruits are edible.
buttons:
  - Continue: continue
---
code: |
  vegetable_intro
  favorite_vegetable
  log("The favorite vegetable question has been asked.", "success")
  vegetable_asked_about = True
---
question: |
  Introduction to vegetables
subquestion: |
  Note that the `code` block action we are in right now will not be
  over unless `vegetable_intro` and `favorite_vegetable` are defined.
  You can refresh the screen now and this screen will appear again.
  Note that `code` blocks with `event` do not behave this way.
continue button field: vegetable_intro
---
question: |
  What is your favorite vegetable?
fields:
  - Favorite vegetable: favorite_vegetable
---
question: |
  What is your favorite legume?
fields:
  - Legume: favorite_legume
---
question: |
  Why do you like ${ favorite_legume }?
subquestion: |
  Note that `legume_rationale` has already been defined by a
  `code` block during this action, but this `question` is
  being asked anyway.

  An `action` will continue past a `code` block that defines a
  variable and will seek a `question` that defines the same
  variable, if such a `question` exists.
fields:
  - label: |
      Reason liking ${ favorite_legume }
    field: legume_rationale
    label above field: True
    input type: area
---
code: |
  favorite_legume
  legume_rationale = "because legumes are good"
---
event: increment_counter
code: |
  counter += 1
---
code: |
  counter = 0
---
event: review_preferences
code: |
force_ask('favorite_fruit', 'favorite_vegetable')Actions are “stackable.” If an action is launched while another action is still active, then when the second action is complete, the user will be returned to the first action.
You can test this out in the following interview:
mandatory: True
question: First page
subquestion: |
  [Go to second page](${ url_action('second_page') })
---
question: Second page
subquestion: |
  [Go to third page](${ url_action('third_page') })
continue button field: second_page
---
question: Third page
subquestion: |
  [Go to fourth page](${ url_action('fourth_page') })

  [Go to fourth page with forget prior](${ url_action('fourth_page', _forget_prior=True) })
continue button field: third_page
---
question: Fourth page
continue button field: fourth_pageNote that when you press a Continue button in this interview, you are taken back to where you were when you clicked on the action link; you complete the current action and “fall back” to the previous incomplete action.
The url_action() function accepts an optional keyword parameter
_forget_prior. If set to True, then when the action is run, any
actions that were already pending are “forgotten.” The above example
interview demonstrates this; note that when you click the “Go to
fourth page with forget prior” link, you go to the fourth page, but
then when you click Continue, you go back to the first page of the
interview; launching the action to go to the fourth page wipes out all
of the prior actions.
Using _forget_prior=True is useful when you have an action that
serves a navigation-related purpose. If the user clicks links to
navigate through screens, the “stacking” aspect of actions is not what
the user expects.
Note that the “current action” or the current “stack” of actions is specific to the user. In a multi-user interview, if one user has a pending action, other users will not see that pending action, even though the normal interview logic may take both users to the same screen. The action “stack” that is effective for a user is based on access credentials stored in a cookie in the browser. If a user is not logged in, these credentials are tied to the user’s session in their browser.
See interview_url_action() and scheduled tasks for information
about triggering actions externally.
action_menu_item()
One way to let the user trigger “actions” is to provide a selection in
the menu of the web app. You can do this by setting the menu_items
list. See special variables section for more information about
setting menu items.
mandatory: True
code: |
  menu_items = [ action_menu_item('Review Answers', 'review_answers') ]
In this example, a menu item labeled “Review Answers” is added, which when run triggers the action “review_answers.”
The action_menu_item(a, b) function returns a Python dictionary with
keys label and url, where label is set to the value of a and
url is set to the value of url_action(b).
If you want to pass arguments to the action, you can include the
arguments as keyword parameters to action_menu_item().
mandatory: True
code: |
  menu_items = [ action_menu_item('Get more', 'change_count', increment=1),
                 action_menu_item('Get less', 'change_count', increment=-1) ]
One keyword parameter has special meaning. If you set _screen_size
to 'small', then the menu item will only appear on small screens.
If you set it to 'large', it will only appear on large screens. A
“large” screen is Bootstrap md size or above.
interview_url()
The interview_url() function returns a URL to the interview that
provides a direct link to the interview and the current variable
store. This is used in multi-user interviews to invite additional
users to participate.
mandatory: True
code: |
  multi_user = True
---
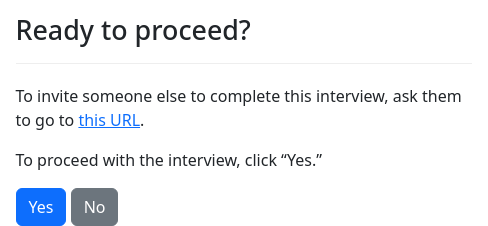
question: |
  Ready to proceed?
subquestion: |
  To invite someone else to complete
  this interview, ask them to go to
  [this URL](${ interview_url() }).

  To proceed with the interview,
  click "Yes."
yesno: ready_to_proceedPeople who click on the link (other than the current user) will not be
able to access the interview answers unless multi_user is set to
True. This is because interviews are encrypted on the server by
default. Setting multi_user to True disables this encryption.
Note that the communication between docassemble and the browser
will always be encrypted if the site is configured to use HTTPS.
The server-side encryption merely protects against the scenario in
which the server running docassemble is compromised.
You can include keyword arguments to interview_url(). These will be
included as additional URL parameters. When the user visits the URL,
docassemble will store the names and values in the url_args
dictionary of the interview, and the interview logic of the interview
can access the names and values by inspecting url_args.
The keyword argument i is special: you can set this to the name of
an interview (e.g., docassemble.demo:data/questions/questions.yml)
and this interview will be used instead of the current interview. In
this case, the session parameter is omitted and the URL functions as
a referral to a different interview, with a fresh variable
store. Interview filenames relative to the current package are valid
(e.g., questions.yml).
The keyword argument session is also special: you can set this to
the known session ID of an interview (e.g., obtained from
interview_list()), and also set i to the filename of the
interview corresponding with the session. Then the link will point
not to the current session, but to the session indicated by the
session ID.
If you want the URL to always starts a new session when the user
clicks on it, include the keyword argument new_session and set it to
1. For more information about how this works, see the documentation
for the new_session URL parameter.
If you want the URL to restart any existing sessions that the user
already is running in the interview, set reset=1. For more
information about how this works, see the documentation for the
reset URL parameter.
The keyword argument local is also special: set this to True if
you want the URL to be relative (i.e., it will start with ?). Note
that for purposes of the “copy link” feature of web browsers, this
does not matter; the web browser will provide a full URL even if the
underlying URL is relative. However, docassemble treats URLs
differently if they begin with http:/https: or ?: links that
begin with http will open in another tab.
The keyword argument style is also special: set this to 'short' if
you want the URL to begin with /run instead of /interview. This
will use /run/shortcutname format if the interview is listed in
dispatch, and otherwise will use /run/packagename/filename
format. In the absence of a style argument, the URL returned by
interview_url() in the context of the web application will use the
style of the URL that is in the location bar of the web browser. If
the URL in the location bar is /run/packagename/filename, the URL
returned by interview_url() will be /run/packagename/filename.
However, if interview_url() is called by a background process or a
call to the API, interview_url() will return
/interview?i=docassemble.packagename:data/questions/filename.yml by
default, unless a style is specified.
There are security risks with URLs created using interview_url().
The URLs contain a session key, and if multi_user is True,
anyone with that session key can access the interview session. If
you e-mail the result of interview_url(), the session key may be
stored permanently in the person’s e-mail account, where a third party
may see it.
One way around this potential security risk is to set the keyword argument
temporary. Then a special URL will be returned, which will contain
a code that will expire after a certain number of hours. For example,
if you add temporary=48 to the keyword arguments, the link will
expire after 48 hours. When the user clicks visits the link, the user
will be redirected to the location that interview_url() would return
if temporary was not set. By using a temporary URL, you will avoid
sharing the actual session ID, and you will protect against any
unauthorized access that would take place after 48 hours have expired.
mandatory: True
code: |
  multi_user = True
---
question: |
  Ready to proceed?
subquestion: |
  To invite someone else to complete
  this interview, ask them to go to
  [this URL](${ interview_url(temporary=1) })
  within the next hour.

  To proceed with the interview,
  click "Yes."
yesno: ready_to_proceedIf you set temporary to 0 or to a non-number, the expiration
period will default to 24 hours.
You can add additional security by using the keyword argument
once_temporary instead of the keyword argument temporary. This
works the same way as temporary, except the link will also expire
immediately after it is used for the first time.
interview_url_as_qr()
interview_url_as_qr() is like interview_url(), except it inserts
into the markup a QR code linking to the interview. The resulting
QR code can be used to pass control from a web browser or a paper
handout to a mobile device.
interview_url_action()
interview_url_action() is like interview_url(), except that it
also has the effect of running url_action(). You will want to use
this instead of url_action() if you want the user to be able to
share the URL with other people, or run it unattended.
objects:
  - user: Individual
---
mandatory: True
code: |
  multi_user = True
  status = 'normal'
---
initial: True
code: |
  process_action()
---
event: check_update_status
code: |
  if 'status' in action_arguments():
    status = action_argument('status')
---
mandatory: True
question: |
  The current status is ${ status }.
subquestion: |
  Anyone can use the following links
  to change the current status:

  * Change to [normal](${ interview_url_action('check_update_status', status='normal') })
  * Change to [danger](${ interview_url_action('check_update_status', status='danger') })
* Change to [critical](${ interview_url_action('check_update_status', status='critical') })Note that in this example, multi_user is set to True. This
disables server-side encryption of answers. This is necessary because
the encryption uses an decryption key, and a decryption key should not
be embedded in a URL.
The first argument to interview_url_action() is the name of the
action. The keyword arguments are the arguments of the action. In
this respect, interview_url_action() is similar to
url_action(). However, the following keyword arguments have
special meaning:
i- if you set aniparameter,interview_url_action()will form a URL for an interview other than the current interview. The current session ID will not be included by default in the URL.session: if you set asessionparameter, the value ofsessionwill be used as the session ID. This will allow the user of the URL to resume an existing interview session other than the current interview session. By default, ifiis not set, the session ID of the current session is included in the URL, which allows the user of the URL to resume the current interview sessionlocal: if you set thelocalparameter to a true value, then a relative URL will be returned. By default,interview_url_action()returns a complete URL.new_session: if you set thenew_sessionparameter to a true value, thennew_session=1will be included in the URL. Set this if you are providing aniparameter and you want to make sure that the user of the URL starts a new session rather than resuming an existing one.reset: if you set theresetparameter to a true value, thenreset=1will be included in the URL. Set this if you are providing aniparameter and you want the user of the URL to restart any existing session they may be using in the interview indicated byi._forget_prior: if you set the_forget_priorparameter to a true value, then the action, when run, will cause any prior pending actions to be forgotten, and the only pending action will be the one indicated byinterview_url_action(). For more information about the meaning of_forget_prior, see the documentation for theurl_action()function.
interview_url_action_as_qr()
interview_url_action_as_qr() is like interview_url_action(),
except it inserts into the markup a QR code linking to the
interview, with the specified actions.
Note that there is a limit to the number of characters a QR code can
hold, and you might run up against this limit if you try to add too
many arguments to the URL. Using the temporary keyword parameter is
one way around this limitation.
action_arguments()
The action_arguments() function returns a dictionary with any
arguments that were passed when the user clicked on a link generated
by url_action() or interview_url_action().
When a check in action takes place, action_arguments() returns the
fields on the screen. Although the special arguments _initial and
_changed can be read with action_argument(), the
action_arguments() function does not return these values.
action_argument()
The action_argument() function is like action_arguments(),
except that it returns the value of a given argument.
For example, if you formed a URL with:
question: |
  The total amount of your bill is ${ currency(bill + tip) }.
subquestion: |
  [Tip your waiter $10](${ url_action('tip', amount=10)}).

  [Tip your waiter $20](${ url_action('tip', amount=20)}).
Then you could retrieve the value of amount by doing:
event: tip
code: |
  tip = action_argument('amount')
If you are writing an initial block that calls process_action()
and you want to know the name of the action itself before you call
process_action(), you can retrieve the name of the action by calling
action_argument() without an argument. This will return the name of
the action itself. If the result is None, then no action was called
for the current request (and process_action() will not do anything).
You can only retrieve the action name with action_argument() before
you call process_action(). During the processing of the action, and
after process_action() returns, action_argument() will always
return None.
url_of()
This function returns a URL to a file within a docassemble
package’s static folder.
For example, you might have PDF files associated with your interview.
You would keep these in the data/static directory of your package,
and you would refer to them by writing something like:
mandatory: True
question: You are done.
subquestion: |
  To learn more about this topic, read
  [this brochure](${ url_of('docassemble.mycompany:data/static/brochure.pdf') }).
You can also refer to files in the current package by leaving off the package part of the file name:
mandatory: True
question: You are done.
subquestion: |
  To learn more about this topic, read
  [this brochure](${ url_of('brochure.pdf') }).
If you do not specify a package, docassemble will look for the
file in the static folder of the package in which the current
question or current code block resides.
Special uses
The url_of() function also has a few special uses.
- If applied to a
DAFileobject, it will return a URL to the file. url_of('help')returns a URL that causes the help tab to be shown, if there is a help tab.url_of('login')returns a URL to the sign-in page. It takes an optional keyword parameternext, which you can set to a URL if you want the user to be directed to a particular URL after they log in.url_of('signin')does the same thing asurl_of('login').url_of('new_session')returns a URL that starts a new session of the current interview, preserving the existing session.url_of('interview')returns a URL to the interview page. This should be used with aniparameter. If youriparameter does not begin with a package name, the current package will be substituted. (See alsointerview_url(), which does something similar but with more features.)url_of('restart')returns a URL that will delete the current session and restart it with the same URL parameters.url_of('exit')returns a URL that deletes the interview session and redirects to theexitpage. It accepts anextparameter, which is a URL to redirect the user to, instead of theexitpage.url_of('logout')returns a URL that logs the user out. It accepts anextparameter.url_of('exit_logout')returns a URL that deletes the interview session, logs the user out (if the user is logged in), and redirects to theexitpage. It accepts anextparameter.url_of('leave')redirects to theexitpage. It does not log the user out or delete the interview session. It accepts anextparameter.url_of('register')returns a URL to the user registration page. It accepts anextparameter.url_of('profile')returns a URL to the logged-in user’s profile page.url_of('change_password')returns a URL to a page where a logged-in user can change his or her password.url_of('interviews')returns a URL to the page listing the on-going interviews of a signed-in user.url_of('dispatch')returns a URL to the page listing the interviews defined in thedispatchdirective of the Configuration.url_of('manage')returns a URL to a page where the user can delete his or her account data.url_of('config')returns a URL to the Configuration page.url_of('playground')returns a URL to the Playground.url_of('playgroundtemplate')returns a URL to the Templates folder of the Playground.url_of('playgroundstatic')returns a URL to the Static folder of the Playground.url_of('playgroundsources')returns a URL to the Sources folder of the Playground.url_of('playgroundmodules')returns a URL to the Modules folder of the Playground.url_of('playgroundpackages')returns a URL to the Packages folder of the Playground.url_of('configuration')returns a URL to the Configuration page.url_of('root')returns the root URL of your server.url_of('temp_url', url=some_url)returns a URL that redirects tosome_url. This special feature is explained below.url_of('login_url', username='[email protected]', password='abc123', i='docassemble.foo:data/questions/bar.yml')returns a URL that a user can click on to be automatically logged in This special feature is explained below.
By default, url_of() returns relative URLs, which begin with /.
However, if you want a full URL, you can call, e.g., url_of('root',
_external=True).
You can set _attachment=True if you want the user to download the
file. This only works when url_of() refers to a file.
The url_of() function can also be used to format URLs with
parameters. For example, url_of('https://example.com', query="Hello, world!")
becomes https://example.com?query=Hello%2C+world%21.
You can also use this feature to format mailto: URLs:
question: |
  What e-mail would you like to send?
fields:
  - To: addressee
    datatype: email
  - Subject: subject
  - Body: body
    input type: area
---
mandatory: True
question: |
  Draft e-mail
subquestion: |
  [Your draft e-mail](${ url_of('mailto:' + addressee, subject=subject, body=body) })
  is ready.
url_of('redirect', url=some_url) acts like a URL shortener; it
returns a URL to the /goto endpoint of the docassemble server
with a URL parameter c set to a 32-character code. When this URL is
visited, the server responds with a redirect to the URL indicated by
the url parameter. The /goto URL expires after 90 days or another
time period you indicate.
mandatory: True
question: |
  All done
subquestion: |
  [Click here within 60 seconds](${ url_of('redirect', url='https://google.com', expire=60) })
The temp_url variant of url_of() returns a URL that redirects to
another URL. It uses four keyword parameters:
url(required): the URL to which the user should be redirected.expire(optional): this indicates the number of seconds until the temporary URL should no longer funtion. The default is 7,776,000 sends (90 days).local(optional): iflocalis true, the/gotoURL returned bytemporary_url()will be a relative URL (e.g.,/goto). Iflocalis false (which is the default), the URL will be complete (e.g.,https://yourserver.com/goto).one_time(optional): ifone_timeis true, then the redirect link can only be used once. If the/gotoURL is visited once, the temporary URL immediately expires. This has security advantages. If the/gotolink is visited by a bot (for example, if Slack tries to visit the link in order to fetch its metatag information and show “preview” information) then/gotoresponds with a blank page; this helps protect against the link expiring prematurely whenone_timeis used. By default, redirect links can be used more than once.
If the URL that you want to shorten is a URL created with
interview_url(), you do not need to use url_of('temp_url'); the
temporary and once_temporary keyword parameters to
interview_url() do the same thing.
The login_url variant of url_of() provides a URL containing a
special code that logs the user in and directs them to an interview
session or another destination. It uses the following keyword
parameters:
username: the user name of the user.password: the password of the user.i(optional): the filename of an interview to which the user will be redirected after they log in. E.g.,docassemble.demo:data/questions/questions.yml.session(optional): the session ID for the interview session (ifiis also provided). Providing this here rather than in theurl_argsprevents sending the session ID to the user’s browser.resume_existing(optional): set this to1if you do not know thesessioncode but you are providing anifilename and you want the user to resume an existing session in that interview, if they have one.expire(optional): the number of seconds after which the URL will expire. The default is 15 seconds.url_args(optional): a dictionary containing additional URL arguments that should be included in the URL to which the user is directed after they log in.next(optional): if the user should be directed after login to a page that is not an interview, you can omitiand instead set this parameter to a value likeplayground(for the Playground) orconfig(for the Configuration page). For a list of all possible values, see above (these are the “special uses” ofurl_of()). Ifurl_argsare supplied, these will be included in the resulting URL.
In addition to expiring after expire seconds, the URL expires
immediately after first use. The best way to use a login_url link is
by creating the URL and then immediately redirecting the user to the
URL. If you share the URL with the user directly, there is a chance
that the URL could expire before the user has a chance to click on
it. Some software visits URL for purposes of rendering a URL preview
box, and if the software visits the URL before the user does, the
software will invalidate the URL.
An API version of the login_url feature is available at
/api/login_url.
url_ask()
The url_ask() function is like url_action(), except instead
of accepting a single action name and optional arguments, it accepts a
single data structure, which is treated like the fields specifier
inside an item of a review block. It returns a URL that will
result in the asking of certain questions when the user visits it.
url_ask('favorite_fruit')- Ask thequestionthat definesfavorite_fruit.url_ask(['favorite_fruit', 'favorite_vegetable'])- Ask thequestionthat definesfavorite_fruit, then ask thequestionthat definesfavorite_vegetable.url_ask(['favorite_fruit', {'follow up': ['favorite_apple']}, 'favorite_vegetable'])- Ask thequestionthat definesfavorite_fruit; then ask thequestionthat definesfavorite_apple, if such aquestioncan be found; then ask thequestionthat definesfavorite_vegetable.url_ask(['favorite_fruit', {'recompute': ['fruit_to_offer']}, 'favorite_vegetable'])- Ask thequestionthat definesfavorite_fruit; then undefine the variablefruit_to_offerif it is defined; then compute the value offruit_to_offer; then ask thequestionthat definesfavorite_vegetable.url_ask(['favorite_fruit', {'set': [{'fruit_to_offer': 'apple'}]}, 'favorite_vegetable'])- Ask thequestionthat definesfavorite_fruit; then setfruit_to_offerto'apple'; then ask thequestionthat definesfavorite_vegetable.url_ask([{'action': 'increment_counter', 'arguments': {'amount': 2}}, 'follow_up_screen'])- Run the actionincrement_counterwith the argumentamountset to2, and when that is done, ask the question that definesfollow_up_screen.
For more information on how these data structures work, see the
subsection on customizing the display of review options.
action_button_html()
The action_button_html() function returns the HTML of a
Bootstrap-formatted button (an <a> tag styled as a button) that
visits a given URL. It is often given the output of url_ask() or
url_action(), but you can give it any URL.
mandatory: True
question: |
  Need more information?
subquestion: |
${ action_button_html("https://docassemble.org", label="Visit our web site", color="primary", size="md") }It accepts the following optional keyword arguments:
icon- this is the name of the Font Awesome icon to use at the start of the button. It can take a value like'pencil-alt'. By default, the icon is assumed to be in the “solid” collection (fas). To use a different collection, specify a name such asfab-fa-windowsfor thewindowsicon in the “brand” collection. If you do not want any icon, seticontoNone. The default isNone.color- this is the Bootstrap color of the button. The options areprimary,secondary,success,danger,warning,info,light,link, anddark. The default is'dark'. The actual colors depend on the Bootstrap theme.size- this is the Bootstrap size of the button. The options are'sm','md', and'lg'. The default is'sm'.block- if set toTrue, the button will fill the width of the question area.label- this is the text on the button. It passes through theword()function, so you can use the translation system to handle different languages.classname- set this to one or more class names (separated by a space) if you want to add additional CSS classes to the button.new_window- By default, internal links open in the same tab, except for links to files, which open in a new tab. If you want to force the link to open in the same window, setnew_window=False. If you want to force the link to open in a new tab, setnew_window=True. If you use a value other thanTrueorFalse, it will be used as thetargetof the hyperlink. If your link runs an action that responds with acommand()or aresponse(), settingnew_windowtoTrue,False, or a manual target is helpful for its side effect, which is that the action will be submitted to the server as a synchronous GET request from the browser, rather than an asynchronous POST request using Ajax. This will ensure that the response is handled appropriately.id_tag- if you want your button to have anidso that you can manipulate it with JavaScript, setid_tagto theidyou want to use. For example, if you don’t want the button to actually visit a link, you can doaction_button_html('#', label="Click me", id_tag="mybutton")and then write JavaScript code that does something like$("#mybutton").click(function(e){e.preventDefault(); console.log("Hello"); return false;}).
QR code functions
qr_code()
The qr_code() function allows you to include the [QR ...] markup statement
using Python.
It has two optional parameters: width and alt_text.
question: |
  Read the news on your mobile
  phone
subquestion: |
  If you have a QR code reader on
  your phone, point it here:

  ${ qr_code('https://news.google.com') }
mandatory: TrueThese two questions are equivalent:
question: |
  Here is a QR code.
subquestion: |
  Go to Google:

  ${ qr_code('http://google.com', width='200px') }

  Or go to Yahoo:

${ qr_code('http://yahoo.com') }question: |
Here is a QR code.
subquestion: |
Go to Google:
[QR http://google.com, 200px]
Or go to Yahoo:
[QR http://yahoo.com]For more information about what the [QR ...] markup statement
does, see the QR markup documentation.
Since this function returns [QR ...] markup, if you want to use it
within a docx template file, you will need to use the markdown
filter:
{{p qr_code(url) | markdown }}
Note that if you want to include a QR code that points to an interview
or an interview action, there are shorthand functions for that. See
interview_url_as_qr() and
interview_url_action_as_qr().
read_qr()
This function reads QR codes from one or more image files and returns a Python list with the encoded text string or strings.
question: |
  Please upload a file (or files) with
  a QR code.
fields:
  - File: user_upload
    datatype: files
---
question: |
  Codes found
subquestion: |
  The following codes were found:

  % for code in read_qr(user_upload):
  * ${ code }
  % endfor
mandatory: TrueThe first argument must be a DAFile or DAFileList object. If
the argument is a DAFileList with more than one file, all files
(and all pages within all files) will be scanned for QR codes.
The function accepts image files (JPEG, PNG, etc.) as well as PDF files. If you provide PDF files, the following optional parameters customize the reading of the PDF files (they are passed directly to pdftoppm).
findicates the first page of the PDF file to read. By default, all pages are read.lindicates the last page of the PDF file to read. By default, all pages are read.x: for cropping PDF pages. Indicates the x-coordinate of the crop area’s top left corner, in pixels. (By default, PDF files are converted at 300 dpi unless another value is given by theocr dpiconfiguration directive.)y: for cropping PDF pages. Indicates the y-coordinate of the crop area’s top left corner, in pixels.W: for cropping PDF pages. Indicates the width of the crop area in pixels (default is 0).H: for cropping PDF pages. Indicates the height of the crop area in pixels (default is 0).
The function returns a Python list with the codes found, in the order in which they were found.
E-mail functions
send_email()
The send_email() function sends an e-mail.
objects:
  - recipient: Individual
---
mandatory: true
question: |
  E-mail test
subquestion: |
  % if intro_provided and email_sent_ok:
  The e-mail was sent successfully.
  % else:
  There was a problem sending the e-mail.
  % endif
---
question: |
  E-mail test
subquestion: |
  This interview will send you an e-mail.
field: intro_provided
---
question: |
  What is your name?
fields:
  - First Name: recipient.name.first
  - Last Name: recipient.name.last
---
question: |
  What is your e-mail address?
fields:
  - E-mail: recipient.email
    datatype: email
---
code: |
  email_sent_ok = send_email(to=recipient, template=notification)
---
template: notification
subject: |
  Greetings, ${ recipient }!
content: |
  This is an e-mail sent from a
  **docassemble** interview.

Have a nice day!All of the arguments to send_email() are keyword arguments:
toexpects a list ofIndividuals, orPersons,DAEmailRecipients, or plain e-mail addresses. It also accepts a single item of any of these.senderexpects a singleIndividual. If not set, thedefault_senderinformation from the configuration is used.reply_toexpects a singleIndividual, orNone. This sets the (optional)Reply-Toheader of the e-mail, which determines the e-mail address to which replies are directed.ccexpects a list ofIndividuals, orNone.bccexpects a list ofIndividuals, orNone.bodyexpects text, orNone. Will set the plain text content of the e-mail.htmlexpects text, orNone. Will set the (optional) HTML content of the e-mail.subjectexpects text, orNone. Will set the subject of the e-mail. The default is"".templateexpects atemplateobject, orNone. These templates can be created in an interview file using thetemplatespecifier. If this keyword argument is supplied, both the plain text and HTML contents of the e-mail will be set by converting the Markdown text of the template into HTML and by converting the HTML to plain text (using html2text). In addition, the subject of the e-mail will be set to the subject of the template. You can override any of these behaviors by manually specifyingbody,html, orsubject.taskexpects the name of a task. If this argument is provided, and if sending the e-mail is successful, the task will be marked as having been performed (i.e.,mark_task_as_performed()will be called). Alternatively, you can handle this in your own code, but you might find it convenient to let thesend_email()function handle it for you.task_persistent: if you set atask, you can optionally set the “persistence” of the task by setting this toTrueor a value like'user'. For more information, see the documentation for the task-related functions.attachmentsexpects a list ofDAFile,DAFileList, orDAFileCollectionobjects. You can include:- Images generated by
signatureblocks (objects of classDAFile); - File uploads generated by including fields of
datatype: fileordatatype: filesin aquestion(objects of classDAFileList); - Documents generated by
attachmentsto aquestionfor which avariablewas provided (objects of classDAFileCollection).
- Images generated by
mailgun_variablesexpects a dictionary of user variables that should be passed to the Mailgun API. This is only applicable if you are using the Mailgun API for e-mail sending.dry_runcan be set toTrueif you want to do a “dry run” of the e-mail sending process. You would use this if you wanted to make sure that all of the variablessend_email()needs are defined before you actually send the e-mail. The default isFalse.configcan be set to thenameof an e-mail configuration if you are using multiple e-mail configurations in your Configuration. This allows you to contol which e-mail server or provider is used to send the e-mail. Alternatively, you can set a default e-mail configuration for the interview usingemail configin themetadata, in which case any call tosend_email()within the interview will use that e-mail configuration.
If you use Individual objects as recipients, send_email() will
use the name and email attributes of the listed Individuals to
form e-mail addresses.
send_email() returns False if an error prevented the e-mail from
being delivered to the mail server; otherwise it returns True. Note
that this function might return True even though no e-mail is
actually delivered to the recipient; the return value indicates only
whether there was a problem sending the e-mail with Flask-Mail.
See configuration for information about how to configure the mail
server that send_email() will use.
Here is an example of sending an attachment via e-mail:
question: |
  Please fill in the following information.
fields:
  - Your First Name: user.name.first
  - Your Last Name: user.name.last
  - Your E-mail: user.email
    datatype: email
  - A Picture: the_file
    datatype: file
---
code: |
success_sending_email = send_email(to=[user], template=hello_email, attachments=[the_file])Sending e-mail can be slow. If you call send_email() from within
your interview logic, the user might have to look at a spinner. In
order to provide a better experience to users, you may wish to call
send_email() from within a background process.
interview_email()
The interview_email() function returns an e-mail address that the
user can use to send a message to the interview. For more information
about how users can send e-mails to interview sessions, see the
documentation for the e-mail to interview feature.
If the incoming mail domain directive in your configuration is
help.example.com, then interview_email() will return something
like [email protected].
The address returned by interview_email() is a unique random
sequence of six lowercase letters. If any e-mails are received at
this e-mail address, docassemble will associate them with the
user’s session and the e-mails can be retrieved with get_emails().
The result returned by interview_email() will be unique to the
session. Every time your interview calls interview_email(), the
same e-mail address will be returned.
You can also associate more than one e-mail address with the session,
if you wish. For example, in a litigation application, you may want
to have one e-mail address for receiving evidence from the client and
another address for corresponding with opposing counsel. You can
obtain these different e-mail addresses using the optional keyword
argument key. For example, interview_email(key='evidence') and
interview_email(key='opposing counsel') will return different unique
addresses.
If you are using a key to get an e-mail address, you can also
set the optional keyword argument index to an integer. For example,
if there are multiple opposing counsel and you want a separate e-mail
address for each one, you can use interview_email(key='opposing
counsel', index=1), interview_email(key='opposing
counsel', index=2), etc.
get_emails()
The get_emails() function returns a list of objects representing
e-mail addresses generated with interview_email(). For more
information about how users can send e-mails to interview sessions,
see the documentation for the e-mail to interview feature.
Each object in the list returned by get_emails() has the following
attributes:
address: the part of the e-mail address before the@.emails: a list ofDAEmailobjects representing e-mails that have been sent to the e-mail address.key: thekeyassociated with the e-mail address, which isNoneif you did not supply akeytointerview_email()index: theindexassociated with the e-mail address, which isNoneif you did not supply anindextointerview_email().
If you used key with interview_email(), you can use the optional
key and index keyword arguments to get_emails() in order to
filter the results. For example, get_emails(key='evidence') will
only return information about e-mail addresses created with
interview_email(key='evidence'). Calling
get_emails(key='evidence', index=2) will limit the list even further
to the e-mail address created by interview_email(key='evidence',
index=2).
Fax functions
send_fax()
The send_fax() function sends a PDF document as a fax. This
function requires you to create an account with a fax provider.
send_fax() takes two arguments, a destination and a file.
objects:
  - user: Individual
---
question: |
  What is your fax number?
fields:
  - Fax: user.fax_number
---
question: |
  What file would you like
  me to fax?
fields:
  - File: document
    datatype: file
---
code: |
  fax_result = send_fax(user, document)
---
mandatory: True
question: |
  % if fax_result.received():
  The fax was received.
  % else:
  The status of the fax is
  ${ fax_result.status() }.
  % endif
reload: True
The destination can be a Person or a fax number. If it is a
Person, the fax number will be obtained from the fax_number
attribute of the object. The send_fax() function will convert the
fax number to E.164 format. To do so, it will need to determine the
appropriate country calling code for the phone number. This country
code will be based on the country attribute of the object, or the
address.country attribute, but if neither of these attributes is
already defined, the value of get_country() will be used. If you
want to use a specific country, you can call send_fax() with the
optional keyword parameter country. The format of the country
attribute and the keyword parameter is expected to be ISO 3166-1
alpha-2 format.
The second argument, the file, must be a file object such as a
DAFile, DAFileList, DAFileCollection, or DAStaticFile
object.
The send_fax() function returns an object that represents the status
of the fax sending. The object has the following methods:
.status()- this will represent the status of the sending of the fax. The available values depend on your fax provider. If there is a configuration error, it will be'not-configured', and if no result is available, it will be'no-information'..info()- this will be a dictionary containing information about the fax. The format depends on which fax provider you are using..received()- this will beTrueorFalsedepending on whether the fax has been received yet. It will beNoneif no result is available..pages()- if the fax is successfully delivered, this will return the number of pages sent.
Immediately after send_fax() is called, the result will likely be
unavailable, because the fax provider will not have had time to start
processing the request.
In addition, the result will expire 24 hours after the last time the
fax provider reported a change in the status of the fax sending.
Thus, if you want to ensure that the outcome of a fax sending gets
recorded in the interview session dictionary, you should launch a
background_action() that polls the status, or set up a scheduled
task that checks in hourly.
Geographic functions
map_of()
The map_of() function inserts a Google Map into question text. (It
does not work within documents.) The arguments are expected to be
docassemble objects. Different objects are mapped differently:
Addressobjects: if anAddressobject is provided as an argument tomap_of(), a map marker will be placed at the geocoded coordinates of the address. The description of the address will be the address itself.- Technical details: if the object is called
address, the marker will be placed at the coordinatesaddress.location.latitudeandaddress.location.longitude. (The attributeaddress.locationis aLatitudeLongitudeobject.) The description of the marker will be set toaddress.location.description. These fields are set automatically during the geocoding process, which will take place the first time docassemble runsmap_of(), if it has not taken place already. The marker icon can be customized by settingaddress.icon.
- Technical details: if the object is called
Organizationobjects: map markers will be placed at the locations of each of the organization’s offices. For example, if the object name iscompany, markers will be placed on the map for each address incompany.office(which is a list ofAddresses). The icon for theith office will becompany.office[i].icon, or, if that is not defined, it will becompany.iconif that is defined. The description of each marker will be the organization’s name (company.name.full()) followed bycompany.office[i].location.description.Personobjects: a map marker will be placed at the person’s address. The description will be the person’s name, followed by the address. The marker icon can be customized by settingperson.icon(for aPersonobject calledperson). If thePersonobject is the user, the default icon is a blue pin.
objects:
  - user: Individual
  - enemy: Individual
---
initial: True
code: |
  set_info(user=user, role='user')
  track_location = user.location.status()
---
mandatory: True
code: |
  need(welcome_screen, user.address.address, enemy.name.first, enemy.address.address, map_shown)
---
event: map_shown
question: Map of you and your enemy
subquestion: |
${ map_of(user, enemy) }In order for maps to appear, you will need to configure a Google API
key. From the google section of the configuration, the google
maps api key will be used if it exists. If a google maps api key is
not present, the api key will be used. In the Google Cloud console,
you will need to enable the Maps JavaScript API.
The icon attribute is expected to be a dict of options that will
be passed to a PinElement constructor.
location_known()
Returns True or False depending on whether docassemble was
able to learn the user’s GPS location through the web browser.
See track_location and LatitudeLongitude for more information
about how docassemble collects information about the user’s
location.
location_returned()
Returns True or False depending on whether an attempt has yet been
made to transmit the user’s GPS location from the browser to
docassemble. Will return true even if the attempt was not successful
or the user refused to consent to the transfer.
See track_location and LatitudeLongitude for
more information about how docassemble collects information about
the user’s location.
user_lat_lon()
Returns the user’s latitude and longitude as a tuple.
See track_location and LatitudeLongitude for more information
about how docassemble collects information about the user’s
location.
iso_country()
The iso_country() function takes a country name or abbreviation as
input and returns a two-character ISO 3166-1 alpha-2 code or other
ISO 3166-1 information about a country.
question: |
  In what country do you live?
fields:
  - Country: country
validation code: |
  try:
    country = iso_country(country)
  except:
    validation_error("That country does not exist.  Please try again.")
---
mandatory: True
question: |
You live in ${ country_name(country) }.By default, it returns the ISO 3166-1 alpha-2 country code, but it
can return other things depending on the optional keyword parameter
part, which can be set to one of the following values:
'alpha_2'(the default): returns the two-letter country code (e.g.,US).'alpha_3': Returns the three-letter country code (e.g.,'USA').'name': Returns the name of the country (e.g.,'United States').'numeric': Returns the three-digit country code, as text (e.g.,'840').'official_name': Returns a long-form name of the country (e.g.,'United States of America').
countries_list() and country_name()
The countries_list() function returns a list of dictionaries, where
each dictionary contains a single key-value pair mapping a two-letter,
capitalized country abbreviation to the name of the country (in
English). This function is primarily useful when asking a user to
specify his or her country.
The country_name() function returns the name of a country (in
English) based on the two-letter, capitalized country abbreviation.
question: |
  Where do you live?
fields:
  - Country: user_country
    code: countries_list()
    default: US
---
mandatory: True
question: |
  You live in
  ${ country_name(user_country) },
  which is abbreviated
${ user_country }.When working with countries, it is a good idea to store country names
in this two-letter, capitalized format (ISO 3166-1 alpha-2 format).
The country code is used by the send_sms() function to determine
the appropriate universal formatting of phone numbers.
The data come from the pycountry package.
states_list() and state_name()
The states_list() function returns a dictionary that maps state
abbreviations to state names. This function is primarily useful when
asking a user to specify his or her state.
The function takes an optional keyword argument country_code, which is
expected to be a country abbreviation (ISO 3166-1 alpha-2, e.g.,
'SE' for Sweden). If the country_code is not provided, it is assumed
to be the default country (the value returned by get_country()).
For countries other than the United States, the geographic areas
returned are the first-level subdivisions within the country. The
name of these subdivisions varies. The subdivision_type()
function can be used to find the name of the major subdivision, and
also to find if the country has any subdivisions at all.
The states_list() function also takes an optional keyword argument
abbreviate. The default value is False. If it is set to True,
then the labels and values will both be the abbreviated version of the
state name.
The state_name() function returns the name of a state based on the
state abbreviation provided.
question: |
  Where do you live?
fields:
  - State: user_state
    code: states_list()
---
mandatory: True
question: |
  You live in
  ${ state_name(user_state) },
  which is abbreviated
${ user_state }.Like states_list(), state_name() accepts an optional keyword
parameter country_code that determines which country is used to find
the state name.
When working with states, it is a good idea to store state names in this abbreviated format.
The data come from the pycountry package.
subdivision_type()
Given a country code (ISO 3166-1 alpha-2), subdivision_type()
returns the name of the primary subdivision within that country.
mandatory: True
question: |
  Geography lesson
subquestion: |
  % for country in ['BG', 'SE', 'TN', 'VN', 'LV', 'US']:
  In ${ country_name(country) },
  you live in a
  ${ subdivision_type(country) }.

% endforNote that some countries have no subdivisions at all. In that case,
this function will return None.
The data come from the pycountry package.
Navigation and progress bar functions
For more information about the progress bar, see the documentation for
the progress bar initial block and the progress modifier.
For more information about the navigation bar, see the documentation
for the navigation bar feature and how to work with sections.
get_progress()
You can retrieve the current numeric value of the progress bar by
calling get_progress().
set_progress()
You can set the numeric value of the progress bar by calling, e.g.,
set_progress(20). If you run set_progress(None), the progress
meter will be hidden. You can also use the progress modifier on a
question to set the progress meter to a particular value.
nav.get_section()
The navigation bar is controlled by a special variable called
nav. This is a special Python object of type DANav. Access
to the navigation bar is achieved by methods that act upon this
object.
sections:
  - Introduction
  - About you:
    - Contact info
    - Demographics
  - Preferences
  - Conclusion
---
features:
  navigation: True
  progress bar: True
---
mandatory: True
code: |
  menu_items = [ action_menu_item('Roadmap', 'road_map') ]
---
initial: True
code: |
  if returning_user(minutes=0.5):
    welcome_back
---
mandatory: True
question: |
  Welcome to the interview
subquestion: |
  If you are not on a
  smartphone-sized device,
  you should see a navigation
  bar to the left.
field: sees_nav_bar
---
mandatory: True
question: |
  I am going to ask you some
  questions about yourself.
field: intro_to_about_you
section: About you
---
mandatory: True
question: |
  What is your name?
fields:
  - First Name: first_name
  - Last Name: last_name
section: Contact info
---
mandatory: True
question: |
  What is your e-mail address?
fields:
  - E-mail: email_address
    datatype: email
---
mandatory: True
question: |
  What is your gender?
field: gender
choices:
  - Male
  - Female
  - Something else
section: Demographics
---
mandatory: True
question: |
  What kind of belly button
  do you have?
subquestion: |
  To see what a user would
  see after returning to
  the interview after a period
  of absence, try waiting
  thirty seconds, then
  [click into the
  interview](${ interview_url(local=True) }).

  In addition, there is a similar
  screen available on the Menu in the
  upper-right, under "Roadmap."
field: belly_button
choices:
  - Innie
  - Outie
---
mandatory: True
question: |
  What is your favorite fruit?
fields:
  - Favorite fruit: favorite_fruit
section: Preferences
---
mandatory: True
question: |
  What is your favorite vegetable?
fields:
  - Favorite vegetable: favorite_vegetable
---
progress: 100
mandatory: True
question: Thank you.
subquestion: |
  ${ first_name },

  Your answers mean a lot to me.

  I am going to go eat some
  ${ favorite_vegetable }
  now.
section: Conclusion
---
event: welcome_back
question: |
  Welcome back!
subquestion: |
  You are currently in the
  **${ nav.get_section(display=True) }**
  section.

  ${ nav }

  Press "Continue" to pick up
  where you left off.
buttons:
  Continue: continue
---
event: road_map
question: |
  Roadmap
subquestion: |
  You are currently in the
  **${ nav.get_section(display=True) }**
  section.

  ${ nav }

  Press "Continue" to resume the
  interview.
buttons:
Continue: continueYou can retrieve the current section by calling nav.get_section().
This will return the keyword corresponding to the current section.
To get the displayed name of the section, call it using
nav.get_section(display=True). When you call it with
display=True, you can also use the optional keyword parameter
language to indicate a language to use, if you want the display name
for a language other than the current language.
nav.set_section()
You can change the current section by calling nav.set_section() with
the keyword of the section you want to be the current section.
sections:
  - intro: Introduction
  - about: About you
    subsections:
      - contact: Contact info
      - demographic: Demographics
  - prefs: Preferences
  - conclusion: Conclusion
---
features:
  navigation: True
---
mandatory: True
code: |
  sees_nav_bar
  nav.set_section('about')
  intro_to_about_you
  nav.set_section('contact')
  first_name
  email_address
  nav.set_section('demographic')
  gender
  belly_button
  nav.set_section('prefs')
  favorite_fruit
  favorite_vegetable
  nav.set_section('conclusion')
  final_screen
---
question: |
  Welcome to the interview
subquestion: |
  If you are not on a
  smartphone-sized device,
  you should see a navigation
  bar to the left.
field: sees_nav_bar
---
question: |
  I am going to ask you some
  questions about yourself.
field: intro_to_about_you
---
question: |
  What is your name?
fields:
  - First Name: first_name
  - Last Name: last_name
---
question: |
  What is your e-mail address?
fields:
  - E-mail: email_address
    datatype: email
---
question: |
  What is your gender?
field: gender
choices:
  - Male
  - Female
  - Something else
---
question: |
  What kind of belly button
  do you have?
field: belly_button
choices:
  - Innie
  - Outie
---
question: |
  What is your favorite fruit?
fields:
  - Favorite fruit: favorite_fruit
---
question: |
  What is your favorite vegetable?
fields:
  - Favorite vegetable: favorite_vegetable
---
event: final_screen
question: Thank you.
subquestion: |
  ${ first_name },

  Your answers mean a lot to me.

  I am going to go eat some
  ${ favorite_vegetable }
now.nav.get_sections()
Calling nav.get_sections() returns a Python list with the sections
defined using the sections initial block or the
nav.set_sections() method.
sections:
  - intro: Introduction
  - about: About you
    subsections:
      - contact: Contact info
      - demographic: Demographics
  - prefs: Preferences
  - conclusion: Conclusion
---
features:
  navigation: True
---
mandatory: True
question: |
  Welcome to the interview
subquestion: |
  The sections of this interview,
  as a JSON list, are:

  ```
  ${ json.dumps(nav.get_sections(), indent=2) }
  ```
field: sees_nav_bar
---
mandatory: True
question: |
  I am going to ask you some
  questions about yourself.
field: intro_to_about_you
section: about
---
mandatory: True
question: |
  What is your name?
fields:
  - First Name: first_name
  - Last Name: last_name
section: contact
---
mandatory: True
question: |
  What is your e-mail address?
fields:
  - E-mail: email_address
    datatype: email
---
mandatory: True
question: |
  What is your gender?
field: gender
choices:
  - Male
  - Female
  - Something else
section: demographic
---
mandatory: True
question: |
  What kind of belly button
  do you have?
field: belly_button
choices:
  - Innie
  - Outie
---
mandatory: True
question: |
  What is your favorite fruit?
fields:
  - Favorite fruit: favorite_fruit
section: prefs
---
mandatory: True
question: |
  What is your favorite vegetable?
fields:
  - Favorite vegetable: favorite_vegetable
---
mandatory: True
question: Thank you.
subquestion: |
  ${ first_name },

  Your answers mean a lot to me.

  I am going to go eat some
  ${ favorite_vegetable }
  now.
section: conclusionnav.set_sections()
You can programmatically set the list of sections using
nav.set_sections(). It takes one argument, the Python list
containing the sections defintion. The list should have the same
structure as a sections definition using the sections initial
block (except it should be a Python data structure rather than
YAML text). This method takes an optional keyword argument
language that you can specify if you want to define the section
names for a language other than the current language.
sections:
  - intro: Introduction
  - about: About you
    subsections:
      - contact: Contact info
      - demographic: Demographics
  - prefs: Preferences
---
features:
  navigation: True
---
question: |
  What additional section
  would you like to add to
  this interview?
fields:
  - Name: new_name
  - Keyword: new_keyword
    help: |
      Use only letters and
      underscores.
---
mandatory: True
code: |
  new_section = {}
  new_section[new_keyword] = new_name
  the_sections = nav.get_sections()
  the_sections.append(new_section)
  nav.set_sections(the_sections)
---
mandatory: True
code: |
  sees_nav_bar
  nav.set_section('about')
  intro_to_about_you
  nav.set_section('contact')
  first_name
  email_address
  nav.set_section('demographic')
  gender
  belly_button
  nav.set_section('prefs')
  favorite_fruit
  favorite_vegetable
  nav.set_section(new_keyword)
final_screennav.show_sections()
To display the section list to the user in the body of a question, you
can include the nav variable in a Mako template like so:
${ nav }. This has the effect of doing
${ nav.show_sections(style='inline') }. This method takes the optional
keyword arguments style, the options for which are None or
'inline', and show_links, which you can set to True if you want
users to be able to click on section names.
nav.hide()
If you want to hide the main navigation bar, run nav.hide(). The
sections system will still work, and you can still insert nav into
the body of a question, but the main navigation bar will not be shown
on the screen. The navigation bar is shown by default if sections are
defined.
nav.unhide()
Calling nav.unhide() will undo the effect of nav.hide().
nav.visible()
The result of nav.visible() will be False if the navigation bar
has been hidden with nav.hide(), and it will return False if no
sections have been defined. nav.visible() takes an optional keyword
argument language, and when determining whether no sections have
been defined, it will look to that language. If sections are defined
and the navigation bar has not been hidden with nav.hide(),
nav.visible() will return True.
nav.disable()
If your navigation bar has clickable links, but you want to make the
links inoperable, run nav.disable().
nav.enable()
Calling nav.enable() will undo the effect of calling nav.disable().
nav.enabled()
To test whether clickable links in the navigation bar are currently
enabled or disabled, call nav.enabled(). True will be returned
unless the navigation bar had been disabled with nav.disable().
Functions for managing global variables
If you try writing your own functions, you will learn that functions do not have access to all of the variables in your interview. Functions only know the variables you pass to them.
If your functions need to know background information about the interview, but you do not want to have to pass a lot of variables to every function you call, you can use “global” variables.
You set “global” variables in docassemble by calling set_info()
and you retrieve them by calling get_info(). Note that
docassemble will forget the values of these variables every time
the screen loads, so you will have to make sure they are set by
setting them in initial code, which runs every time the screen
loads.
set_info()
This function is used to store information for later retrieval by
get_info(). You pass it one or more keyword arguments:
---
initial: True
code: |
  set_info(interview_type='standard')
---
Some of the functions and methods will behave differently
depending on who the interviewee is and what the interviewee’s role
is. For example, if trustee is an object of the class
Individual, and you call trustee.do_question('have'), the result
will be “do you have” if if the interviewee is the trustee, but
otherwise the result will be “does Fred Jones have” (or whatever the
trustee’s name is).
In order for docassemble to know this background information, you
need to include an initial code block (or a default role block
containing code) that:
- Defines
useras an object of the classIndividual; - Defines
roleas a text value (e.g.,'advocate'); and - Calls
set_info(user=user, role=role).
For example, this is how basic-questions.yml does it:
---
objects:
  - client: Individual
  - advocate: Individual
  # etc.
---
default role: client
code: |
  if user_logged_in() and user_has_privilege('advocate'):
    user = advocate
    role = 'advocate'
  else:
    user = client
    role = 'client'
  set_info(user=user, role=role)
---
(See initial blocks for an explanation of objects and default
role. See the roles section for an explanation of how user roles
work in docassemble.)
get_info()
This function is used to retrieve information passed to
set_info().
For example, if you passed interview_type as a keyword argument to
set_info(), you can retrieve the value in your Python module by
doing:
from docassemble.base.util import *

class Recipe(DAObject):
    def difficulty_level(self):
        if get_info('interview_type') == 'standard':
            #etc.
If the item was never set, get_info() will return None.
interface()
The interface() function returns 'web' if the user is accessing
the interview through a web browser and 'sms' if the user is using
SMS. If the web interface is used, but &json=1 is added to the
URL, then interface() will return 'json'. If the API is being
used, interface() will return 'api'.
question: |
  You are using the ${ interface() }
  interface.
mandatory: TrueSometimes interviews are accessed by background processes.
interface() will return 'cron' if the interview is being accessed
by a scheduled task, and will return 'worker' if it is being
accessed by a background process.
You might want to use this function to provide special instructions to users depending on the way they access the interview. For example, the following will show a special instruction screen to users who are accessing the interview through SMS.
---
mandatory: True
code: |
  if interface() == 'sms':
    sms_instructions
---
question: |
  Instructions
subquestion: |
  To leave the interview, type exit.
field: sms_instructions
---
You can also use interface() to distinguish between actual user
requests and requests that originate from background processes.
---
code: |
  request_counter = 0
---
initial: True
code: |
  if interface() in ['sms', 'web']:
    request_counter += 1
---
user_logged_in()
The user_logged_in() function returns True if the user is logged
in, and otherwise returns False.
You can use this function to ensure that the user is logged in before the user can finish your interview:
mandatory: True
code: |
  favorite_fruit
  ok_to_finish
  final_screen
---
question: |
  What is your favorite fruit?
fields:
  - Fruit: favorite_fruit
---
code: |
  if not user_logged_in():
    require_login_screen
  ok_to_finish = True
---
event: require_login_screen
question: |
  You need to log in to finish this interview.
buttons:
  - Log in: leave
url: ${ url_of('login', next=interview_url()) }This function uses the url_of() function and the
interview_url() function. The next parameter is set to a URL
for the session. The URL returned by interview_url() takes the
user back to the original session.
user_privileges()
The user_privileges() function returns the user’s privileges as a
list. If the user is not logged in, the result is ['user']. If the
user is a “user” as well as a “customer,” the result is ['user',
'customer']. If the interview is running a scheduled task, the
result is ['cron'].
user_has_privilege()
The user_has_privilege() function returns True if the user has any
of the given privileges, and False otherwise. For example, if the
user has the privilege of “customer,” user_has_privilege('customer')
will return True. A list can also be provided, in which case True
will be returned if the user has any of the given privileges. For
example, if the user has the privilege of “developer”,
user_has_privilege(['developer', 'admin']) will return True.
current_context()
The current_context() function will return an object with the
following attributes describing information about the context in which
Python code is executing:
session- the session ID of the current interview sessionfilename- the filename of the current interview sessionpackage- the package of the current filenamequestion_id- theidof the currentquestion, orNoneif there is no currentquestionor thequestiondoes not have anid.current_filename- the filename of the currently executing blockcurrent_package- the package of the filename of the currently executing blockvariable- the name of the last variable to be sought, orNoneif there was no variable being sought.current_section- the name of the current section, as determined by thesectionmodifier of the latestquestiondocassemble tried to process. In most situations, you will want to usenav.get_section()instead. Thecurrent_sectionis useful if your Python code needs to know thesectionmodifier of thequestionthat docassemble is currently trying to display (which might not be the samequestionthat ultimately is displayed).inside_of- the document assembly context, if any. The possible values are'standard','docx','pdf','pandoc','raw','md', and'html'. The default context is'standard'; the other contexts are in effect if code is executing to assemble a file using thedocx template file,pdf template file, Pandoc document assembly system, raw text file assembly, creation of a Markdown file, or creation of an HTML version of a Markdown file (typically used with the Pandoc document assembly system as an HTML preview of the output).attachment- if the code that is currently executing is inside of a document assembly process, this is an object with attributes that relate to the document being assembled.attachment.name- the name of the document, as specified in theattachmentorattachmentsblock.attachment.filename- the filename of the document.attachment.description- the description of the document.attachment.update_references- indicates whether the attachment has been instructed toupdate references.attachment.redact- isFalseifredactis set to a false value, andTrueotherwise.attachment.pdfa- indicates whether the attachment has been instructed to produce a PDF/A file.attachment.tagged- indicates whether the attachment has been instructed to produce a tagged PDF.
request_url- a dictionary containing the elements of the URL of the currently executing request. Note that this URL does not always match the URL that the user sees in the navigation bar in the browser, because many requests are Ajax requests. The dictionary keys areargs,base_url,full_path,path,scheme,url,url_root. These come directly from the Flask Request object.
user_info()
The user_info() function will return an object with the following
attributes describing the current user:
idthe integer ID of the user, which is used in the API and appears in the URLs of Playground files.first_namelast_nameemaillogin_method(will belocalfor regular username and password,phonefor telephone login, or will indicate the third-party sign-on method)phone_numberthe user’s phone number in E.164 format, iflogin_methodisphone,country(will be an official ISO 3166-1 alpha-2 country code likeUS)subdivision_first(e.g., state)subdivision_second(e.g., county)subdivision_third(e.g., municipality)organization(e.g., company or non-profit organization)languagethe user’s language, if set (an ISO-639-1 or ISO-639-3 code)timezonethe user’s time zone, in a format likeAmerica/New_Yorkprivilegesa list of the user’s privileges; same result as theuser_privileges()functionpermissionsa list of special permissions allowed to the user based on the user’s privileges.
For example:
---
question: |
  Your e-mail address is ${ user_info().email }. Is that
  the best way to reach you?
yesno: email_is_best
---
The first_name, last_name, country, subdivision_first,
subdivision_second, subdivision_third, organization, language,
and timezone attributes can be set by the user on the Profile
page. They can also be set by the set_user_info() function. The
permissions are controlled by the permissions in the
Configuration. The privileges of a user are controlled by a user
with admin privileges on the User List page or using the
set_user_info() function.
If the user is not logged in, the first name will be 'Anonymous',
the last name will be 'User', the privileges will be ['user'],
the permissions will be [] (unless the Configuration confers
additional permissions to an anonymous user), and the other attributes
will be None.
set_save_status()
The set_save_status() function is useful in code that replies to
actions. By default, running an action will create a new step in
the interview history (which the user can undo by clicking the Back
button). However, sometimes this can be a source of confusion. When
the user undoes something, the user will expect to see something
different; but if you are using actions, undoing an action might
not change anything visibly on the screen. You can use
set_save_status() to tell the interview to save the result of the
action, but not create a new step. Or, if you want to run a “read
only” action that does not change the interview answers at all, you
can use set_save_status() for that. This can be useful for
actions that return a JSON response.
The function takes one of three parameters:
set_save_status('new')- the changes made during the processing of the interview logic are saved, and a new step is created in the interview history. This is the default.set_save_status('overwrite')- the changes made during the processing of the interview logic are saved, but the current step is overwritten.set_save_status('ignore')- the changes made during the processing of the interview logic are not saved.
set_parts()
The set_parts() function allows you to configure text on various
parts of the screen, which is displayed in the “My Interviews” list
and in the navigation bar. It is also used to set certain
interview-level default values.
It accepts any of the following optional keyword arguments:
title- this is the main title of the interview. It should be plain text. It is displayed in the navigation bar if there is nologo.logo- this can be used for raw HTML that you want to go into the navigation bar in place of the plain text title of the interview. If you include an image, you should size it to be about 20 pixels in height.short_logo- If you include a logo that is much wider than 100 pixels, you should also specify a short logo that is not as wide, so your navigation bar will look good on small screens.short- for the mobile-friendly version of the interview title, which is displayed in the navigation bar when the screen is small.short_titledoes the same thing asshort.subtitle- for the subtitle of the interview, which is displayed in the “Interviews” list. The subtitle is not visible on the screen of the interview itself.tab- for the HTML title of the web page. This is typically displayed in the browser tab.tab_titledoes the same thing astab.exit_link- can be set to'exit'or'leave'in order to control the behavior of the “Exit” menu option, which is displayed whenshow loginisFalse. If set to'exit', then clicking “Exit” will delete the user’s answers. If set to'leave', the user’s answers will not be deleted. The default behavior is'exit'.exit_label- can be used to change the appearance of the “Exit” menu option.pre- can be set to HTML that will be inserted before thequestionpart of a screen.submit- can be set to HTML that will be inserted before the buttons.continue_button_label- will change the text in the Continue button.resume_button_label- will change the text in the Resume button onreviewscreens.back button label- will change the text of the back button that appears insidehelp_label- will change the default label of the help tab and the help buttonunder- can be set to HTML that will be inserted after the buttons.right- can be set to HTML that will be inserted to the right of the question, or below theundercontent on small screens.post- can be set to HTML that will be inserted at the bottom of the screen, after the buttons.date format- this can be set to a default date format string used by theformat_date()function and the.format_date()method of theDADateTimeobject (which is called when aDADateTimeobject is reduced to text).datetime format- this can be set to a default date/time format string used by theformat_datetime()function and the.format_datetime()method of theDADateTimeobject.time format- this can be set to a default time format string used by theformat_time()function and the.format_time()method of theDADateTimeobject.
In the following interview, note that the screen parts that were
initially set by metadata are overridden when set_parts() is
run.
metadata:
  title: Set the interview title
  short title: Title
  tab title: The Title
  subtitle: The subtitle
  pre: The pre text
  submit: The submit text
  post: The post text
---
question: |
  What is your favorite fruit?
subquestion: |
  Note the interview titles.
fields:
  Fruit: favorite_fruit
---
mandatory: True
code: |
  favorite_fruit = noun_plural(favorite_fruit)
  favorite_fruit = capitalize(favorite_fruit)
---
mandatory: True
code: |
  set_parts(
    title=favorite_fruit + " rule",
    short="I'm Tiny!",
    tab="TabTab",
    subtitle="a fruit interview",
    pre="This is about fruit",
    submit="Get ready for some buttons",
post=DAStaticFile(filename="endmatter.html").slurp())The following example shows how you can use a DAStaticFile to
display a logo from your “static” folder in the navigation bar.
objects:
  - company_logo: DAStaticFile.using(filename='example-inc.svg')
---
mandatory: True
code: |
set_parts(title='Example Inc.', logo='<img src="' + company_logo.url_for() + '" style="height: 20px; width: 157px;">')For information about other ways to set defaults for different parts of the screens during interviews, see the screen parts section.
session_tags()
Every interview and interview session can be “tagged” with “tags.” If
you include a tags specifier in your interview’s metadata, and
the tags specifier is a list, then you will define the tags for
the interview itself. These tags can be seen on the
list of available interviews that can be started (/list) and on
the list of saved interviews that can be resumed (/interviews).
The tags associated with an interview session can be edited using
Python code. The function session_tags() returns a Python set
representing the tags. It isn’t technically a Python set, but it
works just like one, and it allows you to read and write the
tags associated with the interview session.
metadata:
  tags:
    - apples
    - oranges
---
mandatory: True
question: Tags
subquestion: |
  The tags are:

  % for tag in session_tags():
  * ${ tag }
  % endfor

  Check your
  [interview list](${ url_of('interviews') })
  to see these tags.
field: first_screen_done
---
mandatory: True
code: |
  session_tags().add('grapes')
---
mandatory: True
question: Tags
subquestion: |
  The tags are:

  % for tag in session_tags():
  * ${ tag }
  % endfor

  Check your
  [interview list](${ url_of('interviews') })
  to see how these tags
have changed.set_status()
The set_status() function allows you to configure global settings
for the interview session. You give it keyword arguments for one or
more settings, and it will save the values for the session.
Currently, there is only one setting available, variable_access,
which turns off the get_interview_variables() feature on a
production server. By default, the get_interview_variables()
function can be called from JavaScript and all of the variables in
the interview answers will be returned in JSON format. While this
function is useful for many applications, it also poses a risk of
revealing confidential information, particularly in multi-user
interviews where users should not be able to find out other users’
answers. Setting variable_access to False with set_status()
will disable this feature.
mandatory: True
code: |
  set_status(variable_access=False)
However, if your server is a development server (the debug
directive in the Configuration is set to True), then this has no
effect.
get_status()
If you set a value using set_status(), you can retrieve the value
using get_status(). For example:
field: variable_access_shown
question: |
  % if get_status('variable_access') is False:
  The `get_interview_variables()` function is
  disabled.
  % else:
  The `get_interview_variables()` function is
  enabled.
  % endif
If a setting has not been set, the function returns None.
update_terms()
The update_terms() function allows you to define or override
interview-wide terms or auto terms using Python code.
terms:
  - creeper: |
      A tall green creature that explodes if
      you get too close.
  - zombie pigman: |
      A harmless creature who carries a gold
      sword.
---
mandatory: True
code: |
update_terms({'zombie pigman': 'A nether dweller', 'nether': 'The underworld'})update_terms() has one required parameter, a Python dictionary
that maps terms to definitions. It also accepts two optional keyword
parameters:
auto: whether to updateauto termsorterms. Set toTrueforauto terms. The default behavior ofupdate_terms()is to update the interview-wideterms, not the interview-wideauto terms.language: the language to update. For example, to update the French translations of terms, setlanguagetofr. If you leavelanguageunset, the terms you will update are the terms associated with the default language*. If your interview uses adefault languageinitial block or uses thelanguagemodifier, you should set a specificlanguagewhen you callupdate_terms().
Functions for determining information about the browser
language_from_browser()
The language_from_browser() function returns a language code
representing the preferred language of the user. Most browsers allow
users to select one or more preferred languages. These languages are
transmitted to web sites using the Accept-Language header. The
language_from_browser() function reads this header and extracts the
language from it.
The code will be in ISO-639-1, ISO-639-2, or ISO-639-3 format and will be in lower case. If multiple languages are listed in the Accept-Language header, the first recogized language will be returned.
question: |
  I think your language code is
  `${ language_from_browser() }`.
mandatory: TrueThat this function will return None if the interface() is sms,
if the Accept-Language header is missing, or if no valid
ISO-639-1, ISO-639-2, or ISO-639-3 code can be found in the
Accept-Language header.
Optionally, you can call language_from_browser() with arguments,
where the arguments are valid languages. The first valid language
will be returned. If none of the languages in the
Accept-Language header is in the list, None will be returned.
question: |
  % if language_from_browser('es', 'fr') is None:
  I guess you do not speak
  Spanish or French.
  % else:
  Great!  Your language code is
  `${ language_from_browser('es', 'fr') }`.
  % endif
mandatory: Truedevice()
The device() function returns an object containing
information about the user’s browser, derived from the User-Agent header.
question: |
  % if device().is_mobile:
  You are on a phone.
  % elif device().is_tablet:
  You are on a tablet.
  % elif device().is_pc:
  You are on a PC.
  % elif device().is_bot:
  You are a bot.
  % else:
  Your device is: ${ device() }.
  % endif
subquestion: |
  % if device().is_touch_capable:
  You are using a touchscreen device.
  % else:
  You are not using a touchscreen device.
  % endif
mandatory: TrueFor more information about the properties of this object, see the documentation for the user-agents library.
If docassemble cannot determine information about the user’s
browser, this function will return None.
You can also use this function to obtain the user’s IP address. If
you call the function using device(ip=True), the IP address is
returned:
question: |
  Your IP address is
  ${ device(ip=True) }.
mandatory: TrueLanguage and locale functions()
These functions access and change the active language and locale. See language support for more information about these features.
get_language()
If the language is set to English, get_language() returns en.
set_language()
This sets the language that will be used in the web application and in
language-specific functions of docassemble. It does not change
the active Python locale. See update_locale() for information on
changing the Python locale.
If you need to set the language to something other than the language
set in the configuration, you need to call set_language() within
initial code. For example:
initial: True
code: |
  set_language(user_language)
---
question: |
  What language do you speak? (¿Qué idioma habla?)
field: user_language
choices:
  - English: en
  - Español: es
---
The value given to set_language() must be a lowercase ISO-639-1 or
ISO-639-3 code. For example in ISO-639-1, Spanish is es, French
is fr, and Arabic is ar.
Using the optional dialect and voice keyword arguments, you can
also set the dialect and/or voice of the language that should be used
for the text-to-speech engine. For example:
---
initial: True
code: |
  set_language('en', dialect='au', voice='Zoe')
---
This will set the language to English, and will instruct the
text-to-speech engine to use an Australian dialect with the voice of
“Zoe.” (The dialect is relevant only for the text-to-speech engine,
which is controlled by the special variable speak_text.) The
default values are controlled by the VoiceRSS Configuration.
For more information about languages in docassemble, see language support.
If your interview uses actions, and your actions need to know what
language to use, you will need to manually include
process_action() in an initial block, as follows:
initial: True
code: |
  set_language(user_language)
  process_action()
By default, process_action() is called automatically, prior to the
execution of any mandatory or initial blocks. However, in
cases where your actions have a prerequisite, you need to indicate
exactly where in the interview logic actions should be executed.
Note that in the above example, actions will not be able to be run
until user_language is defined, so if your interview uses actions
very early on in the interview, you may need to set a default value
for user_language before asking the user what user_language should
be.
language_name()
Given a ISO-639-1 or ISO-639-3 language code, such as 'en',
'de', 'eng', or 'deu', language_name() returns the name of the
language, such as 'English' or 'German'. The database of
languages comes from the pycountry package.
The language name is passed through the word() function, so that
you can use the words system to provide translations from English
representations of a language name into other languages. Language
names are not listed by default in the system phrase translation file
because there are 7,847 of them, so you will need to add them manually.
If the language cannot be found, the language code is returned,
also passed through word().
get_dialect()
Returns the current dialect, as set by the dialect keyword argument
to the set_language() function.
get_country()
Returns the current country as a two-digit ISO 3166-1 alpha-2
country code. The default country is 'US', unless a different
default is set using the country configuration setting.
set_country()
Sets the current country. Expects a two-digit, uppercase country code
(ISO 3166-1 alpha-2 format) such as 'US', 'GB', or 'DE'.
set_locale()
If you run set_locale('FR.utf8'), then get_locale() will return
FR.utf8. The only effect is to remember the value; there are no
side effects.
The actual Python locale will not change unless you run
update_locale(), which will use the value you set with
set_locale('FR.utf8').
The information you set with set_locale(), like the language you set
with set_language(), is only remembered for the duration of a page
load. Thus, you can use set_locale() and get_locale(), without
update_locale(), for your own purposes, as a way of passing a
locale identifier to custom functions and methods without having to
pass the locale identifier as an argument or setting an object
attribute.
A second use of set_locale() is to set a default currency symbol for
use in an interview session, if the default currency symbol associated
with the locale is not appropriate. To indicate what currency symbol
should be used, you can call set_locale() with a currency_symbol
keyword parameter. You need to call this in an initial block, in
much the same way as you use set_language() to indicate what
language to use.
---
initial: True
code: |
  if user.address.country == 'US':
    set_locale(currency_symbol='$')
  else:
    set_locale(currency_symbol='€')
It is important that an initial code block is used, because the
code needs to run every time the screen loads.
If you want to undo the effect of set_locale() with a
currency_symbol, call set_locale(currency_symbol=None) and the
default behavior will be used instead.
Other locale conventions can be overridden by passing keyword
parameters to set_locale(). The conventions that docassemble
uses are currency_symbol, n_cs_precedes, p_cs_precedes,
n_sep_by_space, p_sep_by_space, thousands_sep,
mon_thousands_sep, decimal_point, and mon_decimal_point. Any
locale convention you set with set_locale() can be retrieved with
get_locale(). Note that these overrides do not affect the behavior
of the locale Python package.
Another way to change the currency symbol that users see is to set the
currency symbol field specifier on the datatype: currency
fields you use to collect currency values. You can also provide a
symbol keyword parameter to the currency() function.
get_locale()
If the locale is set to US.utf8, get_locale() returns US.utf8.
Given an argument, get_locale() returns a characteristic of the
current locale
To obtain the currency symbol, call get_locale('currency_symbol').
This will return None if there is no currency symbol set.
update_locale()
Running update_locale will change the Python locale based on the
current language and locale settings.
For example, if you run:
import docassemble.base.util
docassemble.base.util.set_language('fr')
docassemble.base.util.set_locale('FR.utf8')
docassemble.base.util.update_locale()
then the Python locale will be changed to fr_FR.utf8.
Running update_locale() is necessary in order to affect the behavior
of functions like currency() and currency_symbol().
Note that changes to the locale are not thread-safe. This means that
there is a risk that between the time docassemble runs
update_locale() and the time it runs currency_symbol(), another
user on the same server may cause docassemble to run
update_locale() and change it to the wrong setting.
If you want to host different interviews that use different locale
settings on the same server (e.g., to format a numbers as 1,000,000 in
one interview, but 1.000.000 in another), you will need to make sure
you run the docassemble web server in a multi-process, single-thread
configuration. (See installation for instructions on how to do
that.) Then you would need to begin each interview with initial
code such as:
---
initial: True
code: |
  import docassemble.base.util
  docassemble.base.util.set_language('fr')
  docassemble.base.util.set_locale('FR.utf8')
  docassemble.base.util.update_locale()
---
Access time functions
Internally, docassemble keeps track of the last time the interview session was accessed. The following functions retrieve information about access times. These functions are particularly useful in scheduled tasks.
start_time()
start_time() returns a DADateTime object representing the time
the interview session was started.
The time is expressed in the UTC time zone. If you would
like to localize the time to a particular time zone, you can set the
optional keyword parameter timezone (e.g., to 'America/New_York').
last_access_time()
last_access_time() returns a DADateTime object containing the
last time the interview session was accessed by a user other than the
special cron user.
The time is expressed in the UTC time zone. (Note: before version
0.2.27, the object returned was a UTC datetime without a time zone;
as of 0.2.27, the object returned is UTC with a time zone). If you
would like to localize the time to a particular time zone, you can set
the optional keyword parameter timezone (e.g., to
'America/New_York').
Optionally, a privilege name or a list of privilege names can be provided. In this case, the function will return the latest access time by any user holding one of the privileges.
last_access_time('client'): returns the last time a user with the privilege ofclientaccessed the interview session.last_access_time('advocate'): returns the last time a user with the privilege ofadvocateaccessed the interview session.last_access_time(['advocate', 'admin']): returns the last time a user with the privilege ofadvocateoradminaccessed the interview session.
The first argument can also be written as a keyword parameter
include_privileges:
last_access_time(include_privileges='client'): same aslast_access_time('client').
By default, last_access_time() will ignore session access by the
cron user. However, if you do not wish to ignore access by the
cron user, you can call last_access_time() with the optional
keyword argument include_cron equal to True:
last_access_time(include_cron=True): returns the last time any user, including the cron user if applicable, accessed the session.
You can also provide a list of privileges you want the method to ignore,
using the exclude_privileges keyword parameter. This can be useful
because users can have multiple privileges.
last_access_time(include_privileges='advocate',
exclude_privileges=['developer'])
: returns the last time a user who is anadvocatebut not adeveloperaccessed the interview.
The last_access_time() function takes an optional keyword argument
timezone. If timezone is provided (e.g.,
timezone='America/New_York'), the DADateTime object will be
expressed in the given time zone.
last_access_days()
The function last_access_days() works just like
last_access_time(), except that it returns the number of days
(including fractional days) between the current time and the last
access time.
last_access_hours()
Like last_access_days(), except returns hours.
last_access_minutes()
Like last_access_days(), except returns minutes.
last_access_delta()
The function last_access_delta() works just like
last_access_time(), except that it returns a
datetime.timedelta object giving the difference between the
current time and the last access time.
returning_user()
The function returning_user() returns True if the user has not
accessed the interview session in at least six hours, and otherwise
returns False. To use a different time limit, you can set one of
the optional keyword arguments.
returning_user(minutes=5)returning_user(hours=1)returning_user(days=30)
Functions for working with dates and times
month_of(), day_of(), year_of(), and dow_of()
These functions read a date and provide the parts of the date.
mandatory: True
question: |
  The date ${ some_date }, explained.
subquestion: |
  The year is ${ year_of(some_date) }.

  The month is ${ month_of(some_date) }.

  The month as a word is
  ${ month_of(some_date, as_word=True) }.

  The day of month is
  ${ day_of(some_date) }.

  The day of week is
  ${ dow_of(some_date) }.

  The day of week as a word is
${ dow_of(some_date, as_word=True) }.The month_of() and dow_of() functions have an optional setting: if
called with the optional parameter as_word=True, they will return the result as a
word (according to the current language and locale) rather than as a
number.
format_date()
The format_date() function takes as input a date and returns the
date formatted appropriately for the current language. It can be
given a piece of text containing a time, a DADateTime object, a
datetime.datetime object, or a datetime.time object.
For example:
format_date(today())returns the current date, formatted likeJanuary 1, 2018.format_date("10/31/2016")returnsOctober 31, 2016.format_date("2016-04-01")returnsApril 1, 2016.format_date('April 5, 2014')returnsApril 5, 2014.format_date('April 5, 2014', format='long')returnsApril 5, 2014.format_date('April 5, 2014', format='full')returnsSaturday, April 5, 2014.format_date('April 5, 2014', format='EEEE')returnsSaturday.format_date('April 5, 2014', format='yyyy')returns2014.format_date('April 5, 2014', format='yy')returns14.format_date('April 5, 2014', format='MMMM')returnsApril.format_date('April 5, 2014', format='MMM')returnsApr.format_date('April 5, 2014', format='d')returns5.format_date('April 5, 2014', format='dd')returns05.format_date('April 5, 2014', format='E')returnsSat.format_date('April 5, 2014', format='e')returns6(numbers range from 1 to 7).format_date('April 5, 2014', format='EEEE, MMMM d, yyyy')returnsSaturday, April 5, 2014.format_date('April 5, 2014', format='short')returns4/5/14.format_date('April 5, 2014', format='M/d/yyyy')returns4/5/2014.format_date('April 5, 2014', format='MM/dd/yyyy')returns04/05/2014.format_date('April 5, 2014', format='yyyy-MM-dd')returns2014-04-05.
The date formatting is provided by the
babel.dates
package, which has good support for language and locale variation.
The format argument, is passed directly to the
babel.dates.format_date() function.
The
patterns
used in date formatting by babel.dates.format_date() are based on
Unicode Technical Standard #35.
If you do not provide a format argument, the default date format
will be used. This default can be set in the interview metadata
or overridden using set_parts(). If no default is set, 'long'
is used.
The date formatting will be different depending on the current
language. For example, if you run set_language('es'), then
format_date('4/5/2014') returns 5 de abril de 2014. If you run
set_language('fr'), then format_date('4/5/2014') returns 5 avril
2014.
format_time()
The format_time() function works just like format_date(), except
it returns a time, rather than a date. It can be given a piece of
text containing a time, a DADateTime object, a
datetime.datetime object, or a datetime.time object.
For example:
format_time(current_datetime())returns the current time, formatted like12:00 AM.format_time("04:01:23")returns4:00 AM.format_time("04:01:23", format='h')returns4.format_time("04:01:23", format='hh')returns04.format_time("04:01:23", format='m')returns1.format_time("04:01:23", format='mm')returns01.format_time("04:01:23", format='ss')returns23.format_time("04:01:23", format='a')returnsAM.format_time("04:01:23", format='z')returnsEST, or whatever the current time zone is.format_time("04:01:23", format='zzzz')returnsEastern Standard time, or whatever the current time zone is.format_time("04:01:23", format='h:mm a')returns4:01 AM.
The time formatting is provided by the babel.dates package.
The format argument is passed directly
to the babel.dates.format_time() function. The
patterns
used in time formatting are based on Unicode Technical Standard #35.
If you do not provide a format argument, the default time format
will be used. This default can be set in the interview metadata
or overridden using set_parts(). If no default is set, 'short'
is used.
format_datetime()
The format_datetime() function works like a combination of
format_date() and format_time(). It is different only in that
it allows date and time to be joined in the same output.
format_datetime('4/5/2014 07:30')returnsApril 5, 2014 at 07:30:00 AM EST.format_datetime('4/5/2014 07:30', 'h:mm in MMMM')returns'7:30 in April'.
If you do not provide a format argument, the default datetime
format will be used. This default can be set in the interview
metadata or overridden using set_parts(). If no default is
set, 'long' is used.
today()
question: |
  Today's date is ${ today() }.
mandatory: TrueReturns a DADateTime object representing today’s date at midnight.
It takes an optional keyword argument timezone, which refers to one
of the time zone names in timezone_list() (e.g.,
'America/New_York'). If the timezone is not supplied, the default
time zone will be used.
Since the result is a DADateTime object, if today() is included
in a Mako template, the result will be equivalent to calling
format_date() on the object.
So this:
Today's date is ${ today() }.becomes, for example:
Today’s date is August 1, 2018.
The fact that the object is a DADateTime object means you can use
methods on it. For example, you can write things like Your term
paper is due in a week, so make sure you give it to me by ${
today().plus(weeks=1) }!
The today() function also takes an optional keyword parameter
format. If a format is provided, then today() returns text, not
an object. So this:
Today's date is ${ today(format='M/d/YYYY') }.becomes, for example:
Today’s date is 8/1/2018.
timezone_list()
question: |
  What is your time zone?
fields:
  - Time zone: user_timezone
    default: "America/New_York"
    code: |
timezone_list()The timezone_list() function returns a list of time zones that the
other date-related functions in docassemble understand. The list
is generated from the pytz module. The primary purpose of this
function is to include in a multiple choice question.
Note that the items in this list are strings, like America/New_York.
get_default_timezone()
question: |
  The default time zone is
  ${ get_default_timezone() }.
mandatory: TrueThe get_default_timezone() function returns the default timezone
(e.g., 'America/New_York'). This is the time zone of the server,
unless the default timezone is set using the timezone
configuration.
as_datetime()
question: |
  The Delorean will go back in time to
  ${ as_datetime('11/5/1955').year }.
mandatory: TrueThe as_datetime() function expresses a date as a DADateTime
object with a time zone. It takes an optional keyword argument,
timezone, which will override the default time zone.
as_datetime('12/25/2018')returns midnight on Christmas.as_datetime('12/25/2018 07:30 AM')returns 7:30 a.m. on Christmas.as_datetime('07:30 AM')returns 7:30 a.m. on the current day.as_datetime('07:30 AM', timezone='America/New_York')returns 7:30 a.m. on the east coast.
In combination with the .time() method of DADateTime, this
function can be used to create objects of type datetime.time.
as_datetime('07:30 AM').time()returns adatetime.timeobject representing 7:30 a.m.
current_datetime()
question: |
  % if current_datetime() < as_datetime('October 14, 1066'):
  The Normans have not yet invaded
  England.
  % else:
  Unfortunately, the Normans have
  already invaded England.
  % endif
mandatory: TrueThe current_datetime() function returns the current date and time as
a DADateTime object. It takes an optional keyword argument,
timezone (e.g., 'America/New_York'), which will override the
default time zone.
date_difference()
code: |
  birthday = as_datetime('5/17/2016')
  christmas = as_datetime('12/25/2016')
  interval = date_difference(starting=birthday, ending=christmas)
---
question: |
  The length of time between my
  birthday and Christmas can be
  described several ways.
subquestion: |
  * ${ interval.weeks } weeks
  * ${ interval.days } days
  * ${ interval.hours } hours
  * ${ interval.minutes } minutes
  * ${ interval.seconds } seconds
mandatory: TrueThe date_difference() function returns the difference between two
dates as an object with attributes that express the difference using
different units. The function takes two keyword arguments: starting
and ending. If either is omitted, the current_datetime() is used
in its place.
If you do date_difference(starting=a, ending=b), then if date a comes
before date b, the resulting values will be positive. But if date
b comes before date a, the values will be negative.
For example, if you set z = date_difference(starting='1/1/2025', ending='1/3/2025'), then:
z.yearsreturns0.005475814013977016.z.weeksreturns0.2857142857142857.z.daysreturns2.0.z.hoursreturns48.0.z.minutesreturns2880.0.z.secondsreturns172800.z.deltareturns adatetime.timedeltaobject representing the difference between the times.
Dates without time zones are localized into the default time zone
before the calculation takes place. You can supply the optional
keyword argument timezone (e.g., 'America/New_York') to use a
different time zone.
The object returned by date_difference() has a method
.describe(). If you set
z = date_difference(starting='1/1/2024', ending='4/3/2025'), then:
z.describe()returnsone year, three months, and two days.z.describe(capitalize=True)returnsOne year, three months, and two days.z.describe(specificity='year')returnsone year.z.describe(specificity='month')returnsone year and three months.z.describe(nice=False)returns1 year, 3 months, and 2 days
If you set
z = date_difference(starting='1/1/2022 23:22:35', ending='4/3/2023 21:45:22'), then:
z.describe()returnsone year, three months, and one day.z.describe(specificity='second')returnsone year, three months, one day, 22 hours, and 47 seconds.
If you set
z = date_difference(starting='4/3/2025 20:45:22', ending='4/3/2025 23:22:35'), then:
z.describe()returnstwo hoursz.describe(specificity='minute')returnstwo hours and 37 minutes
If you set
z = date_difference(starting='4/3/2025 21:45:22', ending='4/3/2025 23:22:35'), then:
z.describe()returnsone hour and 37 minutesz.describe(specificity='hour')returnsone hour
If you set
z = date_difference(starting='4/3/2025 22:45:22', ending='4/3/2025 23:22:35'), then:
z.describe()returns37 minutes
If you set
z = date_difference(starting='4/3/2025 23:22:22', ending='4/3/2025 23:22:35'), then:
z.describe()returns13 seconds
If you reduce the result of date_difference() to text, this has the
effect of running .describe() on the object.
date_interval()
question: |
  In three days, it will be
  ${ format_date( current_datetime() + date_interval(days=3) ) }.
mandatory: TrueThe date_interval() function can be used to perform calculations on
a date. For example,
current_datetime() + date_interval(days=1)represents 24 hours in the future.current_datetime() - date_interval(years=1)represents one year in the past.
The available keyword arguments are:
yearsmonthsdaysweekshoursminutessecondsmicroseconds
This function is a direct wrapper around
dateutil.relativedelta.relativedelta.
Functions for working with phone numbers
The following functions help with mangaging phone numbers. They rely
on the phonenumbers package in Python.
phone_number_in_e164()
The phone_number_in_e164() function takes a phone number and formats
it into E.164 format. It takes an optional keyword argument
country, which is expected to be a country abbreviation (ISO 3166-1
alpha-2 format, e.g., 'SE' for Sweden). (See the pycountry
package for the list of codes.) The country code is used to
determine the country code for the phone number. If country is not
provided, the get_country() function is used to determine the
applicable country.
phone_number_formatted()
The phone_number_formatted() function is use to rewrite a number in
a standard phone number format according to national conventions. It
works like phone_number_in_e164(), except that it returns the format
in the national format for the country, rather than E.164.
phone_number_is_valid()
The phone_number_is_valid() function takes a phone number and
returns True or False depending on whether the phone number is
valid. It takes an optional keyword argument country that is used
to determine the country whose phone number standards should be used
to determine the validity of the phone number. The country must be
expressed in ISO 3166-1 alpha-2 format. If country is not
provided, the get_country() function is used to determine the
applicable country.
phone_number_part()
The phone_number_part() function is use to extract individual parts
of a phone number.
phone_number_part("555-212-5623", 0)returns'555'.phone_number_part("555-212-5623", 1)returns'212'.phone_number_part("555-212-5623", 2)returns'5623'.
The function takes an optional keyword argument country, a ISO
3166-1 alpha-2 country code, that is used to format the phone number
according to the national conventions. If country is not provided,
the get_country() function is used to determine the applicable
country.
Functions for tracking tasks
These are helpful functions for keeping track of whether certain tasks have been performed. For example, if your interview logic sends an e-mail to the user about something, but you want to avoid sending the e-mail more than once, you can give the “task” a name and use these functions in your code to make sure your interview logic only sends the e-mail if it has never been successfuly sent before.
Instead of using these functions, you could use your own variables to keep track of whether tasks have been carried out or not. These functions do not do anything besides keep track of information. A good reason to use these functions is to increase the readability of your code.
task_performed()
The task_performed() function returns True if the task has been
performed at least once, otherwise False.
For example, task_performed('application_for_assistance') will
return False until
mark_task_as_performed('application_for_assistance') is called.
task_not_yet_performed()
The task_not_yet_performed() function returns True if the task has
never been performed, otherwise False. It is simply the opposite of
task_performed().
mark_task_as_performed()
The mark_task_as_performed() function increases by 1 the number of
times the task has been performed.
For example, if task_performed('send_reminder') is False, and then
you call mark_task_as_performed('remind_user'), then
task_performed('send_reminder') will now return True, and
times_task_performed('remind_user') will return 1.
If you call mark_task_as_performed('remind_user') again,
task_performed('send_reminder') will still return True, and
times_task_performed('remind_user') will now return 2.
times_task_performed()
The times_task_performed() function returns the number of times the
task has been performed (i.e., the number of times
mark_task_as_performed() is called). If the task has never been
performed, 0 is returned.
set_task_counter()
The set_task_counter() function allows you to manually set the
number of times the task has been performed.
set_task_counter('remind_user', 0) sets the counter of the
remind_user task to zero, which means that
task_performed('remind_user') would subsequently return False.
Persistent task results
The above functions for tracking “tasks” store data in the interview
answers. When the user presses the “Back” button to undo the results
of answering questions, the record of a task being completed will also
be undone. Thus, if the user goes back and changes a variable on
which the task depends, the task will be re-run. If you do not want a
task to be re-run, you can set the optional keyword parameter
persistent on your functions.
The example below demonstrates how this works; after the user answers
the favorite_fruit question, the task is marked as completed, but if
the user clicks the “Back” button, the fact that the the task was
completed will “persist.” Without persistent=True, the memory of
the task completion would be forgotten along with the value of
favorite_fruit.
default screen parts:
  under: |
    % if task_performed('fruit_gathered', persistent=True):
    The task has been performed.
    % else:
    The task has not been performed.
    % endif
---
mandatory: True
code: |
  favorite_fruit
  mark_task_as_performed('fruit_gathered', persistent=True)
  final_screen
---
question: |
  What is your favorite fruit?
subquestion: |
  Note whether the task has been
  performed yet.
fields:
  - Fruit: favorite_fruit
---
event: final_screen
question: |
  You like ${ favorite_fruit }
subquestion: |
  Press the Back button and
  then notice whether the task
has been performed.When persistent is true, the task functions use a DAStore instead
of the interview answers to store information about whether tasks have
been completed. Specifically, the functions use a DAStore with a
base of 'session' within that DAStore, they use a value called
tasks. If you set persistent to something other than True, the
DAStore will use this value as the base. Thus, if you call
mark_task_as_performed('fruit_gathered', persistent='interview'),
then the result of task completion will apply across all sessions in
the same interview. If you set persistent to 'user', the results
will apply across all sessions of the user. If you set persistent
to 'global', the results will apply across all sessions of the
server.
Tracking reasoning
It may be important that the logic of your interview be explainable. There are many ways to write your interviews in such a way you can explain to the user the reasoning you are applying, and there is no one right way to do this; nor is there a way that this process can be feasibly automated.
The functions in this subsection may be of use for explaining reasoning. They allow you to write “comment”-like phrases in your code that are saved into a list as the user goes through the interview. Then you can present the user with the list of phrases.
Here is an illustrative example:
modules:
  - .somefuncs
---
mandatory: True
code: |
  clear_explanations()
  if favorite_fruit in ('apple', 'orange'):
    explain("You said your favorite fruit was " + favorite_fruit + ".")
    if wrong_vegetable(favorite_vegetable):
      explain("Because your favorite vegetable is disgusting, you are not eligible for the space program.")
      eligible = False
    else:
      explain("Since you like apple or orange, and turnips are not your favorite, you are mentally fit to go to the moon.")
      eligible = True
  else:
    explain("Since you do not like apple or orange, you are not eligible for the space program.")
    eligible = False
  final_screen
---
event: final_screen
question: |
  % if eligible:
  You will be joining the Apollo mission.
  % else:
  You are not allowed to enter the space program.
  % endif
subquestion: |
  Reasoning:

  % for reason in logic_explanation():
  * ${ reason }
% endforThe contents of the referenced module, somefuncs.py, are:
from docassemble.base.util import explain

__all__ = ['wrong_vegetable']

def wrong_vegetable(vegetable):
    if vegetable == 'turnip':
        explain("You also said your favorite vegetable was turnip.")
        return True
    else:
        explain("You also said your favorite vegetable was " + vegetable + ".")
        return False
Note that even though the call to explain takes place in a module,
and even though it references no variables in your interview answers,
the phrase is tracked in the list of explanations.
explain()
The explain() function stores a phrase in the list of explanations.
If the same phrase, verbatim, already exists in the list, the phrase
is not added.
The explain() function takes an optional keyword argument,
category. This allows you to keep track of more than one list of
explanations. By default, the category is 'default'. The two
category names that are reserved are 'default' and 'all'.
clear_explanations()
The clear_explanations() function resets the explanation list. It
takes an optional keyword argument category, which resets the given
list. If you set category to 'all', every list is reset.
It is a good idea to call clear_explanations() every time the screen
loads. If your users can edit their answers, then reasoning that has
been made obsolete by changes to the variables may persist in the
explanations list. Clearing the history and running through all of
the logic every time the screen loads will help make sure that the
explanations are corrected.
logic_explanation()
The logic_explanation() function returns the explanation list as a Python
list. If the list does not exist, an empty list is returned. This
function takes an optional keyword argument category, which
indicates the category of explanation list you would like to be
returned.
Simple translation of words
word()
word() is a general-purpose translation function that is used in the
code of the web application to ensure that the text the user sees is
translated into the user’s language. It is also available for use
inside interviews. It is not the only mechanism for translating
your interviews into different languages, but it is one of the
essential components of language support in docassemble.
Suppose the following words directive appears in the
Configuration.
words:
  - docassemble.missouri:data/sources/words.yml
Suppose that the words.yml file contains the following:
es:
  "fish": "pez"
  "cow": "vaca"
Suppose further that your interview has an
initialcode block that sets the language to
'en' or 'es':
initial: True
code: |
  set_language(user_language)
---
question: |
  Please select your language.
field: user_language
choices:
  - English: en
  - Español: es
Finally, suppose that the user selected “Español” as their language.
Thereafter, if code in your interview runs word("cow"), the
returned value will be 'vaca'. However, if the user had selected
“English” as their language, the returned value would have been
'cow'.
When you call word("cow"), the word() function looks through all
the data in the YAML files listed under words and checks to see if
there is an entry for the phrase cow under the current language
(which is controlled by set_language() and get_language()).
If, among the key/value pairs listed under the language in question,
there is a key matching the word 'cow', the corresponding value is
returned.
In addition to using the
words directive in the Configuration, you can a Python module
to change the translations. The function
docassemble.base.util.update_word_collection() takes a language and
a Python dictionary as parameters and updates the translation
tables, which are kept in memory.
import docassemble.base.util
definitions = {'Continue': 'Continuar', 'Help': 'Ayuda'}
docassemble.base.util.update_word_collection('es', definitions)
Since this function is not thread-safe, you should only run it from code that runs when the module loads.
Language-specific functions
These functions behave differently according to the language and
locale. You can write functions for different languages, or reprogram
the default functions, by
using import docassemble.base.util and
then running
docassemble.base.util.update_language_function().
For example, suppose you had a Spanish linguistic package that you wanted to use for writing possessives. You could include the following in a Python module that you include in your interview:
import docassemble.base.util
from special.spanish.package import spanish_possessify

def possessify_es(a, b, **kwargs):
    return spanish_possessify(a, b)

docassemble.base.util.update_language_function('es', 'possessify', possessify_es)
This means that whenever the current language is Spanish, the function
possessify_es should be substituted for the default function. The
first argument is the name of the language, the second argument is the
name of the standard language function, and the third argument is a
reference to your function.
If you want to override the default function, use '*' as the
language. This will be used if no language-specific function exists.
If you want to create a new language function that does not already
exist in docassemble, you can use the
language_function_constructor() function from
docassemble.base.util.
import docassemble.base.util

__all__ = ['closing']

closing = docassemble.base.util.language_function_constructor('closing')

def closing_default(indiv, **kwargs):
    return "Goodbye, " + indiv.name.first + "!"

def closing_fr(indiv, **kwargs):
    return "Au revoir, " + indiv.name.first + "."

docassemble.base.util.update_language_function('*', 'closing', closing_default)
docassemble.base.util.update_language_function('fr', 'closing', closing_fr)
When writing a language function, do not use named keyword parameters.
Instead, using **kwargs so that the function accepts any combination
of keyword parameters. This is necessary because language functions
can be called with an optional parameter language, which forces the
use of a language other than the default language. It is also helpful
so that other developers can extend your language function. For
example, suppose someone wants to add a Japanese version of
closing(), but in Japanese there are formal and informal ways of
saying goodbye. In interviews, the developer will want to write
things like closing(client, formal=False) or closing(judge,
formal=True) to use these different forms. The developer would
create a module that imports your module. Then they would write a
function called closing_ja and call
docassemble.base.util.update_language_function('ja', 'closing',
closing_ja)
. Unless **kwargs is used, the keyword parameter
formal would trigger an error when used outside of a Japanese context.
Note that updates to language functions are not thread-safe; they
have a server-wide effect. update_language_function() needs to be
called in main body of a module so that it has an effect on all
threads. The code needs to run when the server starts and loads
modules. Module files are only loaded when the server starts if 1)
they contain a class definition; 2) they contain the literal text
docassemble.base.util.update somewhere; or 3) they contain a line
that starts with # pre-load. Therefore, if your module runs
from docassemble.base.util import update_language_function, then you
need to include a line that starts with # pre-load.
Listed below are some of the existing language functions that can be customized.
capitalize()
question: |
  ${ capitalize(color) } is your
  favorite color, but ${ color } is
  not your favorite color of eggs.
sets: all_doneIf favorite_food is defined as “spaghetti marinara,” then
capitalize(favorite_food) will return Spaghetti marinara.
This is often used when a variable value begins a sentence. For example:
question: |
  ${ capitalize(favorite_food) } is being served for dinner. Will you
  eat it?
yesno: user_will_eat_dinner
There is also the title_case() function, which is described below.
comma_and_list()
If things is a Python list with the elements
['lions', 'tigers', 'bears'], then:
comma_and_list(things)returnslions, tigers, and bears.comma_and_list(things, oxford=False)returnslions, tigers and bears.comma_and_list('fish', 'toads', 'frogs')returnsfish, toads, and frogs.comma_and_list('fish', 'toads')returnsfish and toadscomma_and_list('fish')returnsfish.comma_and_list('fish', 'toads', 'frogs', and_string='or')returnsfish, toads, or frogs.comma_and_list('fish', 'toads', 'frogs', comma_string='; ')returnsfish; toads; and frogs.comma_and_list('fish', 'toads', 'frogs', before_and='---')returnsfish; toads;---and frogs.comma_and_list('fish', 'toads', 'frogs', after_and=' (last but not least) ')returnsfish, toads, and (last but not least) frogs.
comma_list()
If things is a Python list with the elements
['lions', 'tigers', 'bears'], then:
comma_list(things)returnslions, tigers, bears.comma_list(things, comma_string='; ')returnslions; tigers; bears.comma_list('fish', 'toads', 'frogs')returnsfish, toads, frogs.comma_list('fish')returnsfish.
add_separators()
The add_separators() functions takes a list as input and returns a
list in which each item is reduced to text, a period is appended to
the last item, ; and is appended to the penultimate item, and ; is
appended to all other items.
mandatory: True
question: |
  Fruits
subquestion: |
  You like:

  % for item in add_separators(fruit):
  * ${ item }
  % endfor
attachment:
  docx template file: add-separators.docx
buttons:
- Try another: restartadd_separators() takes three optional keyword parameters:
separator: default is';'last_separator: default is'; and'end_mark: default is'.'
The function is also available as a Jinja2 filter called
add_separators. In the above example, the add-separators.docx
file contains:
You like:
{%p for item in fruit | add_separators %}
1. {{ item }}
{%p endfor %}
currency()
If the locale is US.utf8, currency(45.2) returns $45.20.
question: |
  If you sold ${ number } fish for
  a dollar each, you would get
  ${ currency(number) }.
mandatory: Truecurrency(45) returns $45.00, but currency(45, decimals=False)
returns $45.
With decimals unset or equal to True, this function uses the
locale module to express the currency. However, currency(x,
decimals=False) will simply return currency_symbol() followed by
x formatted as an integer, which might not be correct in your
locale. This is due to a limitation in the locale module. If the
currency function does not meet your currency formatting needs, you
may want to define your own.
If you defined a currency symbol in an initial block by calling
set_locale() with a currency_symbol keyword parameter, then the
locale-specific currency formatting function is not used.
The currency() function accepts an optional keyword parameter
symbol. If this is set, then the locale-specific currency formatter
function is not used, and instead the provided symbol is used.
question: |
  How much is your house worth?
fields:
  - Value: house_value
    datatype: currency
    min: 0
    currency symbol: €
---
question: Your home value
subquestion: |
  Your house is worth
  ${ currency(house_value, symbol=u'€') }.
mandatory: TrueIf the optional keyword argument symbol_precedes is set to true,
then the symbol will come before the number. If symbol_precedes is
set to false, the symbol will come after the number. If it is unset,
the position of the symbol will be determined by the current
locale.
currency_symbol()
If the locale is US.utf8, currency_symbol() returns $.
The locale can be set in the configuration or through the
set_locale() and update_locale() functions.
If you set currency symbol in the configuration, then
currency_symbol() returns the symbol specified there, and does not
use the locale to determine the symbol.
indefinite_article()
question: |
  Would you prefer to have
  ${ indefinite_article(fruit) }
  as opposed to
  ${ indefinite_article(vegetable) }?
yesno: prefer_fruitThe English language version of this function uses the article()
function of pattern.en.
indefinite_article('bean') returns a bean and
indefinite_article('apple') returns an apple.
nice_number()
question: |
  There are ${ nice_number(toads) }
  toads and ${ nice_number(frogs) }
  frogs in the pond.
buttons:
  - Restart: restart
sets: all_donenice_number(4)returnsfournice_number(10)returnstennice_number(10, capitalize=True)returnsTennice_number(10, language='es')returnsdieznice_number(11)returns11nice_number(5.0)returnsfivenice_number(23423)returns23,423(this depends on the locale)nice_number(12873818.27774)returns12,873,818.28(this depends on the locale)nice_number(501)returns501nice_number(501, use_word=True)returnsfive hundred and onenice_number(5.1)returns5.1nice_number(5.1, use_word=True)returnsfive point onenice_number(-1)returns-1nice_number(-1, use_word=True)returnsminus one
This function uses the num2words package, which supports several
languages by default, but not all languages.
This function can be customized by calling
docassemble.base.util.update_nice_numbers() with a language as the
first parameter and a dictionary as the second parameter, where the
dictionary maps numbers to their textual representation. Since
docassemble.base.util.update_nice_numbers() is not thread-safe, you
should only run it from a Python module in code that runs when the
module loads.
noun_plural()
question: |
  There
  % if the_number > 1:
  are
  ${ nice_number(the_number) }
  ${ noun_plural(the_noun) }
  % else:
  is one ${ the_noun }
  % endif
  in the pond.
fields:
  - Singular noun: the_noun
sets: all_doneThe English language version of this function passes all arguments
through to the pluralize() function of pattern.en.
noun_plural('friend')returnsfriendsnoun_plural('fish')returnsfishnoun_plural('moose')returnsmooses
You can also pass a number as a second argument to the function. If the number is 1, the first argument will be returned as a singular noun; otherwise, the pluralized version of the first argument will be returned.
noun_plural('friend', number_friends)returnsfriendifnumber_friendsis1, otherwise it returnsfriends.
Instead of a number, you can pass a list, dictionary, or set as the
second argument to the function. If the number of items in the group
is 1, the singular will be used. Otherwise, the plural will be
used.
The noun_plural() function can accept a noun that is either singular
or plural. For example, noun_plural('barrel') and
noun_plural('barrels') both return 'barrels'. The function handles
this by passing the first argument through noun_singular(), and
then using the pluralize() function of pattern.en on the
result. In some circumstances, this can lead to an incorrect word
being returned. If you know that the noun you are providing is
singular, you can call noun_plural('barrel', noun_is_singular=True)
and noun_plural() will not call noun_singular() on the noun.
quantity_noun()
mandatory: True
question: |
You have ${ quantity_noun(4, "apple") }.This function combines nice_number() and noun_plural() into a
single function. It will round the number to the nearest integer unless
you add the optional keyword argument as_integer=False.
quantity_noun(2, "apple")returnstwo apples.quantity_noun(1, "apple")returnsone apple.quantity_noun(144, "apple")returns144 apples.quantity_noun(1.5, "apple")returns2 apples.quantity_noun(1.5, "apple", as_integer=False)returns1.5 apples.
noun_singular()
The English language version of this function passes all arguments
through to the singularize() function of pattern.en.
noun_singular('friends')returnsfriendnoun_singular('fishes')returnsfishnoun_singular('mooses')returnsmoose
You can also pass a number as a second argument to the function. If the number is 1, the singularized version of the first argument will be returned. Otherwise, the first argument will be returned, untouched.
noun_singular('friends', number_friends)returnfriendifnumber_friendsis1, otherwise it returnsfriends.
Instead of a number, you can pass a list, dictionary, or set as the
second argument to the function. If the number of items in the group
is 1, the singular will be used. Otherwise, the plural will be
used.
ordinal_number()
ordinal_number(8)returnseighth.ordinal_number(8, capitalize=True)returnsEighth.ordinal_number(8, use_word=False)returns8th.ordinal_number(10)returnstenth.ordinal_number(11)returns11th.ordinal_number(11, use_word=True)returnseleventh.ordinal_number(523, use_word=True)returnsfive hundred and twenty-third.
question: |
  The ${ ordinal_number(toads) }
  toad is here to see you.
buttons:
  - Restart: restart
sets: all_doneBy default, the num2words package is used to produce the word supports several
languages by default, but not all languages.
ordinal_number() can be customized with
docassemble.base.util.update_ordinal_numbers() and
docassemble.base.util.update_ordinal_function().
import docassemble.base.util

es_ordinal_nums = {
  '0': 'zeroth',
  '1': 'primero',
  '2': 'segundo',
  '3': 'tercero',
  '4': 'cuarto',
  '5': 'quinto',
  '6': 'sexto',
  '7': 'séptimo',
  '8': 'octavo',
  '9': 'noveno',
  '10': 'décimo'
}

docassemble.base.util.update_ordinal_numbers('es', es_ordinal_nums)
docassemble.base.util.update_ordinal_function()
Since update_ordinal_numbers() and update_ordinal_function() are
not thread-safe, you should only run them from a Python module in
code that runs when the module loads.
ordinal()
ordinal(x) returns ordinal_number(x + 1). This is useful when
working with indexes that start at zero.
alpha()
alpha(x) returns x + 1 as an alphabetical character. This is
intended to be used with indexes that start at zero.
alpha(0)returnsA.alpha(25)returnsZ.alpha(26)returnsAA.alpha(26)returnsAB.alpha(0, case='lower')returnsa.
roman()
roman(x) returns x + 1 as a Roman numeral. This is intended to be
used with indexes that start at zero.
roman(0)returnsI.roman(65)returnsLXVI.roman(65, case='lower')returnslxvi.
item_label()
item_label(x) returns x + 1 as a label for a list item. This is
intended to be used with indexes that start at zero. It takes an
optional second argument indicating a level between 0 and 6. It takes
an optional keyword argument punctuation indicating whether
punctuation should be provided or not.
item_label(0)returnsI..item_label(1)returnsII..item_label(0, 0)returnsI..item_label(0, 1)returnsA..item_label(0, 2)returns1..item_label(0, 3)returnsa).item_label(0, 4)returns(1).item_label(0, 5)returns(a).item_label(0, 6)returnsi).item_label(0, 6, punctuation=False)returnsi.
period_list()
period_list returns a list within a list:
[[12, "Per Month"], [1, "Per Year"], [52, "Per Week"],
[24, "Twice Per Month"], [26, "Every Two Weeks"]]
This is useful for using in code associated with periodic currency
amounts.
question: |
  What is your income?
fields:
  - Income: user_income_amount
    datatype: currency
  - Period: user_income_period
    datatype: number
    code: |
period_list()The text in the default period_list() function can be translated to
different languages using the
docassemble.base.util.update_word_collection() function. If you
want to customizes the choices available, you can override the default
function by including something like the following in your
Python module:
def my_period_list():
  return [[365, word("Per Day")], [52, word("Per Week")]]

docassemble.base.util.update_language_function('*', 'period_list', my_period_list)
name_suffix()
Like period_list(), except it represents common suffixes of
individual names.
Returns the following list:
['Jr', 'Sr', 'II', 'III', 'IV', 'V', 'VI']Here is a question that asks for the user’s name with an optional suffix:
question: |
  What is your name?
fields:
  - First Name: user.name.first
  - Middle Name: user.name.middle
    required: False
  - Last Name: user.name.last
  - Suffix: user.name.suffix
    required: False
    code: |
      name_suffix()
---
title_case()
question: |
  Title of your book
subquestion: |
  If your book is about
  ${ subject },
  its title should be
  "${ title_case(subject) }."
sets: all_donetitle_case("the importance of being ernest") returns The Importance
of Being Ernest.
The default version of this function passes through all arguments to
the titlecase() function of the titlecase module.
There is also the capitalize() function, which is described above.
verb_past()
question: |
  I ${ verb_past(the_verb) }
  the apple.
fields:
  - Present tense verb: the_verb
sets: all_doneThe English-language version of this function passes all arguments
through to the conjugate() function of pattern.en.
verb_past('help', '3gp')returnshelped(third person past tense).verb_past('help', 'ppl')returnshelped(plural past tense).
verb_present()
The English-language version of this function passes through all
arguments to the conjugate() function of the pattern.en.
verb_present('helped', '3sg')returnshelps(third person singular).verb_present('helps', '1sg')returnshelp(first person singular).verb_present('helps', 'pl')returnshelp(plural).
All language-specific functions
The following is a list of all of the language functions that
docassemble uses. Many of these are very basic functions called by
DAObject methods.
a_in_the_b('cat', 'hat')returns'cat in the hat'.a_preposition_b('fish', 'sea')returns'fish in the sea'.a_preposition_b(plaintiff, 'James')returns'Thomas Smith son of James'ifplaintiffwhen reduced to text is'Thomas Smith'and theprepositionattribute ofplaintiffis ‘son of’.add_separators()is described above.am_i()returns'am I'.are_we()returns'are we'.are_word('fruit')returns'are fruit'.are_you()returns'are you'.are_you_plural()returns'are you'.capitalize()is described above.comma_and_list()is described above.comma_list()is described above.currency()is described above.currency_symbol()is described above.did_a_b('Fred', 'eat')returns'did Fred eat'.did_a_b_plural('Fred', 'eat')returns'did Fred eat'.did_i()returns'did I'.did_we()returns'did we'.did_you()returns'did you'.did_you_plural()returns'did you'.do_a_b('pigs', 'fly')returns'do pigs fly'.do_i()returns'do I'.do_we()returns'do we'.do_you('smoke')returns'do you smoke'.do_you_plural()returns'do you'.does_a_b('Fred', 'smoke')returns'does Fred smoke'.genderless_objective()returns'them'.genderless_self()returns'themself'.genderless_subjective()returns'they'.has_a_b('Fred', 'left')returns'has Fred left'.have_a_b('elephants', 'invented')returns'have elephants invented'.have_i()returns'have I'.have_we()returns'have we'.have_you()returns'have you'.have_you_plural()returns'have you'.he_subjective()returns'he'.her('turtle')returns'her turtle'.her('turtle', capitalize=True)returns'Her turtle'.her_objective()returns'her'.herself()returns'himself'.him_objective()returns'him'.himself()returns'himself'.his('turtle')returns'his turtle'.i_subjective()returns'I'.in_the('house')returns'in the house'.indefinite_article()is described above.is_word('Thomas')returns'is Thomas'.it_objective()returns'it'.it_subjective()returns'it'.its()returns'its'.itself()returns'itself'.me_objective()returns'me'.my_possessive('fish')returns'my fish'.myself()returns'myself'.name_suffix()is described above.nice_number()is described above.noun_plural()is described above.noun_singular()is described above.of_the('world')returns'of the world'.ordinal()is described above.ordinal_number()is described above.our_possessive('common interest')returns'our common interest'.ourselves()returns'ourselves'.period_list()is described above.possessify('Fred', 'cat')returns'Fred's cat'.possessify_long('Fred', 'cat')returns'the cat of Fred'.quantity_noun()is described above.salutation()is described in the object section.she_subjective()returns'she'.some('beads')returns'some beads'.the('apple')returns'the apple'.their('fruit')returns'their fruit'.them_objective()returns'them'.themselves()returns'themselves'.these('tomatoes')returns'these tomatoes'.they_subjective()returns'they'.this('place')returns'this place'.title_case()is described above.us_objective()returns'us'.verb_past()is described above.verb_present()is described above.was_a_b('Fred', 'here')returns'was Fred here'.was_i('here')returns'was I here'.we_subjective()returns'we'.were_a_b('celebrities', 'present')returns'were celebrities present'.were_a_b_plural('celebrities', 'present')returns'were celebrities present'.were_we('cool')returns'were we cool'.were_you('innocent')returns'were you innocent'.were_you_plural('innocent')returns'were you innocent'.you_objective()returns'you'.you_objective_plural()returns'you'.you_subjective()returns'you'.you_subjective_plural()returns'you'.your('house')returns'your house'.your_plural('house')returns'your house'.yourself()returns'yourself'.yourselves()returns'yourselves'.
These functions have the property that if the optional argument
capitalize=True is added, the resulting phrase will be capitalized.
Note that most of the language functions are not imported into the
namespace of the Python environment in which the code of your YAML
operates. (The functions explained in their own subsections above are
available for use in your YAML.) Likewise, if you do from
docassemble.base.util import *, most of these names will not be
imported, because they are not automatically exported by
docassemble.base.util.
These functions may be called from Python modules, where you can import them specifically by doing:
from docassemble.base.util import his, herdocassemble only defines English versions of these functions, but you can create custom versions of the functions for other languages.
For example, suppose you wanted the .pronoun_possessive() method of the
Individual class to work appropriately in French. You could create
a module like the following.
import docassemble.base.util
from pylexique import Lexique383

LEXIQUE = Lexique383()

def his_her_fr(the_word, capitalize=False, **kwargs):
  the_word = str(the_word).strip()
  word_to_look_up = the_word.lower()
  try:
    result = LEXIQUE.lexique[word_to_look_up]
    if not isinstance(result, list):
      result = [result]
    result = [item for item in result where item.cgram == 'NOM']
    if len(result) == 0:
      raise KeyError()
  except KeyError:
    if capitalize:
      return 'Son ' + the_word
    return 'son ' + the_word
  if result[0].genre == 'f':
    output = 'sa ' + the_word
  else:
    output = 'son ' + the_word
  if capitalize:
    return docassemble.base.util.capitalize(output)
  return output

docassemble.base.util.update_language_function('fr', 'her', his_her_fr)
docassemble.base.util.update_language_function('fr', 'his', his_her_fr)
Helper functions for form filling
yesno()
The yesno() function returns 'Yes' or 'No' depending on the
truth value of the argument. This is useful for filling in checkboxes
in PDF templates. It takes an optional keyword argument invert,
which, if set to true, returns 'No' in place of 'Yes' and
vice-versa.
noyes()
The noyes() function does the opposite of yesno(), or the same
thing as yesno(some_fact, invert=True).
split()
The split() function splits a phrase into parts that are a certain
number of characters long. It splits on word breaks when it can.
This is useful for filling in PDF templates when a single phrase
must be typed into more than one field.
The first argument is the phrase. The second argument is a list of
maximum character lengths of each part. If there are two numbers,
there will be at most three parts. The third argument is the index of
the part you want. The first index is 0.
In this example, the first part should be no more than 12 characters and the second part should be no more than 20 characters.
split("The quick brown fox jumped over the lazy dog", [12, 20], 0)returns'The quick'.split("The quick brown fox jumped over the lazy dog", [12, 20], 1)returns'brown fox jumped over'.split("The quick brown fox jumped over the lazy dog", [12, 20], 2)returns'the lazy dog'.
If you only want to split in two parts, and you do not wish to limit the length of the second part, you can pass a single number instead of a list of numbers as the second argument.
split("The quick brown fox jumped over the lazy dog", 12, 0)returns'The quick'.split("The quick brown fox jumped over the lazy dog", 12, 1)returns'brown fox jumped over the lazy dog'.
If you refer to an index for a part that does not exist because the
phrase was too short, empty text ('') is returned.
To figure out what character lengths you should use, one method is to
test the PDF file to see how many letter Ms you can fit into a
field. If you can fit 10 Ms into the first field and 22 Ms in
into the second field, the second argument to split() would be
[10, 22].
showif()
The showif() function returns the value of variable if the given
condition is true, and otherwise returns empty text ('').
showif('favorite_fruit', likes_fruit)returns the value of the variablefavorite_fruit, but only if the variablelikes_fruitis true.
Note that the first argument must be a variable name in quotes. This ensures that a definition of the variable will not be sought unless the condition is true.
If you want the function to return something other than the empty
string (''), supply a third argument:
showif('favorite_fruit', likes_fruit, 'no fruit')returns the value of the variablefavorite_fruitif the variablelikes_fruitis true, and otherwise returns the textno fruit.
showifdef()
The showifdef() function is like showif(), except that the value
of the variable is only returned if the variable is defined.
showifdef('favorite_fruit')returns the value of the variablefavorite_fruitif the variablefavorite_fruitis defined, and otherwise returns empty text.showifdef('favorite_fruit', 'no fruit')returns the value of the variablefavorite_fruitif the variablefavorite_fruitis defined, and otherwise returns the textno fruit.
The showifdef() function accepts an optional keyword argument
prior. If you set prior=True, then on screens that loaded because
the user pressed the Back button, showifdef() will look in the previous
set of interview answers (the set that was deleted by pressing the
Back button) to see if the variable was defined.
Administrative functions
interview_list()
If the current user is logged in, interview_list() returns a list
of dictionaries indicating information about the user’s interview
sessions. This function provides a programmatic version of the screen
available at /interviews.
interview_list() takes the following optional keyword parameters:
exclude_invalid- ifTrue, do not return any sessions where the interview could not be found or the interview_answers (thedict) could not be unencrypted. The default isTrue.action- if set to'delete_all', theninterview_list()will delete the sessions and return the number of sessions deleted. This can be limited by specifyingfilename,session,user_id, orquery. Theactionparameter can also be set to'delete', in which case afilenameand asessionmust be specified, and that single session will be deleted.filename- if set,interview_list()will only act on sessions with this interview filename (e.g.,docassemble.demo:data/questions/questions.yml).session- if set,interview_list()will only act on sessions with this session ID.user_id- if not set,interview_list()will only act on interviews owned by the current user. If set to an integer,interview_list()will only act on sessions that the user with the given user ID is a user of. If set to'all', the sessions will not be limited to the interviews of a particular user; you can then usequeryto narrow the list. Only users withadminprivileges (or users with a custom privilege with theaccess_sessionspermission) can access sessions of other users.query- this can be set to a query expression if you want to do a complex query. The syntax is explained below.include_dict- ifTrue, theninterview_list()will return the interview answers in the response. If you are not going to use the interview answers, it is best to set this toFalse. The default isTrue.delete_shared- this can be set toTrueif you setactionto'delete_all'or'delete', in which case all of the interview answers of the deleted sessions will be deleted even if the user is one of several users in the session. The default isFalse.next_id- this is used for pagination (more on that later).
When action is set to 'delete_all' or 'delete',
interview_list() returns an integer indicating the number of
sessions deleted. Otherwise, interview_list() returns a list of
sessions.
Since the list of sessions may be very long, interview_list() uses
pagination. When you first call interview_list(), up to 100 records
are returned in the first item in the tuple. The number of records
returned is configurable using the pagination limit Configuration
directive. If additional records exist, the second item in the tuple
will be a code. To obtain the next page of records, call
interview_list() again, this time with the next_id optional
keyword parameter set to the second item in the tuple. By making
multiple calls to interview_list(), you can obtain the complete list
of user records. For example:
from docassemble.base.util import interview_list

sessions_list = []
next_id = None
while True:
    (items, next_id) = interview_list(next_id=next_id)
    sessions_list.extend(items)
    if not next_id:
        break
The first item in the tuple (items in this example) is a Python
list of Python dictionaries, where the items in each dictionary
are:
dict: the interview session dictionary for the session (not present ifinclude_dictisFalse).encrypted: whether the interview session dictionary is encrypted (not present ifinclude_dictisFalse).email: the e-mail address of the logged-in user associated with the session, if any.user_id: the user ID of the logged-in user associated with the session, if any.temp_user_id: the temporary user ID of the anonymous user associated with the session, if the user was not logged in. (Note that these IDs do not correspond in any way with the IDs of logged-in users.)filename: the filename of the interview, e.g.,docassemble.demo:data/questions/questions.ymlmetadata: the metadata of the interview as a dictionary.modtime: the modification time of the session, in text format, formatted to the user’s time zone.session: the ID of the session.starttime: the start time of the session, in text format, formatted to the user’s time zone.title: the title of the session.subtitle: the subtitle of the session.utc_modtime: the modification time of the session, in UTC.utc_starttime: the start time of the session, in UTC.valid: whether the interview session can be resumed. This will beFalseif there is an error with the interview that prevents it from being resumed, or the interview session dictionary is not able to be decrypted.
Sometimes you might not need to use pagination. For example, the following question will display a list of the titles of each session associated with the current user (at most the first 100):
question: Sessions
subquestion: |
  % for info in interview_list()[0]:
  * ${ info['title'] }
  % endfor
To limit the results to sessions involving specific interviews, you
can provide the optional keyword argument filename:
question: Session start times
subquestion: |
  % for info in interview_list(filename='docassemble.demo:data/questions/questions.yml')[0]:
  * ${ info['starttime'] }
  % endfor
If the current user has admin privileges or a custom privilege
with the access_sessions permission, the optional keyword argument
user_id can be used to retrieve a list of sessions belonging to
another user:
question: Sessions John has started
subquestion: |
  % for info in interview_list(user_id=22)[0]:
  * ${ info['title'] }
  % endfor
To list sessions belonging to any user, set user_id to 'all'.
question: Who has what session
subquestion: |
  % for info in interview_list(filename='docassemble.demo:data/questions/questions.yml', user_id='all')[0]:
  * ${ info['email'] } started at ${ info['starttime'] }.
  % endfor
Since the information about each session could include the interview
session dictionary, to avoid storing all of this information in your
own dictionary, it is a good idea to avoid keeping interview
information around when you are done using it. For example, this
interview runs del to ensure that the variable info is not left
over when the for loop completes its work:
code: |
  users = set()
  for info in interview_list()[0]:
    users.add(info['email'])
    del info
You can also refrain from obtaining the interview session dictionary
by setting the optional keyword parameter include_dict to False.
The interview_list() function takes an optional keyword argument
exclude_invalid. If this is set to False, a session will be
included even if there is an error that would prevent the session from
being resumed. By default, exclude_invalid is True, meaning that
sessions will only be included if they can be resumed. You can check
whether a session can be resumed by checking the value of the valid
key. The most common reason for a session not to be valid is that
the current user does not have an encryption key that decrypts the
interview answers; so a session belonging to someone else might be not
valid for you, but it would be valid for the user who started that
session.
The interview_list() function can be useful in interviews that
replace the standard list of sessions. See the session list
interview configuration directive for more information.
Note that more than one user can be associated with any given session.
Unless server-side encryption prevents it, any user who has the
session ID of a session can join that interview by visiting a URL with
the i and session parameters set. This will associate the user
with the session. Thus, if a session has been joined by more than one
user, it will show up multiple times in the list returned by
interview_list(user_id='all').
You can use interview_list() to delete sessions. If you set the
optional keyword parameter action to 'delete_all', all of the
user’s sessions will be deleted. Or, if you want to delete all of the
sessions belonging to any user, you can set user_id to 'all' and
set action to 'delete_all'. You can delete a particular session
by setting action to 'delete', with optional keyword parameter
filename set to the filename of the session’s interview, and
optional keyword parameter session set to the ID of the session. By
default, the underlying session data associated with a particular user
will not be deleted if it is shared by another user. For example, if
there was an interview with multi_user set to True, and two
users accessed a session of this interview, and then one user deletes
the session, the other user will still be able to access the session
and all of its data. However, if you set the optional keyword
parameter delete_shared to True, then the session and its data
will be deleted regardless of whether it is shared by one or more
other users.
If you want to filter the results
by attributes other than filename, session, and user_id, or you
want to filter with a boolean query, you can set the keyword parameter
query to an expression such as the following:
DA.Sessions.modtime < '4/5/2022'DA.Sessions.user_id.In(1, 41)DA.Sessions.email == '[email protected]'DA.Sessions.email.Like('%@abc.com') & DA.Sessions.modtime < '4/5/2022'DA.Sessions.first_name == 'Joseph' | DA.Sessions.first_name == 'Joe'DA.Sessions.first_name == 'Joseph' | (DA.Sessions.first_name == 'Joe' & DA.Sessions.last_name == 'Smith')
The available fields are:
DA.Sessions.indexno- the integer number of the latest step in the interview answers of the session. This is the integer that is used fornext_id.DA.Sessions.modtime- the timestamp of the latest step in the interview answers.DA.Sessions.filename- the filename of the interview.DA.Sessions.session- the session ID of the session.DA.Sessions.encrypted- a boolean value representing whether the latest step in the interview answers of the session is encrypted.
The following fields are available for sessions that are tied to a logged-in user. They come from the user profile.
DA.Sessions.user_id- theuser_idof the user.DA.Sessions.email- the e-mail address of the user.DA.Sessions.first_name- the user’s first name.DA.Sessions.last_name- the user’s last name.DA.Sessions.country- the user’s country.DA.Sessions.subdivisionfirst- the user’s first geographical subdivision.DA.Sessions.subdivisionsecond- the user’s second geographical subdivision.DA.Sessions.subdivisionthird- the user’s third geographical subdivision.DA.Sessions.organization- the user’s organization name.DA.Sessions.timezone- the user’s time zone.DA.Sessions.language- the user’s language code.DA.Sessions.last_login- the timestamp of the user’s last login.
When writing query expressions, you can indicate “and” and “or” in
two different ways.
DA.Sessions.modtime >= '4/1/2022' & DA.Sessions.modtime < '5/1/2022'DA.And(DA.Sessions.modtime >= '4/1/2022', DA.Sessions.modtime < '5/1/2022')
Likewise, the following are equivalent:
DA.Sessions.first_name == 'Joseph' | DA.Sessions.first_name == 'Joe'DA.Or(DA.Sessions.first_name == 'Joseph', DA.Sessions.first_name == 'Joe')
The operators ==, !=, >=, >, <=, and < are available. In
addition, the ~ operator can be used to negate conditions. For
example, to exclude sessions owned by users named Joseph, you would
write something like:
~DA.Or(DA.Sessions.first_name == 'Joseph', DA.Sessions.first_name == 'Joe')~DA.Sessions.first_name.like('Jo%')~(DA.Sessions.first_name == 'Joseph')
There are two methods available, Like and In:
DA.Sessions.email.Like('%@abc.com')DA.Sessions.last_name.In('Smith', 'Jones')
For API versions of this function, see /api/interviews,
/api/user/interviews, and /api/user/<user_id>/interviews.
interview_menu()
The interview_menu() function returns a list of dictionaries
indicating information about interviews available on the web site.
See the dispatch configuration directive for information about
setting up this menu. This function provides a programmatic version
of the screen available at /list.
The keys in each dictionary are:
title: the title of the interviewsubtitle: the subtitle of the interviewfilename: e.g.,docassemble.demo:data/questions/questions.ymllink: a hyperlink to the interview on your servermetadata: a dictionary representing the metadata of the interview (minus thetags, which are provided separately).package: the package in which the interview is located, e.g.,docassemble.demostatus_class: this is set todainterviewhaserrorif there is a problem with the interview.subtitle_class: this is set toinvisibleif there is a problem with the interview.tags: a list of tags specified in the interview metadata.
The interview_menu() function takes three optional keyword arguments,
absolute_urls, start_new, and tag.
If absolute_urls is set to True, then the URLs will be absolute
rather than relative, so that the HTML can be used from a web site on
another server.
If start_new is set to True, then the URLs will have &reset=1 at
the end. Thus, even if the user has already started an interview,
clicking the link will start the interview at the beginning again.
If tag is set to 'estates' (for example), then interview_menu()
will only return interviews that have 'estates' defined as a tag
in the interview metadata.
This function can be useful in interviews that replace the standard
list of available interviews. See the dispatch interview
configuration directive for more information.
For an API version of this function, see /api/list.
create_user()
The create_user() function creates a new user account on the
system.
new_user_id = create_user('[email protected]', 'xxxsecretxxx')This will create an account with the e-mail address [email protected]
and the password xxxsecretxxx. The variable new_user_id will be
set to the user ID of the newly-created account.
Only users with privileges of admin or users with a custom
privilege with the create_user permission can use this function.
The create_user() function also accepts an optional keyword
parameter privileges, which can be set to the name of a privilege
(e.g., 'advocate') or a list of privileges (e.g., ['advocate',
'trainer']). Non-admin users do not have the power to confer
privileges of admin, developer, or advocate.
The function also accepts an optional keyword parameter info, which
is expected to be a dictionary containing information about the new
user. The info dictionary can contain any of the following keys:
country: user’s country code (ISO 3166-1 alpha-2 format).first_name: user’s first name.language: user’s language code.last_name: user’s last name.organization: user’s organizationsubdivisionfirst: user’s state.subdivisionsecond: user’s county.subdivisionthird: user’s municipality.languagethe user’s language (an ISO-639-1 or ISO-639-3 code).timezone: user’s time zone (e.g.'America/New_York').
To set this information after the user account is created, use
set_user_info().
For an API version of this function, see /api/user/new.
invite_user()
The invite_user() function allows an administrator to create an
invitation for a user with a given email address to create an account
on the server.
Creating the invitation does not create an account; it generates a token that can be transmitted to the user. The user can use that token when registering. The administrator can indicate that the user should be given a specific privilege upon registering.
url = invite_user('[email protected]', privilege='advocate', send=False)This will return a URL that can be shared with a user. The URL is the
URL of the registration screen of the server with a token
parameter. When the user visits the URL, they will go to the
registration page and they will be able to register there even if
allow registration is false.
When the user chooses a password and submits the registration form, a
new user account will be created. If a privilege was indicated, the
user will have that privilege. Only one privilege may be defined
through the invitation process.
If send is set to True, which is the default, the
invite_user() function will email the URL to the email address and
None will be returned. If send is False, the registration URL is
returned.
Only users with privileges of admin or users with a custom
privilege with the create_user permission can use this function.
For an API version of this function, see /api/user_invite.
get_user_list()
The get_user_list() function returns a list of registered users on
the server. If the optional keyword parameter include_inactive is
set to True, then any inactive users are included in the results;
otherwise they are excluded.
In order to use this function, the user must have privileges of
admin, advocate, or a custom privilege with the access_user_info
permission.
The function returns a two-item tuple. The first item in the tuple is a Python list of Python dictionaries, where each dictionary has the following keys:
active: whether the user is active. This is only included if theinclude_inactiveparameter is set.country: user’s country code (ISO 3166-1 alpha-2 format).email: user’s e-mail address.first_name: user’s first name.id: the integer ID of the user.language: user’s language code.last_name: user’s last name.organization: user’s organizationprivileges: a Python list of the user’s privileges (e.g.,'admin','developer').subdivisionfirst: user’s state.subdivisionsecond: user’s county.subdivisionthird: user’s municipality.languagethe user’s language (an ISO-639-1 or ISO-639-3 code).timezone: user’s time zone (e.g.'America/New_York').
The second item in the tuple is a code that is used for pagination.
Since the list of users may be very long, get_user_list() uses
pagination. When you first call get_user_list(), up to 100 records
are returned in the first item in the tuple (configurable using the
pagination limit Configuration directive). If additional records
exist, the second item in the tuple will be a code. To obtain the
next page of records, call get_user_list() again, this time with the
next_id optional keyword parameter set to the second item in the
tuple. By making multiple calls to get_user_list(), you can obtain
the complete list of user records. For example:
from docassemble.base.util import get_user_list

user_list = []
next_id = None
while True:
    (items, next_id) = get_user_list(next_id=next_id)
    user_list.extend(items)
    if not next_id:
        break
For an API version of this function, see /api/user_list.
get_user_info()
The get_user_info() function is like get_user_list(), except
it only returns information about one user at a time. If called
without arguments, it returns a Python dictionary of information
about the current user. The function can also take a user ID as an
argument (e.g., get_user_info(user_id=22)), or an e-mail address as
an argument (e.g., get_user_info(email='[email protected]'), in
which case it returns information about the user with that user ID or
e-mail address. If no user is found, None is returned.
This function will only work if the user running the interview that
calls the function is logged in. If the user is not logged in, None
will be returned.
In order to see information about other users, the user must have
privileges of admin, advocate, or a custom privilege with the
access_user_info permissions.
For API versions of this function, see /api/user and
/api/user/<user_id>. (Searching by e-mail address is not
supported in the API.)
set_user_info()
The set_user_info() function writes information to user profiles.
It accepts the following keyword parameters, all of which are optional:
country: user’s country code (ISO 3166-1 alpha-2 format).first_name: user’s first name.last_name: user’s last name.languagethe user’s language (an ISO-639-1 or ISO-639-3 code).organization: user’s organizationsubdivisionfirst: user’s state.subdivisionsecond: user’s county.subdivisionthird: user’s municipality.timezone: user’s time zone (e.g.'America/New_York').password: user’s new password.old_password: user’s old password. If this is supplied whenpasswordis supplied, the user’s encrypted information will be converted from the old encryption key to the new encryption key.account_type: the type of login the user used. This islocalfor the username/password system,auth0for Auth0,googlefor Google, etc.
The current user’s profile will be updated with the values of the
parameters. Note that the user_id and email attributes cannot be
changed using this function; these attributes are used only for
selecting the user whose information is going to be changed.
This function will only work if the user running the interview that calls the function is logged in.
In order to change information about other users, the user must have
privileges of admin or a custom privilege with the following
permissions, depending on what information they try to change:
edit_user_infofor editing any information about other users;edit_user_passwordfor editing passwords;edit_user_active_statusfor making a user inactive or active;edit_user_privilegesfor editing a user’s privileges.
Only users with the admin privilege can edit the information of
users with admin, developer, or advocate privileges.
Here is an example of a code block that updates the name of the user:
mandatory: True
code: |
  set_user_info(first_name=user.name.first, last_name=user.name.last)
If the user running the interview that calls the function has
appropriate privileges, then the function can be used to change the
profiles of other users. A user account can be indicated by the
inclusion of an additional keyword parameter, user_id or email,
that identifies the user whose profile should be changed.
For example, the following Python code, when run by a user with
sufficient privileges, will change the “organization” setting of the
user [email protected]:
set_user_info(email='[email protected]', organization='Example, Inc.')Users with admin privileges or the edit_user_active_status
permission can disable user accounts by setting the active keyword
parameter to False (or enable a disabled account by setting active
to True).
In addition, users with admin privileges or the
edit_user_privileges permission can change the privileges of a
user by setting the privileges keyword parameter to the list of
privilege names that the user should have.
set_user_info(user_id=22, privileges=['user', 'trainer'])For an API version of this function, see the POST method of
/api/user/<user_id>, the DELETE method of
/api/user/<user_id>, the POST method of
/api/user/<user_id>/privileges, and the DELETE method of
/api/user/<user_id>/privileges (Changing accounts by e-mail address is
not supported in the API.)
get_user_secret()
The get_user_secret() function takes an e-mail address and a
password as arguments and returns a decryption key if the e-mail
address/password combination is valid. You will need this decryption
key in order to use get_session_variables() and
set_session_variables() with interview answers that are encrypted.
secret = get_user_secret('[email protected]', 'xx_Secr3t_xx')Note that you need to keep decryption keys secret, or else you defeat
the purpose of server-side encryption. The idea behind server-side
encryption is that if a system’s security is breached, and all the
data on the server is revealed, the information would still be
protected because it is encrypted. But if the decryption key is
stored on the server in an accessible place, then the information
would no longer be protected, since someone who found the decryption
key could decrypt the data. Thus, you would not want to store the
result of get_user_secret() in the interview session dictionary of
an interview that sets multi_user to True. Also, even if your
interview answers are encrypted, it is still a good idea to
avoid storing passwords or decryption keys in an interview session
dictionary.
For an API version of this function, see /api/secret.
get_session_variables()
The get_session_variables() function retrieves the dictionary for
an interview session. It has two required arguments: an interview
filename (e.g., 'docassemble.demo:data/questions/questions.yml'), a
session ID (e.g., 'iSqmBovRpMeTcUBqBvPkyaKGiARLswDv'). In addition,
it can take a third argument, an encryption key for decrypting the
interview answers. If the interview answers are encrypted, the third
argument is required.
If the third argument is omitted, but the interview answers are
encrypted, the current user’s decryption key will be tried. To obtain
an encryption key for a different user, you can use
get_user_secret().
To get the interview filename for the current interview, and the
session ID for the current interview session, you can use the
[current_context()] function.
However, note that if you want to get the dictionary for the current
interview session, you can simply use the all_variables()
function.
Like the all_variables() function, get_session_variables()
simplifies the dictionary (converting objects to dictionaries, for
example), so that it is safe to convert the result to a format like
JSON. If you want the raw Python dictionary, you can call
get_session_variables() with the optional keyword parameter
simplify set to False.
vars = get_session_variables(filename, session_id, secret, simplify=False)For an API version of this function, see the GET method of /api/session.
create_session()
The create_session() function allows you to initiate a session in
an interview.
yaml_filename = 'docassemble.demo:data/questions/questions.yml'
secret = get_user_secret(username, password)
session_id = create_session(yaml_filename, secret=secret, url_args={'foo': 'bar'})
The session_id that is returned can then be passed to functions like
set_session_variables().
The first and only required parameter is the file name of the YAML interview for which you want to create a session.
create_session() supports two optional keyword parameters:
secreturl_args
The parameter secret can be set to the output of
get_user_secret(). If the target interview does not use server-side
encryption (multi_user is set to True), then the secret
parameter is not important. If you do not provide a secret
parameter and the target interview uses server-side encryption, then
the current user’s decryption key will be used, and only the current
user will be able to access the session.
The optional keyword parameter url_args can be set to a Python
dictionary representing the url_args you want to be present in
the session when it starts.
After setting the url_args (if any), create_session() will
evaluate the interview logic in the session and save the interview
answers for the session. Thus, if mandatory or initial blocks in
the interview cause side effects, these side effects will be triggered
by the call to create_session(). Also, note that when this code
executes, the user for purposes of this code execution will be the
same as the user who ran create_session().
set_session_variables()
The set_session_variables() function allows you to write changes
to any interview session dictionary (except the current interview
session). It has three required parameters: an interview filename (e.g.,
'docassemble.demo:data/questions/questions.yml'), a session ID
(e.g., 'iSqmBovRpMeTcUBqBvPkyaKGiARLswDv'), and a Python
dictionary containing the variables you want to set.
If you run this:
vars = {"defense['latches']": False, "client.phone_number": "202-555-3434"}
set_session_variables(filename, session_id, vars)
Then the following statements will be executed in the interview session dictionary:
defense['laches'] = False
client.phone_number = '202-555-3434'
Note that if you pass DAFile, DAFileList, or
DAFileCollection objects from one interview session to another,
the other interview will not be able to read the files unless the
.set_attributes() method has been used to either change the
session and filename to match the destination interview session,
or the private attribute has been set to False. Note that if the
session and filename are changed, then the first interview session
will no longer be able to access the file. Note also that if
private is set to False, then the file will be accessible on the
internet from a URL.
set_session_variables() supports the following optional keyword
parameters:
question_namesecretoverwriteprocess_objectsdelete
If you set question_name to the ID of a question in the interview,
the question will be marked as answered. You can obtain the ID of a
question from the questionName attribute in the question data using
get_question_data() or the /api/session/question API method.
It is only necessary to specify a question_name when you are setting
a variable for purposes of answering a mandatory question. You
can tell if a question is mandatory by checking for the presence
of the attribute mandatory in the question data.
The keyword parameter secret can be an encryption key for decrypting
the interview answers. If no secret is provided, the encryption key
of the current user is used.
The parameter overwrite can be set to True if you do not want to
create a new step in the interview when the function runs.
The parameter process_objects can be set to True if you want the
Python dictionary that you pass to set_session_variables() to be
treated as a “serializable” representation of docassemble objects.
For more information about how this works, see the documentation for
the set_variables() function, which also accepts a
process_objects keyword parameter. By default,
set_session_variables() does not process the variables as
docassemble objects.
The parameter delete can be set to a list of variables in the
interview answers of the other session that you want to undefine.
set_session_variables(filename, session_id, {}, delete=["defense['estoppel']", "client.paid"])For an API version of this function, see the POST method of
/api/session.
run_action_in_session()
The run_action_in_session() function runs an action in a different
session. It requires three positional parameters: the YAML filename of
the interview, the session ID of the session in that interview, and
the action to run.
For example, this code block runs the action do_the_thing in the
session of the interview
docassemble.demo:data/questions/questions.yml with the session ID
45BrppwmAxQRRhdCYCs4rVJ4iYtfleDm.
code: |
  run_action_in_session('docassemble.demo:data/questions/questions.yml',
                        '45BrppwmAxQRRhdCYCs4rVJ4iYtfleDm',
                        'do_the_thing')
  action_has_been_run = True
run_action_in_session() accepts the following optional keyword
parameters:
arguments: if the action takes arguments, setargumentsto a dictionary containing the arguments.secret: the encryption key to use with the interview, if the interview uses server-side encryption. (Seeget_user_secret().) If nosecretis provided, the encryption key of the current user is used.persistent: set this toTrueif you intend the action to show aquestion, as opposed to merely execute some code. The default behavior is for the action to run in a non-persistent fashion.overwrite: if set toTrue, then when the interview answers are saved, they will overwrite the previous interview answers instead of creating a new step in the session. The default behavior is to create a new step in the session.read_only: if set toTrue, then the interview answers will not be saved after the action completes, and the operation of the action will not prevent concurrent processes from accessing the interview answers. Ifread_onlyis true, thenoverwritehas no effect.
Here is an example interview that uses run_action_in_session(),
among other functions for manipulating other sessions.
code: |
  interview_filename = 'docassemble.demo:data/questions/examples/secondary-interview.yml'
---
mandatory: True
question: |
  Press Continue to start a new session in
  `${ interview_filename }`.
continue button field: first_screen
---
code: |
  session_id = create_session(interview_filename)
---
mandatory: True
question: |
  The session ID of the other session is
  `${ session_id }`.
subquestion: |
  `number_of_fruit` in the other session is
  currently
  `${ get_session_variables(interview_filename, session_id)['number_of_fruit'] }`.

  `favorite_fruit` in the other session is
  currently
  `${ get_session_variables(interview_filename, session_id)['favorite_fruit'] }`.

  Press Continue to set the variable
  `favorite_fruit` in the other session
  to `'apple'`.
continue button field: second_screen
---
mandatory: True
code: |
  set_session_variables(interview_filename,
                        session_id,
                        {'favorite_fruit': 'apple'})
---
mandatory: True
question: |
  The favorite fruit in the other session is now
  `${ get_session_variables(interview_filename, session_id)['favorite_fruit'] }`.
subquestion: |
  Press Continue to run the action
  `add_to_fruit_count` in the other session
  with action argument `number` set to `2`.
continue button field: third_screen
---
mandatory: True
code: |
  run_action_in_session(interview_filename,
                        session_id,
                        'add_to_fruit_count',
                        arguments={'number': 2})
---
mandatory: True
question: |
  `number_of_fruit` in the other session
  is now
  `${ get_session_variables(interview_filename, session_id)['number_of_fruit'] }`.
subquestion: |
  Note: if you press the Back button
  and press Continue again, you will see
  number increase again, since the other
  session is not affected by the Back
  button in this session.

${ action_button_html(interview_url(i=interview_filename, session=session_id), label='Visit other session', new_window=True) }For an API version of this function, see the POST method of /api/session/action.
get_question_data()
The get_question_data() function returns data about the current
question of an interview session. It has two required parameters: an
interview filename (e.g.,
'docassemble.demo:data/questions/questions.yml') and a session ID
(e.g., 'iSqmBovRpMeTcUBqBvPkyaKGiARLswDv'). If the interview
session is encrypted, you must supply a third parameter (or the
keyword parameter secret) containing the encryption key for
decrypting the interview answers.
code: |
  data = get_question_data('docassemble.demo:data/questions/questions.yml',
                           'iSqmBovRpMeTcUBqBvPkyaKGiARLswDv',
                           secret=secret_of_other_user)
The function returns a Python dictionary containing information about the question. The format of the dictionary varies by question type.
You can only use this function to access the question data for an interview other than the current interview.
For an API version of this function, see the /api/session/question.
go_back_in_session()
The go_back_in_session() function has the effect of clicking the
Back button in another interview session. It has two required
parameters: the interview filename and the session ID of the other
session. It also accepts an optional keyword parameter secret,
which is the encryption key to use to decrypt the interview session
dictionary, if it is encrypted.
go_back_in_session(filename, session_id, secret=secret)For an API version of this function, see the POST method of /api/session/back.
manage_privileges()
The manage_privileges() function allows a user with admin
privileges or a custom privilege with appropriate permissions to
list, add, remove, or see additional information about privilege
types from the list of existing privileges.
manage_privileges('list')returns the list of existing privilege types as an alphabetically sorted list. If the user does not haveadminprivileges, the user must have a privilege with theaccess_privilegespermission.manage_privileges('add', 'supervisor')adds a privilege calledsupervisorto the list of existing privilege types. If the user does not haveadminprivileges, the user must have a privilege with theaccess_privilegesandedit_privilegespermissions in order to use the'add'feature.manage_privileges('remove', 'supervisor')removes the privilege calledsupervisorfrom the list of existing privilege types. Moreover, if any users have the privilege, the privilege is taken away from the users. If the user does not haveadminprivileges, the user must have a privilege with theaccess_privilegesandedit_privilegespermissions in order to use the'remove'feature.manage_privileges('inspect', 'supervisor')returns the permissions of the custom privilegesupervisor.
For an API version of this function, see /api/privileges.
Miscellaneous functions
validation_error()
The validation_error() function
takes an error message as a parameter and raises a
DAValidationError exception with that error message. This means
that any code that follows the call to validation_error() will not
be executed.
This is primarily useful inside validate code and validation
code when you want to indicate that the validation did not succeed.
The validation_error() function requires a single argument, which is
the error message the user should see.
For more information, see the documentation for validate and
validation code.
The validation_error() function can be used to raise an error
message from inside a lambda function that is used as the argument
for validate:
question: Repeat after me.
subquestion: |
  To continue, type "I solemnly swear
  that I am up to no good."
fields:
  - no label: oath
    validate: |
      lambda y: validation_error("No, you typed it wrong.") if y != 'I solemnly swear that I am up to no good.' else True
---
mandatory: True
need: oath
question: |
  You are now allowed to use
the Marauder's Map.However, note that lambda functions can be confusing to people who don’t have a good knowledge of Python, so you might want to keep them out of your interview files.
validation_error() accepts an optional keyword argument field,
which should refer to a variable name on the screen. If you call
validation_error() from validation code and reference a field,
the error message will be placed next to the indicated field.
server_capabilities()
The server_capabilities() function returns a dictionary indicating
whether the server has particular features enabled.
mandatory: True
question: |
  Server capabilities
subquestion: |
  % for feature, enabled in server_capabilities().items():
  * **${ feature }**: ${ 'enabled' if enabled else 'disabled' }
% endforThe keys are:
sms- whether SMS messaging is available. See thetwilioconfiguration.fax- whether fax sending is available. See thetwilioconfiguration.google_login- whether logging in with Google is available. See theoauthconfiguration.facebook_login- whether logging in with Facebook is available. See theoauthconfiguration.x_login- whether logging in with X is available. See theoauthconfiguration.phone_login- whether logging in with an SMS security code is available. See thephone loginconfiguration.voicerss- whether the text-to-speech feature is available. See thevoicerssconfiguration.s3- whether Amazon S3 is enabled. See thes3configuration.azure- whether Azure blob storage is enabled. See theazureconfiguration.googledrive- whether Google Drive synchronization is available. See thegoogledriveconfiguration.github- whether developers have the option of integrating their Playgrounds with GitHub. See thegithubconfiguration.pypi- whether developers have the option of integrating their Playgrounds with PyPI. See thepypiconfiguration.google_maps- whether the Google Maps API (used in themap_of()function and thegeocode()method) is available. See thegoogleconfiguration.
referring_url()
Returns the URL that the user was visiting when the user clicked on a link to go to the interview (if that click initiated the interview).
Under some circumstances, this URL (which comes from the referer header) cannot be obtained. For example, if the user started the interview by typing a URL directly into the location bar of the browser, or if the user has a browser setting that blocks the referer header, then the URL will not be available.
If the URL cannot be obtained, then the URL indicated by the optional
keyword parameter default will be returned. If no default URL is
provided, or default is None, then the value of the configuration
directive exitpage will be used.
This function is useful when you want to bring the user back to where they started at the end of the interview.
question: |
  We are on a quest.
subquestion: |
  This quest is exciting!
field: continue_with_quest
---
question: |
  We have finished our quest.
buttons:
  - Return: exit
    url: |
      ${ referring_url() }
need:
  - continue_with_quest
mandatory: TrueIf you just want to find out the referring URL, make sure to set the
default parameter to something you can test. For example, the
following blocks will set the variable how_user_heard_of_us either
by obtaining the referring URL or, if the URL is not available, by
asking the user “How did you hear about us?”
question: |
How did you hear about us?
fields:
no label: how_user_heard_of_us
---
code: |
if referring_url(default=False) is not False:
how_user_heard_of_us = referring_url()If you set the optional keyword parameter current to True, it will
return the Referer of the current request, if available.
static_image()
mandatory: True
question: |
An image created by code
subquestion: |
This is the "${ image_name }" image.
${ static_image(image_name + '.svg') }Returns appropriate markup to include a static image. If you know the
image path, you can just use the [FILE ...] markup statement. The
static_image() function is primarily useful when you want to
assemble the image path using code.
The function takes an optional keyword argument “width” that will affect the width of the image on the screen or page:
static_image('docassemble.demo:crawling.png', width='2in'))get_config()
Returns a value from the docassemble configuration file. If the value is not defined, returns None.
See the explanation of this function in the configuration section for more information.
prevent_going_back()
docassemble’s back button helps users when they make a mistake and want to go back and correct it. But sometimes, we want to prevent users from going back. For example, if the interview code causes an e-mail to be sent, or data to be written to a database, allowing the user to go back and do the process again would create confusion.
You can call prevent_going_back() to instruct the web application to
prevent the user from going back past that point. See also the
modifier of the same name.
code: |
app_submitted = True
prevent_going_back()selections()
This is used in multiple choice questions in fields lists where the
datatype is object, object_radio, or object_list and the list
of selections is created by embedded code. The function takes one
or more arguments and outputs an appropriately formatted list of
objects. If any of the arguments is a list, the list is unpacked and
its elements are added to the list of selections.
objects_from_file()
objects_from_file() imports data from a YAML or JSON file,
including objects.
The import acts like a standard YAML import, except that when an
associative array (dictionary) is encountered that has the keys
object and items, then the associative array is converted into a
list of objects (specifically, a DAList). In addition, if an
associative array is encountered that has the keys object and
item, then the associative array is converted into a single
object.
code: |
people = objects_from_file("contacts.yml", use_objects=True)
---
mandatory: true
question: |
How to contact us
subquestion: |
% for person in people:
You can e-mail ${ person } at
${ person.email }.
% endforIn the above example, contacts.yml is a file in the data/sources
folder of the package, and it has the following contents:
object: Individual
module: docassemble.base.util
items:
- name:
object: IndividualName
item:
first: Fred
last: Smith
email: [email protected]
allergies:
- peanuts
- subway tokens
- name:
object: IndividualName
item:
first: Larry
last: Jones
email: [email protected]
skills:
- stapling
- making coffeeThis example uses two standard docassemble objects,
Individual and IndividualName.
A JSON file can also be used.
code: |
people = objects_from_file("contacts.json")
---
mandatory: true
question: |
How to contact us
subquestion: |
% for person in people:
You can e-mail ${ person } at
${ person.email }.
% endforIn the above example, the file contacts.json file has the following contents:
{
"object": "Individual",
"module": "docassemble.base.util",
"items": [
{
"name": {
"object": "IndividualName",
"module": "docassemble.base.util",
"item": {
"first": "Fred",
"last": "Smith"
}
},
"email": "[email protected]",
"allergies": [
"peanuts",
"subway tokens"
]
},
{
"name": {
"object": "IndividualName",
"module": "docassemble.base.util",
"item": {
"first": "Larry",
"last": "Jönes"
}
},
"email": "[email protected]",
"skills": [
"stapling",
"making coffee"
]
}
]
}What gets returned
The objects_from_file() function will return a DAList object if:
- There is more than one YAML “document” (separated by
---). - There is one YAML “document” and it is an associative array with
the keys
objectanditems.
If there is one YAML “document” and it is an associative array
with the keys object and item, then the object itself will be
returned.
If there is one YAML “document” and it is something other than an
associative array with the keys object and items or object and
item, then the data structure will be returned.
There is an optional keyword argument name that will be used to set
the .instanceName attribute of the resulting object. If you do
not pass a name parameter, the object/data structure returned by
objects_from_file() will still be readable, but it will not be
writable by docassemble questions.
There is also an optional keyword argument use_objects, which, if
True, will cause lists to become gathered DALists, and
dictionaries to become gathered DADicts.
Note that there is an initial block called objects from file
that can be used as a shorthand way of calling objects_from_file().
Instead of writing:
---
mandatory: True
code: |
claims = objects_from_file('claim_list.yml', name='claims')
---you can instead write:
---
objects from file:
- claims: claim_list.yml
---Using your own object types
If you want to import objects that are not standard docassemble
objects, you need to specify a module that defines the object’s
class so that docassemble knows where to get the class definition.
For example, suppose you defined some classes with a Python module
called fish.py:
from docassemble.base.util import DAObject
class Halibut(DAObject):
pass
class Food(DAObject):
passSuppose you want to import some objects of type Halibut. You can
create a YAML file called fishes.yml with the following
contents:
object: Halibut
module: .fish
items:
- name: Fred Halibut
scales: 500
food:
object: Food
module: .fish
items:
- name: plankton
calories: 5
- name: Larry Halibut
scales: 600
food:
object: Food
module: .fish
items:
- name: seaweed
calories: 2Note the inclusion of module: .fish along with each object
specifier. This indicates that the Halibut and Food classes are
defined in the module .fish.
The following interview will import these two Halibut objects into
the interview:
code: |
fishes = objects_from_file("fishes.yml")
---
mandatory: true
question: |
Fish summary
subquestion: |
% for fish in fishes:
${ fish } has
${ fish.scales } scales.
% endforNote that the . in front of the module name (.fish) is
standard Python notation for indicating that the module is part of
the current package. In this example, the interview lives in the
docassemble.demo package, so we could have written the full module
name, docassemble.demo.fish, instead of .fish.
To see how these separate files are able to find one another, check
out the docassemble.demo package on GitHub and look for the
following files:
- The interview file,
data/questions/examples/fish-example.yml - The Python module,
fish.py - The YAML data file,
data/sources/fishes.yml
How YAML files are located
When the interview calls objects_from_file('fishes.yml'), the
objects_from_file() function looks for the file fishes.yml in the
data/sources folder of the current package (or the sources folder
if your interview is running in the Playground).
The objects_from_file() function can also be given explicit
references. For example, calling
objects_from_file('docassemble.demo:data/sources/fishes.yml') would
have the same effect.
Preventing recursive object conversion
By default, objects_from_file() will comb through the data structure
looking for objects to convert. If you only want it to convert
objects that are specified in an associative array at the very top
level, you can set the keyword parameter recursive to False.
code: |
raw_data = objects_from_file("raw_data.yml", recursive=False)
---
mandatory: true
question: |
The imported data
subquestion: |
% for item in raw_data:
The `inventory` of
"${ item.title }" is:
> `${ item.inventory }`
% endforHow objects are created
The objects_from_file() creates objects by passing keyword arguments
to the object constructor. In the “fishes” example above, the first
object was effectively created by calling:
Halibut(name='Fred Halibut', scales=500, food=[Food(name='plankton', calories=5)])The second object was effectively created by calling:
Halibut(name='Larry Halibut', scales=600, food=[Food(name='seaweed', calories=2)])Therefore, object attributes will only be initialized if the object
supports initialization of attributes through keyword arguments passed
to the constructor. All objects that are instances of the
DAObject class have this property.
However, if you are using objects that are not DAObjects, but you
want to make them compatible with objects_from_file(), you can
include an __init__() method in your class that does the following:
class SwordFish:
def __init__(self, **kwargs):
for key, value in kwargs.iteritems():
setattr(self, key, value)You could also write your own custom code in __init__() that
initiates the object attributes in special ways in response to keyword
parameters.
You can use objects_from_file() to import other kinds of objects
that allow initialization through keyword parameters. For example,
datetime.datetime objects can be created by doing:
datetime.datetime(year=2017, month=4, day=1)Thus, you could import a datetime.datetime object with the following YAML:
object: datetime
module: datetime
item:
year: 2017
month: 4
day: 1Importing group objects
To import a DAList, DADict, or DASet objects that contain
items, set the elements attribute to a YAML list (in the case of a
DAList or DASet or a YAML dictionary (in the case of a
DADict).
Here is a sample YAML file that defines a DADict:
object: DADict
item:
elements:
apple: 4
peach: 5
orange: 10Here is an interview that imports this file:
code: |
fruitseeds = objects_from_file("fruitseeds.yml")
---
mandatory: True
question: |
Summary of
${ fruitseeds.number_as_word() }
fruit
subquestion: |
% for fruit in fruitseeds:
The seeds of ${ fruit } are
${ fruitseeds[fruit] }
in number.
% endforBy default, any groups that are populated by importing will be marked
as gathered. If you want docassemble to ask the user if more
elements should be added, you can set the optional keyword argument
gathered to False:
code: |
fruitseeds = objects_from_file("fruitseeds.yml", gathered=False, name='fruitseeds')
---
question: |
The fruits so far are ${ fruitseeds }.
Are there more?
yesno: fruitseeds.there_is_another
---
question: |
What fruit would you like to add?
fields:
- Fruit: fruitseeds.new_item_name
- Seeds: fruitseeds.new_item_value
---
mandatory: True
question: |
Summary of
${ fruitseeds.number_as_word() }
fruit
subquestion: |
% for fruit in fruitseeds:
The seeds of ${ fruit } are
${ fruitseeds[fruit] }
in number.
% endforAvoiding problems with whitespace
If you include text in your YAML file and you wish to use this text within documents, you should understand a few rules about YAML.
This in YAML:
claim: |
The landlord is not entitled
to collect back rent.becomes this in Python:
{'claim': 'The landlord is not entitled\nto collect back rent.\n'}Note that the newline after the word “entitled” was treated
literally (\n), and a newline was added at the end. This is not a problem
when your text is treated as Markdown, because Markdown treats
single newlines as though they were spaces and only breaks a line when
it sees two newlines together. However, if you are inserting text
into a docx template file, the newlines will cause paragraph
breaks, which may be what you want, or it may not be what you want.
Here are some YAML tips that can help you out in situations like this.
This in YAML:
claim: |-
The landlord is not entitled
to collect back rent.becomes this in Python:
{'claim': 'The landlord is not entitled\nto collect back rent.'}Changing the quote mark from | to |- gets rid of the newline at the
end, but not the one in the middle.
This in YAML:
claim: >
The landlord is not entitled
to collect back rent.becomes this in Python:
{'claim': 'The landlord is not entitled to collect back rent.\n'}The > treats newlines as spaces, but adds a newline at the end.
claim: >-
The landlord is not entitled
to collect back rent.becomes this in Python:
{'claim': 'The landlord is not entitled to collect back rent.'}The >- quote mark treats newlines as spaces and refrains from adding
a newline at the end.
This in YAML:
claim: The landlord is not entitled to collect back rent.becomes this in Python:
{'claim': 'The landlord is not entitled to collect back rent.'}Similarly, this in YAML:
claim: "The landlord is not entitled to collect back rent."also becomes:
{'claim': 'The landlord is not entitled to collect back rent.'}The quotation marks do not change the text in this case. Quotation marks can still be useful, however, if your text contains any punctuation marks that have special meaning in YAML.
If you want literal quotation marks, you could use quotes within quotes:
This in YAML:
quotation: '"It was the best of times, it was the worst of times."'becomes this in Python:
{'quotation': '"It was the best of times, it was the worst of times."'}Similarly, this in YAML:
quotation: >-
"It was the best of times, it was the worst of times."also becomes:
{'quotation': '"It was the best of times, it was the worst of times."'}For more information, see The YAML Format.
ocr_file()
Given a PDF file, ocr_file() uses optical character recognition (OCR) to
read the text of the file. In the text returned, pages are
separated by the form feed character.
mandatory: True
question: |
Here is the text of the file
subquestion: |
${ ocr_file(the_file) }
---
question: |
Please upload a file
fields:
- File: the_file
datatype: filesThe first argument must be a DAFile or DAFileList object. If
the argument is a DAFileList with more than one file, all files
will be OCRed, and the text of all the pages will be returned.
The following optional keyword arguments affect the way OCR is performed.
languageindicates the language of the document. If not specified, the language returned byget_language()is used. The language must be a lowercase ISO-639-1/ISO-639-3 code or a language code that Tesseract uses.psmindicates the Tesseract page segmentation mode. The default is 6 (“assume a uniform block of text”). The choices are:- 0: Orientation and script detection (OSD) only.
- 1: Automatic page segmentation with OSD.
- 2: Automatic page segmentation, but no OSD, or OCR.
- 3: Fully automatic page segmentation, but no OSD.
- 4: Assume a single column of text of variable sizes.
- 5: Assume a single uniform block of vertically aligned text.
- 6: Assume a single uniform block of text. (Default)
- 7: Treat the image as a single text line.
- 8: Treat the image as a single word.
- 9: Treat the image as a single word in a circle.
- 10: Treat the image as a single character.
In addition, the following optional parameters, which are passed to pdftoppm, customize the conversion of PDF files:
findicates the first page of the PDF file to read. By default, all pages are read.lindicates the last page of the PDF file to read. By default, all pages are read.x: for cropping PDF pages. Indicates the x-coordinate of the crop area’s top left corner, in pixels. (By default, PDF files are converted at 300 dpi unless another value is given by theocr dpiconfiguration directive.)y: for cropping PDF pages. Indicates the y-coordinate of the crop area’s top left corner, in pixels.W: for cropping PDF pages. Indicates the width of the crop area in pixels (default is 0).H: for cropping PDF pages. Indicates the height of the crop area in pixels (default is 0).
If you want a PDF with embedded OCRed text, see the make_ocr_pdf()
method of DAFile.
By default, the ocr_file() function uses Tesseract to do optical
character recognition. Optionally, you can use Google Cloud Vision
instead. To do so, call ocr_file() with the keyword parameter
use_google=True.
ocr_file(the_file, use_google=True)To get the raw output of the Google Cloud Vision API, set
raw_result to True:
ocr_file(the_file, use_google=True, raw_result=True)The output will then be a Python list of data structures returned from the Google Cloud Vision API. The format will be different depending on whether a PDF or other image was provided. Consult the Google Cloud Vision API to figure out what the data structures represent.
When use_google=True is used, none of the other keyword arguments
(language, psm, f, l, etc.) are applicable. Those arguments are
specific to the default Tesseract engine.
In order to use use_google=True, you need to follow the setup
instructions for DAGoogleAPI. In addition, in your app in Google
Cloud Console, under “APIs & Services,” you need to enable the APIs
for Google Cloud Vision and Google Cloud Storage. In addition, you
need to provide the name of a bucket in Google Cloud Storage that
ocr_file() can use to do its work.
google:
work bucket: some-unique-name-a28b3d97dThe ocr_file() will create this bucket in your Google Cloud
Storage if it does not already exist. It needs this bucket in order
to temporarily store files for use by the Google Cloud Vision
API. Unless something goes wrong, it will delete the files it writes
to the bucket.
Note that Google Cloud Vision is not necessarily faster than the
Tesseract OCR engine, so you may need to use
ocr_file_in_background() (which also accepts the use_google=True
keyword parameter`).
ocr_file_in_background()
Note that the OCR process usually takes a long time; it takes a lot of computational power to recognize characters from a graphical image. Unless the document is only one page long, the user will have to wait, looking at a spinner, for what may be an inconvenient period of time. The user may think that the application has crashed.
The best practice is to run OCR tasks in the background, using the
ocr_file_in_background() function. This function is a cross
between ocr_file() and background_action().
To control the details of the OCR process, you can set optional
keyword parameters language, psm, x, y, W, and H. (See
ocr_file() for information about what these do.)
Like background_action(), it immediately returns an object
representing a background task. You can call .ready() on this
object to see if the task is still running in the background, and you
can call .get() to obtain the result of the OCR task. (See
background_action() for more information about these methods.)
Here is an example of how ocr_file_in_background() can be used.
mandatory: true
code: |
the_task
final_screen
---
code: |
the_task = ocr_file_in_background(the_file)
---
question: |
Please upload one or more files.
fields:
- File: the_file
datatype: files
---
question: |
What is your nickname?
fields:
- Nickname: nickname
---
event: final_screen
question: |
Here is the text of the uploaded
file, ${ nickname }.
subquestion: |
% if the_task.ready():
The text is: ${ the_task.get() }
% else:
Still processing. Please press Refresh
after a few seconds to see if the task
is done.
% endif
buttons:
- Refresh: refreshThis example demonstrates a technique for avoiding making the user
wait. First, the user uploads a document. Then,
ocr_file_in_background() is called on the uploaded file, which
starts the OCR process in the background. Then, the user is asked a
question (“What is your nickname?”). Then is the user sent to a
screen that displays the text obtained through OCR. Hopefully, the
question about the nickname took enough time that the results of the
OCR are ready by the time this screen appears in the interview. Just
in case there wasn’t enough time, the interview question calls
.ready() to check to see if the task is done. If it is not done,
the user is asked to wait, and to press “Refresh.” If the process has
completed by then, .ready() will be True, and the user can see the
text obtained through OCR.
It is safe to call .get() without first ensuring that .ready() is
True. The .get() method will cause the system to wait until the
OCR text is available. The user will see a spinner in the meantime.
Other questions could be asked, in addition to the nickname question, in order to give the computer more time to finish the OCR process.
If you do not want to stall for time by asking questions, but you want
to give the user a user-friendly screen to look at while they wait and
you don’t want to make the user press a Refresh button, you can use
the optional second argument to the ocr_file_in_background()
function. This second argument acts like the second argument to
background_action(). In this example, we set it to refresh:
mandatory: true
code: |
the_files
if the_task.ready():
final_screen
else:
waiting_screen
---
code: |
the_task = ocr_file_in_background(the_files, 'refresh')
---
event: waiting_screen
question: |
Please wait.
subquestion: |
Your document is being processed.
This may take several minutes.
The text of your document will be
shown on the screen when the
processing is finished.
---
event: final_screen
question: |
Here is the text of the uploaded
file.
subquestion: |
${ the_task.get() }
---
question: |
Please upload one or more files.
fields:
- File: the_files
datatype: filesBe careful about combining the use of refresh with the method of
asking questions of the user to pass the time. If any of the
questions call for the user to type something in, the user will be
very annoyed if the screen refreshes while they are typing; they will
lose what they have typed. However, if you are only asking questions
that require buttons to be pressed, then the user will not notice if
the screen refreshes.
You can also use other notification methods, such as:
ocr_file_in_background(the_file, 'javascript', message='all done')ocr_file_in_background(the_file, 'flash', message='All done')
These notification methods show a Javascript alert or a message
“flashed” at the top of the screen when the background task is
complete. The message is “OCR succeeded” unless you override the
message using the optional keyword argument message.
See the documentation of background_action() for more information
about notification methods.
The value returned by .get() is an object, not a piece of text. If
the attribute .ok is True, the text can be found in the .content
attribute of this object. If the attribute .ok is False, then
there was an error during the OCR process, and the error message can
be found in the attribute .error_message. When you put the output
of .get() inside of a ${ ... } Mako tag, the object is forced to
be text, in which case either .content or .error_message is used,
depending on the success of the OCR process.
By default, ocr_file_in_background() uses Tesseract as the OCR
engine. Optionally, you can use Google Cloud Vision as an OCR engine
by passing use_google=True as a keyword parameter to
ocr_file_in_background(). For more information about setting this
up, see the documentation about use_google=True in ocr_file().
If you want a PDF with embedded OCRed text, see the
make_ocr_pdf_in_background() method of DAFile.
Advantages of ocr_file_in_background() over ocr_file()
Note that it is also possible to use ocr_file() within
background_action():
mandatory: True
code: |
the_file
the_task
user_testimonial
if not the_task.ready():
waiting_screen
---
question: |
Please upload a file
fields:
- File: the_file
datatype: files
---
code: |
the_task = background_action('ocr_start', None)
---
event: ocr_start
code: |
the_text = ocr_file(the_file)
background_response_action('ocr_finish', text=the_text)
---
event: ocr_finish
code: |
text_of_the_file = action_argument('text')
background_response()
---
question: |
How do you describe what happened?
fields:
- no label: user_testimonial
input type: area
---
event: waiting_screen
reload: 5
question: |
Please wait.
---
mandatory: True
question: |
All done
subquestion: |
You claim that:
${ quote_paragraphs(user_testimonial) }
The document states:
${ quote_paragraphs(text_of_the_file) }However, the advantage of ocr_file_in_background() is that it can
be a lot faster if there is more than one page image. The
ocr_file() function OCRs one page at a time, using a single CPU
core. The ocr_file_in_background() function, by constrast,
assigns each page image to a separate background task, and these tasks
are then distributed across all the CPU cores in your system. If your
docassemble installation has two application servers, each with
four CPU cores, the system will process the OCR job eight pages at a
time rather than one page at a time. For a large document,
ocr_file_in_background() will get the whole job done much faster.
Running OCR with languages other than English
Tesseract supports the following languages.
| Code | Language |
|---|---|
afr |
Afrikaans |
ara |
Arabic |
aze |
Azerbaijani |
bel |
Belarusian |
ben |
Bengali |
bul |
Bulgarian |
cat |
Catalan |
ces |
Czech |
chi-sim |
Simplified Chinese |
chi-tra |
Traditional Chinese |
chr |
Cherokee |
dan |
Danish |
deu |
German |
deu-frak |
German Fraktur |
ell |
Greek |
eng |
English |
enm |
Middle English |
epo |
Esperanto |
est |
Estonian |
eus |
Basque |
fin |
Finnish |
fra |
French |
frk |
Frankish |
frm |
Middle French |
glg |
Galician |
grc |
ancient Greek |
heb |
Hebrew |
hin |
Hindi |
hrv |
Croatian |
hun |
Hungarian |
ind |
Indonesian |
isl |
Icelandic |
ita |
Italian |
ita-old |
Old Italian |
jpn |
Japanese |
kan |
Kannada |
kor |
Korean |
lav |
Latvian |
lit |
Lithuanian |
mal |
Malayalam |
mkd |
Macedonian |
mlt |
Maltese |
msa |
Malay |
nld |
Dutch |
nor |
Norwegian |
pol |
Polish |
por |
Portuguese |
ron |
Romanain |
rus |
Russian |
slk |
Slovak |
slk-frak |
Slovak Fractur |
slv |
Slovenian |
spa |
Spanish |
spa-old |
Old Spanish |
sqi |
Albanian |
srp |
Serbian |
swa |
Swahili |
swe |
Swedish |
tam |
Tamil |
tel |
Telugu |
tgl |
Tagalog |
tha |
Thai |
tur |
Turkish |
ukr |
Ukranian |
vie |
Vietnamese |
The language parameter is flexible; you can set it to a language
code that Tesseract supports (e.g., eng, chi-sim, chi-tra,
slk-frak), or you can give it a two-character ISO-639-1 code, in
which case docassemble will convert it to the corresponding
Tesseract code. If Tesseract does not support the language,
English will be used. If the language parameter is not supplied,
docassemble will use the default language (the result of
get_language()).
For some languages, there is more than one variant. For example, if
you specify Chinese, zh, docassemble will use chi-tra
(traditional Chinese). If this is not what you want, you can specify
an explicit language parameter, such as chi-sim (simplified
Chinese). Alternatively, you can override the mapping between
ISO-639-1 codes and Tesseract codes by editing the
ocr languages directive in the configuration. For example, if
you wanted all Chinese to be interpreted as Simplified Chinese, and
all Uzbek to be interpreted as the Cyrillic form, you could set the
following:
ocr languages:
zh: chi-sim
uz: uzb-cyrlpath_and_mimetype()
The path_and_mimetype() function returns a tuple consisting of a
file path and MIME type for a given reference to a file.
The function works with a variety of file references, including:
- A
DAFileobject; - A file number (see
DAFile); - A reference to a file in the current package (e.g.,
data/sources/training-data.json); - A reference to a file in a particular package (e.g.,
docassemble.demo:data/static/crown.png); or - A URL to a file on the Internet.
If the reference is to a file on the Internet, the file will be downloaded to a temporary file.
code: |
(filename_a, mimetype_a) = path_and_mimetype('data/static/hello.pdf')
(filename_b, mimetype_b) = path_and_mimetype('docassemble.demo:data/static/house.png')
(filename_c, mimetype_c) = path_and_mimetype('https://docassemble.org/img/docassemble-logo.jpg')
---
mandatory: True
question: |
File locations and MIME types
subquestion: |
#### `data/static/hello.pdf`
Path **${ filename_a }** has
MIME type **${ mimetype_a }**.
#### `docassemble.demo:data/static/house.png`
Path **${ filename_b }** has
MIME type **${ mimetype_b }**.
#### `https://docassemble.org/img/docassemble-logo.jpg`
Path **${ filename_c }** has
MIME type **${ mimetype_c }**.Paths retrieved through path_and_mimetype() can be used by Python
functions right away.
Note, however, that paths obtained from DAFile objects, file
numbers, and URLs, will not necessarily be stable from request to
request. If you save a path to a variable at one time, and expect to
use it later in a subsequent question, you may find that the path does
not exist. This is because temporary files can be deleted, and
subsequent user screens may be handled by different servers.
If you want a file that persists from request to request, you should
store its contents to a DAFile object. When a DAFile object
is assigned to a variable, you can reliably obtain the file path by
calling the .path() method on the variable.
The path_and_mimetype() function can be used along with the
.set_mimetype() and .copy_into() methods of the DAFile
class in order to save files to DAFile objects.
The following interview retrieves an image from the Internet and saves
it to a variable logo, which is a DAFile object.
mandatory: True
objects:
- logo: DAFile
---
code: |
url = 'https://docassemble.org/img/docassemble-logo.jpg'
(filename, mimetype) = path_and_mimetype(url)
logo.set_mimetype(mimetype)
logo.copy_into(filename)
---
field: initial_screen
question: |
Obtained file
subquestion: |
The URL [${ url }](${ url })
has been saved to a file.
It has a MIME type of
${ mimetype }.
Click "Continue" to see it.
---
mandatory: True
need: initial_screen
question: |
Here is the file.
subquestion: |
${ logo }run_python_module()
The run_python_module() runs a Python module as though it were
being run from the command line, and returns the output of the command
(standard output as well as standard error) along with the return code
from running the command.
The first argument, which is required, is the name of the module.
This can be expressed in a few ways. If it is the name of a file
ending in .py, it is assumed to be a module in the same package as the
interview file. Or, if you are using the Playground, it is assumed
to be a file in the modules folder. The module file is executed as
you would execute a module file by using python modulename.py from
the command line. If the first argument is the name of a module, that
module will be run, much as you would execute a module by using python
-m modulename from the command line.
The function returns a tuple of two variables: the output of the command (text) and the return value (an integer). If the command was successful, the return value will be zero.
The following three example interviews refer to a very simple
Python module file, hello.py. The contents of this file are:
print "Hello, world!"The interviews and the hello.py module are all in the
docassemble.demo package.
The first example refers to the .py file:
code: |
output, return_code = run_python_module('hello.py')
---
mandatory: True
question: |
${ output }The second example refers to the same Python module, but by its full module name:
code: |
output, return_code = run_python_module('docassemble.demo.hello')
---
mandatory: True
question: |
${ output }The third example refers to the same Python module, but using a relative module name instead of a full module name:
code: |
output, return_code = run_python_module('.hello')
---
mandatory: True
question: |
${ output }Note that the first example and the third example only work because the interviews and the module are in the same package.
When calling run_python_module(), you can also include an optional
second argument, which must be a list of command line arguments to be
passed to the module.
The following example demonstrates how you can use
run_python_module() to run unit tests using the standard
unittest framework. The interview, the tests.py file it
refers to, and the my_name_suffix module that is being tested in
tests.py, are all in docassemble.demo package.
The command line argument -v results in “verbose” output.
code: |
output, return_code = run_python_module('tests.py', ['-v'])
---
mandatory: True
question: |
Result of unit tests
subquestion: |
% if return_code == 0:
Command succeeded.
% else:
Command failed!
% endif
${ indent(output) }The indent() function is used here because it indents each line in
the output by four spaces. In Markdown, this causes the text to be
displayed in a monospace font.
pdf_concatenate()
The pdf_concatenate() function accepts one or more file objects
(DAFile, DAStaticFile, DAFileList, or
DAFileCollection) as input (raw file paths are also accepted) and
returns a DAFile containing the files concatenated into a single
PDF file. Image files and word processing files (.doc, .docx, .rtf,
and .odt) will be converted to PDF. If any of the arguments is a
list, it will be unpacked.
objects:
- static_file: DAStaticFile.using(filename='star.pdf')
---
attachment:
variable name: assembled_file
filename: assembled_file
content: |
Hello world!
---
question: |
Upload a file
fields:
- File: uploaded_file
datatype: file
---
mandatory: True
code: |
output_file = pdf_concatenate(uploaded_file, assembled_file, static_file, filename="result.pdf")
---
mandatory: True
question: |
Here is your concatenated file.
subquestion: |
${ output_file }pdf_concatenate() supports the following optional keyword parameters:
filename: if provided, this will be the name of the resulting file. If not provided, the file will be namedfile.pdf.pdfa: ifTrue, the PDF file will be converted to PDF/A format. The default isFalse.password: if provided, the PDF file will be protected. Ifpasswordis a string, the password will be a “user password.” To supply an “owner password,” you can setpassword=[owner_pw, user_pw]orpassword={'owner': owner_pw, 'user': user_pw}.output_to: if this refers to aDAFileobject, the output ofpdf_concatenate()will be saved to thisDAFile. By default,pdf_concatenate()returns a newDAFilewith a random instance name.
docx_concatenate()
The docx_concatenate() function accepts one or more file objects
(DAFile, DAStaticFile, DAFileList, or
DAFileCollection) as input (raw file paths are also accepted) and
returns a DAFile containing the files concatenated into a single
DOCX file. Only word processing files (.doc, .docx, .rtf, and .odt)
are accepted. If any of the arguments is a list, it will be unpacked.
docx_concatenate() takes an optional keyword parameter filename,
which, if provided, will be used as the name of the resulting file.
If no filename is provided, the file will be named file.docx.
docx_concatenate() takes an optional keyword parameter output_to,
which, if provided, will be used as the DAFile object to which the
output of docx_concatenate() will be stored. By default,
docx_concatenate() returns a new DAFile with a random instance
name.
overlay_pdf()
The overlay_pdf() function overlays a single page from a PDF file on
top of the pages of another PDF file.
It has two mandatory parameters: a main document, and an overlay
document. The parameters can be DAFileCollection, DAFileList,
or DAFile objects. They can also be file paths for files on the
file system.
The function returns a DAFile containing a PDF file where the
first page of the overlay document has been superimposed on top of the
main document.
question: |
What is your favorite fruit?
fields:
- Fruit: favorite_fruit
---
question: |
What is your favorite vegetable?
fields:
- Vegetable: favorite_vegetable
---
question: |
Upload your company logo.
fields:
- Logo: logo_image
datatype: file
---
attachment:
variable name: logo_page
docx template file: logo_template.docx
---
attachment:
variable name: the_document
docx template file: food_template.docx
---
mandatory: True
question: |
Here is your document.
subquestion: |
${ overlay_pdf(the_document, logo_page) }The overlay_pdf() function accepts several optional keyword
parameters. If you only want to overlay on top of some of the pages
of the main document, you can indicate a first_page and/or a
last_page, which will instruct overlay_pdf() to start at a given
page number and/or end at a given page number. By default,
overlay_pdf() starts on the first page and ends on the last page.
If you only want to overlay over even-numbered pages, set only to
'even'. If you only want to overlay over odd-numbered pages, set
only to 'odd'.
If your document containing the logo has more than one page, you can
specify which page to use by setting logo_page to the page number of
the page you want to use.
The optional keyword parameter multi is used when you want to
overlay two PDF files with the same number of pages on top of one
another. (That is, page 1 of document A will be overlayed with page 1
of document B, page 2 of document a will be overlayed with page 2 of
document B, etc.)
question: |
Upload a PDF file.
subquestion: |
Page numbers will be overlayed on your PDF.
fields:
- File: the_doc
datatype: file
---
attachment:
variable name: overlay_doc
docx template file: numbering_template.docx
---
mandatory: True
question: |
Here is your document.
subquestion: |
${ overlay_pdf(the_doc, overlay_doc.pdf, multi=True) }When multi=True is used, the first_page, last_page, only, and
logo_page parameters are disregarded.
overlay_pdf() takes an optional keyword parameter output_to,
which, if provided, will be used as the DAFile object to which the
output of overlay_pdf() will be stored. By default, overlay_pdf()
returns a new DAFile with a random instance name.
zip_file()
The zip_file() function is like the pdf_concatenate() function,
except it returns a ZIP file archive of the files.
zip_file() has two optional keyword parameters:
filename: if provided, this will be the name of the resulting file. If not provided, the file will be namedfile.zip.output_to: if this refers to aDAFileobject, the output ofzip_file()will be saved to thisDAFile. By default,zip_file()returns a newDAFilewith a random instance name.
If you want your zip file to include file structure, you can pass a Python dictionary as a parameter, and they keys of the dictionary will be folder names.
The following example results in a ZIP file called “Image files.zip”
that contains an uploaded file and a folder called assets that
contains two files from the “static” folder of the interview’s
package.
objects:
- coins_picture: DAStaticFile.using(filename='coins36.png')
---
question: |
Please upload a picture of yourself.
fields:
- Picture: user_picture
datatype: file
---
mandatory: True
question: |
Here is your ZIP file.
subquestion: |
${ zip_file(user_picture, {'assets': [coins_picture, 'cow.jpg'] }, filename="Image files.zip") }log()
The log() function allows you to log a message to the server log, to
the browser console, or to the user’s screen.
The first parameter is the message you want to send. The second
parameter, which is optional, is the “priority” of the message. The
default priority is 'log'.
mandatory: True
code: |
log("Hello, user!", "info")
log("Lookout, user!", "danger")
---
mandatory: True
decoration: coins
question: |
The interview is complete.The options for the priority are:
'log'- a message is immediately logged to the server logs.'console'- when the next screen loads in the user’s browser, the message will appear in the browser log. (This uses theconsole.logJavaScript function.)'javascript'- like'console', except that the contents of the “message” will be passed to theevalJavaScript function instead of theconsole.logJavaScript function. This allows you to log a message in the front end in your own custom fashion. It can also be used for tasks other than logging messages.'success'- when the next screen loads in the user’s browser, a popup message (a Bootstrap alert) will appear at the top of the page, using the Bootstrap color associated with “success” (typically green). The message will disappear after a few seconds.'info'- like'success', except it uses the “info” Bootstrap color. The message will not disappear.- Other Bootstrap color names besides
'info'and'success'.
The Bootstrap color names are as follows:
You can also use the JavaScript function flash() to display
notifications like this.
encode_name()
In the HTML of the web interface, input elements for variables are base64-encoded versions of the Python variable names.
The encode_name() function converts a variable name to base64
encoding.
>>> encode_name('favorite_fruit')
'ZmF2b3JpdGVfZnJ1aXQ'For more information about the relationship between HTML and the setting of variables, see the discussion in the section on custom front ends.
decode_name()
The decode_name() function does the opposite of encode_name():
it converts a variable name from base64 encoding to plain text.
>>> decode_name('ZmF2b3JpdGVfZnJ1aXQ')
'favorite_fruit'transform_json_variables()
transform_json_variables() is a function that is used by
set_session_variables() when process_objects is
enabled.
It recursively traverses the data structure it is given, transforming
dictionaries of the form generated by .as_serializable() into
DAObject instances, and strings that look like dates/times in into
datetime objects.
Functions for working with SMS messages
send_sms()
The send_sms() function is similar to send_email(), except it
sends a text message (also known as an SMS message). This requires
a Twilio account.
All of its arguments are keyword arguments, the defaults of which are:
send_sms(to=None, body=None, template=None, task=None, attachments=None, config='default')toexpects a list of recipients. The list can consist ofIndividuals (or any otherPersons), objects of typephonenumbers.PhoneNumber, or a simple string containing a phone number. If the number begins withwhatsapp:, then WhatsApp will be used to send the message. If the recipient is aPerson, then thesms_number()method will be used to obtain the person’s number.bodyexpects text, orNone. If provided, it will be the content of the message. Markdown will be converted to plain text.templateexpects atemplateobject, orNone. These templates can be created in an interview file using thetemplatespecifier. The “subject” of the template, if provided, will be the first line of the message.taskexpects the name of a task. If this argument is provided, and if sending the text message is successful, the task will be marked as having been performed (i.e.,mark_task_as_performed()will be called). Alternatively, you can handle this in your own code, but you might find it convenient to let thesend_email()function handle it for you.task_persistent: if you set atask, you can optionally set the “persistence” of the task by setting this toTrueor a value like'user'. For more information, see the documentation for the task-related functions.attachmentsexpects a list ofDAFileobjects,DAFileListobjects,DAFileCollectionobjects, or ordinary URLs. If provided, the message will be an MMS message containing the attached files. No more than 10 attachments may be added. You can include:- Images generated by
signatureblocks (objects of classDAFile); - File uploads generated by including fields of
datatype: fileordatatype: filesin aquestion(objects of classDAFileList); - Documents generated by
attachmentsto aquestionfor which avariablewas provided (objects of classDAFileCollection).
- Images generated by
configindicates the section of thetwilioconfiguration that should be used when sending the text message. If you only have one Twilio phone number, you do not need to set this parameter. This will determine which Twilio phone number will be used to send the text.dry_runcan be set toTrueif you want to do a “dry run” of the SMS sending process. You would use this if you wanted to make sure that all of the variablessend_sms()needs are defined before you actually send the SMS message. The default isFalse.
When the recipients are Individuals or Persons, the
mobile_number attribute will be used, but only if it already exists.
Otherwise, the phone_number attribute will be used, and sought if it
is not already defined.
Note that Twilio expects the phone number to be expressed in E.164
format, which includes the country calling code (e.g., 1 for the
United States). However, users do not typically write phone numbers
in such a way. Therefore, the phonenumbers package is used to
convert phone numbers to E.164 based on the applicable country. If
an Individual or Person is the recipient, the country
attribute, if it exists, will be used to determine the country.
Otherwise, the get_country() function is used to determine the
applicable country. Your interview can use set_country() in
initial code to set a default country, or you can set a default on
a server level by setting the country configuration directive.
The country must be specified as a two-letter, capitalized
abbreviation (ISO 3166-1 alpha-2 format).
send_sms() returns False if an error prevented the message from
being sent; otherwise it returns True.
See the twilio configuration directive for information about how to configure that send_sms() will use.
get_sms_session()
When someone sends a text message to one of your Twilio numbers, the SMS interface is invoked. The interview session is tracked based on the user’s phone number and the Twilio number with which the user interacts.
The function get_sms_session() retrieves session information and
returns it in the form of a Python dictionary with the following
keys:
yaml_filename- the name of the interview; e.g.,docassemble.demo:data/questions/questions.yml.uid- the session IDsecret- the encryption key for decrypting the interview answersencrypted- aTrueorFalsevalue indicating whether the interview answers are encrypted.email- the e-mail address of the user. If the user is not authenticated, this isNone. Note that authentication of SMS users is only possible if the interview session is started withinitiate_sms_session().
The get_sms_session() functions takes an optional keyword argument
config, which indicates a section of the twilio configuration
that should be used. A single SMS user can have multiple sessions
with the SMS interface if there is
more than one twilio configuration directive.
initiate_sms_session()
The initiate_sms_session() function is used to bring someone into an
interview using the SMS interface.
In its simplest form, initiate_sms_session("202-555-1212") will send
an SMS message to 202-555-1212, where the body of the message is the
current question in the interview.
The following optional keyword arguments alter the way the function works:
yaml_filename- this controls which interview the SMS user will be placed into. Ifyaml_filenameis not specified, the current interview will be used.email- this controls the identity of the SMS user in user login system, which may affect the interview questions that the SMS user sees. Ifemailis not specified, the SMS user will have the same identity as the user who was using the interview when the call toinitiate_sms_session()was made.new- this controls whether the SMS user will join an ongoing interview session or start a fresh session. Set this toTrueif you want the SMS user to start a fresh session. Ifnewis not specified, the SMS user will join the session that was ongoing when the call toinitiate_sms_session()was made.send- this controls whether the invitation message should be sent or not. Ifsendis not specified, the message will be sent. Set this toFalseto suppress sending the message. IfsendisFalse, the SMS session will still be created. The fact that the session is created means that if an SMS message is received from the given phone number, the SMS user will receive a response as if the interview session had already been started. The user’s initial message will not be interpreted as a choice of an interview from thedispatchsection of thetwilioconfiguration.config- this controls which Twilio phone number is used for communication. You would only need to use this if you have more than more than onetwilioconfiguration directive set up in your configuration.
If you are not using new=True, note that there may be a delay
between the time the message is sent to the SMS user and the time
the SMS user sees the message and responds. The SMS user will
join the interview at whatever state the interview session is in at
the time the SMS user responds. docassemble does not make a
copy of the interview state when the call to initiate_sms_session()
is made.
Here is an example interview that solicits input through SMS.
mandatory: True
code: |
if interface() == 'sms':
how_many_apples
all_done_sms
if ok_to_initiate and session_initiated:
all_done_web
---
question: |
How many apples are there?
fields:
- no label: how_many_apples
datatype: integer
---
sets: all_done_sms
question: |
Thank you!
---
question: |
What phone number should be used?
fields:
Phone Number: phone_number
---
question: |
Ready to send a message to
${ phone_number }.
field: ok_to_initiate
---
code: |
initiate_sms_session(phone_number)
session_initiated = True
---
sets: all_done_web
question: |
All done.
subquestion: |
% if defined('how_many_apples'):
Visitor said there are ${ how_many_apples } apples.
% else:
We have not heard from the visitor yet.
% endif
buttons:
- Check: refreshterminate_sms_session()
The terminate_sms_session() function will terminate the current
session, if any, for a given phone number.
terminate_sms_session("202-555-1212")After the above code executes, then if a message is received from
202-555-1212, it will be treated as a selection of an interview from
the dispatch section of the twilio configuration. If the SMS
user had been in the middle of an interview session, the user will not
be able to get back to that session again.
Storing data
With Redis
If you do not know what a Redis server is, skip this section!
The background processes feature of docassemble depends on a Redis server being available. The server is also used to facilitate live chat.
Interview developers may want to make use of the Redis server for purposes of storing information across users of a particular interview, keeping usage statistics, or other purposes.
objects:
r: DARedis
---
mandatory: True
code: |
key = r.key('my_variable')
r.set(key, 'hello world')
---
mandatory: True
question: |
Value has been retrieved from
the redis server.
subquestion: |
The key is `${ key }`.
The value is "${ r.get(key).decode() }".To use the Redis server, use an objects section to create an
object of type DARedis. This object can now be used to
communicate with the redis server, much as though it had been created
by calling redis.StrictRedis().
With SQL
Since Redis is an in-memory database, it is not appropriate for long-term storage or for the storage of large amounts of data.
An alternative is to store data in SQL. docassemble provides
an object called DAStore that is similar to DARedis, except it
uses SQL instead of Redis, and it supports encryption.
objects:
- userdata: DAStore
- preferences: DAObject
---
code: |
if userdata.defined("prefs"):
preferences = userdata.get("prefs")
---
question: |
What is your favorite fruit?
fields:
- Fruit: preferences.favorite_fruit
---
mandatory: True
code: |
preferences.favorite_fruit
if not userdata.defined("prefs"):
userdata.set("prefs", preferences)
---
mandatory: True
code: |
final_screen
---
event: final_screen
question: All done
subquestion: |
Your favorite fruit is
${ userdata.get("prefs").favorite_fruit }.In the above example, the user’s preferences are stored in the
database using a key that is specific to the user. The first time the
user uses the interview, the user is asked for their favorite fruit.
If the user restarts the interview (which permanently erases the
interview answers), the user’s favorite fruit will be retrieved from
the DAStore, and it will not need to be asked of the user. The
object stored in the database is a DAObject, and the favorite
fruit is an attribute of that object. In the database, the object is
stored under key called prefs. This key is specific to the user, so
that each user will have their own personal prefs entry in the
database.
For more information, see the DAStore documentation.
write_record(), read_records(), and delete_record()
There are also three functions, write_record(), read_records(), and
delete_record(), for managing data in SQL. These functions are
useful when you want to store a list of one or more “records” under a
single “key.” Encryption is not used.
mandatory: True
code: |
write_record('fruit', favorite_fruit)
---
reconsider: True
code: |
fruit_summary = ''
records = read_records('fruit')
for id in records:
fruit_summary += "* " + str(records[id]) + "\n"
---
mandatory: True
question: |
Contents of database
subquestion: |
The following fruits have
been reported:
${ fruit_summary }When you call write_record(key, data),
the variable data is stored in a SQL database. The function returns
the integer unique ID for the record. The data variable can be any
type of data, such as a number, some text, an object, a
Python dictionary, or something else. The only limitation is that
the information in the variable needs to be able to be pickled.
When you call read_records(key), you will
retrieve all of the records that had been stored using that key.
The function returns a Python dictionary where the keys are integers
representing the unique ID of the record.
You can delete records by calling
delete_record(key, id) where key is the key under which the record
was saved and id is the unique ID integer of the record.
Note that all interviews on the server will have access to the data
stored with write_record(), and the data are not encrypted on the
server. It is important to choose your key names wisely because if
you use a simple name like mydata, another interview developer might
have chosen the same key, and then your data will become intermingled.
It is a good idea to include your interview package name in the key
names you choose.
docassemble will attempt to sanitize data you pass to
write_record() by converting any item that cannot be pickled to
None.
Example of using stored objects with write_record()
Suppose you have an interview that your user might complete several
times for different situations, but you do not want the user to have
to re-enter the same information more than once. You can use
read_records() and write_record() to accomplish this.
Here is an example:
metadata:
title: Side of the bed
---
code: |
user_key = 'workers_comp_user:' + user_info().email
---
objects:
- user: Individual
---
code: |
saved_records = read_records(user_key)
for id in saved_records:
user = saved_records[id]
---
mandatory: True
code: |
if not user_logged_in():
command('leave', url=url_of('login', next=interview_url()))
first_part_finished
user_info_saved
interview_finished
---
question: |
Thanks for all that information!
subquestion: |
We now know that your name is
${ user },
your favorite fruit is
${ user.favorite_fruit },
and you woke up on the
${ side_of_bed }
side of the bed this morning.
field: first_part_finished
---
question: |
What is your name?
fields:
- First name: user.name.first
- Last name: user.name.last
---
question: |
What is your favorite fruit?
fields:
- Fruit: user.favorite_fruit
---
question: |
On which side of the bed did you
wake up this morning, ${ user }?
field: side_of_bed
choices:
Right side: right
Wrong side: wrong
---
event: interview_finished
question: |
Ok, go eat some
${ user.favorite_fruit },
${ user }.
subquestion: |
Perhaps you will wake up on
the ${ side_of_bed } side of
the bed tomorrow, too.
buttons:
- Exit: leave
url: ${ url_of('dispatch') }
---
code: |
for id in read_records(user_key):
delete_record(user_key, id)
write_record(user_key, user)
set_parts(title=capitalize(side_of_bed) + " side of the bed")
session_tags().add(side_of_bed)
user_info_saved = TrueThe first time the user goes through the interview, the interview will ask for the user’s name and favorite fruit. The second time the user goes through the interview, the interview does not ask for the name and favorite fruit, because it already knows the information – even though the user’s second interview is a separate session with a separate, isolated set of interview answers.
The interview accomplishes this using write_record() and
read_records().
When the interview is done asking questions, it calls
write_record() to store the object user to SQL. It records this
information using a unique “key” that is based on the e-mail address
of the user (e.g., workers_comp_user:[email protected]). To get the
e-mail address of the user, the interview requires the user to log in,
and uses user_info().email to get the e-mail address.
Whenever the interview starts, the interview first checks to see if
anything has been stored under the unique “key.” If there is
something stored, then the user object is retrieved from storage.
If there is nothing stored, user is initialized as an object of type
Individual.
Note that the timing of when user is stored is important. The
write_record() function will store a “snapshot” of the object, so
if user is stored before the necessary information (name and
favorite fruit) have been gathered, then the interview will not work
as intended.
Here is the code that initializes the user object:
objects:
- user: Individual
---
code: |
saved_records = read_records(user_key)
for id in saved_records:
user = saved_records[id]Note that neither of these blocks is mandatory; when the interview
needs to know the definition of user, it will try the code block
first (because it is later in the YAML). If user is still
undefined, the interview will “fall back” to trying the objects
block, which will initialize a fresh object of class Individual.
The read_records() function always returns a Python dictionary,
because you can store more than one record under a single key. But in
this interview, we are only storing one record under the key
user_key.
The interview logic starts with forcing the user to log in:
mandatory: True
code: |
if not user_logged_in():
command('leave', url=url_of('login', next=interview_url()))
first_part_finished
user_info_saved
interview_finishedThe command() line redirects the user to the sign-in page, but
tells the sign-in page that when the user logs in, the user
should be directed back to the same interview.
The reference to user_info_saved before interview_finished ensures
that before the user sees the last screen of the interview, some code
is run that saves the user object to storage.
The code block that defines user_info_saved looks like this:
code: |
for id in read_records(user_key):
delete_record(user_key, id)
write_record(user_key, user)
set_parts(title=capitalize(side_of_bed) + " side of the bed")
session_tags().add(side_of_bed)
user_info_saved = TrueFirst, the code deletes any existing records under user_key, and
then stores the user object. This means that even if the interview
session started off by retrieving user from storage, it will save a
new copy of the user object to storage. Thus, the interview can
make changes to the user object if necessary, and those changes will
be saved.
This interview also uses set_parts() and session_tags() to
change the title and tags of the interview, so that when the user goes
to “My Interviews,” the user will see a different title and different
tags based on their interview answers. Using a technique like this
might help your users in case your users want to resume their
interview session.
Now, suppose you have a variety of interviews, all of which relate to the same topic (e.g., workers compensation). If any one of these interviews is the first interview that the user uses, you want the basic questions (name, favorite fruit) to be asked. And if the user launches another interview, you don’t want to re-ask those basic questions.
You can do this using interviews like the above, but each interview
would need to contain the same blocks that force the user to log in,
retrieves user from storage, saves user to storage at the end,
etc. It is inconvenient to maintain the same code in several
different files.
You can avoid this problem by using include. You can create a
“common” YAML file called wc_common.yml, which contains the
following:
objects:
- user: Individual
---
code: |
user_key = 'workers_comp_user:' + user_info().email
---
code: |
saved_records = read_records(user_key)
for id in saved_records:
user = saved_records[id]
---
initial: True
code: |
if not user_logged_in():
command('leave', url=url_of('login', next=interview_url()))
---
question: |
What is your name?
fields:
- First name: user.name.first
- Last name: user.name.last
---
question: |
What is your favorite fruit?
fields:
- Fruit: user.favorite_fruit
---
code: |
for id in read_records(user_key):
delete_record(user_key, id)
write_record(user_key, user)
user_info_saved = TrueThen your actual interview file will just incorporate this by
reference. For example, you could have a file called
wc_side_of_bed.yml, which looks like this:
metadata:
title: Side of the bed
---
include:
- wc_common.yml
---
mandatory: True
code: |
first_part_finished
user_info_saved
interview_tagged
interview_finished
---
question: |
Thanks for all that information!
subquestion: |
We now know that your name is
${ user },
your favorite fruit is
${ user.favorite_fruit },
and you woke up on the
${ side_of_bed }
side of the bed this morning.
field: first_part_finished
---
question: |
On which side of the bed did you
wake up this morning, ${ user }?
field: side_of_bed
choices:
Right side: right
Wrong side: wrong
---
event: interview_finished
question: |
Ok, go eat some
${ user.favorite_fruit },
${ user }.
subquestion: |
Perhaps you will wake up on
the ${ side_of_bed } side of
the bed tomorrow, too.
buttons:
- Exit: leave
url: ${ url_of('dispatch') }
---
code: |
set_parts(title=capitalize(side_of_bed) + " side of the bed")
session_tags().add(side_of_bed)
interview_tagged = TrueYou could then create other YAML files that follow the same pattern,
all of which include the wc_common.yml file. Any time you
wanted to change a “common” question, you would only need to make the
change in one place.
Storing interview answer snapshots in unencrypted JSON format in SQL
If you want to “run reports” on the interview answers of multiple
sessions, you can use store_variables_snapshot() in your interview
logic to save an unencrypted copy of the interview answers in JSON
format to a SQL table. If you use PostgreSQL, you can
conveniently run SQL queries on the contents of interview answers.
Using PostgreSQL syntax for working with JSON data, you can
extract, filter, and order by specific variables embedded in the
interview answers of sessions.
Here is an example of an interview that asks the user a question and
then saves the interview answers in JSON format to a SQL table. Then,
using a function analyze() that was defined in the
read_snapshot.py module, the final question of the interview reads
the interview answers of all sessions that have been completed on this
interview on the server and summarizes the results.
modules:
- .read_snapshot
---
mandatory: True
code: |
favorite_fruit
store_variables_snapshot()
final_screen
---
question: |
What is your favorite fruit?
fields:
- Fruit: favorite_fruit
---
event: final_screen
question: |
Your favorite fruit is
${ favorite_fruit }.
subquestion: |
Here is a summary of fruits
and how many people like them.
% for fruit, count in sorted(analyze().items(), key=lambda y: y[1], reverse=True):
* **${ fruit }**:
% if count == 1:
1 person
% else:
${ count } people
% endif
% endforThe contents of the read_snapshot.py module are as follows.
from docassemble.base.util import variables_snapshot_connect, user_info
__all__ = ['analyze']
def analyze():
with variables_snapshot_connect() as conn:
with conn.connection.cursor() as cur:
cur.execute("select data->>'favorite_fruit' from jsonstorage where filename='" + user_info().filename + "'")
counts = {}
for record in cur.fetchall():
fruit = record[0].lower()
if fruit not in counts:
counts[fruit] = 0
counts[fruit] += 1
return countsThe analyze() function imports the variables_snapshot_connect()
function from docassemble.base.util and calls it in order to get a
SQLAlchemy connection object (conn). The underlying connection
object is conn.connection, and conn.connection.cursor() returns a
cursor. If your database is PostgreSQL, this will be a psycopg2
connection object.
Note that variables_snapshot_connect() is not available for use
inside interview YAML the way store_variables_snapshot() is. If
you tried to call variables_snapshot_connect() from inside of a
code block, you would get an error. Always call
variables_snapshot_connect() from a function or method defined in a
Python module.
When using PostgreSQL, the data type used for the JSON data is
JSONB. This allows for the use of the special PostgreSQL
operators -> and ->> to efficiently probe inside the data
structure. For more information on how these operators work, see the
documentation for the JSONB data type.
Note that the JSON snapshots created by store_variables_snapshot()
are tied to the underlying interview session. When the session is
deleted, the snapshot is deleted. (However, see the discussion of
persistent below.)
If you call store_variables_snapshot() multiple times, each time you
will overwrite the stored JSON snapshot of the interview answers.
(However, see the discussion of key below.)
Note that the snapshot is a copy of the interview answers, not the interview answers themselves. The JSON snapshot does not automatically synchronize with the current state of the interview answers. In docassemble, the interview answers are stored in a Python-specific object format, not JSON; it is not possible for JSON to serve as the format for docassemble interview answers because docassemble allows interview answers to contain complex data structures containing Python objects and object references. The conversion from Python objects to JSON is one-way, and is a simplification; Python objects cannot be recreated from JSON.
Because of this, the store_variables_snapshot() is not as useful as
other data storage options for many applications. You should use
store_variables_snapshot() if you want to run SQL queries on
multiple sessions belonging to different users. You should use other
methods, such as DAStore, for storing reusable global data.
The store_variables_snapshot() accepts the optional keyword
parameters, key, persistent, include_internal, and data.
If you want to save multiple snapshots during the course of the
interview, you can set key when you call
store_variables_snapshot(). For example, you might want to save a
snapshot after the user completes an initial section of an interview,
and save another snapshot after the user completes the entire
interview. You could write:
mandatory: True
code: |
intro_section_completed
store_variables_snapshot(key='intro')
---
mandatory: True
code: |
final_section_completed
store_variables_snapshot(key='final')This will allow you to run queries on two populations of users: a
large population of users who started but may not have finished, and a
smaller population of users who finished. The key is similar to a
key in Redis; it uniquely identifies a snapshot within the interview
session.
If you do not want the interview snapshot (or snapshots) to be deleted
when the session is deleted, call
store_variables_snapshot(persistent=True). Note that this means
that if a user restarts an interview session, the user may have
multiple sessions in JSON data table.
By default, store_variables_snapshot() does not save the “internal”
portion of the interview answers; this is a data structure under the
_internal key that docassemble uses internally. (The data
structure is not documented and the design may change at any time, but
you are welcome to use it at your own risk.)
store_variables_snapshot() also does not store the nav variable,
which stores information about which sections have been visited. If
you want to include the _internal data and the nav varialbe in the
JSON snapshot, call store_variables_snapshot() with
include_internal=True.
store_variables_snapshot() can store something other than the
interview answers if you set the optional keyword parameter data.
You can set data to any Python data structure, and it will be
serialized to JSON and stored in place of the data structure
representing the interview answers.
While the example above shows how the JSON data table can be queried
from within an interview, you will probably find that it is easiest to
query the data tables from outside of docassemble. You can set up
your server’s db configuration to use an external SQL database,
and then query the jsonstorage table in that database using the
credentials for the docassemble SQL database. However, there are
many other tables in this database, and it may be preferable to use a
separate database for JSON snapshots. If you define a variables
snapshot db in your Configuration, a jsonstorage table will be
created in the referenced database, and store_variables_snapshot()
and variables_snapshot_connect() will use this database instead
of the default docassemble database.
The columns in the jsonstorage table are as follows.
id- a unique integer ID for the rowfilename- the YAML filename of the interviewkey- the session ID of the sessiondata- the JSON datatags- the value of thekeyyou passed tostore_variables_snapshot()(not to be confused with the columnkey)modtime- the last time the row was modifiedpersistent- whether the row should be preserved when the session is deleted.
Note that there is no API for querying the JSON data. The best way to access the data is by using a PostgreSQL client because it provides an extremely powerful and flexible query language.
Note that unlike DAStore, store_variables_snapshot() cannot use
server-side encryption. If the interview itself uses server-side
encryption, calling store_variables_snapshot() will effectively
defeat the purpose of server-side encryption by storing user data in a
way that would allow anyone with shell access on the server to read
the data.
Advanced SQL storage
Though the data are stored on a SQL server, you cannot use SQL queries
to retrieve data stored by write_record(); you can only use
read_records() to retrieve data.
If you want to use the full power of SQL in your interviews, you can write a module that does something like this:
from docassemble.base.util import get_config
import psycopg2
def get_conn():
dbconfig = get_config('db')
return psycopg2.connect(database=dbconfig.get('name'),
user=dbconfig.get('user'),
password=dbconfig.get('password'),
host=dbconfig.get('host'),
port=dbconfig.get('port'))
def some_function(id, thing):
conn = get_conn()
cur = conn.cursor()
cur.execute("update foo set bar=%s where id=%s", (thing, id))
conn.commit()
cur.close()This assumes the db configuration refers to a PostgreSQL
database. If you connect to the database with the credentials from
db, you have the power to create and drop tables.
Temporarily stashing encrypted data
The stash_data() and retrieve_stashed_data() functions can be used
to store encrypted data in Redis for a period of time.
The stash_data() function stores a Python dictionary. The
dictionary given to stash_data() can contain any pickle-able
Python objects in any structure. In this example, the user object is
stored.
(key, secret) = stash_data({'user': user}, expire=300)The key and secret are needed to retrieve and decrypt the
data later. The optional keyword parameter expire indicates that the
data should disappear after five minutes (300 seconds). If expire is
not provided, the default period is 90 days.
The retrieve_stashed_data() function takes the key and secret as
input and returns the Python dictionary that was stored.
stored_data = retrieve_stashed_data(key, secret)
if stored_data is not None:
set_variables(stored_data)If the data cannot be retrieved, retrieve_stashed_data() returns
None. This example uses the set_variables() function to set the
variable user in the interview answers.
retrieve_stashed_data() accepts the optional keyword parameter
delete, which indicates whether the data should be deleted after
being retrieved. The default is False. It is generally a good idea
to use delete=True whenever possible because it frees up space in
Redis.
retrieve_stashed_data() accepts the optional keyword parameter
refresh, which can be set to True or an integer number of seconds.
If refresh is True, then after the information is accessed, the
expiration date of the data stash will be reset to 90 days from the
current time. If refresh is set to an integer number of seconds,
then the expiration time is set to that number of seconds.
For API versions of these functions, see /api/stash_data and
/api/retrieve_stashed_data.
Functions for working with DOCX templates
include_docx_template()
The include_docx_template() function can be called from within a
DOCX template file in order to include the contents of another
DOCX file within the template being assembled.
mandatory: True
question: |
Here is your document.
attachment:
name: A document
filename: final_document
docx template file: main_document.docxThe file main_document.docx looks like this:
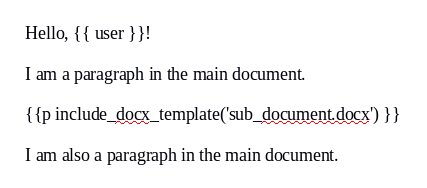
The file sub_document.docx looks like this:

Note that it is important to use the p form of Jinja2 markup, or
else the contents of the included document will not be visible. The
template text must also be by itself on a line, and the
include_docx_template() function must be by itself within a Jinja2
p tag, and not combined with the + operator with any other text.
The filename that you give to include_docx_template() must be a file
that exists in the templates folder of the current package. You can
also refer to templates in other packages using a full package
filename reference, such as
docassemble.demo:data/templates/sub_document.docx. You can also
give the function a DAFile, a DAFileList, a
DAFileCollection, or a DAStaticFile object.
The include_docx_template() function also accepts optional keyword
parameters. These values become variables that you can use in
Jinja2 inside the DOCX file you are including. This can be useful
if you have a “sub-document” that you want to include multiple times,
but you want to use different variable values each time you include
the “sub-document.”
Here is an example:
mandatory: True
question: |
Here is your document.
attachment:
name: A document
filename: final_document
docx template file: main_doc_params.docxThe file main_doc_params.docx looks like this:

The file sub_doc_params.docx looks like this:

In this example, the variables grantor, grantee, and stuff are
set by the keyword parameters of the include_docx_template()
function. Note that in your sub-document you can still refer to
ordinary interview variables in addition to variables created by
keyword parameters; in this example, the sub-document references the
variable planet, which is set by the interview.
The effect of including keyword parameters is to insert Jinja2 set
commands at the start of the included document. For example, the
first call to include_docx_template() might result in the following:
{%p set grantor = father %}
{%p set grantee = mother %}
{%p set stuff = 'toadstools' %}Nobody ever actually sees these set statements; they are inserted
and evaluated behind the scenes.
Note that if the values of any of your keyword arguments are objects
other than DAObjects, they will be converted to their repr()
representation before being included. This means that there may be
some objects that you cannot pass through to your sub-documents.
When a docx template file document contains a call to
include_docx_template(), the document is assembled in multiple
“passes.” On the first pass, all of the Jinja2 is evaluated. The
effect of include_docx_template() is to insert any set statements
based on keyword parameters, along the verbatim contents of the file.
Then, on the second pass, any remaining Jinja2 code is evaluated;
this would be any Jinja2 code contained in sub-documents, as well as
the set statements included by include_docx_template(). If any of
the sub-documents contain calls to include_docx_template(), a third
pass will be done, and so on, until the document is fully assembled.
(The number of passes is limited to 10 in order to protect against
accidentally creating an infinite loop of document inclusion.)
There is a special keyword parameter change_numbering that when set
to False will refrain from fixing up the numbering of lists in the
included documents. You should set change_numbering=False when your
included document only contains list items, and you want the list
items to merge into a list in the main document.
There is a special keyword parameter _use_jinja2 that when set to
False will prevent Jinja2 processing from taking place within the
subdocument.
As discussed above,
include_docx_template() needs to be used with {{p … }} because it returns the paragraphs from the included
document. If you would like to include “inline” text from a secondary
DOCX file, you can do so by setting the _inline keyword parameter.
You can create a DOCX file called (for example) statement.docx that
only contains one paragraph, and then include something like the
following in your main document:
I state the following: {{r include_docx_template(‘statement.docx’, _inline=True) }}`
Note the use of {{r; this is necessary because
when include_docx_template() is called with _inline=True, it
returns character-level content. (Similarly, when you use the
inline_markdown filter, you need to use {{r.)
When you use _inline=True, only the first paragraph of the included
document matters; other paragraphs will be ignored.
raw()
This function is only used in the context of an attachments block
that uses a docx template file and values are passed to the DOCX
template using the code or field code methods.
Normally, all values that you transfer to a DOCX template with code
or field code are converted so that they display appropriately in
your DOCX file. For example, if the value is a DAFile graphics
image, it will be displayed in the DOCX file as an image. Or, if the
value contains document markup codes that indicate line breaks,
these will display as actual line breaks in the DOCX file, rather
than as codes like [BR].
However, if your DOCX file uses advanced template features, such as
for loops, this conversion might cause problems for you. By passing a
value val as raw(val), you will ensure that the template sees the
original value of val, not a converted value.
For example, suppose you have a variable fruit_list that is defined
as a DAList with items ['apples', 'oranges'], and you pass it to
a DOCX template as follows.
event: document_shown
question: |
Here is the document.
attachment:
docx template file: letter_template.docx
field code:
list_of_fruit: fruit_listThis will work as intended if your template uses list_of_fruit in a
context like:
make sure to bring {{ list_of_fruit }} to the partyThis will result in:
make sure to bring apples and oranges to the party
When the DAList is converted to text, the .comma_and_list()
method is automatically applied to make the data structure
“presentable.”
However, suppose you wanted to write:
{%p for fruit in list_of_fruit: %}
Don't forget to bring {{ fruit }}!
{%p endfor %}In this case, the variable list_of_fruit is a literal piece of text,
apples and oranges. The for loop will loop over each character,
and you will get:
Don’t forget to bring a! Don’t forget to bring p! Don’t forget to bring p! Don’t forget to bring l!
and so on. That is certainly not what you want!
You can prevent the conversion of fruit_list into text by wrapping
it in the raw() function, as follows:
event: document_shown
question: |
Here is the document.
attachment:
docx template file: letter_template.docx
field code:
list_of_fruit: raw(fruit_list)Now, the resulting DOCX file will contain:
Don’t forget to bring apples! Don’t forget to bring oranges!
Note that another way to pass “raw” values to a DOCX template is to
use a list of raw field variables.
Moreover, the easiest way to pass “raw” values is to omit field,
field code, field variables, code, and raw field variables
entirely, so that your DOCX file is assembled using your full set
of interview variables.
assemble_docx()
The assemble_docx() function does what an attachment does, except
it is triggered by Python code and it does not create a DAFile in
the document storage.
This is an advanced function, so in the vast majority of
circumstances, you should instead use an attachments block.
The assemble_docx() takes a single positional parameter, which needs
to be a file. The format is flexible; it can be a DAFile or
related object, or a template reference like
'data/templates/mytemplate.docx'.
The function returns a path to a temporary file in DOCX format, representing the assembled document. This file needs to be processed right away, because it is not guaranteed to persist across HTTP requests.
It also takes the following optional keyword parameters:
fields: this can be set to a Python dictionary in which the keys are variable names and the values are the values of those variables. This allows you to superimpose particular variables on top of the interview answers for purposes of document assembly. The values are not saved in the interview answers. The keys can only be simple Python variable names (favorite_fruit,type_of_document), not indices (fruits[0],favorite['fruit']) or attributes (favorite_vegetable.color,apple.seeds).output_path: if you want the function to save a file to a particular path instead of returning a path to a temporary file, setoutput_pathto the path to which you wantassemble_docxto write.output_format: if you want the assembled document to be converted to PDF, setoutput_formatto'pdf'. If you want it assembled to Markdown, setoutput_formatto'md'.pdf_options: if you are settingoutput_formatto'pdf', you can also set options for the way the PDF conversion is conducted by settingpdf_optionsto a Python dictionary with one or more of the following keys:pdfa(boolean for whether PDF/A should be created,password(a password for securing the PDF),update_refs(if you want references to be updated in the DOCX file before conversion),tagged(if you want LibreOffice to produce a tagged PDF). For more information about these options, see the Documents section.return_content: if you want the contents of the file to be returned, instead of a file path, setreturn_contenttoTrue.
Here is an example of an interview that uses assemble_docx() in a
contract assembly interview. All of the clauses of the contract are
in the contract.docx DOCX template file, but they are written in
such a way that they can be extracted from the DOCX file using
assemble_docx() and converted into Markdown. Extracting clauses
in Markdown format is useful because:
- It allows you to manage your contract clauses as a list of paragraphs, separated from the logic about whether the clauses should be included in the contract or not.
- It allows you to draft your contract clauses in a DOCX file, which is the ideal format for writing, especially when formatting is used.
- It allows you to show the text of the contract clauses in the web browser, without needing to maintain the content for the contract clauses in more than one place.
- It allows you to give the user an opportunity to edit contract clauses during the interview and then insert the clauses into the DOCX file with formatting preserved (at least as far as the formatting translates to and from Markdown).
objects:
- markdown_clause: DADict
- edited_clause: DADict
---
code: |
markdown_clause[i] = assemble_docx('data/templates/contract.docx', fields={'clause': i}, output_format='md', return_content=True)
---
code: |
# This variable is set to None
# so that the .docx file does
# not assemble a single clause
# when it is assembled at the
# end.
clause = None
---
question: |
A contract
subquestion: |
You are agreeing to a contract
with me. Please continue.
continue button field: welcome_screen
---
question: The clauses
subquestion: |
The firstborn clause is:
${ quote_paragraphs(markdown_clause['firstborn']) }
The counterparts clause is:
${ quote_paragraphs(markdown_clause['counterparts']) }
continue button field: clauses_shown
---
question: |
Make any necessary changes to the ${ i } clause.
fields:
- no label: edited_clause[i]
default: ${ markdown_clause[i] }
input type: area
---
event: final_screen
question: |
Here is the contract.
attachment:
name: Contract
docx template file: contract.docxThe contract.docx DOCX template is used for two very different
purposes:
- Assembling a document containing a single clause.
- Assembling the contract itself.
The template uses the variable clause to determine which clause to
assemble, or whether to assemble the contract itself. In the
interview answers, clause is set to None, but the fields
parameter passed to assemble_docx() will override that value for
purposes of assembling a single clause.
The DOCX file uses the macro feature of Jinja2. The DOCX template
could be written without the use of macro definitions, but they are
useful so that if you want, you can insert clauses into the contract
without converting them to Markdown and back again.
Writing your own functions
There are two ways that you can write your own functions in docassemble.
The first way is to use the <%def></%def> feature of Mako in order
to use “functions” in your templates. These are not true
Python functions because they are based around Mako templates, but
they are similar to Python functions. The <%def></%def> feature
is documented on the Mako web site. docassemble’s def block
makes it easy to re-use def blocks in your interviews.
The second way, which is usually more elegant, is to write a
Python module containing a definition of a Python function, and
then include that module in your interview using the
modules block. This allows you to use your function both in
Mako templates and in code blocks.
Here is a brief tutorial on how to write a function plus_one() that
takes a number and returns the number plus one. For example,
plus_one(3) should return 4.
First, go to the Playground. (This requires that you have a developer account on the server.)
Then, go to the modules folder of the Playground.
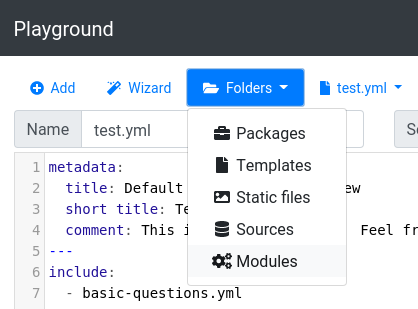
Then, type the following Python code into the text box:
def plus_one(number):
return number + 1The screen should look like this:
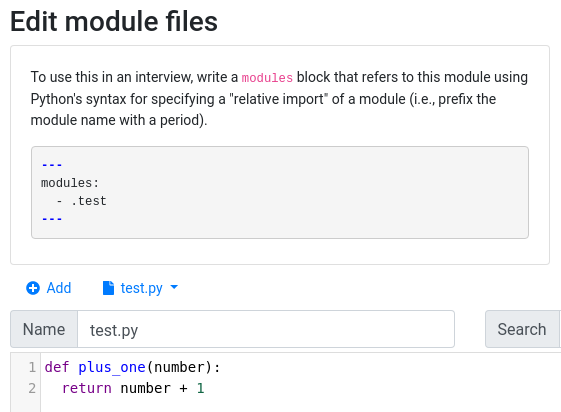
Then, press the “Save” button at the bottom of the screen. This will
create a Python module called test. (The text file is called
test.py in the modules folder because files containing Python code
have the extension .py in their file names. Within Python, you
refer to modules using the file name without the file extension.)
Then click the “Back to Playground” button to leave the “Modules” folder.
Now, you can use the plus_one() function in your interviews by
doing something like:
modules:
- .test
---
mandatory: True
question: |
The number after 3 is
${ plus_one(3) }.The . in front of the module name is Python’s way of referring to
modules that are in the current package. If you put your module
within a package called docassemble.simplemath, then you could
write, instead:
---
modules:
- docassemble.simplemath.test
---Note that the modules block has the same effect as:
from docassemble.simplemath.test import *This means that every name defined in the module file will be imported
into the interview answers. It is recommended that you always define
__all__ in your modules in order to limit what gets imported. You
should only import the names you actually need to use in your
interview YAML, such as the names of functions or classes.
__all__ = ['plus_one']
def plus_one(number):
return number + 1When docassemble pickles the interview answers, it will screen
out top-level names that refer to modules, functions, classes, and
other standard objects that are not able to be pickled. However,
custom objects like database connection objects will not be screened
out, so you may encounter pickle-related errors if you import too
much into your interview answers. Defining __all__ in every module
you write will protect against this.
Using a module is a good way to avoid pickling errors. Objects that
cannot be pickled can live in the namespace of the module (in which
case you should make sure you have an __all__ variable and make
sure it does not include the names of those objects). Objects that
cannot be pickled can also live in the namespace of a function. You
can call those functions from Python code in your YAML, but if so,
make sure that you do not save the result of the function call in a
variable in your interview answers, or else you will encounter a
pickling problem. Also note that if you define a class in your module
file and you want to keep instances of that class in your interview
answers, all of the attributes of the object instance need to be
pickleable. For example, you should not define a database connection
object as an attribute of an object, because in order to save the
object instance to the SQL database, docassemble would have to
pickle the database connection object, which is not possible.
A caveat regarding functions called from docx templates
If you write your own functions and they are called from markup inside
docx template file functions, beware that Jinja2 will send your
functions objects in place of arguments when the arguments are
undefined. For example, consider a a template that contains:
{%p if claiming_damages %}
You owe me {{ currency(compute_damages(amount_owed, demand_interest)) }}.
{% endif %}If demand_interest is undefined, and claiming_damages is true,
docassemble should seek out a block that defines amount_owed.
However, when Jinja2 sees that demand_interest is undefined, it
creates an object amount_owed of the class
jinja2.runtime.Undefined. If the only way compute_damages() acts
upon demand_interest is by evaluating the conditional expression
demand_interest is True, the expression will evaluate to False,
even though your interview has not actually defined
demand_interest.
This is different to how Python normally works. Normally, if the
code is compute_damages(amount_owed, demand_interest) and
demand_interest is undefined, a NameError is raised before
compute_damages() is even called.
The behavior of Jinja2 might not be a problem if your function does
arithmetic with the variable, calls unicode() on the variable or
does other things with the variable that access its “value”; in those
situations, an exception will be raised and docassemble will seek
out a definition of the undefined variable. However, if your function
uses try/except on the operations, this exception may not be
passed on to docassemble.
To get around this problem, you can include the following in your module file:
from docassemble.base.util import ensure_definitionThen at the start of every function that might be called from
Jinja2, run the function’s parameters through ensure_definition:
def compute_damages(amount_owed, demand_interest):
ensure_definition(amount_owed, demand_interest)
...The ensure_definition() function checks to see if each of its
arguments (both positional and named) are Undefined, and if so, it
raises an exception that will cause docassemble to seek out the
appropriate definition.
Example module: using Google Sheets
This section explains an example of something you might do with a module: integrate with Google Sheets.
In order for your site to communicate with Google Sheets, you will need to create an account on the Google Developers Console and create an “app.” Within this app, you will need to create a “service account.” (More information is available on the internet about what a “service account” is and how you create one.) When you create the service account, you will be provided with “credentials.” Download the JSON (not p12) credential file for the service account. Also make a note of the e-mail address of the service account.
Within the Google Developers Console, enable the Google Drive API and the Google Sheets API.
Go to Google Sheets, pick a spreadsheet that you want to use, and share it with the e-mail address of the service account, just like you were sharing it with a real person. (When you share the spreadsheet with this e-mail address, you will get an e-mail notification from Google about an undeliverable e-mail. This is because Google will try to e-mail the service account, but the service account does not actually have an e-mail account. To avoid getting this e-mail, click the “Advanced” link on the sharing screen and uncheck “Notify people.”)
Go to the Configuration and set the service account credentials
subdirective under the google directive. Set it to the contents of
the JSON file you downloaded. The directive will look something
like this:
google:
service account credentials: |
{
"type": "service_account",
"project_id": "redacted",
"private_key_id": "redacted",
"private_key": "-----BEGIN PRIVATE KEY-----REDACTED-----END PRIVATE KEY-----\n",
"client_email": "[email protected]",
"client_id": "redacted",
"auth_uri": "https://accounts.google.com/o/oauth2/auth",
"token_uri": "https://accounts.google.com/o/oauth2/token",
"auth_provider_x509_cert_url": "https://www.googleapis.com/oauth2/v1/certs",
"client_x509_cert_url": "https://www.googleapis.com/robot/v1/metadata/x509/googledocs%40redacted.iam.gserviceaccount.com"
}Next, go to the modules folder of the Playground and add a new
module called google_sheets.py. Set the contents to:
import gspread
import json
from docassemble.base.util import get_config
from oauth2client.service_account import ServiceAccountCredentials
credential_info = json.loads(get_config('google').get('service account credentials'), strict=False)
scope = ['https://spreadsheets.google.com/feeds',
'https://www.googleapis.com/auth/drive']
__all__ = ['read_sheet']
def read_sheet(sheet_name, worksheet_index):
creds = ServiceAccountCredentials.from_json_keyfile_dict(credential_info, scope)
client = gspread.authorize(creds)
sheet = client.open(sheet_name).get_worksheet(worksheet_index)
return sheet.get_all_records()You might need to change the reference to 'google' and 'service account credentials'
to something else if you used a different name for the JSON crededials
in your Configuration.
Go to the Playground and create an interview that references the
google_sheets module and the read_sheet function.
modules:
- .google_sheets
---
mandatory: True
question: |
List of countries
subquestion: |
% for row in read_sheet("Country Data", 0):
* ${ row['name'] } is at ${ row['longitude'] } longitude.
% endforIn this example, a Google Sheet called “Country Data” has been
shared with the “service account” that owns the credentials in the
service account credentials subdirective under the google
directive. The first worksheet in the spreadsheet (index 0) contains
a table with headings for name and longitude, among other columns.
The read_sheet function returns a list of dictionaries representing
the contents of the table.
For more information on using Google Sheets from Python, see the documentation for the gspread module.
Example module: storing data in a Google Sheet
The following example interview extends the system developed in the previous section by adding functionality for writing data to the worksheet. This interview asks the interviewee some questions and then stores the results in a Google Sheet, much like Google Forms would.
modules:
- .google_sheets
---
mandatory: True
code: |
data_stored_in_google_sheet
final_screen_shown
---
code: |
append_to_sheet('Fruits and veggies', [user_name, favorite_fruit, favorite_vegetable])
data_stored_in_google_sheet = True
---
event: final_screen_shown
question: |
Thank you for your input!
subquestion: |
% if favorite_vegetable in ('turnips', 'brussel sprouts'):
Although I disagree with your
vegetable preferences!
% endif
---
question: |
What is your first name?
subquestion: |
Note: This interview will store
your answers in a public Google
Sheet.
fields:
- Name: user_name
---
question: |
What is your favorite fruit?
fields:
- Fruit: favorite_fruit
---
question: |
What is your favorite vegetable?
fields:
- Vegetable: favorite_vegetableThis interview uses a Google Sheet called Fruits and veggies (you
can view it at that link), which has been shared with the “service
account” referenced in the service account credentials subdirective
under the google directive in the Configuration on the
demo.docassemble.org server.
You can try out this interview and then look at the Fruits and veggies spreadsheet to see your answers along with the answers of other people who have tested the interview.
There is a single mandatory block in this interview: a code
block that first requires a definition of
data_stored_in_google_sheet, and then seeks a definition of
final_screen_shown.
The variable data_stored_in_google_sheet is defined by a code
block that calls append_to_sheet(), which is a function defined in
the google_sheets module. This module is in the same Python
package as the interview (docassemble.demo). (The google_sheets
module is based on the Python module described in the previous
section.)
The append_to_sheet() function is very similar to the read_sheet()
function described in the previous section.
def append_to_sheet(sheet_name, vals, worksheet_index=0):
creds = ServiceAccountCredentials.from_json_keyfile_dict(credential_info, scope)
client = gspread.authorize(creds)
sheet = client.open(sheet_name).get_worksheet(worksheet_index)
sheet.append_row(vals)There is a handy method in gspread called append_row(), which adds
a row to the end of a spreadsheet. If you use a method like this
yourself, please note in Google Sheets, spreadsheets by default have
several hundred rows, so if you append data to them, you might not see
the data that you have appended unless you scroll all the way down.
It is recommended that you delete all of these extraneous rows before
you use gspread’s append_row() method to write to a spreadsheet.
Javascript functions
If you know how to program in JavaScript, you can include
browser-side code in your interviews using script, html, and
css elements within a fields block, or you can put
JavaScript and CSS static files in your packages
and bring them into your interview using the javascript and
css specifiers within a
features block.
The following JavaScript functions are available for your use in your JavaScript code.
flash() JavaScript function
The flash() function displays a notification at the top of the
screen, using the standard Bootstrap notification style.
mandatory: True
decoration: coins
question: |
The interview is complete.
script: |
<script>
flash("Hello, user!")
flash("Lookout, user!", "danger")
</script>The first parameter is the message itself, the second parameter is the optional priority, and the third parameter is an optional true/false value indicating whether the existing messages should be removed before the new message is displayed.
The available priorities are:
If no priority is supplied, 'info' is used.
The success message is special because it automatically disappears
after three seconds.
If you only want to clear the messages, you can run
flash(null, null, true).
You can also access this function under the name da_flash(), which
can be useful if you are embedding docassemble and there is a name
conflict.
val() JavaScript function
If you need the value of one of the HTML inputs on the screen, you can
call val(), passing as the sole parameter the variable name of the
field as a string. The variable name must be written exactly as it
appears in the underlying question.
question: |
What do you want for
dessert<span id="the_dessert"></span>?
fields:
- Dessert: dessert
- html: |
<a href="#" id="show_me" class="btn btn-primary">Eat it</a>
script: |
<script>
$("#show_me").click(function(){
$("#the_dessert").html(" besides " + val('dessert'));
return false;
});
</script>This function is essential for using the js show if feature.
Note that val() only works with fields that exist on the screen; the
JavaScript environment is not aware of the Python environment. If
you want to pass variable values from Python to JavaScript, see the
recipe on the topic.
If you have a datatype: checkboxes field where the variable name is
favorite_fruits and the choices are apple, orange, and peach, then:
val("favorite_fruits['apple']")will returntrueorfalsedepending on whether the checkbox is checked.val("favorite_fruits")will return anArraywhere the items are the strings"apple","orange", etc., depending on which items were selected.val("favorite_fruits[nota]")will returntrueorfalsedepending on whether the “None of the above” checkbox is checked.val("favorite_fruits[aota]")will returntrueorfalsedepending on whether the “All of the above” checkbox is checked.
If you call val() on a field with a datatype of yesno, noyes,
yesnoradio, or noyesradio, the function will return null (if no
selection has been made), true, false.
If you call val() on a field with a datatype of yesnomaybe or
noyesmaybe, the result is the same except that if the “I don’t know”
choice is selected, the function will return "None".
The val() function returns null if the field for the given
variable is disabled or non-existent.
You can also access this function under the name da_val(), which can
be useful if you are embedding docassemble and there is a name
conflict.
getField() JavaScript function
The getField() function is similar to val(), except that instead
of returning the value of the input element, it returns the element
itself.
question: |
What do you want for
dessert<span id="the_dessert"></span>?
fields:
- Dessert: dessert
- html: |
<a href="#" id="show_me" class="btn btn-primary">Eat it</a>
script: |
<script>
$("#show_me").click(function(){
$("#the_dessert").html(" besides " + getField('dessert').value);
return false;
});
</script>If a field consists of multiple radio buttons or checkboxes,
getField() returns the <fieldset> element that contains the
input elements.
The getField() function returns null if the field for the given
variable is disabled.
You can also access this function under the name daGetField(), which
can be useful if you are embedding docassemble and there is a name
conflict.
setField() JavaScript function
The setField() function sets the value of a field. The first
parameter is the the variable name of the field, as a string. The
second parameter is the value that the variable should have. The
variable name must be written exactly as it appears in the underlying
question.
question: |
What groceries should we buy for
tomorrow's breakfast?
subquestion: |
<a id="decide" href="#" class="btn btn-sm btn-primary">Decide for me</a>
fields:
- Cold cereal: cold_cereal
choices:
- Lucky Charms
- Cheerios
- Froot Loops
- Corn Flakes
- Hot cereal: hot_cereal
input type: radio
choices:
- Oatmeal
- Cream of wheat
- Bran
- Juice: juice_varieties
datatype: checkboxes
choices:
- Apple
- Orange
- Grapefruit
- Other: other_groceries
script: |
<script>
$("#decide").click(function(){
setField("cold_cereal", "Lucky Charms");
setField("hot_cereal", "Cream of wheat");
setField("juice_varieties['Apple']", true);
setField("juice_varieties['Orange']", true);
setField("juice_varieties['Grapefruit']", false);
setField("other_groceries", "Bread and jam");
return false;
});
</script>If you have a datatype: checkboxes field where the variable name is
favorite_fruits and the choices are apple, orange, and peach,
then:
setField("favorite_fruits['apple']", true)will check theapplecheckbox.setField("favorite_fruits", ['apple', 'orange'])will check theappleandorangecheckboxes.setField("favorite_fruits[nota]", true)will check the “None of the above” checkbox.setField("favorite_fruits[aota]", true)will check the “All of the above” checkbox.
You can also access this function under the name daSetField(), which
can be useful if you are embedding docassemble and there is a name
conflict.
getFields() JavaScript function
The getFields() function returns an array of names of the fields on
the screen that can be used with val(), getField(), and
setField().
question: |
Tell me about your musical tastes.
fields:
- Best band ever: best_band
- Best singer ever: best_singer
- Best composer ever: best_composer
- Best songwriter ever: best_songwriter
- html: |
<a href="#" id="decide_for_me" class="btn btn-success">Decide for me</a>
script: |
<script>
$("#decide_for_me").click(function(){
var fields = getFields();
for (var i = 0; i < fields.length; ++i){
setField(fields[i], 'Carly Simon');
}
return false;
});
</script>
---
mandatory: True
question: |
You like ${ comma_and_list(set([best_band, best_singer, best_composer, best_songwriter])) }.If you have a datatype: checkboxes field where the variable name is
favorite_fruits and the choices are apple, orange, and peach,
then getFields() will return favorite_fruits,
favorite_fruits["apple"], favorite_fruits["orange"], etc., but it
will not return favorite_fruits[nota] or favorite_fruits[aota].
You can also access this function under the name daGetFields(), which
can be useful if you are embedding docassemble and there is a name
conflict.
url_action() JavaScript function
The url_action() function, like its Python namesake,
returns a URL that will run a particular action in the interview. The
first parameter is the action to run, and the second
parameter is an object containing the arguments to provide to the
action (to be read with action_argument()), and the third
(optional) parameter is a boolean value representing whether the
action should cause any pending actions to be terminated (the
default is false).
mandatory: True
code: |
dessert = "cod liver oil"
---
mandatory: True
question: |
Your dessert is ${ dessert }.
subquestion: |
If you want, you can
<a id="choose">choose something tastier</a>.
script: |
<script>
$("#choose").attr('href', url_action('myaction', {fruit: 'apple'}));
</script>
---
event: myaction
code: |
fruit = action_argument('fruit')
dessert = fruit + " pie"You can also access this function under the name da_url_action(),
which can be useful if you are embedding docassemble and there is
a name conflict.
action_perform() JavaScript function
The action_perform() function is like
url_action(), except that instead of returning a
URL that would run the action if accessed, it actually causes the
user’s web browser to run the action.
The JavaScript function takes three arguments:
- The action to take. This corresponds with the name of an
eventin your interview. - An object containing arguments to pass to the action. In your
interview, you can use the
action_argument()function to read these values. - (optional) A boolean value representing whether the action should
cause any pending actions to be terminated. The default is
false.
You can also access this function under the name
da_action_perform(), which can be useful if you are embedding
docassemble and there is a name conflict.
action_call() JavaScript function
The action_call() function is like url_action(),
except it makes an Ajax call to the URL and runs a callback function
when the server responds to the request. In combination with
json_response(), this can allow you to write JavaScript code
that interacts with “APIs” within your interview.
The JavaScript function takes three required and two optional arguments:
- The action to take. This corresponds with the name of an
eventin your interview. - An object containing arguments to pass to the action. In your
interview, you can use the
action_argument()function to read these values. - A callback function that will be run when the Ajax call returns.
This function takes a single argument (
datain this example), which is the return value ofjson_response(). - (optional) A boolean value representing whether the action should
cause any pending actions to be terminated. The default is
false. The keyword name of this parameter isforgetPrior. - (optional) A boolean value representing whether the action should
be processed in read-only mode. If true, then the action is
processed and any changes to the interview answers will not be
saved. In addition, while the action is processing, other
concurrent processes will be able to access the interview
answers. The default is
false. The keyword name of this parameter isreadOnly.
mandatory: True
question: |
The pie
subquestion: |
<button id="run" class="btn btn-primary">Run</button>
<span id="resultsArea"></span>
script: |
<script>
$("#run").click(function(){
action_call('myaction', {fruit: 'apple'}, function(data){
$("#resultsArea").html("The pie is called " + data.pie + ".")
});
});
</script>
---
event: myaction
code: |
fruit = action_argument('fruit')
dessert = fruit + " pie"
json_response(dict(pie=dessert))This example takes advantage of the CSS classes btn and
btn-primary that are available in Bootstrap. See the
Bootstrap documentation for more information about using these
classes.
Note that Ajax interactions with the interview are possible without
writing any JavaScript code; see the check in feature.
You can also access this function under the name da_action_call(),
which can be useful if you are embedding docassemble and there is
a name conflict.
get_interview_variables() JavaScript function
If you would like to work with all of the variables in the interview
in your JavaScript code, you can do so with the
get_interview_variables() function, which sends an Ajax call to
the server to retrieve the contents of the interview session dictionary.
The function takes a single argument, which is the callback function. The callback function is given one parameter, which is an object having the following attributes:
success: this will beTrueif the call succeeds,Falseotherwise.variables: this will be an object containing the interview variables in the format produced byall_variables().i: the current interview YAML file.uid: the current session ID.encrypted: whether the interview session dictionary is encrypted.steps: the number of steps taken so far in the interview.
var the_vars;
get_interview_variables(function(data){
if (data.success){
the_vars = data.variables;
console.log("The current role is " + the_vars['role']);
}
});You can also access this function under the name
da_get_interview_variables(), which can be useful if you are
embedding docassemble and there is a name conflict.
Running Javascript at page load time
If you have JavaScript code in a .js file that you load with the
javascript feature, but you need that code to run when a screen
loads, it is necessary to wrap the code in a daPageLoad trigger.
$(document).on('daPageLoad', function(){
console.log("The screen is loaded");
});This is because the docassemble front end is a “single page
application.” When the user navigates from screen to screen, the whole
page is not reloaded; rather, an Ajax request is sent and the DOM is
redrawn. Thus, the javascript file will only executed on the first
page load, or when the user presses the refresh button. The
daPageLoad event is triggered whenever the user arrives at a new
screen.
Note that you should only attach a daPageLoad listener from a
javascript file, not from a script.

