How docassemble uses objects
Python allows object-oriented programming and so does docassemble.
Object-oriented programming can seem complicated at first, but it actually makes programming much easier. For an easy-to-read introduction to object-oriented programming, see Object-oriented Programming for Document Assembly Developers by Quinten Steenhuis.
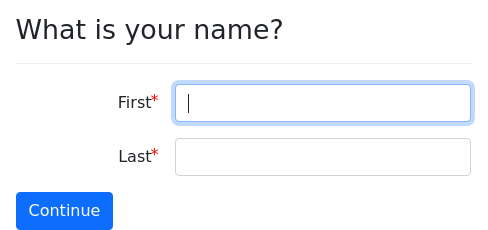
Here is a non-object-oriented way of saying hello to the user by name:
question: What is your name?
fields:
  - First: user_first_name
  - Last: user_last_name
---
question: |
  Hello, ${ user_first_name } ${ user_last_name }!
mandatory: TrueA better way is to define user as a docassemble object,
Individual.
objects:
  - user: Individual
---
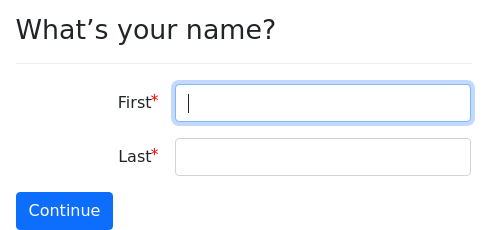
question: |
  What's your name?
fields:
  - First: user.name.first
  - Last: user.name.last
---
question: |
  Hello, ${ user }!
mandatory: TrueAs explained in the fields section, variable names cannot contain
any punctuation other than the underscore. So while user_first_name
is a valid variable name, user.name.first must be referring to
something different. Periods in Python are used to refer to the
“attributes” of “objects.”
An object is a special type of variable. Rather than being a piece of
text, like user_first_name is, the variable user is an “object”
that is an “instance” of the “class” known as Individual.
Using objects in docassemble requires a little bit of setup using
initial blocks. The objects block declares that user is an
instance of the class Individual.
Objects have “attributes.” In the above example, name is an
attribute of the object user. And name is itself an object (it is
an instance of the class IndividualName, though you would need to
look at the source code to know that) with attributes first and
last. The attributes first and last are not objects, but rather
pieces of text. Anything before a . is an object, and anything
after the . is an attribute of the object.
Objects also have “methods,” which are functions that return a value
based on the attributes of the object. For example,
user.age_in_years() will return the current age of the user based
on the date defined in the attribute user.birthdate:
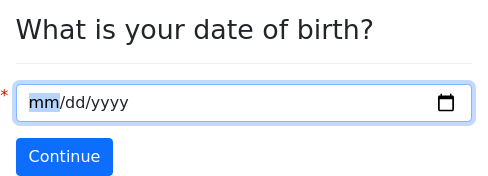
question: |
  What is your date of birth?
fields:
  - no label: user.birthdate
    datatype: date
---
question: |
  You are ${ user.age_in_years() }
  years old.
mandatory: TrueMethods are similar to attributes in that they are written with a .
before them. The difference is that they run code to produce a value,
rather than simply accessing a stored value. You can tell by the
presence of parentheses whether a method is being used.
Using objects in your interviews has a number of advantages over using plain variables.
The first advantage is that you can write
generic object questions. (See modifiers for documentation of
the generic object feature.)
For example, if you need to collect the phone numbers of three people,
the grantor, the grantee, and the trustee, you don’t have to
write separate questions for grantor.phone_number,
grantee.phone_number, and trustee.phone_number. You can write one
question to collect x.phone_number, where x is a “generic object”
that acts as a stand-in for any object of type Individual.
objects:
  - grantor: Individual
  - grantee: Individual
  - trustee: Individual
---
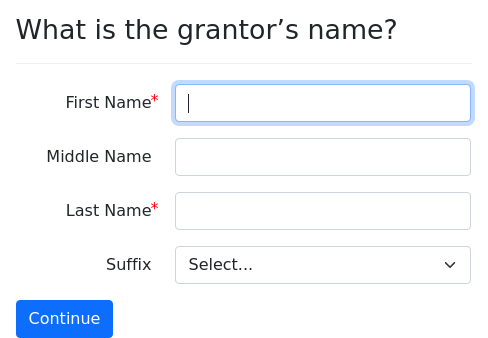
generic object: Individual
question: |
  What is
  ${ x.object_possessive('name') }?
fields:
  - First Name: x.name.first
    default: ${ x.first_name_hint() }
  - Middle Name: x.name.middle
    required: False
  - Last Name: x.name.last
    default: ${ x.last_name_hint() }
  - Suffix: x.name.suffix
    required: False
    code: |
name_suffix()Any time docassemble needs to know the phone number of an
Individual, this question will allow it to ask the appropriate question.
In the question text above, possessive() is a “method” that you can
use on any instance of the Individual class. If trustee’s name is
Fred Smith, trustee.possessive('phone number') returns “Fred Smith’s
phone number.” The method is pretty smart; user.possessive('phone
number') will return “your phone number.”
Using objects also allows you to have different variables that refer
to the exact same thing. For example, if user is already defined as
an object and you run this code:
trustee = userthen you will define the variable trustee as being equivalent to the
user object. trustee.name.first will always return the same thing
as user.name.first, and trustee.phone_number will always return
the same thing as user.phone_number. In addition,
trustee.possessive('phone number') will return “your phone number.”
You can write code that checks for the equivalence of objects, using
the is operator:
mandatory: True
question: |
  % if user is trustee:
  As the trustee of the estate, you need to understand that it is
  your fiduciary duty to safeguard the assets of the estate.
  % elif user is grantee:
  You are the grantee, which means that ${ trustee } is required to
  safeguard the assets of the estate on your behalf.
  % else:
  ${ trustee } will safeguard the assets of the estate on behalf of
  ${ grantee }.
% endifObject methods allow you to have a standard way of expressing
information even though the methods used to gather the information may
vary depending on the circumstances. For example, the
age_in_years() method, discussed above, first looks to see if the
attribute age is defined, and if so will return that instead of
asking for the birthdate attribute:
objects:
  - user: Individual
---
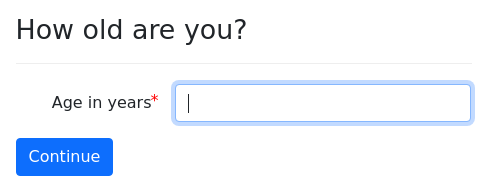
question: |
  How old are you?
fields:
  - Age in years: user.age
    datatype: number
---
mandatory: True
code: |
  need(user.age)
---
mandatory: True
question: |
You are ${ user.age_in_years() } years old.Although objects are a fairly complicated concept, as you can see, they allow you to write code that looks much like plain English.
In part, this is because objects allow you to do complicated things in
an implicit way. For example, writing ${ grantee } in a Mako
template will return the name of the grantee. The interview
implicitly calls the method __str()__ on grantee.
grantee.__str()__ in turn calls grantee.name.full(), which strings
together the grantee’s full name from its constituent parts
(name.first, name.middle, name.last, and name.suffix), all but
the first of which are optional and will not be included if they are
not defined.
Note that object methods may depend upon particular attributes of
objects being defined. If an attribute is needed but not defined,
docassemble will go looking for a question or code block that
defines the attribute. For example, if you write this in a question:
Remember that ${ trustee.possessive('phone number') } is
${ trustee.phone_number }.
then in order to ask the question, docassemble may ask you for the
trustee’s name (so it can say “Remember that John Smith’s phone number
is …”), and then ask for the trustee’s phone_number if it is not
already defined.
Standard docassemble classes
The classes in this section are automatically available for use in docassemble interviews.
When you use objects from non-standard packages, you will need to
include a modules block to import the names from the package into
your interview, so that you can use the objects that are available
from that package.
Behind the scenes, the classes described in this section are part of
the docassemble.base.util module. By default, a docassemble
interview will effectively add this to the top of your YAML file:
modules:
  - docassemble.base.util
You can turn this off by setting suppress loading util to True.
If you are writing a Python module, you will need to manually import
the class names from the docassemble.base.util module. For
example, if you want to use the class Individual, you would add
this to the top of your Python module file:
from docassemble.base.util import IndividualDAList
A DAList acts like an ordinary Python list, except that
docassemble can ask questions to define items of the list.
Here is a simple “Mad Libs” interview that uses DALists to keep
track of words:
objects:
  - adjective: DAList
  - noun: DAList
  - person: DAList
  - place: DAList
---
mandatory: True
question: A funny story
subquestion: |
  ${ person[0] } went to ${ place[0] }
  to buy
  ${ indefinite_article(noun[0]) }.

  At the ${ place[0] }, there was
  ${ indefinite_article(adjective[0])}
  ${ noun[1] }, which tried to zap
  ${ person[0] }.

  But luckily, ${ person[1] } came out
  of the back room just in time and
  lunged at the ${ noun[1] }, thereby
  saving the day.
buttons:
  - Do it again: restart
---
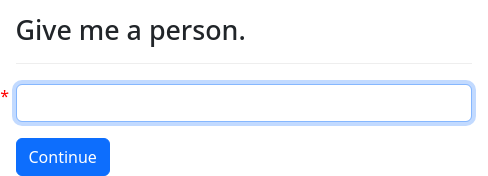
generic object: DAList
question: |
  % if i == 0:
  Give me
  ${ indefinite_article(x.object_name()) }.
  % else:
  Give me another ${ x.object_name() }.
  % endif
fields:
- no label: x[i]The variable i is special. When the interview encounters
person[0] and sees that it is undefined, it will go searching for a
question that offers to define person[0]. If it does not find that,
it will generalize and look for a question that offers to define
person[i]. If that is not found, it will generalize further and
look for a question that offers to define x[i]. Thus, the one
generic object question, which defines x[i] where x is a
DAList, will ask all of the questions in the interview.
For another example, suppose you want to work with a list of
prospective recipients of an e-mail. You could define recipient as
a DAList containing five Individuals
objects:
  - recipient: DAList
  - trustee: Individual
  - beneficiary: Individual
  - grantor: Individual
---
mandatory: True
code: |
  recipient.clear()
  recipient.append(trustee)
  recipient.append(beneficiary)
  recipient.append(grantor)
  recipient.appendObject(Individual)
  recipient.appendObject(Individual)
  recipient.gathered = True
---
mandatory: True
question: The recipients
subquestion: |
  % for person in recipient:
  ${ person } is a recipient.
  % endfor
---
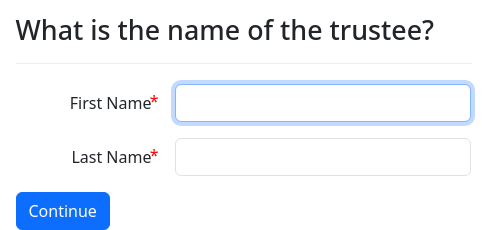
generic object: Individual
question: |
  What is the name of the ${ x.object_name() }?
fields:
  - First Name: x.name.first
  - Last Name: x.name.last
---
generic object: Individual
question: |
  The ${ ordinal(i) } ${ x.object_name() } must have a name.  What is it?
fields:
  - First Name: x[i].name.first
- Last Name: x[i].name.lastThis will result in the following five questions being asked:
- What is the name of the trustee?
- What is the name of the beneficiary?
- What is the name of the grantor?
- What is the name of the fourth recipient?
- What is the name of the fifth recipient?
The DAList operates like a list
in Python, but it also has some special methods. When adding a new
item to the list, you should use the docassemble-specific
appendObject() method. This method is similar to the
initializeAttribute() method we discussed earlier. Running
recipient.appendObject(Individual) creates a new object of the class
Individual and adds it to the list. The .appendObject() method
returns the object it creates. In the example above, the
first such object is the fourth item in the list, which means that the
intrinsic name of the new object is recipient[3]. The result of
using() can be used in place of the name of a class.used as the
second parameter.
A DAList can be given a default object type, so that
appendObject() can be called without an argument. This default
object type is controlled by the .objectFunction attribute. For
example, when a PartyList object is created, the .objectFunction
attribute is set to Person.
If you want greater control over the way the questions are asked, you
could add a generic object question that is specific to the
recipients that were added with appendObject(). For example:
generic object: DAList
question: |
  The ${ ordinal(i) } ${ x.object_name() } must have a name.  What is it?
fields:
  - First Name: x[i].name.first
  - Last Name: x[i].name.last
The names of the fourth and fifth recipients are capable of being
asked by this question, since the pattern x[i] (where x[i] is an
Individual) matches the intrinsic names recipient[3] and
recipient[4]. Since the other generic object question, which
matches x (where x is an DAList) also matches recipient[3]
and recipient[4], the order in which you list the questions in the
YAML file will determine which one is chosen. Later-appearing questions
take precedence, so you would need to place the second generic
object question somewhere after the first generic object question
in order for it to be chosen.
Other methods available on a DAList are:
append(item_to_append)- addsitem_to_appendto the end of the list. Just like the Python list method of the same name. It takes an optional keyword argumentset_instance_name. Ifset_instance_nameisTrue, then the object’s intrinsic name will be changed to that of a member of the list (e.g.,my_list[2]). Ifset_instance_nameisFalse(the default), then the object’s instance name will not be changed.clear()- makes the list empty.sort()- reorders the elements of the list, saves the reordered items, runshook_after_gather(), and returns the object. If you pass keyword parameters tosort(), those parameters will be passed directly to Python’ssorted()function.
objects:
building: DAList.using(object_type=Thing, minimum_number=2)sort_elements()- acts likesort()but does not cause the list to be gathered.complete_elements()- returns the subset of elements in the list that are “complete.” This is useful when you have a list of objects, and some objects are still in a nascent state, and you only want to use the objects that are “complete.” (See the discussion of.complete_attributebelow.)gathered_and_complete()- this effectively re-runs the gathering logic on the list to make sure that the list is “complete.” This method is run automatically when editing a list item using atable. Ifcomplete_attributeis set to'complete', this method will reset the “completeness” of each item before re-running the gathering logic.gathering_started()- this returnsTrueif the gathering process has started, or is complete; otherwise it returnsFalse.set_object_type()- when you use Python code to define theobject_typeattribute, call.set_object_type()instead of simply setting theobject_typeattribute..set_object_type()takes a single parameter, which can be the name of the class or a class name modified by.using().extend(extension_list)- adds the items in theextension_listto the end of the list. Just like the Python list method of the same name.index()- given an item that exists in the list, returns the index number at which the item can be found.pop()- removes an item from the list. Just like the Python list method of the same name.insert()- inserts an item into the list. Just like the Python list method of the same name.reverse()- reverses the order of elements in the list, runshook_after_gather(), and returns the object. Just like the Python list method of the same name.count()- returns the number of times a given item appears in the list. Just like the Python list method of the same name.first()- returns the first item of the list; error triggered if list is empty.last()- returns the last item of the list; error triggered if list is empty.item(idx)- iffruitis aDAList,fruit.item(2)is equivalent tofruit[2], except that iffruitdoes not have an item2, the result will be empty text. This is a helpful method in some contexts, such as fillable PDF forms. Empty text will also result if you try to use attributes on the result, sofruit.item(2).seedsorfruit.item(2).total_value()will also result in empty text.
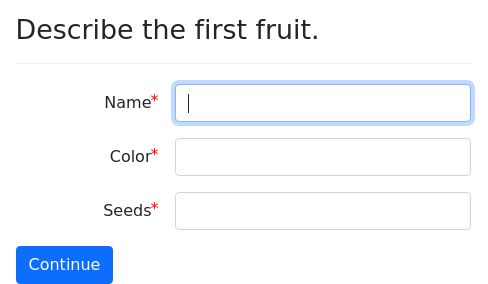
question: |
Describe the ${ ordinal(i) } fruit.
fields:
- Name: fruit[i].name
- Color: fruit[i].color
- Seeds: fruit[i].seeds
datatype: integer
---
question: |
Are there any more fruit?
yesno: fruit.there_is_another
---
mandatory: True
question: |
Description of ten fruits.
subquestion: |
% for index in range(10):
The name of the ${ ordinal(index) }
fruit is ${ fruit.item(index).name }.
It is ${ fruit.item(index).color }
and it has
${ fruit.item(index).seeds } seeds.
% endfor-
item_name(idx)- returns the variable name for an item, given the item. For example,mylist.item_name(0)returns'mylist[0]'. This can be useful when calling functions likeforce_ask()andreconsider(). -
delitem(idx, ...)- Deletes one or more items by index number. For example,mylist.delitem(4, 5)deletes the fifth and sixth items from the list. does_verb(verb)- like theverb_present()function, except that it uses the singular or plural form depending on whether the list has more than one item or not.did_verb(verb)- like theverb_past()function, except that it uses the singular or plural form depending on whether the list has more than one item or not.as_singular_noun()- if the variable name iscase.plaintiff, returnsplaintiff; if the variable name isapplicant, returnsapplicant.as_noun()- if the variable name iscase.plaintiff, returnsplaintiffsorplaintiffdepending on the number of items in the list; if the variable name isapplicant, returnsapplicantsorapplicantdepending on the number of items in the list. You can also give this function any arbitrary noun and it will pluralize it or singularize it depending on whether the number of items in the list is more than one. E.g.,client.child.as_noun('kid')will return'kid'or'kids'.number()- returns the total number of items in the list. If necessary it will trigger questions that ask for all of the items of the list to be populated.number_gathered()- likenumber(), except it will not require that the list be fully gathered before returning a value. It takes the optional keyword parameterif_started, which can be set toTrueif you want to trigger the start of the gathering process if gathering has not started. Usingnumber_gathered()withif_startedcan be helpful onreviewscreens because it will prevent the item from being shown if list gathering has not started, but it will not prevent the item from being shown if list gathering has started.number_as_word()- same asnumber(), except that thenice_number()function is applied to the result.current_index()- similar tonumber(), except it returns the index value of the last item in the list. If there is one item in the list,current_index()returns 0. If there are two items, it returns 1. If there are no items in the list, it returns 0. This is useful in questions where an iteratoriis not available, such as question that set.new_object_type.remove(val, ...)- removes the given items from the list, if they are in the list.comma_and_list()- returns the items of the list run through thecomma_and_list()function.possessive()- if the variable name isplaintiffand the parameter is"fish", returns “plaintiff’s fish” if there is one item in the list and “plaintiffs’ fish” if there is more than one item in the list.pronoun()- returns a pronoun like “you,” “her,” “him,” or “them” “it”, or “them,” as appropriate, depending on the number of items in the list.pronoun_objective()- for aDAList, this is the same aspronoun().pronoun_possessive()- given a word like “fish,” returns “her fish,” “his fish,” or “their fish,” as appropriate, depending on the number of items in the list.pronoun_subjective()- returns a pronoun like “you,” “she,” “he,” or “they” as appropriate, depending on the number of items in the list.union(other_set)- returns a Python set consisting of the items of current list, considered as a set, combined with the items of theother_set.intersection(other_set)- returns a Python set consisting of the items of the current list, considered as a set, that also exist in theother_set.difference(other_set)- returns a Python set consisting of the items of the current list, considered as a set, that do not exist in theother_set.isdisjoint(other_set)- returnsTrueif no items overlap between the current list, considered as a set, and theother_set. Otherwise, returnsFalse.issubset(other_set)- returnsTrueif the current list, considered as a set, is a subset of theother_set. Otherwise, returnsFalse.issuperset(other_set)- returnsTrueif theother_setis a subset of the current list, considered as a set. Otherwise, returnsFalse.gather()- causes the items of the list to be gathered and named. ReturnsTrue. Optional keyword parameters includeitem_object_type, which overrides the default.object_typeattribute;number, which indicates a list length (overriding any.target_numberattribute),minimum, which indicates a minimum number of items to gather (overriding the.minimum_numberattribute), andcomplete_attribute, which indicates the attribute of an item that will be sought before an item is considered complete (overriding the.complete_attributeattribute).reset_gathered()- causes the list to be considered not-yet-gathered. This can be used to query the user to add items to a list that may already be considered complete. If called with the optional keyword argumentrecursiveset toTrue(the default isFalse), the lists inside the list are also marked as not-yet-gathered. If theonly_if_emptykeyword argument isTrue, then the list will be marked not-yet-gathered only if it is empty. If themark_incompletekeyword argument isTrue, and the list has acomplete_attribute, then thecomplete_attributeof each item in the list will be undefined if it is defined.-
has_been_gathered()- returnsTrueif the group has been gathered yet. Does not trigger the gathering process. add_action()- returns HTML for a button that adds a new item to the list. This will set up a queue of actions for the user that will ensure that a new item will be added and its elements gathered. See the groups section for details of howDAListandDADictgathering works. This should only be used when the underlying group has the attributegatheredset toTrue. By default, the text of the button is “Add an item” if the list is empty, and “Add another” if the list is non-empty. The label can be overridden with the optional keyword parameterlabel. Thelabelpasses through theword()function, so you can use the translation system to handle different languages. If you set the optional keyword parameterurl_onlytoTrue, the method will return only the URL for the action, not the HTML for a button. You can change the color of the button to another Bootstrap color with the optional keyword parametercolor. The default color issecondary, or whatever theaddvalue is underbutton colorsin the Configuration. The size of the button can be changed with the optional keyword parametersize. The options aresm,md, andlg. The default issm. If you want the button to fill the width of its container, you can set the optional keyword parameterblocktoTrue. The icon that appears in the button can be customized with the optional keyword parametericon. The default value isplus-circle, which refers to the Font Awesome iconfas fa-plus-circle. It will assume you mean to refer to a “solid” icon unless you spell out the icon type with a full reference likefar fa-plus-circle. If you want to add your own CSS classes to the button, you can set them with the optional keyword parameterclassname.item_actions()- returns HTML for “Edit” and “Delete” buttons. This method is primarily used internally; there are specifiers fortablethat control it. It takes two positional parameters: the item itself (the_group[the_index]) and its index (the_index). The remaining positional parameters, which are optional, are attribute names that should be edited when the user presses the “Edit” button. For example, if you want the “Edit” button to show the user a screen for editing thefavorite_fruitattribute, you would writethe_group.item_actions(the_group[the_index], the_index, 'favorite_fruit'). If you wanted the “Edit” button to show two screens, one for editing thefavorite_fruitattribute and one for editing thename.firstattribute, you would writethe_group.item_actions(the_group[the_index], the_index, 'favorite_fruit', 'name.first'). Theitem_actions()method also accepts the optional keyword parametersedit(defaults toTrue),delete(defaults toTrue),reorder(defaults toFalse),ensure_complete(defaults toTrue),confirm(defaults toFalse),edit_url_only(defaults toFalse), anddelete_url_only(defaults toFalse). If the value ofeditis false, the edit button is not shown. If the value ofdeleteis false, the delete button is not shown. Ifreorderis true, up/down buttons for reordering items are shown. Ifensure_completeis true, then after the user edits the attributes given as positional parameters, docassemble will run.gathered_and_complete()on the group. Ifconfirmis true, the user will be asked to confirm before an item is deleted. Theedit_url_onlyanddelete_url_onlyparameters, if set to true, will alter the default output ofitem_actions()so that instead of outputting HTML of buttons, the method will output a single URL that can be used in the web interface as the URL of an edit button or a delete button, respectively._reorder_buttons()- This internal method can be subclassed in order to customize how reordering buttons appear in a table. See the source code for the code you will need to duplicate._edit_button()- This internal method can be subclassed in order to customize how the Edit button appears in a table. See the source code for the code you will need to duplicate._delete_button()- This internal method can be subclassed in order to customize how the Delete button appears in a table. See the source code for the code you will need to duplicate._add_action_button()- This internal method can be subclassed in order to customize how theadd_action()button appears. See the source code for the code you will need to duplicate.hook_on_gather()- this method is run automatically as part of the list gathering process. It is run immediately before the.gatheredattribute is set toTrueto mark the gathering process as finished. If you use.add_action(),.item_actions(), or a feature that uses them (table editing), thehook_on_gather()method will run because these methods trigger the gathering process. By default,hook_on_gather()does nothing, but it is useful in subclasses if you want to make sure that something is done before the list is considered gathered. When you write.hook_on_gather()in subclasses, be careful that your code does not assume that the list has been gathered, because it has not been gathered. For an example, see using hooks.hook_after_gather()- this method is run automatically as part of the list gathering process. It is run immediately after the.gatheredattribute is set toTrueto mark the gathering process as finished. If you use.add_action(),.item_actions(), or a feature that uses them (table editing), thehook_on_gather()method will run because these methods trigger the gathering process. By default,hook_after_gather()does nothing, but it is useful in subclasses if you want to make sure that something is done after the list is gathered. This method is different fromhook_on_gather()because it is run after the list is gathered. Thus, the method can rely on the list having been fully gathered. However, because it runs after gathering is complete,hook_after_gather()should not trigger the asking of anyquestions or the running of anycodeblocks, because the logic will not be idempotent; there would be no reason in the for thehook_after_gather()method to be called again. By contrast, thehook_on_gather()method can trigger the asking ofquestions or the running ofcodeblocks, since the completion ofhook_on_gather()is a prerequisite to the list being gathered. In short,hook_on_gather()is a prerequisite, andhook_after_gather()is an afterthought. For most purposes, you should be able to get by withhook_on_gather(), but one reason to usehook_after_gather()is if you have setauto_gathertoFalse; in this case,hook_on_gather()is run before the.gatheredattribute is sought, so it will be run before any code in acodeblock that defines the.gatheredattribute. You might want your logic to be applied after this code runs, not before. For an example, see using hooks.hook_on_remove()- this method is called immediately before an item is removed from the list. The item that is removed is passed tohook_on_remove()as a single positional parameter.hook_on_item_complete()- this method is not currently called by the docassemble code under any circumstances, but it is a suggested method that you may want to implement in your subclasses and call in your interview logic. The idea is that your code would call this method immediately before setting thecomplete_attributein order to trigger some standard procedure to run. E.g.,my_list.hook_on_item_complete(my_list[i]).filter()- returns a shallow copy of the list object where the elements of the list are filtered according to criteria specified in keyword arguments. For example, ifpersonis a list ofIndividuals, and each individual has an attributeis_witnessthat is eitherTrueif the person is a witness andFalseotherwise, you can writeperson.filter(is_witness=True)to get a list of witnesses. This only works if the list is a list of objects. By default, the list that is returned will have the same instance name as the original list, but you can change this by passing a single positional parameter. Runningwitness = person.filter('witness', is_witness=True), for example, will setwitnessto an object with the instance namewitness. However, note that the instance names of the elements of the list will not be changed. While thefilter()method can be a useful shorthand, its features are very limited. In most situations, it is probably better to use a list comprehension.initializeObject()- Callingmy_list.initializeObject(0, DAObject)will set the first item in the list to aDAObject, with an appropriate instance name.
If you refer to a list in a Mako template (e.g., The applicants
include: ${ applicant }) or convert it to text with the
str() function (e.g. (str(applicant)) in Python code, the result
will be the output of the comma_and_list() method.
The DAList uses the following attributes:
object_type: a class of typeDAObjector subclass thereof, orNone. Initially, this is set toNone. If set to an object type, such asDAObjectorIndividual, then new items will be created as objects of this type. You can also use the result of theusing()method here.gathered: a boolean value, initially undefined. It is set toTruewhen all of the items of the list are defined.elements: a Python list containing the items of the list. If this is set, the list will be considered gathered as soon as it is initialized.set_instance_name: this can be used in combination withelements. If set toTrue, then when theelementsare added to the list, their instrinsic names (see above) are changed to match the intrinsic name of the list. For example, if you initializepartiesas aDAListusingelements=[plaintiff, defendant]andset_instance_name=True, then the name ofplaintiffwill be changed toparties[0]and the name ofdefendantwill be changed toparties[0]. The variablesplaintiffanddefendantwill still exist, but if your interview refers to an undefined attributeplaintiff.net_worth, the interview will seek a definition ofparties[0].net_worth.there_are_any: a boolean value, initially undefined, indicating whether any values should be gathered. The expectation is that the interview will define a question or code block that defines this attribute.there_is_another: a boolean value, initially undefined, indicating whether there are any additional values that should be gathered.auto_gather: a boolean value, set toTrueby default, which indicates whether the interview should use the.gather()method to ask questions to gather the items of the list.complete_attribute: a text string indicating the name of an attribute of a list item. If you have aDAListcalledfruitand you setfruit.complete_attribute = 'weight', then when the.gather()method is gathering the items of the list, it will seek a definition offruit[i].weightfor every item of the list, as it is gathering the items of the list. If you do not set acomplete_attribute, the default behavior is to ask whatever questions are necessary to represent the list item as text. See usingcomplete_attributefor more information.ask_object_type: a boolean value, initially set toFalse. This is used when you want to build a list of objects of diverse types. Whenask_object_typeisTrue, then when items are added to the list, docassemble will seek out a definition of thenew_object_typeattribute before adding an item to the list. When it gets the object type, the object it adds to the list will be of this type.new_object_type: this works likeobject_type, except the attribute is undefined and a definition is sought every time an object is added to the list. It is used in conjunction with theask_object_typeattribute.
For more information about gathering items using DAList objects,
see the section on groups.
DAObject
All docassemble objects are instances of the DAObject class.
DAObjects are different from normal Python objects because they
have special features that allow their attributes to be defined by
docassemble questions. If fruit is an ordinary Python object
and you refer to fruit.seeds when seeds is not an existing
attribute of fruit, Python will generate an AttributeError. But
if fruit is a DAObject, docassemble will intercept that error
and look for a question, code block (or other block) that
offers to define fruit.seeds. Or, if that does not work, it will
look for a generic object block that offers to define x.seeds
for a DAObject.
From the interview developer’s perspective, DAObjects can be treated
like ordinary Python objects in most ways, but there are exceptions.
Intrinsic names
An important characteristic of all DAObject instances is that they
have intrinsic names. If you do:
objects:
- foo: DAObjectthen foo will be an instance of the DAObject class and
foo.instanceName will be 'foo'. The object knows its own name.
This is not a standard feature of Python objects, but a feature
added by docassemble.
In Python, objects are created by calling the class as though it were a function:
>>> from decimal import Decimal
>>> salary = Decimal(20000)
>>> float(salary)
20000.0In this example, Decimal() is called with a parameter representing
a number. Similarly, when you call DAObject() you provide a
parameter representing the name of the variable.
from docassemble.base.util import DAObject
foo = DAObject('foo')Since foo is a Python object, you can create other names
for the same object, but the instanceName attribute will not change.
>>> from docassemble.base.util import DAObject
>>> foo = DAObject('foo')
>>> foo.instanceName
'foo'
>>> foo.seeds = 4
>>> foo.seeds
4
>>> bar = foo
>>> bar.instanceName
'foo'
>>> bar.seeds += 1
>>> foo.seeds
5The fact that each DAObject has only one intrinsic name can lead
to confusion in interviews if you are not careful. For example,
suppose you try the following:
objects:
- tree: DAObject
- long_branch: DAObject
---
mandatory: True
question: |
The length of the branch is
${ tree.branch.length }.
---
code: |
tree.branch = long_branch
---
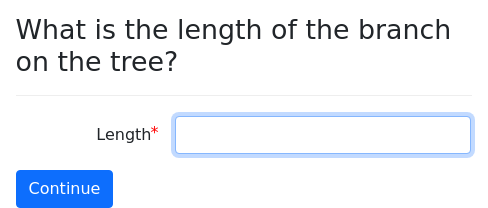
question: |
What is the length of the branch
on the tree?
fields:
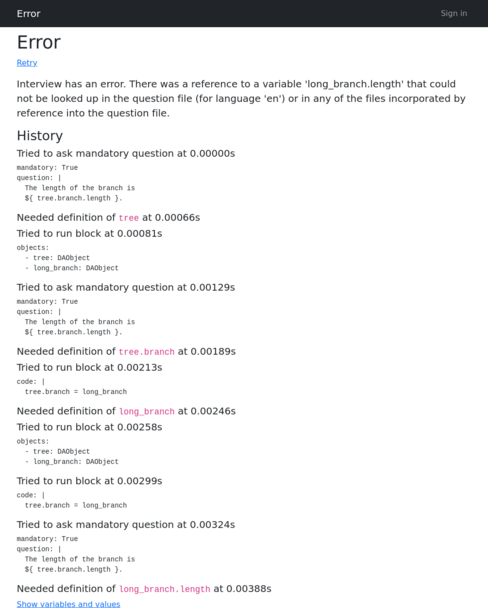
- Length: tree.branch.lengthThis will result in the following error:
There was a reference to a variable ‘long_branch.length’ that could not be looked up in the question file or in any of the files incorporated by reference into the question file.
You might think, “hey, why doesn’t my interview ask the question that
sets tree.branch.length?” The reason is that tree.branch is just
an alias for long_branch, and the object knows itself only as
long_branch. Thus, when the interview needs a definition for the
.length attribute of this object, it will look for
long_branch.length.
If you had a question that defined long_branch.length or a
generic
object
question for the x.length where x is a
DAObject, then the interview would use that question. However,
the interview is not able to search for the length of the branch using
tree.branch.length since the intrinsic name of the object is
long_branch, not tree.branch.
This will work as intended:
objects:
  - tree: DAObject
  - tree.branch: DAObject
---
mandatory: True
question: |
  The length of the branch is
  ${ tree.branch.length }.
---
question: |
  What is the length of the branch
  on the tree?
fields:
- Length: tree.branch.lengthYou also need to be careful about intrinsic names if you write your own functions. For example, assume you wrote a Python module containing:
from docassemble.base.util import DAList, Thing

def build_list():
    the_list = DAList('the_list', object_type=Thing)
    for indexno in range(4):
        the_list.appendObject()
    return the_list
Assume you then created some lists in your interview:
code: |
  list_of_fruits = build_list()
  list_of_vegetables = build_list()
The problem here is that the list_of_fruits and list_of_vegetables
objects, as well as their subobjects, will not have the right
intrinsic names.
In some situations, you can write foo = DAObject() instead of foo =
DAObject('foo'), and it will automatically figure out the instance
name, but this is fragile, and under certain circumstances it can
fail, and it will fall back to giving the object a random instrinsic
name. To avoid this problem, you can always set the intrinsic name of
an object at the time you create it by passing the intrinsic name you
want to use as the first parameter.
Thus, you can do:
def build_list(list_name):
    the_list = DAList(list_name, object_type=Thing)
    for indexno in range(4):
        the_list.appendObject()
    return the_list
And then this will work:
code: |
  list_of_fruits = build_list('list_of_fruits')
  list_of_vegetables = build_list('list_of_vegetables')
The requirement of making sure your objects are aware of their names
is inconvenient, but necessary. Python has no built-in system by
which a variable can know its own name. In docassemble, it is
necessary for objects to know their own names so that when your
interview logic refers to an undefined object attribute, list element,
or dictionary key, docassemble knows what question or code
block to use to obtain a definition of the undefined variable.
One of the useful things about DAObjects is that you can write
generic object questions that work in a wide variety of
circumstances because the questions can use the variable name itself
when forming the text of the question to ask the user.
If you refer to a DAObject in a
Mako template (or reduce it to text with Python’s str() function),
this will have the effect of calling the object_name() method,
which attempts to return a human-friendly name for the object.
For example:
objects:
  - park: DAObject
  - turnip: DAObject
---
mandatory: True
code: |
  park.front_gate = DAObject()
---
mandatory: True
question: |
  The ${ turnip.color } turnip sat
  before the
  ${ park.front_gate.color } gate.
---
generic object: DAObject
question: |
  What is the color of the ${ x }?
fields:
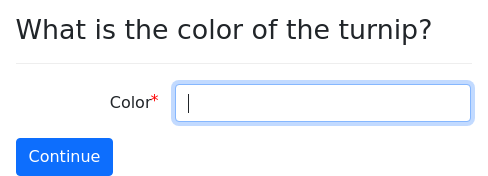
- Color: x.colorAlthough there is only one question for x.color, this question
generates both “What is the color of the turnip?” and “What is the
color of the front gate in the park?” This is because object_name()
is implicitly called and it turns park.front_gate into “front gate
in the park.”
The object_name() method is multi-lingual-friendly. By using
docassemble.base.util.update_word_collection(), you can provide
non-English translations for words that come from variable names, such
as “turnip,” “park,” and “front gate.” By using
docassemble.base.util.update_language_function(), you can define a
non-English version of the a_in_the_b() function, which
object_name() uses to convert an attribute name like
park.front_gate into “front gate in the park.” (It calls
a_in_the_b('front gate', 'park').) So in a Spanish interview,
park.front_gate.object_name() would return “puerta de entrada en el
parque.” (The Spanish version of a_in_the_b() will be more
complicated than the English version because it will need to determine
the gender of the second argument.)
A related method of
DAObject is object_possessive(). Calling
turnip.object_possessive('leaves') will return the turnip's
leaves. Calling park.front_gate.object_possessive('latch') will
return the latch of the front gate in the park.
The DAObject is the most basic object, and all other docassemble
objects inherit from it. These objects will have different methods
and behaviors. For example, if friend is an Individual,
referring to ${ friend } in a Mako template will not return
friend.object_name(); rather, it will return friend.full_name(),
which may require asking the user for the friend’s name.
Methods for working with attributes
A DAObject can have any attributes you want to give it. When
those attributes are objects themselves, you need to use the
initializeAttribute() method.
One way to initialize attributes of an object is to use Python code:
objects:
  - fish: DAObject
---
code: |
  fish.best_friend = DAObject()
Under many circumstances, this works, and the variable on the left
will be assigned a correct instanceName.
However, docassemble’s system for setting the instanceName
in circumstances like this relies on hacking the internals of
Python. It is not guaranteed to work in all circumstances. A safe
way to define attributes is as follows:
objects:
  - fish: DAObject
---
sets: fish.best_friend
code: |
  fish.initializeAttribute('best_friend', DAObject)
The first argument to initializeAttribute is the attribute name, as
quoted text. The second argument is the name of the object the
attribute should be (not quoted).
It is necessary to modify the code block with sets because
docassemble needs help figuring out that the code block
offers to define fish.best_friend.
The initializeAttribute() method returns the object it just
initialized.
The
initializeAttribute() method will have no effect if the attribute
is already defined. If you want to force the setting of an attribute
in situations when the attribute is already defined, use
reInitializeAttribute() instead of initializeAttribute(), and it
will overwrite the attribute. The reInitializeAttribute() method
returns the object it just reinitialized.
The best way to define object attributes is to use the objects
block.
objects:
  - fish: DAObject
  - fish.best_friend: DAObject
This also works with list items:
objects: |
  - companies: DAList.using(object_type=Person)
  - companies[i].principal_place_of_business: City
You can also use objects with the generic object modifier:
generic object: Person
objects: |
  - x.principal_place_of_business: City
This will ensure that the principal_place_of_business of an
Individual or Organization is always a City.
The DAObject provides some convenience functions for working with
object attributes.
The attribute_defined()
method will return True or False depending on whether the given
attribute is defined. The attribute name must be provided as quoted
text. For example:
objects:
  - client: Individual
---
mandatory: True
question: |
  % if client.address.attribute_defined('city'):
  You live in ${ client.address.city }.
  % else:
  I don't know where you live.
  % endif
The attr() method will return the value
of the given attribute. The attribute must be provided as text.
(E.g., client.address.attr('city').) If the attribute is not
defined, None will be returned. This can be useful if you have
several attributes but you want to access them programmatically. For
example:
mandatory: True
question: |
  Your address.
subquestion: |
  % for part in ['address', 'city', 'state', 'zip']:
  Your ${ part } is ${ client.address.attr(part) }.

  % endfor
Note that because None is returned when the attribute is not
defined, this method will not trigger a process of retrieving a
definition for the attribute. If you want to trigger this process,
use the built-in Python function getattr().
code: |
  for characteristic in ['eye_color', 'hair_color', 'weight']:
    getattr(client.child[i], characteristic)
  client.child[i].complete = True
As discussed below, the Individual object has interesting methods
related to pronouns. These methods are universal, so you can use them
on any DAObject.
Sometimes, you need to refer to the
name of an attribute, rather than the attribute itself. For example,
when passing variable names to showif() or force_ask(), you need
to refer to the names of variables as a text string, because if you
just referred to the variable itself, you would be passing its value
and the variable would need to be defined, which isn’t what you want.
For example, if you do this:
code: |
  force_ask(person[i].attr_name('birthdate'))
it will have the effect of doing:
code: |
  force_ask(person[i].instanceName + '.birthdate')
In the case of the fourth person in the list, this has the effect of
doing:
code: |
  force_ask('person[3].birthdate')
If you want to delete attributes of a
DAObject, where the attributes may or may not be defined, you can
use the delattr() method.
client.delattr('birthdate')You can also give it multiple attribute names.
client.delattr('birthdate', 'sibling_count')The invalidate_attr() method
is like the delattr() method, except it remembers the values of the
attributes in order to present them as default values to the user when
the question that defines the attribute is asked again.
The fresh_getattr() method
takes the name of an attribute, calls reconsider() on the
attribute and then returns the value of the attribute.
client.getattr_fresh('total_income')This should only be used on attributes that are defined by code
blocks.
The
raise_undefined_attribute_error() method raises the same type of
exception that a DAObject raises when the interview logic requires a
definition of an object attribute that is undefined.
This can be useful when you are using the @property decorator to
implement getter/setter methods.
from docassemble.base.util import DAObject

__all__ = ['MyObject']

class MyObject(DAObject):

  @property
  def foo(self):
    if not hasattr(self, '_foo'):
      self.raise_undefined_attribute_error('foo')
    return self._foo

  @foo.setter
  def foo(self, val):
    self._foo = val
Language methods
The possessive() method is a
language method that responds with a possessive phrase. For example,
if the object friend when reduced to text returns John Smith, then
friend.possessive('fish') will return John Smith's fish.
If the object is a generic
DAObject, or a subclass of DAObject that does not have any
special pronoun behavior, then the .pronoun(),
.pronoun_subjective(), and .pronoun_objective() methods all return
'it'. The .pronoun_possessive() method returns 'its' followed
by the argument. For example, thing.pronoun_possessive('reason')
returns 'its reason'. These methods work differently on subclasses
Individual and DAList. See language methods for more
information.
The DAObject supports the
language methods is_are_you(), yourself_or_name(), itself(),
is_user(), do_question(), did_question(), were_question(),
have_question(), does_verb(), did_verb(),
subjective_pronoun_or_name(), pronoun_or_name(). For more
information about how to use these methods, see language methods.
Many of the language methods of
the [DAObject] class accept the optional keyword parameter person,
which can be set to 1, 2, 3 to indicate that they should use
first person (“I,” “me”), second person (“you”, “your”), or
third person (“them,” “their”). You can avoid passing this parameter
every time by setting the ._point_of_view attribute of the object to
1, 2, or 3. You can also use plural forms 1p (“we”, “our”) and
2p (which is the same as 2 in English).
Utility methods
The .as_serializable() method
returns a simplified representation of the object and its attributes.
Objects are converted to Python dicts, so that they can be
serialized to JSON or other formats. The conversion is not
reversible, and much information cannot be converted. Nevertheless,
this can be a useful way to convert the information in your objects
into a form that can be digested by non-Python-based systems. See
also the all_variables() and set_variables() functions.
The copy_shallow() method
creates a copy of the object and gives it a new intrinsic name.
new_object = old_object.copy_shallow('new_object')The copy is “shallow,” which means that while new_object will be a
new object with its own separate existence, sub-objects of the new
object will simply be references to corresponding sub-objects of the
original object.
>>> new_object is old_object
False
>>> new_object.sub_object is old_object.sub_object
Trueobjects:
- orig_company: DAObject
---
code: |
other_company = orig_company.copy_shallow('other_company')The copy_deep() method creates a
copy of the object its sub-objects and gives it, and all of its
sub-objects, new intrinsic names.
new_object = old_object.copy_deep('new_object')Because the copy is “deep,” each sub-object has a separate existence:
>>> new_object is old_object
False
>>> new_object.sub_object is old_object.sub_object
Falseobjects:
- orig_company: DAObject
---
code: |
other_company = orig_company.copy_deep('other_company')DADict
A DADict acts like a Python dictionary except that dictionary keys
and values can be defined through docassemble questions.
To add a value that is a new docassemble object, you need to call
the initializeObject() method.
For example:
objects:
  - player: DADict
---
mandatory: True
code: |
  player.initializeObject('trustee', DAObject)
  player.initializeObject('beneficiary', DAObject)
  player.initializeObject('grantor', DAObject)
  player.gathered = True
---
mandatory: True
question: The players
subquestion: |
  % for type in player.keys():
  ${ player[type].firstname }
  ${ player[type].lastname } is here.

  % endfor
---
generic object: DAObject
question: |
  What is
  ${ x[i].object_possessive('name') }?
fields:
  - First Name: x[i].firstname
- Last Name: x[i].lastnameThe first parameter is the name of the attribute. The second
parameter is the type of object. The result of using() can be
used in place of the class name.
The DADict also uses a similar
method called .new(). This method initializes a new object and
makes it an entry in the dictionary. For example, if the dictionary
is called positions, calling positions.new('file clerk',
'supervisor') will result in the creation of the object
positions['file clerk'] and the object positions['supervisor'].
The type of object is given by the object_type attribute, or
DAObject if object_type is not set. You can also pass a
list and it will unpack the list, initializing dictionary entries
for each value.
DADicts use the same attributes that DALists use. It also uses:
new_item_name: a text value, initially undefined, indicating the key of a new item being gathered into the dictionary.new_item_value: a value, initially undefined, indicating the value of a new item being gathered into the dictionary. This is only used when the.object_typeof theDADictis not set.
DADicts use the same methods that DALists use, except for
.appendObject(), .append(), .remove(), .discard(),
.extend(), .filter(), .sort(), .sort_elements(),
.current_index(), .first(), and .last().
It also uses the following methods, which correspond with the same methods of the Python dict.
For most purposes, your code can treat a DADict object just like a
Python dictionary.
objects:
  - things: DADict
---
code: |
  if 'abc' in things:
    gathered_abc = True
  else:
    gathered_abc = False
---
code: |
  if len(things) > 0:
    there_are_things = True
  else:
    there_are_things = False
---
mandatory: True
code: |
  things['abc'] = some_variable
---
code: |
  description = ''
  for key, value in things.items():
    description += "* " + key + ": " + value + "\n"
The
DADict object also uses some methods that are unique to it. The
all_true() and all_false() methods are useful when working with
checkbox groups. If you use datatype: checkboxes to set a
variable called choices, then choices will be a DADict object.
If you call choices.all_true(), the result will be True if all of
the checkboxes were selected (i.e., all of the values of the
dictionary are True). If you call choices.any_false(), the result
is the opposite of choices.all_true().
If you call choices.all_false(), the result will be True if none
of the values were selected (i.e., all of the values of the dictionary
are False). If you call choices.any_true(), the result is the
opposite of choices.all_false().
You can also call these methods with parameters. Calling
choices.all_true('red', 'green') will return True if the user
selected the choices for 'red' and 'green'. Calling
choices.all_true('red', 'green', exclusive=True) will return True
if 'red' and 'green' were selected and these were the only choices
selected.
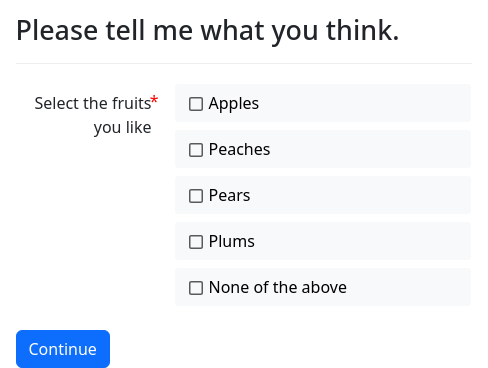
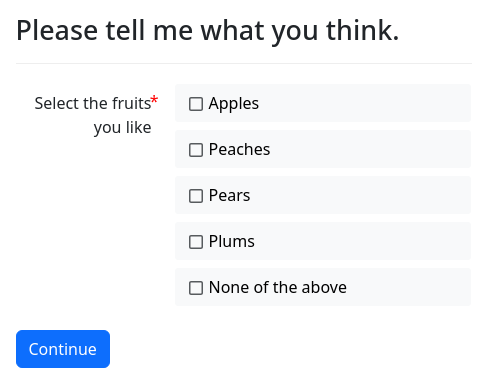
Here is an example that illustrates uses of .all_true():
question: |
  Please tell me what you think.
fields:
  - "Select the fruits you like": likes_fruit
    datatype: checkboxes
    choices:
      - Apples
      - Peaches
      - Pears
      - Plums
---
mandatory: True
question: |
  Summary of your answer
subquestion: |
  It is
  % if likes_fruit.all_true():
  true
  % else:
  not true
  % endif
  that you like all fruit.

  It is
  % if likes_fruit.all_true('Apples', 'Pears'):
  true
  % else:
  not true
  % endif
  that you like apples and pears.

  It is
  % if likes_fruit.all_true('Apples', 'Pears', exclusive=True):
  true
  % else:
  not true
  % endif
  that apples and pears are the only fruits you like.

  It is
  % if likes_fruit.any_true():
  true
  % else:
  not true
  % endif
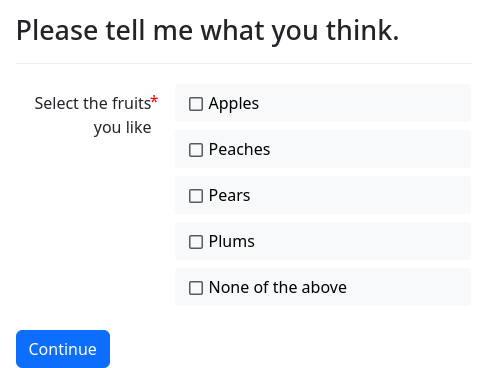
that you like at least one fruit.Here is an example that uses .all_false():
question: |
  Please tell me what you think.
fields:
  - "Select the fruits you like": likes_fruit
    datatype: checkboxes
    choices:
      - Apples
      - Peaches
      - Pears
      - Plums
---
mandatory: True
question: |
  Summary of your answer
subquestion: |
  It is
  % if likes_fruit.all_false():
  true
  % else:
  not true
  % endif
  that you don't like any of the fruit.

  It is
  % if likes_fruit.all_false('Apples', 'Pears'):
  true
  % else:
  not true
  % endif
  that you do not like apples or pears.

  It is
  % if likes_fruit.all_false('Apples', 'Pears', exclusive=True):
  true
  % else:
  not true
  % endif
  that apples and pears are the only fruits you do not like.

  It is
  % if likes_fruit.any_false():
  true
  % else:
  not true
  % endif
that there is at least one fruit you do not like.The method .true_values() will return a
DAList of keys that are True.
question: |
  Please tell me what you think.
fields:
  - "Select the fruits you like": likes_fruit
    datatype: checkboxes
    choices:
      - Apples
      - Peaches
      - Pears
      - Plums
---
mandatory: True
question: |
  Summary of your answer
subquestion: |
  You like
${ likes_fruit.true_values() }..true_values() accepts an optional keyword parameter
insertion_order. If insertion_order is set to True, then the
order of the keys returned by .true_values() will be the insertion
order of the underlying dictionary. Otherwise, the keys are sorted in
alphabetical order.
Similarly, .false_values() will return a
DAList of keys that are False.
question: |
  Please tell me what you think.
fields:
  - "Select the fruits you like": likes_fruit
    datatype: checkboxes
    choices:
      - Apples
      - Peaches
      - Pears
      - Plums
---
mandatory: True
question: |
  Summary of your answer
subquestion: |
  You do not like
${ likes_fruit.false_values() }.Like .true_values(), .false_values() accepts the optional keyword
parameter insertion_order.
For more information about using checkboxes, see the documentation for checkbox groups.
Like the DAList, the DADict supports
the method item(). If Fruit is a DADict, fruit.item('apple')
is equivalent to fruit['apple'], except that if fruit does not
have an item 'apple', the result will be empty text. This is
a helpful method in some contexts, such as fillable PDF forms.
Empty text will also result if you try to use attributes on the
result, so fruit.item('apple').seeds or
fruit.item('apple').total_value() will also result in empty text.
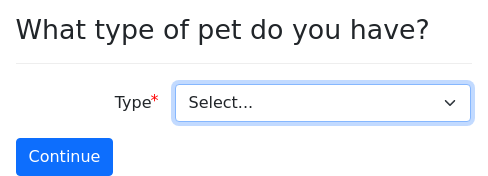
code: |
  pet_types = [
    'dog', 'cat', 'goldfish',
    'turtle', 'lizard', 'rabbit',
    'rock', 'hamster', 'gerbil',
    'rat']
---
question: |
  What type of pet do you have?
fields:
  - Type: pet.new_item_name
    datatype: dropdown
    code: pet_types
---
question: |
  Describe your pet ${ i }.
fields:
  - Name: pet[i].name
  - Color: pet[i].color
  - Legs: pet[i].legs
    datatype: integer
---
question: |
  Do you have any other pets?
yesno: pet.there_is_another
---
mandatory: True
question: |
  Description of ten pets.
subquestion: |
  % for pet_type in pet_types:
  The name of your pet ${ pet_type }
  is ${ pet.item(pet_type).name }.
  It is ${ pet.item(pet_type).color }
  and it has
  ${ pet.item(pet_type).legs } legs.

% endforFor more information about using DADict objects, see the section
on groups.
You can delete one or more items from the
dictionary using the delitem() method. For example,
fruit.delitem('apple', 'orange') removes the 'apple' and
'orange' items from the list if they are present. If an item is not
present, no error is raised.
Similar to the invalidate_attr()
method, the invalidate_item() method runs invalidate() on the
given items of the dictionary.
Similar to the getattr_fresh()
method, the getitem_fresh() method runs reconsider() on the
given item in the list and then returns the recomputed item. This
should only be used if the item value is computed, not posed to the
user as a question.
The .slice() method of the DADict
returns a shallow copy of the dictionary with a subset of the
original key/value pairs. It can be called in one of two ways. If
you give it a single positional parameter, where that parameter is a
function, the function will be applied to the value of the key/value
pair and if the result is true, the key/value pair will be included,
and if it is false, the key/value pair will be excluded. For example,
if you have a DADict called parties where the values are
Individual objects, you can take a “slice” of the dictionary that
consists only of individuals who are 18 or older:
adults = parties.slice(lambda y: y.age_in_years() >= 18)If the values of a DADict are plain text phone numbers, this will
return a version of the DADict where the phone numbers are valid:
good_numbers = phone_numbers.slice(phone_number_is_valid)This uses the phone_number_is_valid() function.
The second way to call the .slice() method is to give it one or more
keys as positional parameters. For example, if you have a DADict
called income where the keys are types of income and the values
represent the amount of income in that category, you can use
.slice() to get a dictionary that only contains particular keys of
the original dictionary:
earnings = sum(income.slice('employment', 'self-employment').values())DAOrderedDict
The DAOrderedDict is just like the DADict, except it is based on a
Python OrderedDict, rather than a Python dict. This means that
the data structure remembers the order in which keys are added, and
returns items in that order during iteration.
DASet
A DASet is like a DADict and a DAList, except it acts like a
Python “set.”
objects:
  - issues: DASet
---
code: |
  if user_needs_to_apply:
issues.add('application')DASets use the same methods that DALists use, except for
.appendObject(), .append(), .extend(), .first(), and
.last(). It also uses the following methods, which correspond with
the methods of the Python set.
add()copy()discard()difference()intersection()isdisjoint()issubset()issuperset()pop()remove()union()
For more information about using DASet objects, see the section
on groups.
The .hook* methods that DAList
and DADict use are not available with DASet.
DAFile
A DAFile object is used to refer to a file, which might be an
uploaded file, an assembled document, or a file generated by code. It
has the following attributes:
filename: the filename (e.g.,complaint.pdf). This attribute should be treated as read-only; you need to use.set_attributes()to actually change the name of a file on the server.mimetype: the MIME type of the file.extension: the file extension (e.g.,pdforrtf).number: the internal integer number used by docassemble to keep track of documents stored on a site. (You will likely never need to use this.)ok: this isTrueif thenumberhas been defined, and is otherwiseFalse. (You will likely never need to use this, either.)alt_text(optional): you can set this to a textual description of the file. This can be useful if the file is an image that will be displayed in the browser. Thealt_textwill then be used as the alt text for the image, which helps users of screen readers. You can also use theset_alt_text()andget_alt_text()methods to set and get this attribute.
You might work with DAFile objects in the following contexts:
- Your interview contains a document upload field. The variable
representing the upload will be set to a
DAFileListobject after the upload has been done. If the variable name ispretty_picture, thenpretty_picture[0]will be aDAFileobject. - Your interview assembles a document and the document is assigned to
a
variable name. If the variable name ismotion_to_reconsider, thenmotion_to_reconsiderwill be aDAFileCollectionobject, the attributes of which represent the various formats of the document. For example,motion_to_reconsider.pdf(the.pdfhere is an attribute, not a file extension) will be aDAFileobject representing the PDF version of the document. - Your interview contains code that needs to create a file. You can
use an
objectsblock to create a blankDAFileobject. Then you would call.initialize()to give the file a name and a presence on the file system.
You can call .path() on a DAFile object to get the
actual file path. Using the file path, can manipulate the underlying
file directly in whatever way you want. However, the DAFile object
has a number of built-in methods for doing common things with files,
so it is a good idea to use the methods whenever possible.
While the DAFile object is saved in your interview session
dictionary like any other variable, the content of the file may be
stored on Amazon S3, Azure blob storage, or the file system,
depending on the server’s configuration. The path you obtain from
.path() might be different from one screen of your
interview to another. You should not save the path to a variable and
expect to be able to use that variable across screens of the
interview. Rather, you should always access the file through the
DAFile object, using its built-in methods (such as
.path()). These methods contain code that
automatically accounts for the fact that the file might be stored in
the cloud. For example, if you use Amazon S3, then when you call
.path()), this will cause the file to be retrieved
from Amazon S3 and placed into a temporary directory.
The methods of DAFile are the following:
The .initialize() method transforms
a fresh, uninitialized DAFile object (e.g., a DAFile object
created by the objects block) into an object that can actually be
used as a file. The method takes the optional keyword parameters
filename or extension. The .initialize() method can be used as
follows (where myfile is a DAFile object):
myfile.initialize(filename='image.jpg')-filenamewill beimage.jpg,extensionwill bejpg,mimetypewill beimage/jpeg.myfile.initialize(extension='jpg')-filenamewill befile.jpg,extensionwill bejpg,mimetypewill beimage/jpeg.myfile.initialize()-filenamewill befile.txt,extensionwill betxt,mimetypewill betext/plain.
When it completes, the .initialize() method sets the initialized
to True.
If the object has already been initialized, the .initialize() method
can safely be called on it, but this will only have the effect of
calling .retrieve() on it, and the filename and extension
parameters will not overwrite existing values. If you actually want to
redo the initialization process on a DAObject that has already been
initialized, you can set the optional keyword argument reinitialize
to True. This will delete any existing file from the file system and
reset the values of filename, extension, and mimetype.
The following example uses the Python Imaging Library to create a JPEG image.
imports:
  - PIL
---
objects:
  - myfile: DAFile
---
sets: myfile.initialized
code: |
  im = PIL.Image.new("RGB",
                     (512, 512),
                     "green")
  myfile.initialize(filename="foo.jpg")
  im.save(myfile.path(), format='JPEG')
  del im
---
mandatory: True
question: |
  Here is the picture.
subquestion: |
${ myfile }Note that because the .initialize() method defines the
.initialized attribute, you can attach sets to a code block that
calls initialize(). This way, your code block that initializes a
file can be called implicitly. In this example, the attempt to display
myfile in the subquestion of the final question causes
docassemble to seek out the value of myfile.initialized.
However, if the reason docassemble runs the code block is to
obtain a definition of .initialized, docassemble will be
satisfied as soon as .initialize() returns. If you have code that
runs after the call to .initialize(), you need to make sure that the
code does not refer to any undefined variables.
The .show() method returns markup that
displays the file as an image. This method takes an optional keyword
argument, width, which can be set to, e.g., '1in', '44mm', or
'20pt'. See inserting images for more information about this
markup.
In the context of a Mako template, writing ${ myfile } is
equivalent to writing ${ myfile.show() } (where myfile is a
DAFile object).
The method also takes an optional keyword argument alt_text, which
can be used to set the alt text of images that appear in the web
browser. If an alt_text keyword argument is not supplied, the
alt_text attribute of the DAFile object itself will be used as the
alt text. If that attribute does not exist, no alt text will be
used. (See the set_alt_text() and get_alt_text() methods for
more information about this attribute.)
The .path() method returns a complete file
path that you can use to read the file or write to the file.
The .num_pages() method returns the
number of pages in a PDF file. If the file is not a PDF file, it
returns 1.
The .url_for() method returns a URL at
which the file can be accessed. The URL should only be used in the
context of the user’s session and the user’s web browser.
mandatory: True
question: |
  This interview is all done.
subquestion: |
  To start your case,
  [download your pleading],
  print it, and take it
  to clerk's office at the
  court.

  [download your pleading]: ${ complaint.pdf.url_for() }
---
attachment:
  filename: complaint
  name: Complaint
  variable name: complaint
  content: |
    This is a complaint.

Blah, blah, blahHowever, if you have set the private attribute to False by calling
.set_attributes(private=False) on the object, than the URL obtained
from .url_for() will be accessible to anyone, regardless of whether
they are logged in. For more information, see
.set_attributes().
The following keyword parameters can be used.
temporary - the .url_for() method can also be used to generate a
temporary URL where anyone who knows the URL can access the file,
regardless of whether they are logged in, regardless of whether the
private attribute is True or False. To obtain such a URL,
include temporary=True as a keyword parameter. By default, the URL
will expire after 30 seconds. To extend this time, include the
optional keyword parameter seconds. This example creates a URL that
expires in 60 seconds.
mandatory: True
question: |
  This interview is all done.
subquestion: |
  To start your case,
  [download your pleading]
  in the next sixty seconds,
  print it, and take it
  to clerk's office at the
  court.

  [download your pleading]: ${ complaint.pdf.url_for(temporary=True, seconds=60) }
---
attachment:
  filename: complaint
  name: Complaint
  variable name: complaint
  content: |
    This is a complaint.

Blah, blah, blahexternal - by default, the URLs returned by .url_for() will be
root-relative URLs. If you want URLs that include the protocol and
hostname, include external=True when you call .url_for(). Using
temporary=True implies external=True.
attachment - by default, the URLs return files suitable for
inclusion in web pages. If you want the user to download the file
when accessing the link, you can set attachment to True. Then the
Content-Disposition header in the response will be set so that the
file can be downloaded.
page and size - if the DAFile is a PDF, you can obtain a URL for
a PNG image of a specific page of the file by passing the page
parameter. The page indicates the page number (starting with 1).
The size can be either 'screen' for a 72 DPI image or 'page' for
a 300 DPI image. The size is optional and it defaults to 'page'.
The Configuration directives png screen resolution and png
resolution can be used to change these default DPI values. If the
PNG image has not yet been created by the time the user visits the
URL, docassemble will generate the PNG image. Converting PDF to
PNG can be time-consuming, so the server may not respond immediately.
If the URL is accessed while there is a pending background task that
is converting the PDF page images to PNG, the server will wait for
that background task to create the image, which may take even longer.
The .page_path() method returns a
file system path to a PNG page image for a given page of a PDF file.
If your DAFile is myfile, calling myfile.page_path(1, 'page')
will return the path of a PNG image with a resolution of 300 DPI for
the first page of the document. Calling myfile.page_path(5,
'screen') will return the path of a PNG image with a resolution of 72
DPI for the fifth page of the document. If the PNG file does not
already exist on the server, .page_path() will create it, or if
there is an ongoing background task for creating PNG page images,
.page_path() will wait for that background task to create the PNG
image. Thus, .page_path() could take several seconds to return a
value, depending on the circumstances. .page_path() accepts an
optional keyword parameter, wait. If the PNG image has not been
generated yet, and .page_path() is called with wait=False, then
.page_path() will not trigger the PNG creation process or wait for
any ongoing process to complete, and instead will immediately return
None. A background task is launched to create page images from a
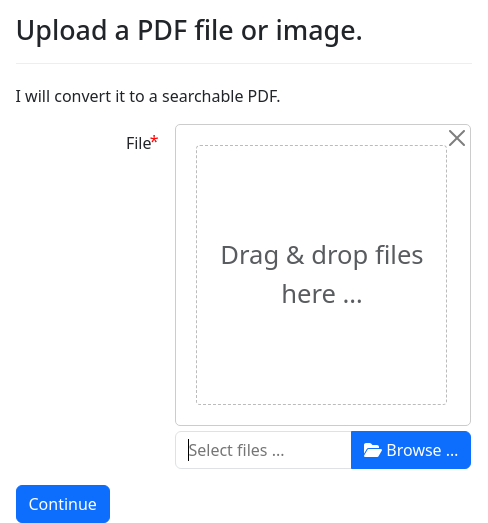
PDF file when a user uploads a file through a datatype: file or
datatype: files field, when a file is uploaded to /api/session,
and when the .pngs_ready() method is called on a DAFile. If the
PDF to PNG creation process fails, .page_path() will return None.
The .pngs_ready() method triggers a
background process for creating PNG images from a PDF file, if the
process has not already started, and returns True or False
depending on whether the PNG creation process has completed. The
resulting PNG files can be accessed using .page_path() and
.url_for(). The PNG images are also used in various other contexts,
such as when inserting a PDF file into a DOCX file or inserting a
DAFile into the screen of the web application.
The .retrieve() command ensures that a
stored file is ready for use on the system. Calling .retrieve is
necessary because if docassemble is configured to use Amazon S3
or Azure blob storage, documents are stored in the cloud, and the
server accesses them by copying them from the cloud to the server and
then copying them back to the cloud. If the file does not exist yet,
calling .retrieve() will generate an error.
The .set_attributes() command
allows you to set three characteristics of the uploaded document:
private: the default value of this attribute isTrue, which means that other interviews and other interview sessions cannot access the contents of the file, even if they know the.number, or have theDAFileobject itself, or have a URL to the file obtained from.url_for(). You will need to set theprivateattribute toFalseif you want other sessions or other users to be able to access the file. For example, you might store aDAFileobject in storage and retrieve it within other interviews at a later time. The contents of the file will not be accessible unless you setprivatetoFalse.persistent: the default value of this attribute isFalse, which means that the file will be deleted when the interview session is deleted. Interview sessions are deleted when the user presses an exit button or an exit command is run. Interview sessions are also deleted when the session has been inactive for a period. You can prevent the deletion of a file by setting thepersistentattribute toTrue.filename: the name of the file, e.g.,complaint.pdf. Note that while you can use.set_attributes()to change the filename, you cannot use it to change the file type. The file type (its MIME type and extension) are intrinsic to the file as it is stored on the file system. If you want to change the type of a file you would need to use.convert_to()or initialize a new file.
You can set these attributes with code like this:
question: |
  Sign your name
signature: user_signature
---
mandatory: True
code: |
  user_signature.set_attributes(persistent=True)
To read the values of the attributes for a variable like
user_signature, refer to user_signature.private and
user_signature.persistent, which are set by
.retrieve(). Setting these attributes directly
has no effect; you need to use .set_attributes() to set them.
When allowing users to upload files using datatype: file, you can
use field modifiers to set initial values for private and
persistent.
You can use the .user_access()
method to grant or deny access to particular users. Suppose you have
a DAFile called my_file. You can call:
my_file.user_access('[email protected]', '[email protected]')This will grant access to the users on the system with those usernames. You can also reference user IDs:
my_file.user_access(21, 43, 54)To deny access, you can set the optional keyword parameter disallow:
my_file.user_access(disallow='[email protected]')my_file.user_access(disallow=['[email protected]', '[email protected]'])To disallow access completely, set disallow to 'all':
my_file.user_access(disallow='all')To find out which users have been assigned privileges, run the
.user_access() method on a DAFile (not a DAFileList or
DAFileCollection) without any arguments. The result will be a
dictionary with the following keys:
user_ids: a list of user IDs;emails: a list of e-mail addresses of users with access; andtemp_user_ids: a list of temporary user IDs for non-logged in users who have access (such users cannot be assigned).
Note that the user_access() method only reports users who have
been given explicit access; users who have joined the interview also
have access; to take away their access, you would need to delete their
session.
You can use the
.privilege_access() method to manage access to a file based on the
privileges of users. Suppose you have a DAFile called my_file.
You can call:
my_file.privilege_access('developer', 'advocate')You can also take privileges away:
my_file.privilege_access(disallow=['developer', 'advocate'])To take all privileges away, use the special code 'all':
my_file.privilege_access(disallow='all')To see what privileges have access to a file, call
.privilege_access() on a DAFile without any parameters:
privileges_list = my_file.privilege_access()This will return a list of privileges (e.g., ['developer', 'user']).
The .convert_to() method accepts a
single positional parameter, which is expected to be 'pdf', 'docx',
'doc', 'odt', 'rtf', 'png', 'jpg', 'tif', or 'md'. The
file will be converted in place to that format. Word processing files
cannot be converted to image files, and vice-versa. If the conversion
fails, an exception will be raised.
The .convert_to() method accepts an optional keyword parameter,
output_to, which can be set to a DAFile. If output_to is
specified, then the input file is not converted in-place, and instead
the output_to file will be be redefined to contain the converted
file.
The .size_in_bytes() method
returns the number of bytes in the file.
The .slurp() method reads the contents of
the file and returns them as a text value.
contents = the_file.slurp()By default, the .slurp() method attempts to automatically decode
text files using the utf-8 encoding. To turn off this automatic
decoding feature, call it with .slurp(auto_decode=False).
The .readlines() method reads the
contents of the file, line-by-line, and returns the lines as a list.
for line in the_file.readlines():
  if line.startswith('header'):
    header_line = line
The .set_mimetype() method sets
the .mimetype and .extension attributes based on the given
MIME type.
the_file.set_mimetype('image/jpeg')The .write() method takes a variable as
an argument and writes the contents of the variable to the file.
contents = the_file.slurp()
contents = re.sub(r'swords', r'ploughshares', contents)
the_file.write(contents)
By default, the .write() method treats the contents as text and
applies the utf-8 encoding. However, if you want to write raw
bytes to the file, include the keyword parameter binary=True.
The .copy_into() method overwrites
any existing contents of the file with the contents of the file given
as an argument.
the_file.copy_into(other_file)The other_file can be a path to a file on the system. If
other_file is a DAFile, DAFileList, DAFileCollection, or
DAStaticFile, the file at other_file.path() will be used.
The .from_url() method overwrites
any existing contents of the file with the contents of the given URL.
the_file.from_url("https://example.com/file.pdf")In order to initialize a DAFile with contents from a remote source so that
it can be used in an interview, first declare the object:
objects:
  - pdf_file: DAFile
Then use code to initialize the object and set the contents:
sets: pdf_file.initialized
code: |
  pdf_file.initialize(extension="pdf")
  pdf_file.from_url("https://example.com/the_file.pdf")
The .make_ocr_pdf() method overwrites
any existing contents of the file with an OCRed PDF of a given file.
mandatory: True
code: |
  ocr_finished
  final_screen
---
code: |
  uploaded_file.make_ocr_pdf()
  ocr_finished = True
---
question: |
  Upload a PDF file or image.
subquestion: |
  I will convert it to a searchable PDF.
fields:
  - File: uploaded_file
    datatype: files
---
event: final_screen
question: |
  Your OCR PDF
subquestion: |
${ uploaded_file }The make_ocr_pdf() method accepts the following optional keyword
arguments:
filename: the filename of the new PDF file that is created.preserve_color: whether to preserve the color of the document. By default, this isFalsebecause the OCR is more accurate if the document is converted to grayscale.language: the language to use for the OCR (e.g.,'en','fr'). If not specified, the language returned byget_language()is used. The language must be a lowercase ISO-639-1/ISO-639-3 code or a language code that Tesseract uses.psmindicates the Tesseract page segmentation mode. The default is 6 (“assume a uniform block of text”). The choices are:- 0: Orientation and script detection (OSD) only.
- 1: Automatic page segmentation with OSD.
- 2: Automatic page segmentation, but no OSD, or OCR.
- 3: Fully automatic page segmentation, but no OSD.
- 4: Assume a single column of text of variable sizes.
- 5: Assume a single uniform block of vertically aligned text.
- 6: Assume a single uniform block of text. (Default)
- 7: Treat the image as a single text line.
- 8: Treat the image as a single word.
- 9: Treat the image as a single word in a circle.
- 10: Treat the image as a single character.
If you do not want to edit the file in place, you can create a new
DAFile with an objects block and pass files that you want to OCR
as positional parameters to make_ocr_pdf().
Since the OCR
process can take a long time, you might want to use the
make_ocr_pdf_in_background() method instead.
mandatory: True
code: |
  if not ocr_task.ready():
    waiting_screen
  final_screen
---
code: |
  ocr_task = uploaded_file.make_ocr_pdf_in_background()
---
question: |
  Upload a PDF file or image.
subquestion: |
  I will convert it to a searchable PDF.
fields:
  - File: uploaded_file
    datatype: files
---
event: waiting_screen
question: Please wait . . .
reload: True
---
event: final_screen
question: |
  Your OCR PDF
subquestion: |
${ uploaded_file }The .make_ocr_pdf_in_background() method operates just like
.make_ocr_pdf(), but does the work in a background action. It
returns the same type of object as background_action(). When the
background action is complete, the DAFile instance will be
overwritten with the OCRed version of the PDF file.
If you do not want to edit a PDF file in place, you can create a new
DAFile with an objects block and pass files that you want to OCR
as positional parameters to make_ocr_pdf_in_background().
objects:
- final_file: DAFileThe .extract_pages() method
extracts a page range from a PDF file and returns a new DAFile
containing the extracted pages.
question: |
  Upload a PDF document at least 6 pages long.
fields:
  - File: pdf_file
    datatype: file
validation code: |
  try:
    assert pdf_file.num_pages() > 5
  except:
    raise DAValidationError("That is not a valid PDF of at least six pages in length.")
---
code: |
  first_five_pages = pdf_file.extract_pages(first=1, last=5)
---
mandatory: True
question: |
  Here are the first five pages of your document.
subquestion: |
${ first_five_pages }The .extract_pages() method accepts the optional keyword parameters
first and last, indicating the sequential range of page numbers
you wish to extract. If first is not provided, it defaults to
1. If last is not provided, it defaults to the last page of the
document.
The optional keyword parameter output_to can be used to specify a
DAFile to which the output of .extract_pages() should be
written. If output_to is omitted, a DAFile with a random
instance name will be returned.
The .bates_number() method overwrites
any existing contents of the file with a Bates numbered PDF of the
file.
question: |
  Upload a file
fields:
  - File: the_file
    datatype: file
---
mandatory: True
code: |
  the_file.bates_number(prefix='FRUIT')
---
mandatory: True
question: |
  Your file
subquestion: |
${ the_file }The bates_number() method accepts the following optional keyword
arguments:
filename: the filename of the new PDF file that is created.prefix: the prefix for the Bates numbers.digits: the number of digits of your Bates numbers.start: the number at which Bates numbering should start (default is 1).area: the area of the page where the Bates numbers should be positioned. The choices are'TOP_LEFT','TOP_RIGHT','BOTTOM_RIGHT', and'BOTTOM_LEFT'. The default is'BOTTOM_LEFT'.
If you do not want to edit the file in place, you can create a new
DAFile with an objects block and pass files that you want to OCR
as positional parameters to bates_number().
The .commit() method ensures that
changes to the file are stored permanently. Under normal
circumstances, docassemble will automatically commit changes when
the interview is finished processing (i.e. right before a new screen
appears), but .commit() can be called to ensure that changes are
written, just in case there is an error.
the_file.commit()The .fix_up() method edits files in
place in order to correct any errors that are correctable. Currently,
the only function of .fix_up() is to run PDF files through qpdf.
Additional operations may be supported in the future.
The .fix_up() method will raise an exception if the file is invalid
even after correction. A helpful way to use .fix_up() is in
validation code:
question: |
  Upload a PDF file.
fields:
  - File: myfile
    datatype: file
validation code: |
  try:
    for item in myfile:
      assert item.mimetype == 'application/pdf'
    myfile.fix_up()
  except:
    raise validation_error("Sorry, that is not a valid PDF file")
If a user uploads a PDF file that is corrupted but correctable with qpdf, then the contents of the file will be replaced with the output of qpdf. If qpdf fails or the file is still not readable after correction, an exception will be raised.
In this example, myfile is a DAFileList rather than a
DAFile, but the .fix_up() method of DAFileList simply
applies .fix_up() to each DAFile in myfile.
The .set_alt_text() and
.get_alt_text() methods can be used to set and retrieve the alt
text of the object, which is stored in the .alt_text attribute.
The .alt_text attribute can be accessed directly, but the methods
are useful because .get_alt_text() returns None if .alt_text is
not defined, and converts the attribute value to unicode if it is not
unicode. The methods are also useful because they work on file
objects of all types, such as DAStaticFile, DAFileList, and
DAFileCollection objects.
my_file.set_alt_text("A photograph of the Shanghai skyline")
the_alt_text = my_file.get_alt_text()
The .uses_acroform() method
returns True if the file is a PDF file that contains form fields in
the AcroForm format. Otherwise, it returns False.
The .is_encrypted() method returns
True if the file is a PDF file and the PDF file is encrypted.
Otherwise it returns False.
The .get_pdf_fields() method
only works on PDF files. It returns a list of fields that exist in
the PDF file.
The items in the list are tuples with five elements. The five elements are:
- The name of the field.
- The default value of the field. If no default value is provided in
the PDF file, this is the empty string for text fields and
'No'for checkbox fields. - The page number on which the field appears.
- A list of four coordinates indicating the bounding box of the field on the page.
- A code indicating the type of the field. This can be
'/Tx','/Btn', orNone. - The export value of the field, if known. This is only applicable
for
'/Btn'fields.
The .get_docx_variables()
method only works on DOCX files. It returns a list of variables that
are used in Jinja2 templating in the DOCX file.
DAFileCollection
DAFileCollection objects are created internally by docassemble
in order to refer to a document assembled by an
attachment/attachments block. When such a block features a
variable name, then a variable by that name will be defined as a
DAFileCollection object. The object is called a “collection”
because an attachment can have multiple formats: PDF, RTF, etc.
A DAFileCollection object has attributes for each file type
generated (e.g., pdf or rtf), where the attributes are objects of
type DAFile.
For example, if the variable my_file is a DAFileCollection,
my_file.pdf will be a DAFile containing the PDF version, and
my_file.rtf will be a DAFile containing the RTF version.
In addition, each DAFileCollection object also has an attribute
.info containing information about the attachment, such as the name,
the filename (before an extension is added), and a description. The
.info attribute is a dictionary containing the following keys:
nameis the printable name of the documentfilenameis the base name used to generate the filename. Iffilenameiscustody_complaint, the PDF file will becustody_complaint.pdf.descriptionis the description of the attachment.
The DAFileCollection also has some methods so that you can use it
much as you would use a DAFile.
The .url_for() method returns
a URL to the first document type in the collection. By default, this
is the PDF version, but this can be changed with the valid formats
modifier.
The .path() method returns a
complete file path that you can use to access the first document type
in the collection.
The .num_pages() method
returns the total number of pages in the PDF file. If there is no PDF
file, it returns 1.
The .show() method inserts
markup that displays each file in the collection as an image, or as a
link if the file cannot be displayed as an image. This
method takes an optional keyword argument, width.
The method also takes an optional keyword argument alt_text, which
can be used to set the alt text of images that appear in the web
browser. If an alt_text keyword argument is not supplied,
get_alt_text() is called on the underlying DAFile object to
obtain the alt text. If no alt_text is defined for the file, no
alt text is used.
The .fix_up() method edits files in
place in order to correct any errors that are correctable. Currently,
the only function of .fix_up() is to run PDF files through qpdf if
they cannot be opened by PyPDF2. Additional operations may be
supported in the future.
The DAFileCollection object
supports the .set_alt_text() and .get_alt_text() methods. These
work much like the set_alt_text() and get_alt_text() methods
of DAFile. Unlike a DAFile, however, a DAFileCollection does
not have a .alt_text attribute. If you run set_alt_text() on a
DAFileCollection, it is like calling set_alt_text() on each of
the files in the collection. If you run get_alt_text() on a
DAFileCollection, it is like calling get_alt_text() on the first
document type in the collection.
The .set_attributes()
method calls .set_attributes() on each of the DAFiles in the
collection, applying the same attributes to each file. For an
explanation of how this method works, see its
documentation.
The .user_access() method
calls .user_access() on each of the DAFiles in the list. If
called with no parameters, it returns None; if you want to inspect
information about a file, call the method on a specific item in the
list.
The
.privilege_access() method calls .privilege_access() on each of
the DAFiles in the list. If called with no parameters, it returns
None; if you want to inspect information about a file, call the
method on a specific item in the list.
The .uses_acroform()
method returns True if the collection contains a PDF file and the
PDF file contains form fields in the AcroForm format. Otherwise, it
returns False.
The .is_encrypted()
method returns True if there is a PDF version of the
DAFileCollection object and that PDF file is encrypted. Otherwise
it returns False.
The .get_pdf_fields()
returns a list of fields that exist in the PDF version of the
DAFileCollection object. See get_pdf_fields() for more
information.
The
.get_docx_variables() returns a list of variables that exist in the
Jinja2 templating of the DOCX version of the DAFileCollection
object. See get_docx_variables() for more information.
DAFileList
A DAFileList is a DAList, the items of which are expected to be
DAFile objects.
When a question has a field with a datatype for a file upload
(datatype: file and datatype: files), the variable will be
defined as a DAFileList object containing the file or files
uploaded. These variables can be used in much the same way that
DAFile variables can be used.
By default, the complete_attribute of a DAFileList is
initialized, and the object_type is DAFile.
The .show() method inserts markup that
displays each file as an image. This method takes an optional keyword
argument, width.
When included in a Mako template, a DAFileList object will effectively
call show() on itself.
The method also takes an optional keyword argument alt_text, which
can be used to set the alt text of images that appear in the web
browser. If an alt_text keyword argument is not supplied,
get_alt_text() is called on the underlying DAFile object to
obtain the alt text. If no alt_text is defined for the file, no
alt text is used.
The .url_for() method returns a URL
at which the first file in the list can be accessed. This is useful
when working with DAFileList objects returned from
datatype: file, when you know that the list will only have one
element in it.
The .path() method returns a complete
file path that you can use to access the first file in the collection.
The .size_in_bytes() method
returns the number of bytes in the first file in the collection.
The .slurp() method reads the
contents of the first file in the collection and returns them as a
text value.
The .num_pages() method returns
the total number of pages in all PDF files in the list. If a file is
not a PDF file, it counts as 1 page.
The .set_attributes() method
calls .set_attributes() on each of the DAFiles in the list,
applying the same attributes to each file. For an explanation of how
this method works, see its documentation.
You would call the method like this:
question: |
  Upload a file
fields:
  - File: the_upload
    datatype: file
---
mandatory: True
code: |
  the_upload.set_attributes(private=False)
The .user_access() method calls
.user_access() on each of the DAFiles in the list. If called
with no parameters, it returns None; if you want to inspect
information about a file, call the method on a specific item in the
list.
The .privilege_access()
method calls .privilege_access() on each of the DAFiles in the
list. If called with no parameters, it returns None; if you want to
inspect information about a file, call the method on a specific item
in the list.
The .fix_up() method edits the files
in the list in-place in order to correct any errors that are
correctable. Currently, the only function of .fix_up() is to run
PDF files through qpdf if they cannot be opened by PyPDF2.
Additional operations may be supported in the future.
The DAFileList object supports
the .set_alt_text() and .get_alt_text() methods. These work much
like the set_alt_text() and get_alt_text() methods of
DAFile. Unlike a DAFile, however, a DAFileList does not have
a .alt_text attribute. If you run set_alt_text() on a
DAFileList, it is like calling set_alt_text() on each of the
items in the list. If you run get_alt_text() on a DAFileList, it
is like calling get_alt_text() on the first item in the list.
The .uses_acroform() method
returns True if the first file in the list is a PDF file that
contains form fields in the AcroForm format. Otherwise, it returns
False.
The .is_encrypted() method
returns True if the first file in the list is a PDF file that file
is encrypted. Otherwise it returns False.
The .get_pdf_fields() method
returns a list of fields that exist in the first file in the list. If
you run get_pdf_fields() on a DAFileList, it is like calling
get_pdf_fields() on the first item in the list. See
get_pdf_fields() for more information.
The
.get_docx_variables() method returns a list of variables that exist
in the Jinja2 templating of the first file in the list. If you run
get_docx_variables() on a DAFileList, it is like calling
get_docx_variables() on the first item in the list. See
get_docx_variables() for more information.
DAStaticFile
A DAStaticFile represents a file in the “static folder” of a
package. It has some of the same characteristics and methods of a
DAFile.
It depends on one attribute, filename, which should be a reference
to a static file, such as:
coins.png- a file in the static folder of the current packagedocassemble.base:data/static/cow.jpg- a file in the static folder of another package.data/templates/application.pdf- a file in the templates folder of the current package. (Though template files are not in the static folder and are not normally used in the same way as static files, it can be useful to use theDAStaticFileobject to refer to files in the templates folder.)
The DAStaticFile also uses the alt_text attribute. If you are
using a DAStaticFile to insert an image into the browser, you can
set the alt_text attribute to the text that you want to use as the
alt text for the image.
The DAStaticFile object can be used like this:
objects:
  - the_icon: DAStaticFile
---
code: |
  if user.gender == 'Female':
    the_icon.filename = 'female243.png'
  else:
    the_icon.filename = 'male244.png'
---
mandatory: True
question: |
  The image
  ${ the_icon.show(width='1em') }
subquestion: |
${ the_icon }It can also be initialized like this:
objects:
  - the_icon: DAStaticFile.using(filename='coins.png')
It is a best practice to always include alt text for every image. For an image that is purely decorative, set the alt text to empty text:
objects:
  - the_icon: DAStaticFile.using(filename='coins.png', alt_text='')
For an image that conveys substantive information, set the alt text to something descriptive:
objects:
  - court_photo: DAStaticFile.using(filename='county_court.jpg', alt_text='Photograph of the Fulton County Courthouse')
The .show() method inserts markup that
displays the file as an image. This method takes an optional keyword
argument, width.
The method also takes an optional keyword argument alt_text, which
can be used to set the alt text of images that appear in the web
browser. If an alt_text keyword argument is not supplied, the
alt_text attribute of the DAStaticFile object itself will be used
as the alt text. If that attribute does not exist, no alt text
will be used.
When included in a Mako template, a DAStaticFile object will effectively
call show() on itself.
The .size_in_bytes() method
returns the number of bytes in the file.
The .slurp() method reads the contents of
the file and returns them as a text value.
contents = the_file.slurp()By default, the .slurp() method attempts to automatically decode
text files using the utf8 encoding. To turn off this automatic
decoding feature, call it with .slurp(auto_decode=False).
The .url_for() method returns a
URL at which the file can be accessed.
The .path() method returns a complete
file path that you can use to access the file on the server.
The DAStaticFile object
supports the .set_alt_text() and .get_alt_text() methods. These
work much like the set_alt_text() and get_alt_text() methods
of DAFile. Like DAFile objects, DAStaticFile objects use
the alt_text attribute to store the alt text associated with the
file.
Here is an example that shows how DAStaticFile,
DAFileCollection, DAFileList, and DAFile objects can be
used interchangeably.
objects:
  - static_file: DAStaticFile.using(filename='cow.jpg')
---
attachment:
  variable name: assembled_file
  filename: assembled_file
  content: |
    Hello world!
---
question: |
  Upload a file
fields:
  - File: uploaded_file
    datatype: file
---
question: |
  What type of file do you want?
choices:
  Static:
    code: |
      the_file = static_file
  Assembled:
    code: |
      the_file = assembled_file
  Upload:
    code: |
      the_file = uploaded_file
  Single:
    code: |
      the_file = uploaded_file[0]
---
code: |
  email_sent = send_email(to=email_address,
    body="Here is your document",
    subject="Your document",
    attachments=the_file)
---
code: |
  (the_path, the_mimetype) = path_and_mimetype(the_file)
---
code: |
  button_list = [{True: 'Next', 'image': the_file}]
---
field: menu_selection
question: |
  Your document
subquestion: |
  ### As image

  ${ the_file }

  ### As path

  `${ the_file.path() }`

  ### As url

  `${ the_file.url_for() }`
  [open](${ the_file.url_for() })

  ### As external url

  `${ the_file.url_for(external=True) }`
  [open](${ the_file.url_for(external=True) })

  ### As downloadable url

  `${ the_file.url_for(attachment=True) }`
  [open](${ the_file.url_for(attachment=True) })

  ### As temporary url

  `${ the_file.url_for(temporary=True, seconds=500) }`
  [open](${ the_file.url_for(temporary=True, seconds=500) })

  ### As temporary downloadable url

  `${ the_file.url_for(temporary=True, seconds=500, attachment=True) }`
  [open](${ the_file.url_for(temporary=True, seconds=500, attachment=True) })

  ### From url_of()

  `${ url_of(the_file) }`
  [open](${ url_of(the_file) })

  ### From url_of(), external

  `${ url_of(the_file, _external=True) }`
  [open](${ url_of(the_file, _external=True) })

  ### From url_of(), downloadable

  `${ url_of(the_file, _attachment=True) }`
  [open](${ url_of(the_file, _attachment=True) })

  ### From path_and_mimetype()

  `${ the_path }`

  `${ the_mimetype }`
buttons:
  code: button_list
---
mandatory: True
need:
  - menu_selection
question: |
  All done
buttons:
- Restart: restartThe .uses_acroform() method
returns True if the file is a PDF file that contains form fields in
the AcroForm format. Otherwise, it returns False.
The .is_encrypted() method
returns True if the file is a PDF file and it is encrypted.
Otherwise it returns False.
The .get_pdf_fields() method
only works on PDF files. It returns a list of fields that exist in
the PDF file. See get_pdf_fields() for more information.
The
.get_docx_variables() method only works on DOCX files. It returns a
list of variables that exist in the Jinja2 templating of the file.
See get_docx_variables() for more information.
DAContext
The DAContext class is for context-dependent text. When an instance
of the DAContext class is reduced to text, different text will be
used depending on whether the text will appear on the screen or in a
document.
The DAContext class is a subclass of DADict. Possible keys of the
dictionary include:
'question''document''pdf''docx''pandoc'
If favorite_fruit is a DAContext, reducing it to text will return
favorite_fruit['question'] in the context of the web application,
and favorite_fruit['document'] in the context of document assembly.
Instead of using 'document', you can indicate particular values for
particular types of document assembly. If you define
favorite_fruit['pdf'], its value will be used in a pdf template
file assembly instead of favorite_fruit['document'].
When a DAContext object is initialized, the positional and keyword
parameters are used to populate items in the dictionary. If you
provide two positional parameters, the first parameter will become the
question and the second will become the document. If you pass one
positional parameter, the parameter will become the question.
Keyword parameters populate items in the dictionary directly
(overriding positional parameters).
objects:
  - fruits: DAList.using(auto_gather=False)
---
code: |
  fruits.clear()
  fruits.appendObject(DAContext, 'Apple', 'red fruit')
  fruits.appendObject(DAContext, 'Orange', 'fruit that rhymes with nothing')
  fruits.appendObject(DAContext, question='Peach', document='juicy fruit', docx='peachy peach', pandoc='very juicy fruit')
  fruits.gathered = True
---
question: |
  What is your favorite fruit?
fields:
  - Fruit: favorite_fruit
    datatype: object
choices: fruitsIf you use a data block with use objects enabled, DAContext
objects will be created instead of DADict objects when the YAML
includes a dictionary where the keys are a non-empty subset of
question, document, pdf, docx, and pandoc.
variable name: fruits
use objects: True
data:
  - question: Apple
    document: red fruit
  - question: Orange
    document: fruit that rhymes with nothing
  - question: Peach
    document: juicy fruit
    docx: peachy peach
    pandoc: very juicy fruit
---
question: |
  What is your favorite fruit?
fields:
  - Fruit: favorite_fruit
    datatype: object
choices: fruitsDAEmail
The e-mail receiving feature converts actual e-mails into objects of
type DAEmail. These objects have the following attributes:
short: the code that was assigned byinterview_email()(e.g.ugjrye) in order to create the e-mail address to which this e-mail was sent (e.g.[email protected]).key: thekeythat was passed tointerview_email(), orNoneif nokeywas passed.index: theindexthat was passed tointerview_email(), orNoneif no index was passed.address_owner: the e-mail address of the user whose identity and privileges were being used wheninterview_email()was called. If the user was not logged in wheninterview_email()was called, this will beNone.to_address: aDAEmailRecipientListobject representing the recipients of the e-mail.cc_address: aDAEmailRecipientListobject representing the “carbon copy” recipients of the e-mail.from_address: aDAEmailRecipientobject representing the sender of the e-mail.reply_to: aDAEmailRecipientobject representing the the Reply-to header of the e-mail.return_path: aDAEmailRecipientobject representing the the Return-path header of the e-mail.subject: the subject line of the e-mail.datetime_message: adatetimeobject representing the stated date and time of the e-mail message.datetime_received: adatetimeobject representing the actual date and time of the message.body_text: aDAFileobject referring to a file containing the plain text version of the e-mail. If the e-mail did not contain a plain text version,body_textwill beNone.body_html: aDAFileobject referring to a file containing the HTML version of the e-mail. If the e-mail did not contain a HTML version,body_htmlwill beNone.attachment: an object of typeDAFileListcontaining any files that were attached to the e-mail. Each attachment is aDAFileobject.headers: aDAFileobject referring to a file containing a JSON representation of the headers of the e-mail. The format of the JSON file is a list, where each item in the list is a list with two items, the first of which is the name of the header (e.g.,To,From), and the second item is the value.
DAEmailRecipient
A DAEmailRecipient object is used within DAEmail objects to
represent a single e-mail address and the name associated with the
e-mail address.
It has two attributes:
address: the e-mail address (e.g.,[email protected]).name: the name of the owner of the address (e.g.,Fred Smith).
.email_address()
If recipient is a DAEmailRecipient, then calling
recipient.email_address() will return the person’s name followed by
the person’s e-mail address, in the standard e-mail format. E.g.,
'Fred Smith <[email protected]>'. If the name is not defined,
it will simply return the e-mail address ([email protected]).
You can suppress the inclusion of the person’s name by setting the
optional keyword parameter include_name to False.
This method is intended to allow you to use DAEmailRecipient objects
in much the same way as Person objects are used when sending
e-mails with send_email(). (See the
.email_address() method for Person objects).
.exists()
The .exists() method returns True if the .address attribute has
been defined, and False otherwise.
DAEmailRecipientList
A DAEmailRecipientList is a DAList of DAEmailRecipient objects.
DALazyTemplate
The template block allows you to store some text to a variable.
The variable will be defined as an object of the DALazyTemplate
class.
Objects of this type have two read-only attributes:
contentsubject
When docassemble shows a template, it assembles any Mako in
the content and optional subject attributes as the resulting text.
Note that the text may have Markdown markup in it.
If a template is a variable
disclaimer, the content can be inserted by writing
${ disclaimer }, ${ disclaimer.content }, or
${ disclaimer.show() }. The latter method facilitates the use of
DALazyTemplates and DAFiles interchangably.
You can also use show() to pass variables to a template. The
template can still access variables in the interview answers, but the
names you pass will take precedence over any names that already
exist. Passing these variables will not change the interview
answers. You cannot pass variables that use indexes ([]) or
attributes (.).
template: disclaimer
content: |
  The opinions expressed herein do not
  *necessarily* reflect the views
  of ${ company }.
---
field: intro_screen
question: Welcome to the interview!
subquestion: |
  Greetings.  We hope you learn something
  from this guided interview.

  ${ disclaimer.show(company="ABC Widgets, Incorporated") }

To get started, press **Continue**.If called from within a DOCX file, show() returns paragraph-level
text converted from Markdown.
The show_as_markdown() method works just like show(), except that
when called from a DOCX file, it does not return paragraph-level text.
You can pass the results through the markdown filter or the
inline_markdown filter depending on how you want the results
formatted.
For more information about how
DALazyTemplate objects work when embedded into DOCX files, see the
section on Inserting multi-line or formatted text into a single field
in a DOCX file.
If you write Python modules
that generate HTML, you may wish to use
disclaimer.subject_as_html() and disclaimer.content_as_html().
These methods return HTML instead of Markdown.
The DALazyTemplate is called a “lazy” object because its content
and subject attributes are evaluated not when the object is defined,
but whenever it is displayed. This allows you to define a template,
the content of which depends on whatever the current state of the
interview answers is, and you can re-use the template in a variety of
contexts.
For more information about using DALazyTemplates, see the
documentation on the template. Also, see the documentation for
send_email() and send_sms().
DATemplate
The DATemplate is like the DALazyTemplate, except that its
subject and content attributes are static.
DAEmpty
The DAEmpty object is designed to stand in place of an object that
might otherwise have important attributes, but it will always return
an empty string whenever the interview tries to access its
attributes.
So if exemption is a DAEmpty object, exemption.amount will
return '', as will exemption[2],
exemption[4].authority.address.unit, etc.
This object is used internally by the item() method.
It can also be useful to use the DAEmpty object if you have a
template that refers to variables that you decide you don’t actually
want to use. If your interview simply sets those variables to
DAEmpty, your template will not trigger an error.
The DAEmpty object is not a type of DAObject.
Optionally, you can use a different textual representation than the
empty string ''. If you initialize the object as DAEmpty(str='not
applicable'), then 'not applicable' will be used in place of the
empty string.
DACatchAll
The DACatchAll is a special class used internally by the catchall
questions feature. If the definition of an undefined variable is
sought, and no block exists in the interview that defines it, the
variable will be initialized as a DACatchAll object. The
DACatchAll is a subclass of DAObject.
Like a DAObject, the DACatchAll can exist without having any
substance. But when str() or int() is called on the object, the
the value attribute is returned. Thus you can write generic
object questions that define x.value. The DACatchAll class
overrides built-in methods like __str__() and __int__() and sets
the context attribute to 'str', 'int', etc. so that your
generic
object
questions know the context in which the value was
sought. If the method is something like __add__() that takes a
parameter, the operand attribute is set to that parameter.
For more information on how DACatchAll is used, see the catchall
questions subsection.
DALink
The DALink class represents a hyperlink to a URL. It has two
properties:
url: the URL to which the link points.anchor_text: the text of the link that the user sees.
In most circumstances, it is not necessary to use a DALink to
represent a hyperlink because you can use Markdown to indicate a
hyperlink. In a docx template file template, you can write:
For more information, visit {{r the_link | inline_markdown }}.
A DALink object is another way that you can insert a hyperlink into
a docx template file.
objects:
  - the_link: DALink
---
question: |
  Tell me about a hyperlink.
fields:
  - URL: the_link.url
    hint: "https://google.com"
  - Anchor text: the_link.anchor_text
    hint: Google
---
mandatory: True
question: |
  Hyperlinks
subquestion: |
  You can find all the information
  you need at ${ the_link }.
attachment:
  name: Hyperlink demonstration
  filename: hyperlink_demo
docx template file: dalink.docxIf you want your hyperlinks to look like hyperlinks, you will need to
make sure that your DOCX template has a character style for
hyperlinks. In the DOCX template in the above example,
dalink.docx, a character style for hyperlinks is defined, and that
is why the link appears with color and underlining. For more
information, see the section on hyperlink style.
DARedis
The DARedis class facilitates the use of Redis for in-memory
storage.
objects:
  r: DARedis
---
mandatory: True
code: |
  key = r.key('my_variable')
  r.set(key, 'hello world')
---
mandatory: True
question: |
  Value has been retrieved from
  the redis server.
subquestion: |
  The key is `${ key }`.

The value is "${ r.get(key).decode() }".For the most part, an object of type DARedis functions just like an
object created through redis.StrictRedis() using the standard
Python package called redis. You can use methods like .set(),
.get(), .delete(), .incr(), etc.
However, there are three additional methods that facilitate the use of Redis in the context of docassemble interviews.
The key() method is a convenience function
for obtaining keys that you can use as Redis keys in order to avoid
name collisions across interviews. Given a key like
'favorite_fruit', it returns the key with a prefix based on the
interview, like
docassemble.food:data/questions/fruit.yml:favorite_fruit. You could
use favorite_fruit as a key, but if another interview on the system
used the same key, the interviews would interfere with one another.
The
set_data() and get_data() methods act just like the standard
methods set() and get(), except that they perform pickling and
unpickling. This allows you to store and retrieve docassemble
objects or any type of data structure that is able to be pickled.
The set_data() method takes an optional keyword argument expire,
which you can set to an integer representing the number of seconds
after which the data should be removed from Redis.
objects:
  - r: DARedis
---
question: |
  Upload a file.
subquestion: |
  Note: if someone else uses this
  interview in the 30 seconds
  after you upload the file,
  your file will be shown to
  that user.
fields:
  - File: uploaded_file
    datatype: file
---
code: |
  mykey = r.key('upload')
---
code: |
  file_from_redis = r.get_data(mykey)
---
mandatory: True
code: |
  if file_from_redis is None:
    uploaded_file.set_attributes(private=False)
    r.set_data(mykey, uploaded_file, expire=30)
    del file_from_redis
comment: |
  If there is no file in Redis, we
  get the user to upload a file.
  Then we undefine file_from_redis
  (which is None) so that in the
  next question, the interview will
  try to fetch the file from Redis
  again.
---
mandatory: True
question: |
  The file
subquestion: |
${ file_from_redis }DAStore
The DAStore is similar to DARedis, except it stores data in SQL and
it allows for encryption. It is also similar in functionality to the
write_record() and read_records() functions.
DAStore objects provide an interface to a database based on keys and
values (like Redis). The keys are strings and the values are any
Python objects that can be pickled. Unlike the interview answers,
which are tied to a particular session, the information in this
database is global and can be accessed from any interview.
objects:
  - userdata: DAStore
  - preferences: DAObject
---
code: |
  if userdata.defined("prefs"):
    preferences = userdata.get("prefs")
---
question: |
  What is your favorite fruit?
fields:
  - Fruit: preferences.favorite_fruit
---
mandatory: True
code: |
  preferences.favorite_fruit
  if not userdata.defined("prefs"):
    userdata.set("prefs", preferences)
---
mandatory: True
code: |
  final_screen
---
event: final_screen
question: All done
subquestion: |
  Your favorite fruit is
${ userdata.get("prefs").favorite_fruit }.In the above example, the user’s preferences are stored in the
database using a key that is specific to the user. The first time the
user uses the interview, the user is asked for their favorite fruit.
If the user restarts the interview (which permanently erases the
interview answers), the user’s favorite fruit will be retrieved from
the DAStore, and it will not need to be asked of the user.
The object stored in the database is a DAObject, and the favorite
fruit is an attribute of that object. In the database, the object is
stored under a key containing the word 'prefs'. This key is
specific to the user, so that each user will have their own personal
'prefs' entry in the database.
In the above interview, the object preferences is just a DAObject
with no special properties. It is an object stored in the interview
answers. You can consider it a “working copy” of the object that is
stored in the database. It is initialized by this YAML:
objects:
  - userdata: DAStore
  - preferences: DAObject
---
code: |
  if userdata.defined("prefs"):
    preferences = userdata.get("prefs")
This means “set the variable preferences to the object stored in the
database under the key "prefs", but if the "prefs" key does not
exist, then fall back to initializing preferences as an empty
DAObject.
The interview logic (the mandatory code blocks)
ensures that preferences.favorite_fruit exists. If
preferences.favorite_fruit is not defined, the question will be
asked. Then the code block will save the preferences object to
the database, but only if there is no database entry for "prefs".
Note that in the final block of the interview, the subquestion
refers to userdata.get("prefs").favorite_fruit instead of
preferences.favorite_fruit. This is because preferences was only
ever a “working copy” for purposes of 1) checking to see if
favorite_fruit was defined, and 2) populating the database if no
preferences had been stored yet. Calling
userdata.get("prefs").favorite_fruit instead of
preferences.favorite_fruit ensures that the question always
returns the user’s favorite fruit, even if it had been changed since
the preferences “working copy” was created.
Here is a different example, where the user’s preferences are a
DADict and the interview merely updates the preferences after asking
for the user’s favorite fruit.
objects:
  - userdata: DAStore
  - preferences: DADict.using(gathered=True)
---
mandatory: True
code: |
  preferences['favorite_fruit']
  preferences.saved
  final_screen
---
question: |
  What is your favorite fruit?
fields:
  - Fruit: preferences['favorite_fruit']
---
code: |
  if userdata.defined("prefsdict"):
    working_copy = userdata.get("prefsdict")
    working_copy.update(preferences)
  else:
    working_copy = preferences
  userdata.set("prefsdict", working_copy)
  preferences.saved = True
---
event: final_screen
question: All done
subquestion: |
  Your favorite fruit is
${ userdata.get("prefsdict")['favorite_fruit'] }.In this example, the prefsdict dictionary might be used in numerous
interviews and contain many different key/value pairs. Each interview
that uses the prefsdict dictionary would not need to know about all
the other key/value pairs; it just updates the key/value pairs that it
works with. Also, note that in this example interview, the user is
always asked for their favorite fruit, even if there is a
favorite_fruit preference in the prefsdict storage area.
A user can have any number of unique keys in the database. Typically,
it makes sense to use a single key to store a number of different
objects. For example, you can store a DAObject and keep different
pieces of information in the attributes, or you can store a DADict
and keep different pieces of information in the values of the
dictionary.
By default, information stored in this database is encrypted, so that only the user who stored the information can retrieve it. An exception will be raised if an attempt is made to access an encrypted record using the incorrect encryption key. As with the interview answers, the encryption key is based on the user’s password (or a randomly-generted key if the user is not logged in).
Assume you have a DAStore object called mystore.
objects:
  - mystore: DAStore
If you call mystore.get('fruit'), you will
retrieve the object from storage that is stored under the key
'fruit'. If no such object exists, None will be returned.
If you call mystore.set('fruit',
favorite_fruit), you will save the object favorite_fruit under the
key 'fruit'.
If you call mystore.delete('fruit'), it
will delete the record from the database for the key 'fruit'. No
error is raised if the record did not exist.
If you call mystore.defined('fruit'),
it will return True if an object is stored under the key 'fruit'
and False otherwise.
If you call
mystore.is_encrypted(), it will return True or False depending
on whether encryption is enabled for the data store.
If you call mystore.keys(), it will
return a list of keys that exist in the data store.
The operations of the DAStore object can be configured using two
optional attributes: base and encrypted.
docassemble stores DAStore data in a
SQL table where each record is identified by a “key” that is a string
(similarly to the way Redis works). The key that you pass to the
get(), set(), delete(), and defined() methods makes up part of
this key, but it is not the only part of it; there is a prefix that
comes before it. The base attribute determines what this prefix is,
and also determines whether the object should be encrypted by default.
For a storage object mystore, you can set mystore.base to:
'user'- The prefix will be based on the user’s ID. (If the user is not logged in, but then registers, the key will be automatically re-assigned to the logged-in user’s ID.) By default, the objects will be encrypted.'interview'- The prefix will be based on the interview name (e.g.,docassemble.demo:data/questions/questions.yml). By default, the objects will not be encrypted. Using'interview'as the prefix can be helpful if users on your server use interviews created by multiple interview developers. It will avoid a situation where, for example, two developers both use'prefs'as the key for a common data store, and there are conflicts between the way that the objects are used.'session'- The prefix will be based on a combination of the interview name (e.g.,docassemble.demo:data/questions/questions.yml) and the session ID. By default, the objects will be encrypted. In this mode, the objects will be specific to the session, meaning that if the user presses the back button, the value of the objects will be preserved. However, if the user restarts the session, the session ID will change, so the saved objects will be unavailable.'global'- Effectively, this means there is no prefix. From any interview on your server, regardless of who the user is, callingmystore.get('fruit')will retrieve the same object.- A string of your own choosing. For example, if you have a
collection of family law interviews and a collection of consumer law
interviews, and the key names you are using overlap between these
two collections, but you want the data to be separate for each
collection, you could use
'family'as thebasein the family law interviews, and'consumer'as thebasein the consumer law interviews. Then the data would be isolated between the two collections, but common within each collection. By default, encryption is disabled when you use a string of your own choosing as thebase.
If you do not specify a .base, the 'user' method will be used.
This is why, in the example above, the unique key was specific to the
user.
If you want to override the defaults
on whether the objects are encrypted, you can set the encrypted
attribute to True if you want encryption, and False if you do not
want encryption.
You can set these attributes when you initialize the object:
objects:
  - mystore: DAStore.using(base='global')
If you want to use different settings for different keys, you can
include more than one DAStore variable in your interview.
DAGlobal
The DAGlobal is a type of DAObject that stores its attributes in a
global, unencrypted area of the SQL database rather than in the
interview answers. A DAGlobal object can be used to share a Python
object across multiple sessions. With a DAGlobal object, you do not
need to manually retrieve and save (as you do with a DAStore); the
“retrieve” happens automatically when the server loads the interview
answers, and the “save” happens automatically when the server saves
the interview answers (similar to the way a SQLObject works).
Here is an example interview that lets you explore how the DAGlobal
object works.
objects:
  - g: DAGlobal.using(base=the_base, key=the_key)
  - g.fruits: DAList.using(object_type=Thing)
---
question: |
  In what scope should the object `g` be global?
field: the_base
choices:
  - User: user
  - Interview: interview
  - Global: global
---
question: |
  Under what key in the `${ the_base }` scope should the object `g` be
  saved?
subquestion: |
  Note: you can see what keys already exist by calling
  `DAGlobal.keys(${ repr(the_base) })`.

  You can test to see if a key is defined by calling
  `DAGlobal.defined(${ repr(the_base) }, some_key)`. It will return
  `True` if the key is defined and `False` otherwise.

  The result of `DAGlobal.keys(${ repr(the_base) })` is:
  `${ repr(DAGlobal.keys(the_base)) }`.
fields:
  - Key: the_key
    maxlength: 50
---
question: |
  Now we will gather a list of fruit into `g.fruits`.
continue button field: g.fruits.there_are_any
---
question: |
  What is the name of the ${ ordinal(i) } fruit?
fields:
  - Fruit: g.fruits[i].name.text
---
question: |
  Besides ${ g.fruits }, are there any more fruits in the list?
yesno: g.fruits.there_is_another
---
mandatory: True
question: |
  The list of fruits from `g.fruits`
subquestion: |
  `g` is an object of class `DAGlobal` with `g.base` set to
  `${ repr(g.base) }` and `g.key` set to `${ repr(g.key) }`.

  This list of fruits, known as `g.fruits` in the interview answers,
  is stored as the `fruits` attribute of an object in global object
  storage on the SQL server, separate from the interview answers.

  The fruits are:

  % for fruit in g.fruits:
  * ${ fruit }
  % endfor

  Because you set `g.base` to `${ repr(g.base) }`,
  % if g.base == 'user':
  `g.fruits` will be the same for the current user, regardless of the
  interview and regardless of the session, any time `g.key` is set to
  `${ repr(g.key) }`. The data will only be deleted if someone runs
  `g.delete()` or the user deletes their account.
  % elif g.base == 'interview':
  `g.fruits` will be the same in this interview,
  `${ user_info().filename }`, regardless of the user and regardless
  of the session, any time `g.key` is set to `${ repr(g.key) }`.
  The data will not be deleted unless someone runs `g.delete()`.
  % else:
  `g.fruits` will be the same on this server, regardless of the user,
  session, or interview, any time `g.key` is set to
  `${ repr(g.key) }`.  The data will not be deleted unless someone
  runs `g.delete()`.
  % endif

  The attributes of `g` do not live in the interview answers; they
  live in a separate, global area. Every time the interview answers
  load, the attributes of `g` are fetched from the separate area of
  the database, and every time the interview answers are saved, the
  attributes of `g` are saved to that separate area of the database.

  Unlike the interview answers, this separate area of the database
  does not use versioning. Thus, your use of `DAGlobal` objects may
  interfere with the way that the "Back" button works. You may wish to
  use `prevent going back: True` strategically throughout your
  interview so that the user is not confused.
buttons:
- Restart: restartThe DAGlobal object takes two attributes, which should be defined at
the time the object is created (e.g., with .using()):
key- the textual identifier for the object. The default is a random alphanumeric string, but that is not very useful so you should always specify a key of your own.base- can be one of'global','interview', or'user'. This indicates the scope in which thekeywill operate. The default is'user'.
The 'global' scope indicates that the DAGlobal object is “global”
across the entire server. If the base is 'global', then regardless
of what interview is being used, who the user is, and what the session
is, DAGlobal objects with the same key will always have the same
attributes.
The 'interview' scope indicates that the DAGlobal object is
“global” across sessions in the current interview (the YAML file for
starting the interview). If a user has multiple sessions in the
current interview, and another user also has a session of their own in
the same interview, then even though these are all separate sessions,
the DAGlobal object will be the same across them all.
The 'user' scope indicates that the DAGlobal object is “global”
across all sessions belonging to the current user.
If you want to use custom scopes, you can adopt a convention of adding
prefixes to your key. (Internally, this is what the base attribute
does inside the DAGlobal class.)
The data associated with a DAGlobal object will persist if the
interview answers are deleted. Objects with the base of 'user'
will be deleted if the user deletes their account. To delete the data
associated with a DAGlobal object, you can call the .delete()
method on it. This will delete the object from storage and also delete
all of the attributes of the Python object.
The DAGlobal class supports some helpful class methods.
Calling DAGlobal.keys(the_base) will return a list of defined keys
for the given base ('global', 'interview', or 'user').
Calling DAGlobal.keys(the_base, the_key) will return True or
False depending on whether the given key is defined within the given
base.
Note that these are class methods, not instance methods.
Since the data associated with a DAGlobal object is not stored in
the interview answers, but is stored instead on a “global” area, there
is no versioning as there is with the regular interview answers. There
is always just one copy of the data. As a result, using a DAGlobal
object in your interview logic can cause unexpected behavior when the
user presses the back button. Pressing the back button restores the
previous version of the interview answers, which ordinarily results in
the user seeing the screen they saw before. However, since the
DAGlobal data is always retrieved from a global area, rather than
from the interview answers, the attributes of the DAGlobal object
will be the same despite the back button.
It is generally advisable to use DAGlobal objects for things the
user might expect to be unaffected by the back button, such as a “user
profile.” Here is an example of an interview that provides an
interface for editing a “profile” for the user.
objects:
  - profile: DAGlobal.using(key='profile')
  - profile.user: Individual
  - profile.preferences: DADict
---
mandatory: True
code: |
  multi_user = True
  profile
  screen = {item: True for item in ['name', 'address', 'preferences']}
---
mandatory: True
question: |
  This is interview A.
subquestion: |
  Go to your [Profile](${ url_action('profile_page') }).
buttons:
  - Restart: restart
---
event: profile_page
question: |
  Your profile
review:
  - label: Edit
    field: screen['name']
    button: |
      #### Name
      % if defined('profile.user.name.first'):
      ${ profile.user }
      % else:
      <span class="text-body-secondary">Your name has not been defined.</span>
      % endif
  - label: Edit
    field: screen['address']
    button: |
      #### Address

      % if defined('profile.user.address.address'):
      ${ profile.user.address.block() }
      % else:
      <span class="text-body-secondary">You have not yet provided your address.</span>
      % endif
  - label: Edit
    fields: screen['preferences']
    button: |
      #### Preferences

      % if defined('profile.preferences.favorite_fruit'):
      Favorite fruit: ${ profile.preferences.favorite_fruit }.

      Favorite vegetable: ${ profile.preferences.favorite_vegetable }.

      Screen mode: ${ profile.preferences.screen_mode }.
      % else:
      <span class="text-body-secondary">Your preferences have not been set yet.</span>
      % endif
skip undefined: False
---
question: |
  Your name
fields:
  - First name: profile.user.name.first
  - Middle name: profile.user.name.middle
    required: False
  - Last name: profile.user.name.last
continue button field: screen['name']
---
question: |
  Your address
fields:
  - Address: profile.user.address.address
    address autocomplete: True
  - Unit: profile.user.address.unit
    required: False
  - City: profile.user.address.city
  - State: profile.user.address.state
    code: |
      states_list()
  - Zip: profile.user.address.zip
continue button field: screen['address']
---
question: |
  Preferences
fields:
  - Favorite fruit: profile.preferences.favorite_fruit
  - Favorite vegetable: profile.preferences.favorite_vegetable
  - Screen mode: profile.preferences.screen_mode
    choices:
      - Dark
      - Light
continue button field: screen['preferences']After you complete the above interview, if you go into a separate
interview that has a DAGlobal object with the same base and key,
you will see the same data.
objects:
  - profile: DAGlobal.using(key='profile')
  - profile.user: Individual
  - profile.preferences: DADict
---
mandatory: True
code: |
  multi_user = True
  profile
  screen = {item: True for item in ['name', 'address', 'preferences']}
---
mandatory: True
question: |
  This is interview B.
subquestion: |
  Go to your [Profile](${ url_action('profile_page') }).
buttons:
- Restart: restartNote that if you restart your session in one of these interviews
(which deletes the interview answers of the current session and starts
a new session), you can see that your data in the DAGlobal object
persists.
The above interview uses a review screen based on continue button
field variables to take the user to different screens. This style is
used because it maintains the back button functionality that users
expect. If the interview had been written without continue button
field variables, it would have looked like this:
objects:
- profile: DAGlobal.using(key='profile')
- profile.user: Individual
- profile.preferences: DADict
---
mandatory: True
code: |
multi_user = True
---
mandatory: True
question: |
This is interview A.
subquestion: |
Go to your [Profile](${ url_action('profile_page') }).
buttons:
- Restart: restart
---
event: profile_page
question: |
Your profile
review:
- label: Edit
field: profile.user.name.first
button: |
#### Name
${ profile.user }
- label: Edit
field: profile.user.address.address
button: |
#### Address
${ profile.user.address.block() }
- label: Edit
fields: profile.preferences.favorite_fruit
button: |
#### Preferences
Favorite fruit: ${ profile.preferences.favorite_fruit }.
Favorite vegetable: ${ profile.preferences.favorite_vegetable }.
Screen mode: ${ profile.preferences.screen_mode }.
skip undefined: False
---
question: |
Your name
fields:
- First name: profile.user.name.first
- Middle name: profile.user.name.middle
required: False
- Last name: profile.user.name.last
---
question: |
Your address
fields:
- Address: profile.user.address.address
address autocomplete: True
- Unit: profile.user.address.unit
required: False
- City: profile.user.address.city
- State: profile.user.address.state
code: |
states_list()
- Zip: profile.user.address.zip
---
question: |
Preferences
fields:
- Favorite fruit: profile.preferences.favorite_fruit
- Favorite vegetable: profile.preferences.favorite_vegetable
- Screen mode: profile.preferences.screen_mode
choices:
- Dark
- LightIn this example, the review screen with skip undefined: False
will cause profile.user.name.first, profile.user.address.address,
and profile.preferences.favorite_fruit to be defined before the user
can see the review screen. This works as long as the user only
goes forward. But if you try pressing the back button after defining
one of these variables, you will see that the screen does not change.
Here are some possible applications of a DAGlobal object:
- Storing basic information about the user in a form that follows them
from session to session, using a
DAGlobalobject with'user'as thebase. You could develop an editing interface for this basic information, package it in a YAML file, and thenincludethat YAML file into all of your interviews, so that the user can edit their basic information from inside of any session. - Aggregating responses to questions in a given interview. For
example, you could conduct a poll by incrementing integer attributes
of a
DAGlobalobject with'interview'as thebase. You could make one of the attributes of aDAGlobalobject a Pythonsetand.add()items to it, building a “crowdsourced” set of items that could be used as the choices in a multiple choice question. - Track usage statistics across your server by incrementing integer
attributes of a
DAGlobalobject with'global'as thebase.
Note that the DAGlobal object, like the DAStore object, is not
meant to be a replacement for a database. If you need to maintain a
large database, storing large amounts of data in a pickled object is
not a good idea. Instead, you should call the API of third-party
database software, or use a SQLObject tied to a real SQL database.
DACloudStorage
The DACloudStorage object allows you to access low-level
functionality of cloud storage using Amazon S3 or Azure blob
storage, using the boto3 and azure.storage.blob libraries,
respectively.
Suppose you include the following in your interview:
objects:
- cloud: DACloudStorageIf you have enabled s3 in your Configuration, then:
cloud.connwill return aboto3.resource('s3')object initialized according to thes3configuration.cloud.clientwill return aboto3.client('s3')object initialized according to thes3configuration.cloud.bucketwill return aBucketobject for the bucket defined in thes3configuration.cloud.bucket_namewill return the name of the bucket defined in thes3configuration.
If you have enabled azure in your Configuration, then:
cloud.connwill return aBlockBlobService()object initialized according to theazureconfiguration.cloud.container_namewill return the name of the container defined in theazureconfiguration.
In some circumstances, you might not be using s3 or azure for
persistent storage, or you may wish to access a different bucket or
container. In that case, you can initialize the DACloudStorage
object so that it uses a different directive in the Configuration.
For example, if you have an S3 bucket called mybucket-example-com,
and your Configuration contains the following:
mybucket:
access key id: AGJBRKYM3T4FY7HYWNBQ
secret access key: BkwEQeg+yeC3EJ2MoCDwY8jbiWrtKdLf4q3++EBd
bucket: mybucket-example-comThen you can initialize a DACloudStorage object as follows:
objects:
- cloud: DACloudStorage.using(provider='s3', config='mybucket')Then, you can use the cloud object to access the contents of the
mybucket-example-com bucket in your interview. For example:
question: |
How to seek help
subquestion: |
${ cloud.bucket.Object('markdown_files/help.md').get()['Body'].read().decode('utf-8') }In this example, the subquestion incorporates the contents of a
file called help.md located in the markdown_files folder of the
mybucket-example-com bucket.
For more information on how to use these objects, see the documentation for boto3 and azure.storage.blob.
The DACloudStorage object simply provides a convenient way to obtain
an authenticated API connection to Amazon S3 or Azure blob
storage. If you do not use a DACloudStorage object, you can still
use the boto3 and azure.storage.blob packages; the only added
complication is that you have to handle authentication yourself. You
can use the get_config() function to retrieve custom values from
your Configuration.
For example, here is a Python module that defines a function that retrieves a list of object names from an existing S3 bucket.
import boto3
import docassemble.base.util
s3_config = docassemble.base.util.get_config('manual s3 configuration')
def list_keys(prefix):
conn = boto3.resource('s3', region_name='us-east-1', aws_access_key_id=s3_config['access key id'], aws_secret_access_key=s3_config['secret access key'])
client = boto3.client('s3', region_name='us-east-1', aws_access_key_id=s3_config['access key id'], aws_secret_access_key=s3_config['secret access key'])
bucket = conn.Bucket('example-com-data-bucket')
output = list()
for item in bucket.objects.filter(Prefix=prefix, Delimiter='/'):
output.append(item.key)
return outputThis assumes you have a custom directive in your Configuration that looks like this:
manual s3 configuration:
access key id: FWIEJFIJIDGISEJFWOEF
secret access key: RGERG34eeeg3agwetTR0+wewWAWEFererNRERERGDAOAuth
The DAOAuth objects facilitates using OAuth2 authentication in the
context of an interview.
modules:
.oauthsheets
---
objects:
- google: GoogleAuth.using(url_args=url_args)
---
initial: True
code: |
if not user_logged_in():
message("Test Google Sheets Integration", "Sorry, you must be logged in to test this interview.")
---
mandatory: True
question: |
Here is some data.
subquestion: |
`${ google.test() }`Although OAuth2 is fairly complicated, the way that docassemble
handles it is fairly simple. There are two main things that the
DAOAuth object does: first, it uses the response() function to
trigger a browser redirect to the third-party OAuth2 process if the
user has missing or invalid credientials; second, the OAuth2 site
redirects the user back to the interview (at /interview on the
docassemble site, or whatever the base URL returned by
interview_url() is) and the url_args dictionary is used to
retrieve the access token obtained during the OAuth2 process.
In the above example, the user needs to be logged in because the OAuth2 credentials are stored globally using Redis using the user’s e-mail address as part of the key. However, a later example will demonstrate how to use identifiers other than the user’s e-mail address.
To follow this example and use a DAOAuth object to connect to
Google, you need to use the Google Developers Console and enable the
“Google Sheets API.” Under Credentials, create an “OAuth client ID”
for a “web application.” Assuming your server is at
https://interview.example.com, add https://interview.example.com to
the “Authorized JavaScript origins.” Then, under “Authorized redirect
URIs,” add https://interview.example.com/interview (or
https://interview.example.com/run/yourshortcut if you are using a
shortcut). Make a note of the “Client ID” and the “Client secret”
because you will need to plug those values into the Configuration
The module oauthsheets.py contains the following:
from docassemble.base.util import DAOAuth
from googleapiclient.discovery import build
__all__ = ['GoogleAuth']
class GoogleAuth(DAOAuth):
def init(self, *pargs, **kwargs):
super().init(*pargs, **kwargs)
self.appname = 'mygoogle'
self.token_uri = "https://www.googleapis.com/oauth2/v4/token"
self.auth_uri = "https://accounts.google.com/o/oauth2/v2/auth"
self.scope = "https://www.googleapis.com/auth/spreadsheets"
def test(self):
service = build('sheets', 'v4', http=self.get_http())
SAMPLE_SPREADSHEET_ID = '1BxiMVs0XRA5nFMdKvBdBZjgmUUqptlbs74OgvE2upms'
SAMPLE_RANGE_NAME = 'Class Data!A2:E'
sheet = service.spreadsheets()
result = sheet.values().get(spreadsheetId=SAMPLE_SPREADSHEET_ID,
range=SAMPLE_RANGE_NAME).execute()
values = result.get('values', [])
return valuesThis example connects to Google, but note that OAuth2 is a general protocol used by a number of authentication providers.
The GoogleAuth class is a subclass of DAOAuth. The following four
attributes must be defined:
appname- This is a name that you choose. Credentials will be stored based on this application name as well as the user’s e-mail address. In this example, the application name ismygoogle.token_uri- This is the URL for obtaining the OAuth2 token. It should be provided in the documentation for the OAuth2 API.auth_uri- This is the URL for OAuth2 authorization. It should be provided in the documentation for the OAuth2 API.scope- This is the scope of access you are requesting. The format should be documented in the documentation for the OAuth2 API.
Since the application name is mygoogle, you need to edit your
Configuration to add the “Client ID” and “Client secret” under the
oauth directive as follows:
oauth:
mygoogle:
id: 18761224589-4t28ji14udf7pa39hd5ssqdttebt959y.apps.googleusercontent.com
secret: UnDdE_EBOft7wYU8rmCFXTdyNote that in the interview, the object was defined with
.using(url_args=url_args), and that the “redirect URI” was
/interview. This is all necessary because after the OAuth2
process, the OAuth2 provider will redirect back to your interview
with the URL parameters state and code. The DAOAuth object needs
to have a reference to the url_args so that it can read these URL
parameters.
Note that if the user has opened sessions in multiple different
interviews, when the user is redirected to /interview, they may
resume a different session. To avoid this, use /start/ URLs to start
interview sessions and /run/ URLs to resume interview sessions. This
is a limitation of OAuth2, which does not allow URL parameters in
the URL to which the user is redirected.
If you need to modify the way DAOAuth works, you can copy and paste the
code for DAOAuth out of docassemble.base.util into your own module.
The methods of DAOAuth that are useful are:
.get_credentials()- this returns credentials in the format used byoauth2client.client..get_http()- this returns ahttplib2.Http()object that has been modified so that it contains the necessary OAuth2 credentials. If the user it not authorized, this will cause authorization to be requested..ensure_authorized()- this does not return anything, but it will cause authorization to be requested if there are no stored credentials or if the stored credentials are invalid..active()- this will returnTrueif there are stored credentials in the system for the user. It will not test if the credentials are valid..is_authorized()- this will returnTrueif there are stored credentials in the system for the user and the credentials are valid. It will not cause authorization to be requested..delete_credentials()- this will delete the stored credentials from the system.
Here is a longer version of the interview above, demonstrating how to add a menu item that allows the users to manage their credentials.
modules:
.oauthsheets
---
objects:
- google: GoogleAuth.using(url_args=url_args)
---
initial: True
code: |
if not user_logged_in():
message("Test Google Sheets Integration", "Sorry, you must be logged in to test this interview.")
menu_items = []
intro_screen
---
question: |
You need to connect with Google Sheets.
subquestion: |
Press Continue to connect.
field: intro_screen
---
code: |
if google.active():
intro_screen = True
---
initial: True
code: |
menu_items = [ action_menu_item('Manage Credentials', 'manage_credentials') ]
---
mandatory: True
question: |
Here is some data.
subquestion: |
`${ google.test() }`
---
question: |
Manage credentials
subquestion: |
You do not have any stored credentials.
field: manage_credentials
continue button label: Resume
---
if: google.active()
question: |
Manage credentials
subquestion: |
If you want to delete your credentials, you can do so.
${ action_button_html(url_action('delete_credentials'), label="Delete credentials", color="danger") }
Otherwise, you can go back to the interview.
continue button label: Resume
field: manage_credentials
---
event: delete_credentials
code: |
google.delete_credentials()
undefine('intro_screen')By default, the DAOAuth object will remember the user’s credentials
for six months. To set a different period, you can set the expires
attribute to an integer number of seconds or to None if the
credentials should be remembered forever. Here is an example of
storing credentials for one week:
objects:
- google: GoogleAuth.using(url_args=url_args, expires=60*60*24*7)The examples above have demonstrated using the logged-in user’s e-mail address as the identifier for storing the credentials. This is the default behavior. The advantage is that a given user only needs to go through the oauth process once and then they will connect automatically in the future, even in different sessions and interviews.
However, you might want to use an OAuth2 process for a non-logged-in
user, or you might want a different unique ID than the user’s e-mail
address. You can set a custom unique_id to be used instead.
objects:
- google: GoogleAuth.using(url_args=url_args, unique_id=process_number)
---
code: |
process_number = some_custom_api_call()You might use this in a situation where an external server initializes the session using the API and populates the unique ID as a variable in the interview answers. In this situation, you would need to prevent users from initiating a session if that unique ID was not defined. Here is one way to do it.
# get the session ID of a new session
r = requests.get(server + '/api/session/new', params={'key': api_key, 'i': interviewname})
session_id = r.json()['session']
# pre-populate the user_id variable in the interview answers of the session
r = requests.post(server + '/api/session', data={'key': api_key, 'i': interviewname, 'session': session_id, 'variables': json.dumps({'initialized': true, 'user_id': user_id})})
# obtain a URL for directing the user to the session
r = requests.post(root + '/api/resume_url', data={'key': key, 'i': interviewname, 'session': session_id})
url = r.json()The interview would then use the initialized variable to control
whether a user can have access.
objects:
- google: GoogleAuth.using(url_args=url_args, unique_id=user_id)
---
mandatory: True
code: |
multi_user = True
if not initialized:
kick_out
---
code: |
initialized = False
---
event: kick_out
question: Go away
---
mandatory: True
code: |
intro_screen
---
question: |
You need to connect with Google Sheets.
subquestion: |
Press Continue to connect.
field: intro_screen
---
code: |
if google.active():
intro_screen = TrueIf you only need the OAuth2 connection to survive for the duration
of the session, you can set use_random_unique_id=True in the
configuration, and a randomly-generated unique_id will be set.
objects:
- google: GoogleAuth.using(url_args=url_args, use_random_unique_id=True)If you set a custom unique_id or you set use_random_unique_id to
true, then the default expiration time for the credentials is 24 hours
rather than six months.
If you are using a DAWeb for
communication with an API that requires OAuth2 authentication, you
can add something like the following to the top of your YAML:
objects:
- auth: MyAuth.using(url_args=url_args)
- api: DAWeb
---
initial: True
code: |
auth.authorize(api)Here, auth is an instance of your DAOAuth subclass, and api is
an instance of the DAWeb class. Running auth.authorize(api)
will perform the OAuth2 process if necessary, and then it will
define a default header in your DAWeb instance that will authorize
requests to the API. It is important that .authorize() always run
in the same screen load as any calls to the web API. This interview
achieves this by running .authorize() every time the screen loads
(with initial: True). This means that if the token has expired, it
will be refreshed.
DAWeb
The DAWeb object facilitates making requests to APIs.
objects:
- web: DAWeb.using(base_url='https://api.spacexdata.com/latest')
---
code: |
launch_info = web.get('launches/latest')
---
code: |
rocket_info = web.get('rockets/' + launch_info['rocket'])
---
code: |
ship_info = web.get('ships',
data={'ship_type': 'Tug'})In this example, the .get() method makes GET requests to API
that provides information about the SpaceX company. The two API
URLs that are called are:
You could make these calls yourself in code using the requests
module, which is very easy to use. The DAWeb object is effectively
a front end for requests. The purpose of DAWeb is to allow you
to call APIs from within interviews while keeping your code readable.
The DAWeb object lets you set default values for things like the
base URL of the API and what headers or cookies to use, so that your
calls to the APIs can be written in succinct code.
A single DAWeb object can be re-used throughout your interview to
call different API endpoints. The object stores default values and
provide methods that you can call.
The following methods are supported:
.get()- makes a GET request.post()- makes a POST request.delete()- makes a DELETE request.put()- makes a PUT request.patch()- makes a PATCH request.options()- makes a OPTIONS request.head()- makes a HEAD request
Each of these methods has a single required parameter, which is the URL. You can give it a full URL:
objects:
- web: DAWeb
---
code: |
launch = web.get("https://api.spacexdata.com/v3/launches/latest")If you set the base_url attribute of the object, you can call the
.get() method with an easier-to-read URL fragment, and keep the
https:// part in your object initializer:
objects:
- web: DAWeb.using(base_url="https://api.spacexdata.com/v3")
---
code: |
launch = web.get("launches/latest")You do not have to worry about putting a / at the end of the
base_url or at the beginning of a relative URL; whether you include
a / or not, it will figure out what the correct URL should be.
The methods also accept a number of optional keyword parameters. The
most import optional keyword parameter is data. Set this to a
dict or DADict containing the URL parameters or form fields
that you want to include in the request.
code: |
launch = web.get('ships', data={'ship_type': 'Tug'})This results in a GET request to the URL
https://api.spacexdata.com/v3/ships?ship_type=Tug. The URI encoding
of the parameters is handled automatically.
The data parameter is also used to pass data when making POST
requests:
code: |
result = web.post('https://api.example.com/new_user', data={'name': 'Fred'})The data parameter will be converted to JSON and passed as the
body of the POST request using application/json as the content
type. If the API cannot accept data in this format, you can set
json_body to False. With json_body set to False, the more
traditional method of sending form data is used, where the content
type is application/x-www-form-urlencoded. In this case, the
data parameter must be a dictionary.
code: |
result = web.post('https://api.example.com/new_user', data={'name': 'Fred'}, json_body=False)To upload a file, set the files keyword parameter to a dictionary
where the keys are the names of the fields the server is expecting and
the values are references to files. You can refer to docassemble
file-like objects (e.g., DAFile, DAStaticFile) or references
to files in a package (e.g., 'picture_of_fred.png' or
'docassemble.missouri:data/static/picture_of_fred.png'). File
system paths are not accepted.
question: |
Please upload a picture of ${ user }.
fields:
- Picture: user.portrait
datatype: file
---
code: |
result = web.post('https://api.example.com/image',
data={'name': user.name.full()},
files={'portrait': user.portrait})In this case, the API at the /image POST endpoint is expecting to
receive a file upload using the field name portrait.
When using GET, DELETE, HEAD, and OPTIONS, you can only pass
information to the API using URL parameters, but when using POST,
PUT, and PATCH, you can use both URL parameters and form data to
send information to the API. If you need to set URL parameters when
sending form data with .post(), .patch(), or .put(), you can set
the params parameter to a dictionary of URL parameters, while
setting the data parameter to a dictionary of information that you
want to send in the body of the request.
code: |
result = web.post('https://api.example.com/user', params={'action': 'new'}, data={'name': 'Fred'})You can also use the keyword parameter params instead of data when
using .get(), .delete(), etc.
You can set a default value for the json_body keyword argument by
setting the json_body attribute of the object:
objects:
- web: DAWeb.using(base_url="https://api.example.com", json_body=False)All of the keyword parameters (except for data, params, and
files) work the same way; if you want to set a default value for a
parameter, you just set the attribute of the object, and then the
value will be used in every method call you make. Thus, the method
calls you make in your interview can be succinct and free of
repetition. If you ever need to override the default value in a
special case, you can just set the keyword parameter when calling the
method.
With the headers attribute (or keyword parameter), you can add
special headers to a request. For example, if you want to masquerade
as a Firefox browser, you can set the User-Agent header.
objects:
- web: DAWeb.using(base_url='https://api.spacexdata.com/v3',
headers={'User-Agent': 'Mozilla/5.0 (X11; Linux x86_64; rv:68.0) Gecko/20100101 Firefox/68.0'})If your API uses Basic Auth or Digest Auth, you can pass your
credentials using the auth attribute (or keyword parameter). It
should refer to a dictionary with three keys: type, username, and
password.
objects:
- web: DAWeb.using(base_url='https://api.example.com', auth={'type': 'basic', 'username': 'jsmith', 'password': 'xxsecret'})To use Basic Auth, set type to 'basic'. To use Digest Auth,
set type to 'digest'. If you don’t specify a type, 'basic' is
assumed.
Similarly, if your API uses bearer token authentication, you can set
auth to a dictionary where 'type' is 'bearer' and 'token' is
your bearer token.
objects:
- web: |
DAWeb.using(base_url='https://api.example.com',
auth={'type': 'bearer',
'token': 'uweoDS0iBfirGwesB.8d29230fa55b5c5deb2f87a82b3f6d2f4ab25c2b7e34b563d3b8fb84532c254b'})It is generally a good idea not to put passwords in source code. You
can store your credentials in the Configuration and use the
get_config() function to retrieve them. You can put this in your
Configuration:
example.com credentials:
type: basic
username: jsmith
password: xxsecretThis YAML specifies a dictionary. When you call
get_config('example.com credentials'), it will return the dictionary
{'type': 'basic', 'username': 'jsmith', 'password': 'xxsecret'}.
Thus, you can write:
objects:
- web: DAWeb.using(base_url='https://api.example.com', auth=get_config('example.com credentials'))If the API you are calling relies on a cookie being set, you can set
the cookies attribute to a dictionary containing your cookie values.
objects:
- web: DAWeb.using(base_url='https://api.example.com', cookies={'X-Auth-Secret': '5tTy34SfTeG3e'})If you set a cookies attribute, then every time the API is called,
any new cookies set by the server will be updated in the cookies
attribute, so that the next time you use the DAWeb object to call
the API, these cookies will be sent. This can be useful if the server
needs its own cookies in order to function correctly. By contrast, if
you only set the cookies in a keyword parameter when calling a method,
then the cookies attribute will not be updated.
If you are using an API that uses OAuth2 authentication, see the
authorize() method of the DAOAuth class, discussed at the end
of the previous section.
The value returned by the method depends on whether the HTTP request
succeeded and the format of the data returned by the server. Most API
servers return a JSON data structure. The DAWeb methods will
convert that JSON data structure into a Python data structure and
return it. If a request is not successful, None is returned.
By default, a request will be considered successful if the status code
returned by the server is between 200 and 299. You can change this by
setting success_code to a specific value, or a list (or tuple) of
values:
code: |
result = web.post('new_user',
data={'name': 'Fred'},
success_code=204)In this case, if the POST request results in a response with status code 200, it will be treated as unsuccessful.
code: |
result = web.post('new_user',
data={'name': 'Fred'},
success_code=[200, 204])In this case, if the POST request results in a response with a status other than 200 or 204, it will be treated as unsuccessful.
One of the dangers of calling APIs in interviews is that you might
mistakenly call the API repeatedly. Like the send_email()
function, DAWeb methods can mark a task as successful if the request
is successful. You indicate the task by setting the task keyword
parameter.
code: |
if task_not_yet_performed('user_created'):
web.post('new_user', data={'name': 'Fred'}, task='user_created')If you set a task, you can optionally set the “persistence” of the
task by setting the task_persistent keyword parameter to True or
False. The default is False. For more information, see the
documentation for the task-related functions.
You can control what is returned if a request is unsuccessful by
setting the on_failure attribute (or keyword parameter). If you set
on_failure to {'success': False}, then that dictionary will be
returned in case of an error. The default value is None, meaning
that None is returned in case the request is not successful.
There are special values of on_failure that
you might want to use:
- if you set
on_failureto'text', then the UTF-8-decoded text response is returned. - if you set
on_failureto'content', then the raw (not UTF-8 decoded) response is returned. - if you set
on_failureto'raise', then if the request is unsuccessful, an exception of typeDAWebErroris raised, which you can trap:
objects:
- web: DAWeb.using(base_url='https://api.example.com', on_failure='raise')
---
code: |
try:
result = web.get('status')
except DAWebError as e:
log("Uh oh, the API returned status code " + str(e.status_code))
result = FalseThe DAWebError object has the following attributes:
url: the full URL to which the request was mademethod: the HTTP method that was used for the requestparams: the URL parameters that were sent in the requestdata: the data that were were sent in the body of the request (if applicable)task: the task that would have been marked as completed if the request was successfultask_persistent: the value oftask_persistentused during the call.headers: the headers that were sent in the requeststatus_code: the status code of the response, or -1 if there no response (e.g., because of a network error)response_text: the raw text of the responseresponse_json: the data structure of the response, if it was in JSON formatresponse_headers: a dictionary containing the response headersexception_type: the name of the exception class, if a call torequestsreturned an exceptionexception_text: the text of the exception, if a call torequestsreturned an exceptioncookies_before: a dictionary containing the cookies that were sent with the requestcookies_after: the cookies that were returned in the responsesuccess:TrueorFalseindicating whether the request was successful
Similarly, you can also control what is returned when the request is
successful by setting on_success to a value. If you set
on_success to True, then True will be returned if the request
was successful.
There are three special values of on_success that you might want to
use:
- if you set
on_successtotext, then the UTF-8-decoded text response is returned. You may want to use this if you don’t want docassemble to attempt to convert the response to JSON, and you just want the plain text of the response - if you set
on_successtocontent, then the raw (not UTF-8 decoded) response is returned. You may want to use this if the request might return a binary file, such as an image or a PDF file. For example, you could download a file by settingon_success=contentand then passing the result to thewrite()method of theDAFileclass, along withbinary=True.
The on_success feature also supports the special 'raise' result,
in case you want to inspect the output of a successful call. Although
if you are this interested in inspecting the results of a successful
call, you should probably be writing custom methods that call
requests directly.
DAGoogleAPI
The DAGoogleAPI object provides convenient access to Google’s APIs
through a Google service account that you set up in the Google
Developers Console and enable in the docassemble Configuration.
The DAGoogleAPI object can be used with the low-level Google API
and also with higher-level API packages like gspread or the Cloud
Translation API Client Library.
The benefit of the DAGoogleAPI object is that it streamlines the
process of authenticating to Google’s servers. It also provides a
standard way to keep service account authentication information in
the Configuration.
Setup process
In order for your site to communicate with Google, you will need to
create an account on the Google Developers Console and create an
“app.” Within this app, you will need to create a service account.
Then set the service account credentials directive in the
Configuration to the credentials for this service account. For
more information on how to do this, see the documentation for the
service account credentials directive.
Finally, you need to use the Google Developers Console to enable the APIs that you want to use. For example, if you want to use the Google Drive API, you need to explicitly enable the Google Drive API for your app.
Usage
Suppose you define api to be a DAGoogleAPI object:
objects:
- api: DAGoogleAPIThere are two categories of methods available. The first is for the
low-level Google API available through the
google-api-python-client package. This can be used to control any
of the Google APIs.
api.api_credentials(scope)- this returns aServiceAccountCredentialsobject from the oauth2client.service_account library, initialized for the givenscope.api.http(scope)- this returns anhttplib2.Http()object that has been modified to send the appropriate credentials to Google.api.drive_service()- this returns the resultapiclient.discovery.build()with the appropriate parameters for the Google Drive API.
The scope can be a single scope like
'https://www.googleapis.com/auth/drive', or it can be a list of
scopes, like ['https://www.googleapis.com/auth/cloud-platform',
'https://www.googleapis.com/auth/cloud-vision']. You can browse
Google’s directory of scopes.
Here is an example of a Python module that uses the
.drive_service() method of the DAGoogleAPI object to provide
convenience functions for reading and writing to a Google Drive
folder:
from docassemble.base.util import DAGoogleAPI, DAFile
import apiclient
api = DAGoogleAPI()
__all__ = ['get_folder_names', 'get_files_in_folder', 'write_file_to_folder', 'download_file']
def get_folder_names():
service = api.drive_service()
items = list()
page_token = None
while True:
response = service.files().list(spaces="drive",
fields="nextPageToken, files(id, name)",
q="mimeType='application/vnd.google-apps.folder' and sharedWithMe"
pageToken=page_token).execute()
for the_file in response.get('files', []):
items.append(the_file)
page_token = response.get('nextPageToken', None)
if page_token is None:
break
return [item['name'] for item in items]
def get_folder_id(folder_name):
service = api.drive_service()
response = service.files().list(spaces="drive",
fields="nextPageToken, files(id, name)",
q="mimeType='application/vnd.google-apps.folder' and sharedWithMe and name='" + str(folder_name) + "'").execute()
folder_id = None
for item in response.get('files', []):
folder_id = item['id']
return folder_id
def get_file_id(filename, folder_name):
folder_id = get_folder_id(folder_name)
if folder_id is None:
raise Exception("The folder was not found")
service = api.drive_service()
file_id = None
response = service.files().list(spaces="drive",
fields="nextPageToken, files(id, name)",
q="mimeType!='application/vnd.google-apps.folder' and '" + str(folder_id) + "' in parents and name='" + str(filename) + "'").execute()
for item in response.get('files', []):
file_id = item['id']
return file_id
def get_files_in_folder(folder_name):
folder_id = get_folder_id(folder_name)
if folder_id is None:
raise Exception("The folder was not found")
service = api.drive_service()
items = list()
page_token = None
while True:
response = service.files().list(spaces="drive",
fields="nextPageToken, files(id, name)",
q="mimeType!='application/vnd.google-apps.folder' and trashed=false and '" + str(folder_id) + "' in parents"
pageToken=page_token).execute()
for the_file in response.get('files', []):
items.append(the_file)
page_token = response.get('nextPageToken', None)
if page_token is None:
break
return [item['name'] for item in items]
def write_file_to_folder(path, mimetype, filename, folder_name):
folder_id = get_folder_id(folder_name)
if folder_id is None:
raise Exception("The folder was not found")
service = api.drive_service()
file_metadata = { 'name': filename, 'parents': [folder_id] }
media = apiclient.http.MediaFileUpload(path, mimetype=mimetype)
the_new_file = service.files().create(body=file_metadata,
media_body=media,
fields='id').execute()
return the_new_file.get('id')
def download_file(filename, folder_name):
file_id = get_file_id(filename, folder_name)
if file_id is None:
raise Exception("The file was not found")
the_file = DAFile()
the_file.set_random_instance_name()
the_file.initialize(filename=filename)
service = api.drive_service()
with open(the_file.path(), 'wb') as fh:
response = service.files().get_media(fileId=file_id)
downloader = apiclient.http.MediaIoBaseDownload(fh, response)
done = False
while done is False:
status, done = downloader.next_chunk()
the_file.commit()
return the_fileTo use this module, log in to Google Drive using a normal Google
account and create a folder. Then share that folder with the e-mail
address of your service account. Then, when you call
get_folder_names(), the name of this folder will be part of the list
that is returned.
Here is an interview that uses this module to access a Google Drive
folder called “DADemo”. It assumes the module is a file called
google_drive.py in the same package as the interview.
modules:
- .google_drive
---
mandatory: True
code: |
first_screen
files_copied_to_google_drive
final_screen
---
question: |
Files in your Google Drive
subquestion: |
% for item in get_files_in_folder('DADemo'):
* ${ item } ${ download_file(item, 'DADemo') }
% endfor
field: first_screen
---
question: |
Please upload a file.
fields:
- File: uploaded_files
datatype: files
---
code: |
for the_file in uploaded_files:
(path, mimetype) = path_and_mimetype(the_file)
write_file_to_folder(path, mimetype, the_file.filename, 'DADemo')
files_copied_to_google_drive = True
---
event: final_screen
question: Names of files in folder
subquestion: |
% for item in get_files_in_folder('DADemo'):
* ${ item }
% endforYou can use any Google API, not just the Google Drive API. The
.drive_service() method is provided only as a convenience. You can
create your own services by running something like:
import apiclient
import docassemble.base.util
api = docassemble.base.util.DAGoogleAPI()
http = api.http('https://www.googleapis.com/auth/cloud-translation')
service = apiclient.discovery.build('translate', 'v2', http=http)Note that while the api object can safely persist in your users’
interview session dictionary, a variable like service cannot be
pickled, so if you store it in your interview file, you will get an
error. Ideally, you should always use Python modules for functions
that access APIs, so that there is no danger of an error if
docassemble tries to pickle an object that cannot be pickled.
The second category of methods is for Google Cloud packages like
google.cloud.storage and google.cloud.translate. If a Google
service is available both through google-api-python-client and
through one of the Google Cloud packages, the Google Cloud
packages are probably preferable because they are newer and
easier to use. Most of these packages are not installed in the
docassemble system by default and will need to be installed with
“Package Management” if you want to use them. Whatever package name
Google tells you to use with pip, you can type into the “Package on
PyPI” field in “Package Management.”
The methods of the DAGoogleAPI object that can be used with the
Google Cloud packages include the following:
api.cloud_credentials(scope)- this returns aCredentialsobject from the google.oauth2.service_account module, initialized for the givenscope.api.project_id()- this returns the ID of the “app” in which the service account is configured. This ID, which is just a text string, is required by some API methods.google_cloud_storage_client()- this returns agoogle.cloud.storage.Clientobject that can be used to access the Google Cloud Storage API.google_cloud_vision_client()- this returns agoogle.cloud.vision.ImageAnnotatorClientobject that can be used to access the Google Cloud Vision API.
Here is an example of a Python module that uses the Google Cloud
Storage API (the google.cloud.storage Python package):
import docassemble.base.util
__all__ = ['make_bucket', 'get_bucket', 'make_blob']
api = docassemble.base.util.DAGoogleAPI()
client = api.google_cloud_storage_client()
def make_bucket(bucket_name):
return client.create_bucket(bucket_name)
def get_bucket(bucket_name):
return client.get_bucket(bucket_name)
def make_blob(bucket_name, blob_name, blob_content):
bucket = get_bucket(bucket_name)
blob = bucket.blob(blob_name)
blob.upload_from_string(blob_content)
return blobDABreadCrumbs
The DABreadCrumbs object facilitates displaying “breadcrumbs” in the
user interface to show the user where they are when the current
question is the result of an action within an action.
In the following example interview, after reaching the “Thank you for your answers!” page, the user can launch an action within an action within an action by doing the following:
- Click the “edit your answers” link
- Click “Edit” on one of the table items
- Click the “types of fruit” link on the page that asks for a person’s favorite fruit.
When the user enters a nested action like this, a “breadcrumbs” display may help make clear how the question they are seeing relates to the original action they launched.
objects:
- bc: DABreadCrumbs
---
default screen parts:
pre: |
${ bc.show() }
---
breadcrumb: Edit person
question: |
Who is the ${ ordinal(i) } person?
fields:
- First Name: person[i].name.first
- Last Name: person[i].name.last
---
breadcrumb: Edit fruit
question: |
What is ${ person[i].possessive('favorite fruit') }?
subquestion: |
Make sure you indicate
${ person[i].possessive('most favorite fruit') },
taking into account all of the
[types of fruit](${ url_action('explore_fruit') }) that exist in the
universe.
fields:
- Fruit: person[i].favorite_fruit
---
breadcrumb: Edit answers
question: |
Edit your answers
review:
- note: |
% if len(person):
The people are:
${ person.table }
${ person.add_action() }
% else:
There are no people.
${ person.add_action("I would like to add one.") }
% endif
event: review_interview
---
breadcrumb: Fruit types
question: Types of fruit
subquestion: |
There are several types of fruit, including:
* apple
* orange
* grapes
* peach
* lemon
* grapefruit
* pear
* lime
* mango
* tomato
* melon
continue button field: explore_fruitA “breadcrumbs” display may be particularly helpful when you have a
review screen that allows the user to spot-edit answers in a
lengthy interview. When an interview is long, it is a best practice
to avoid having a very lengthy review screen and to instead allow
the user to navigate through sub-screens to the field they want to
edit. For example, clicking an edit button on the main review
screen could open a subsidiary review screen, on which clicking an
edit button launches a process of editing several variables in
series. In a scenario like this, the breadcrumbs will help the user
see the path they took from the original review screen.
A DABreadCrumbs object does not store any data; it is simply a
mechanism for accessing and displaying the actions that are
currently active. The core method of DABreadCrumbs is
.get_crumbs(), which returns a Python list of breadcrumb names of
the “parent” questions, followed by the current question. By
default, the breadcrumb name of a question is the text indicated
by the question specifier. However, this can be overridden by
attaching a breadcrumb modifier to the question. If the
question the user is seeing is not the result of an action, then
.get_crumbs() returns an empty list.
The .show() method returns raw HTML for displaying the breadcrumbs
in Bootstrap format. If there are no breadcrumbs to display, the
.show() method returns the empty string.
In the above example interview, the breadcrumbs are inserted into the
pre screen part, but you can place them anywhere you want.
Because DABreadCrumbs is a Python class, you can use Python to
customize how it works. Here is code you can copy and paste into your
own module file and then customize as you see fit.
from docassemble.base.util import DABreadCrumbs
__all__ = ['MyBreadCrumbs']
class MyBreadCrumbs(DABreadCrumbs):
def show(self):
crumbs = self.get_crumbs()
if len(crumbs) < 2:
return ''
last_indexno = len(crumbs) - 1
return self.container(self.inner(item['breadcrumb'], indexno == last_indexno) for indexno, item in enumerate(crumbs))
def container(self, items):
return '<nav class="da-breadcrumb mt-2" aria-label="' + word('breadcrumb') + '"><ol class="breadcrumb">' + ''.join(items) + '</ol></nav>\n'
def inner(self, label, active):
if active:
return '<li class="da-breadcrumb-item breadcrumb-item">' + label + '</li>'
else:
return '<li class="da-breadcrumb-item breadcrumb-item active" aria-current="page">' + label + '</li>'Classes for information about people and things
Thing
If pet_rock is a Thing, it will be an object with one attribute:
pet_rock.name(object of className)
If you include ${ pet_rock } in text, the name of the Thing will
be inserted. docassemble will look for a definition of
pet_rock.name.text.
If you set the name attribute of a Thing to text, the
.name.text attribute will be set to the text you provided.
Event
An Event is a type of DAObject with the following attributes
initialized by default:
address: aCityobjectlocation: aLatitudeLongitudeobject
There may be many other attributes you want to use for an Event, but
they are up to you to choose.
Person
The Person class encompasses Individuals as well as legal persons,
like companies, government agencies, etc. If you create an object of
type Person by doing:
objects:
- opponent: Personthen you will create an object with the following built-in attributes:
opponent.name(object of className)opponent.address(object of classAddress)opponent.location(object of classLatitudeLongitude)
Referring to a Person in the context of a Mako template will
return the output of .name.full().
If you set the name attribute of a Person to text, the
.name.text attribute will be set to the text you provided.
The following attributes are also used, but undefined by default:
email(see.email_address()andsend_email())phone_number(see.sms_number()andsend_sms())mobile_number(see.sms_number()andsend_sms())uses_whatsapp(see.sms_number()andsend_sms())
The following methods can be used:
.possessive()
Calling defendant.possessive('fish') returns “ABC Corporation’s
fish” or “your fish” depending on whether defendant is the user.
.identified()
Calling defendant.identified() returns True if defendant.name.text
has been defined. The
version for Individuals
is different.
.pronoun_objective()
Calling defendant.pronoun_objective() returns “it,” while calling
defendant.pronoun_objective(capitalize=True) returns “It.”
.object_possessive()
Calling defendant.object_possessive('fish') returns “defendant’s
fish.”
.is_are_you()
Calling defendant.is_are_you() returns “are you” if defendant is
the user, and otherwise returns “is defendant.” Calling
defendant.is_are_you(capitalize=True) returns “Are you” or “Is
defendant.”
.is_user()
Calling defendant.is_user() returns True if the defendant is the
user, and otherwise returns False.
.address_block()
Calling defendant.address_block() will return the name followed by
the address, in a format suitable for inclusion in a document. For example:
[FLUSHLEFT] ABC Corporation [NEWLINE] 1500 Market Street [NEWLINE] Philadelphia, PA 19102See markup for more information about how this will appear in documents.
.do_question()
Calling defendant.do_question('testify') returns “do you testify” if
the defendant is the user, or otherwise it uses the defendant’s name,
as in “does ABC Corporation testify.”
.did_question()
Calling defendant.did_question('testify') returns “did you testify” if
the defendant is the user, or otherwise it uses the defendant’s name,
as in “did ABC Corporation testify.”
.were_question()
Calling defendant.were_question('guilty') returns “were you guilty” if
the defendant is the user, or otherwise it uses the defendant’s name,
as in “was ABC Corporation guilty.”
.have_question()
Calling defendant.have_question('lied') returns “have you lied” if
the defendant is the user, or otherwise it uses the defendant’s name,
as in “has ABC Corporation lied.”
.does_verb()
Calling defendant.does_verb('testify') returns “testify” if the
defendant is the user, but otherwise returns “testifies.” The method
accepts the optional keyword arguments present and past, which are
expected to be set to True or False. For example,
defendant.does_verb('testify', past=True) will return “testified.”
.did_verb()
The .did_verb() method is like the
.does_verb() method, except that it conjugates
the verb into the past tense.
.subject()
The .subject() method returns “you” if the person is the user, but
otherwise returns the person’s name.
.email_address()
Calling defendant.email_address() will return the person’s name
followed by the person’s e-mail address, in the standard e-mail
format. E.g., 'ABC Corporation <[email protected]>'. If the name is not
yet defined, the e-mail address by itself ([email protected]) will be
returned.
If you want to force docassemble to ask for the recipient’s name,
set the optional keyword parameter include_name to True.
You can suppress the inclusion of the person’s name by setting
include_name to False.
.sms_number()
Calling defendant.sms_number() will return defendant.mobile_number
if the .mobile_number attribute exists; it will not cause
the question to be asked. If the .mobile_number attribute does not
exist, it will use defendant.phone_number.
The method formats the phone number in E.164 format. The method
accepts an optional keyword parameter country, which will be used to
format the phone number, since the E.164 format contains the
international country calling code of the phone number. If a
country is not provided, defendant.country is used, If the
.country attribute is not defined, .address.country will be tried,
but if that is not defined either, the method will call
get_country(). The country is expected to be a two-letter,
capitalized abbreviation of a country (ISO 3166-1 alpha-2 format).
If a mobile_number attribute exists and a uses_whatsapp number
also exists and is True, then WhatsApp will be used to send messages
to the number.
Organization
An Organization is a subclass of Person. It has the attribute
.office, which is an object of type OfficeList.
It uses the following attributes, which by default are not defined:
handles: refers to a list of problems the organization handles.serves: refers to a list of counties the organization serves.
The .will_handle() method
returns True or False depending on whether the organization serves
a given county or handles a given problem. It takes two optional
keyword arguments: problem and county. For example, you could
call agency.will_handle(problem='Divorce', county='Hampshire County').
Individual
The Individual is a subclass of Person. This class should be used
for persons who you know are human beings.
If you create an object of type Individual by doing:
objects:
- president: Individualthen you will create an object with the following built-in attribute:
president.name(object of classIndividualName)
In addition, the following attributes will be defined by virtue of an
Individual being a kind of Person:
president.address(object of classAddress)president.location(object of classLatitudeLongitude)
The following attributes are also used, but undefined by default:
age- this can be set to a number. It is used by theage_in_years()method.birthdate- this can be the result of a date field, or adatetimeobject. It is used by theage_in_years()method if theageattribute has not been defined.gender- this should be set to'male','female', or'other'. It is used by a variety of methods such aspronoun().use_familiar- set this toTrueif you want the individual to be referred to by their first name when the individual’s name is reduced to text. By default, the full name is used.
A number of useful methods can be applied to
objects of class Individual. Many of them will respond differently
depending on whether the Individual is the user or not. If you use
these methods, be sure to inform docassemble who the user is by
inserting the following initial block:
initial: True
code: |
set_info(user=client)(If you include the basic-questions.yml file, this is done for
you.) See the documentation for the set_info() function for more
information.
.identified()
Returns True if the individual’s name has been defined yet,
otherwise it returns False.
.age_in_years()
user.age_in_years() returns the user’s age in years as a whole
number.
There are two optional arguments that modify the method’s behavior:
user.age_in_years(decimals=True)returns the user’s age in years with the fractional part included.user.age_in_years(as_of="5/1/2015")returns the user’s age as of a particular date.
To determine the user’s age, this method first looks to see if there
is an attribute age. If there is, the value of this attribute is
returned. However, the age_in_years() method will not cause the
interview to seek out this attribute.
If the age attribute is not defined, this method will calculate
the individual’s age based on the birthdate attribute, which will
be interpreted as a date. The birthdate attribute can be a date
expressed in text, as it would be if it was defined by a date field,
or it can be a datetime object.
.age_in_months()
The age_in_months() method is like age_in_years(), except the
age attribute is not considered, and the result is a number of
months instead of a number of years.
.first_name_hint() and .last_name_hint()
When you are writing questions in an interview, you may find yourself in this position:
- You are asking for the name of a person;
- That person whose name you need may be the user;
- The user may be logged in;
- The user, if logged in, may have already provided his or her name on the user profile page; and
- It would be repetitive for the user to retype his or her name.
In this situation, it would be convenient for the user if the user’s
name was auto-filled on the page. The .first_name_hint() and
.last_name_hint() methods accomplish this for you. You can ask for
an individual’s name as follows:
generic object: Individual
question: |
What is ${ x.object_possessive('name') }?
fields:
- First Name: x.name.first
default: ${ x.first_name_hint() }
- Middle Name: x.name.middle
required: False
- Last Name: x.name.last
default: ${ x.last_name_hint() }
- Suffix: x.name.suffix
required: False
code: |
name_suffix()For an explanation of how .object_possessive() works, see the
Person class.
.possessive()
If client is an Individual and the individual’s name is “Adam
Smith,” client.possessive('orange') returns “Adam Smith’s orange.”
But if the individual is the current user, this returns “your.” (See
the note above.)
.salutation()
Depending on the gender attribute (one of “male” or “female”),
the .salutation() method returns “Mr.” or “Ms.” This can be helpful
when writing letters. If gender is not one of “male” or “female”
the individual’s full name is returned.
template: letter_to_client
content: |
Dear
${ client.salutation() }
${ client.name.last }:
I hope this letter finds you well.
Blah, blah, blah.
Dear
${ client.salutation(with_name=True) }:
I hope this letter finds you well.
Blah, blah, blah.
Dear
${ client.salutation(with_name_and_punctuation=True) }
I hope this letter finds you well.
Blah, blah, blah.The function takes some optional keyword arguments:
client.salutation()returnsMr.client.salutation(with_name=True)returnsMr. Jonesclient.salutation(with_name_and_punctuation=True)returnsMr. Jones:
This function relies on a few attributes, which it looks for but does not assume exist:
- If
.salutation_to_useis set,.salutation()uses its value as the salutation instead of'Mr.'or'Ms.'. - If
.is_doctoris set to a true value, the salutation “Dr.” is used. - If
.is_judgeis set to a true value, the salutation “Judge” is used. - If
.name.suffixis'MD'or'PhD', the salutation “Dr.” is used. - If
.name.suffixis'J', the salutation “Judge” is used. - If
.is_friendlyis set to a true value, a comma will be used in place of a colon whenwith_name_and_punctuationis true.
The operation of this function can be customized with
docassemble.base.util.update_language_function(). Use the
function name 'salutation' and provide a function that takes an
object of class Individual as an argument. For reference, here is
the default function (from docassemble.base.functions):
def salutation_default(indiv, with_name=False, with_name_and_punctuation=False):
"""Returns Mr., Ms., etc. for an individual."""
used_gender = False
if hasattr(indiv, 'salutation_to_use') and indiv.salutation_to_use is not None:
salut = indiv.salutation_to_use
elif hasattr(indiv, 'is_doctor') and indiv.is_doctor:
salut = 'Dr.'
elif hasattr(indiv, 'is_judge') and indiv.is_judge:
salut = 'Judge'
elif hasattr(indiv, 'name') and hasattr(indiv.name, 'suffix') and indiv.name.suffix in ('MD', 'PhD'):
salut = 'Dr.'
elif hasattr(indiv, 'name') and hasattr(indiv.name, 'suffix') and indiv.name.suffix == 'J':
salut = 'Judge'
elif indiv.gender == 'female':
used_gender = True
salut = 'Ms.'
else:
used_gender = True
salut = 'Mr.'
if with_name_and_punctuation or with_name:
if used_gender and indiv.gender not in ('male', 'female'):
salut_and_name = indiv.name.full()
else:
salut_and_name = salut + ' ' + indiv.name.last
if with_name_and_punctuation:
if hasattr(indiv, 'is_friendly') and indiv.is_friendly:
punct = ','
else:
punct = ':'
return salut_and_name + punct
elif with_name:
return salut_and_name
return salutIf you wanted a simpler function, you could include something like this in a Python module that you include in your interview:
def my_salutation(indiv):
if indiv.is_powerful:
return "Your excellency"
else:
return "Hey you"
docassemble.base.util.update_language_function('*', 'salutation', my_salutation).pronoun_possessive()
If the individual is client, then
client.pronoun_possessive('fish') returns “your fish,” “his fish,”
“her fish,” or “their fish” depending on whether client is the user (see the
note above) and depending on the value of client.gender.
client.pronoun_possessive('fish', capitalize=True) returns “Your
fish,” “His fish,” “Her fish,” or “Their fish.”
If you want to refer to the individual in the third person even if the
individual is the user, write client.pronoun_possessive('fish',
third_person=True).
For portability to different languages, this method requires you to provide the noun you are modifying. In some languages, the possessive pronoun may be different depending on what the noun is.
.pronoun()
Returns “you,” “him,” “her,” or “them,” depending on whether the individual is
the user (see the note above) and depending on the value of the
gender attribute. If called with capitalize=True, the word will
be capitalized (for use at the beginning of a sentence).
.pronoun_objective()
For the Individual class, pronoun_objective() does the same thing
as pronoun. (Other classes returns “it.”) If called with
capitalize=True, the output will be capitalized.
.pronoun_subjective()
Returns “you,” “he,” “she,” or “they,” depending on whether the individual is
the user (see the note above) and depending on the value of the
gender attribute.
You can call this method with the following optional keyword arguments:
third_person=True: will use “he” or “she” even if the individual is the user.capitalize=True: the output will be capitalized (for use at the beginning of a sentence)
.yourself_or_name()
Returns “yourself” if the individual is the user (see the note
above), but otherwise returns the person’s name. If called with the
optional keyword argument capitalize=True, the output will be
capitalized.
Name
The Name is the base class for names of things, such as Person.
For example, if plaintiff is a Person, plaintiff.name is an
object of type Name. If plaintiff is an Individual,
plaintiff.name is an object of type IndividualName, which is a
subtype of Name. (The IndividualName is defined in the next
section.)
Objects of the basic Name class have just one attribute, text.
To set the name of a Person called company, for example, you can
do something like this:
question: |
Do you wish to sue ${ company }?
yesno: user_wants_to_sueThere are multiple ways to refer to the name of an object, but the best way is to write something like this:
question: |
Do you wish to sue ${ company }?
yesno: user_wants_to_sueMultiple ways of referring to the name of a Person are illustrated
in the following interview:
question: |
What are you fighting?
field: opponent.name.text
choices:
- the Empire
- the Rebel Alliance
---
mandatory: True
question: |
You are fighting
${ opponent.name.full() }.
subquestion: |
Your enemy is ${ opponent.name }.
Your opponent is ${ opponent }.Note that ${ opponent.name.full() }, ${ opponent.name }, and ${
opponent } all return the same thing. This is because a Person
in the context of a Mako template returns .name.full(), and a
Name returns .full().
The reason a name is not just a piece of text, but rather an object
with attributes like text and methods like .full(), is that some
objects have names with multiple parts that you will want to express
in multiple ways. You might have a list of parties in a case, where
the parties can be companies or individuals. It helps to have a
common way of referring to the names of these objects.
The Name and IndividualName objects support the following methods:
.full()- e.g., “John E. Smith, Jr.”.firstlast()- e.g., “John Smith, Jr.”.lastfirst()- e.g., “Smith, John Jr.”.middle_initial()- e.g., “E.”.middle_initial(with_period=False)- e.g., “E”.familiar()- e.g., “John”
Applied to an IndividualName object, these methods return
different useful expressions of the name. Applied to a Name
object, these methods all return the same thing – the .text
attribute (except for middle_initial(), which returns the empty
string). This is useful because you can write things like this, which
lists the names of the parties in a bullet-point list:
template: client_letter
content: |
We need to be prepared to bring a lawsuit against the following:
% for party in enemy:
* ${ party.name.lastfirst() }
% endfor
---
objects:
enemy: PartyList
---
mandatory: True
code: |
enemy.appendObject(Individual)
enemy[0].name.first = "Darth"
enemy[0].name.last = "Vader"
enemy.appendObject(Person)
enemy[1].name.text = "Death Star Corporation"
enemy.appendObject(Individual)
enemy[2].name.first = "Kylo"
enemy[2].name.last = "Ren"
enemy.gathered = TrueIn this template, the developer does not need to worry about which parties are companies and which parties are individuals; the name will be listed in the bullet-point list in an appropriate way. For individuals, the last name will come first, but for non-individuals, the regular name will be printed.
The Name and IndividualName objects also support the method:
.defined()
This returns True if the necessary component of the name (.text
for a Name, first for an IndividualName) has been defined yet.
Otherwise it returns False.
IndividualName
The Individual class is a subclass of Person. It defines the
name attribute as an IndividualName rather than a Name. An
IndividualName uses the following attributes, which are expected to
be text:
firstmiddlelastsuffix
In the context of a Mako template, a reference to an IndividualName on
its own will return .full().
The full() method attempts to form a full name from these
components. Only first is required, however. This means that if
you refer to an IndividualName in a Mako template, e.g., by
writing ${ applicant.name }, docassemble will attempt to return
applicant.name.full(), and if applicant.name.first has not been
defined yet, docassemble will look for a question that defines
applicant.name.first.
Here is how full() and other methods of the IndividualName work:
applicant.full(): “John Q. Adams”applicant.full(middle="full"): “John Quincy Adams”applicant.firstlast(): “John Adams”applicant.lastfirst(): “Adams, John”applicant.defined(): ReturnsTrueif the.firstattribute has been defined yet.
The IndividualName also uses the attribute .uses_parts, which is
True by default. If .uses_parts is set to False, then the
methods of the object fall back on the methods of Name, and the
individual’s name is stored in the attribute .text.
If you set the name attribute of an Individual to text, the
.uses_parts attribute will be set to False and .name.text will
be set to the text you provided.
Address
An Address has the following text attributes:
address: e.g., “123 Main Street”unit: e.g., “Suite 100”city: e.g., “Springfield”state: e.g., “MA”zip: e.g. “01199”country: e.g., ‘US’ (ISO 3166-1 alpha-2 format)city_only: defaults toFalse. SeeCity, below.
Instead of zip, you can use postal_code.
It also has an attribute location, which is a LatitudeLongitude
object representing the GPS coordinates of the address.
If you refer to an address in a Mako template, it returns .block().
The .block() method returns a formatted
address. At a minimum, the attribute city is required.
objects:
address: Address
---
question: |
What is your address?
fields:
- Address: address.address
- Unit: address.unit
required: False
- City: address.city
- State: address.state
required: False
- Postal Code: address.postal_code
required: False
- Country: address.country
code: |
countries_list()
required: False
---
mandatory: True
question: Your address block
subquestion: |
Default:
${ address }
Showing the country:
${ address.block(show_country=True) }
International:
${ address.block(international=True) }The optional keyword argument language will affect
the translation of the word “Unit” if the address contains a suite
number like '2000'. (See the
.formatted_unit() method.)
The optional keyword argument show_country can be set to True if
you always want the country to be shown. Set it to False if you
never want the country to be shown. The default value is None,
which means the country is shown only if the .country attribute of
the address differs from the default country.
The optional keyword argument international can be set to True if
you want the address to be formatted according to Google’s
internationalization standards.
The .formatted_unit() method
returns the .unit attribute (or the .floor or .room) attributes,
formatted appropriately. For example, if the unit attribute is
'2000', this will return 'Unit 2000'. But if the unit attribute
is 'Suite 2000', this method will return 'Suite 2000'. By
default, if the .unit attribute is not defined, this method will
return ''. However, if it is called as
.formatted_unit(require=True) and neither .unit nor .floor nor
.room is defined, it will seek the definition of the unit
attribute. It takes an optional keyword argument language, which
will affect the translation of the word “Unit.”
The
.geocode() method determines the latitude and longitude of the
address and stores it in the attribute location, which is a
LatitudeLongitude object. It uses the
geopy.geocoders.GoogleV3 class. To use this, you will need an API
key for the Google Maps Geocoding API, which you will need to add to
the configuration as the api key subdirective under the
google directive.
In previous versions of docassemble, this method was called
.geolocate(). The .geolocate() method and its associated
attributes (.geolocated, .geolocate_success,
.geolocate_response) will continue to function until the next minor
version update.
The following methods are available to query the status of geocoding:
myaddress.was_geocoded(): this will returnTrueif the geocoding process has been performed (whether it was successful or not). Ifmyaddress.was_geocoded()returnsTrue, then calling.geocode()again will not call the API again; rather, it will immediately return with whatever result was obtained the first time.geocode()was called. In previous versions of docassemble, the attributemyaddress.geocodedwas used instead of this method.myaddress.was_geocoded_successfully(): if.geocode()was able to successfully call the API and get a result, this will returnTrue; otherwise, this will returnFalse. In previous versions of docassemble, the attributemyaddress.geocode_successwas used for this purpose.myaddress.get_geocode_response(): if.geocode()was able to successfully call the API and get a result, this will return the raw results returned from the Google Maps Geocoding API. In previous versions of docassemble, the attributemyaddress.geocode_responsewas used for this purpose.
If you call .geocode() on an Address object called
myaddress, the following attributes will be set:
myaddress.location.gathered: if.geocode()was able to successfully call the API and get a result, this will be set toTrue.myaddress.location.known: if.geocode()was able to successfully call the API and get a result, this will be set toTrue.myaddress.location.latitude: if.geocode()was able to successfully call the API and get a result, this will be set to the latitude of the address.myaddress.location.longitude: if.geocode()was able to successfully call the API and get a result, this will be set to the latitude of the address.myaddress.location.description: if.geocode()was able to successfully call the API and get a result, this will be set to the value ofmyaddress.block().myaddress.one_line: if.geocode()was able to successfully call the API and get a result, this will be set to the address as the geocoder would format it to be expressed on one line.myaddress.norm: if.geocode()was able to successfully call the API and get a result, this will be set to anAddressobject containing normalized names of the address components.myaddress.norm_long: if.geocode()was able to successfully call the API and get a result, this will be set to anAddressobject containing long-form normalized names of the address components. (E.g., “1234 Main Street” instead of “1234 Main St” and “California” instead of “CA.”)
In addition, the following attributes will be set if the attribute was
not already set, and if .geocode() was able to successfully
determine the value by calling the API:
myaddress.street_number- the street number (e.g.,123).myaddress.street- the street name (e.g.,Main St).myaddress.city- the city (known as (locality).myaddress.county- the county (known asadministrative_area_level_2).myaddress.state- the state (known asadministrative_area_level_1).myaddress.zip- the Zip code (known aspostal_code).myaddress.country- the country (e.g.,US) in ISO 3166-1 alpha-2 format.
In addition, the following attributes will be set to the “long” form of the values returned from the Google Maps Geocoding API, if applicable:
myaddress.administrative_area_level_1myaddress.administrative_area_level_2myaddress.administrative_area_level_3myaddress.administrative_area_level_4myaddress.administrative_area_level_5myaddress.colloquial_areamyaddress.floormyaddress.intersectionmyaddress.localitymyaddress.neighborhoodmyaddress.post_boxmyaddress.postal_codemyaddress.postal_code_prefixmyaddress.postal_code_suffixmyaddress.postal_townmyaddress.premisemyaddress.roommyaddress.routemyaddress.sublocalitymyaddress.sublocality_level_1myaddress.sublocality_level_2myaddress.sublocality_level_3myaddress.sublocality_level_4myaddress.sublocality_level_5myaddress.subpremise
Here is an example that illustrates how the .geocode() method works:
question: |
Enter an address
fields:
- Address: the_address.address
- Unit: the_address.unit
required: False
- City: the_address.city
- State: the_address.state
code: states_list()
- Zip: the_address.zip
required: False
---
mandatory: True
code: |
the_address.geocode()
---
mandatory: True
question: |
Information about your address
subquestion: |
The address you provided is:
${ the_address }
As JSON, this is:
${ indent(json.dumps(the_address.as_serializable(), indent=2)) }
% if the_address.was_geocoded_successfully():
The normalized version is:
${ the_address.norm }
As JSON, this is:
${ indent(json.dumps(the_address.norm.as_serializable(), indent=2)) }
The long-form normalized
version is:
${ the_address.norm_long }
As JSON, this is:
${ indent(json.dumps(the_address.norm_long.as_serializable(), indent=2)) }
The latitude and longitude are
${ the_address.location.latitude }
and
${ the_address.location.longitude }.
% if hasattr(the_address, 'neighborhood'):
The address is located in the
${ the_address.neighborhood }
neighborhood.
% endif
% if hasattr(the_address, 'county'):
The address is located in
${ the_address.county }.
% endif
${ map_of(the_address) }
% else:
The address could not be
geocoded.
% endifThere is a also a second use of the geocode() method, which is to
populate the attributes of an empty Address object using an address
expressed as one line of text:
objects:
- the_address: Address
---
question: |
Enter an address
fields:
- Address: address_one_line
---
mandatory: True
code: |
the_address.geocode(address_one_line)
---
mandatory: True
question: |
Information about your address
subquestion: |
% if the_address.was_geocoded_successfully():
The address you provided is:
${ the_address }
The address is located in
${ the_address.city }.
The latitude and longitude are
${ the_address.location.latitude }
and
${ the_address.location.longitude }.
% else:
That address could not be geocoded.
% endifIf this is used on an Address that already has populated attributes,
the attributes of the existing address will be overwritten.
Normally, calling geocode() on an object (without an address
parameter) after geocoding has been performed has no effect. This
allows you to safely insert a call to geocode() in your interview
logic without running up a large bill for your Google API usage.
However, if you call geocode(reset=True), the old geocoding
information will be deleted and the geocoding will be performed
again. If your interview allows the user to edit an address after it
has been geocoded, you will want to make sure that your interview
logic will re-run the geocoding after the address is edited. The
reset=True parameter can help you ensure that this geocoding is
redone.
objects:
- the_address: Address
---
mandatory: True
code: |
saw_address
saw_address_again
final_screen
---
undefine:
- the_address.county
question: |
Enter an address
fields:
- Address: the_address.address
- Unit: the_address.unit
required: False
- City: the_address.city
- State: the_address.state
code: states_list()
- Zip: the_address.zip
required: False
---
question: |
In what county is ${ the_address }
located?
fields:
- County: the_address.county
---
sets: the_address.county
code: |
the_address.geocode(reset=True)
---
question: |
Information about your address
subquestion: |
The address you provided is:
${ the_address }
The address is located in
${ the_address.county }.
continue button field: saw_address
---
code: |
saw_address_again = True
undefine('saw_address')
force_ask('the_address.address')
---
event: final_screen
question: |
Done with the interviewYou can also use the .reset_geocoding() method to delete the
geocoding information.
The .normalize() method uses the results of .geocode() to
standardize the formatting of the parts of the address. This will
overwrite the attributes of the object. This method takes an optional
keyword parameter long_format, which defaults to False. If this
parameter is True, the address will be normalized using the long
form of the normalization. (E.g., “California” instead of “CA.”)
objects:
- the_address: Address
---
question: |
Enter an address
fields:
- Address: the_address.address
- Unit: the_address.unit
required: False
- City: the_address.city
- State: the_address.state
- Zip: the_address.zip
required: False
---
mandatory: True
code: |
the_address.normalize()
---
mandatory: True
question: |
The normalized address
subquestion: |
${ the_address }Note that if you want to access a normalized version of the address,
but you don’t want to overwrite the original attributes of the object,
you can simply run .geocode() and then, if it is successful,
access the .norm attribute or the .norm_long attribute, both of
which will be fully populated Address objects, with normalized
attributes.
If you need to redo the geocoding after the original address is
edited, you can call .reset_geocoding() on the Address object
and all of the geocoding information will be deleted. This has the
same effect as calling geocode() with reset=True.
This method was previously called .reset_geolocation(). The old
name still works but will be removed in the next minor version.
The .line_one() method returns the first line of the address,
including the unit, if the unit is defined.
The .line_two() method returns the second line of the address,
consisting of the city, state, and zip code.
The .on_one_line() method returns the address, consisting of
the city, state, and zip code, as a single line of text.
It takes two optional keyword parameters:
include_unit- Default value isTrue. Set toFalseif you don’t want the unit number to be included.show_country- Default value isNone. Set toTrueif you always want the country to be shown. Set toFalseif you never want the country to be shown. Set toNoneif you want the country to be shown only if the.countrydiffers from the default country.
Address autocomplete
If you have defined a google maps api key in the Configuration,
you can use the Place Autocomplete feature of the Google Places
API to help your users enter addresses. Address suggestions will be
provided as the user begins to type. To use this feature, modify the
street address (.address) field by setting address autocomplete to
True. Then, when the user selects an address, the other components
of the address will be filled in with the values obtained from Google.
This will only work if the address components are part of the same
Address object. For example, if the street address field is
client.address.address, the other fields must be called
client.address.city, client.address.state, etc. You do not need
to include all of these attributes; any attributes not included in the
front end of the page will be ignored.
For this feature to work, your google maps api key will need to be
associated with an app for which the following APIs are enabled:
- Places API (New)
- Maps JavaScript API
Here is an example that illustrates how the address autocomplete feature works:
question: |
What is the address of the adverse
party?
fields:
- Address: defendant.address.address
address autocomplete: True
- City: defendant.address.city
- State: defendant.address.state
code: |
states_list()
- Zip: defendant.address.zip
required: False
- County: defendant.address.countyCity
A City is a type of Address for which the attribute .city_only
is set to True. Functions that display the address will only
display the city, the state, and (if set) the zip code.
LatitudeLongitude
A LatitudeLongitude object represents the GPS coordinates of an
address or location. LatitudeLongitude objects have the following
attributes:
latitude: the latitude of the location.longitude: the longitude of the location.description: a textual description of the location.known: whether the GPS location is known yet.gathered: whether a determination of the GPS location has been attempted yet.
One use for the LatitudeLongitude object is for mapping the
coordinates of an address. The Address object has a method
.geocode() for this purpose.
Another use for the LatitudeLongitude object is storing the GPS
location of the user’s device. Many web browsers, particularly those
on mobile devices, have a feature for determining the user’s GPS
coordinates. Usually the browser asks the user to consent to the
sharing of the location information. To support this feature, the
LatitudeLongitude object offers the method .status().
The following example shows how to gather the user’s latitude and longitude from the web browser.
include:
- basic-questions.yml
---
initial: True
code: |
track_location = user.location.status()Alternatively, if you do not want to include all of the questions and
code blocks of the basic-questions.yml file in your interview, you
can do:
objects:
- user: Individual
---
initial: True
code: |
set_info(user=user, role='user_role')
track_location = user.location.status()If all goes well, the user’s latitude and longitude will be gathered
and stored in user.location.latitude and user.location.longitude.
You can control when this happens in the interview by controlling when
track_location is set. For example, you may wish to prepare the
user for this:
initial: True
code: |
set_info(user=user, role='user_role')
if user_ok_with_sharing_location:
track_location = user.location.status()
---
question: |
We would like to gather information about your current location
from your mobile device. Is that ok with you?
yesno: user_ok_with_sharing_locationtrack_location is a special variable that tells docassemble
whether or not it should ask the browser for the user’s GPS
coordinates the next time a question is posed to the user. If
track_location is True, docassemble will ask the browser to
provide the information, and if it receives it, it will make it
available for retrieval through the user_lat_lon() function.
The .status() method looks to see if a latitude and longitude were
provided by the browser, or in the alternative that an error message
was provided, such as “the user refused to share the information,” or
“this device cannot determine the user’s location.” If the latitude
and longitude information is conveyed, .status() stores the
information in user.location.latitude and user.location.longitude.
The .status() method returns False in these situations, which
means “we already asked for the latitude and longitude and got a
response, so there is no longer any need for the browser to keep
asking for it.” Otherwise, it returns True, which means “the
browser has not yet been asked for the location information, so let’s
ask it.”
Classes for currency
Value
A Value is a subclass of DAObject that is intended to represent a
currency value that may or may not need to be asked for in an interview.
For example, suppose you want to have a variable that represents the value of the user’s real estate holdings. But before you ask the value of the user’s real estate holdings, you will want to ask if the user has real estate holdings at all.
A Value has two attributes, both of which are initially undefined:
.value: intended to be a number.exists: a boolean value representing whether the value is applicable
The .exists attribute facilitates asking questions about values
using two screens: first, ask whether the value exists at all, then
ask for the value. For example:
objects:
- real_estate_holdings: Value
---
question: |
Do you have real estate holdings?
yesno: real_estate_holdings.exists
---
question: |
How much real estate do you own?
fields:
- Value: real_estate_holdings.value
datatype: currencyThe FinancialList object, explained below, represents a list of
Values. When computing a total of the values (with .total()), it
checks the .exists attributes of each Value to be defined. This
causes questions to be asked about whether the Value is applicable
to the user’s situation before the value itself is requested.
To access the value of a Value object,
you can use the .amount() method. If the .exists attribute is
False, it will return zero without asking for the .value.
Referring to a Value in a Mako template will show the .amount(). The
value of .amount() is also returned when you pass a Value to the
currency() function. For example:
question: |
The value of your real estate holdings is
${ currency(real_estate_holdings) }.
An identical way of writing this number is
${ currency(real_estate_holdings.amount()) }.PeriodicValue
A PeriodicValue is a Value that has an additional attribute,
period, which is a number representing the number of times per year
the value applies.
objects:
- user_salary: PeriodicValue
---
question: |
Do you make money from working?
yesno: user_salary.exists
---
question: |
What is your salary?
fields:
- Amount: user_salary.value
datatype: currency
- Period: user_salary.period
default: 1
choices:
- Annually: 1
- Monthly: 12
- Per week: 54
---
mandatory: True
question: |
% if user_salary.exists:
You make ${ currency(user_salary) }
per year.
% else:
Get a job!
% endifTo access the value of a
PeriodicValue object, you can use the .amount() method. If the
.exists attribute is False, it will return zero without asking for
the .value. By default, it returns the value for the period 1
(e.g., in the example above, period of 1 represents a year). That is,
it will return the .value multiplied by the .period.
Referring to a PeriodicValue in a Mako template will show the
.amount(). The value of .amount() is also returned when you pass
a PeriodicValue to the currency() function.
Classes for lists of things
PartyList
This is a subclass of DAList.
It is indended to contain a list of Persons (or Individuals,
which are a type of Person) who are parties to a case.
ChildList
This is a subclass of DAList.
It is indended to contain a list of Individuals who are children.
FinancialList
The FinancialList is intended to collect a set of financial items,
such as an individual’s assets. It is a DADict object with an
object_type of Value. The exists attribute of each
Value item is set by default to True.
The FinancialList has three methods:
.total(): tallies up the total value of allValues in the list for which theexistsattribute isTrue. A reference to.total()will cause docassemble to ask the questions necessary to gather the full list of items..existing_items(): returns a list of types of amounts that exist within the financial list.
In the context of a Mako template, a FinancialList returns the result of
.total().
Asset
This is a subclass of FinancialList that is intended to be used to
track assets.
Here is some example code that triggers questions that ask about asset items.
objects:
- decedent: Individual
- estate: Thing
- estate.asset: Asset
---
question: |
Who is the decedent?
fields:
- First Name: decedent.name.first
- Last Name: decedent.name.last
---
code: |
estate.name.text = "estate of " + decedent.name.full()
---
question: |
Does the ${ estate } have
any assets?
yesno: estate.asset.there_are_any
---
question: |
What type of asset does
the ${ estate } have?
fields:
- Type of asset: estate.asset.new_item_name
hint: |
e.g., real estate, 401(k), jewelry
---
question: |
What is the value of ${ i }
in the ${ estate }?
fields:
- Value: estate.asset[i].value
datatype: currency
---
question: |
Is there another asset in
the ${ estate }?
yesno: estate.asset.there_is_another
---
mandatory: True
question: |
Summary of the ${ estate }.
subquestion: |
The total value of
${ decedent.possessive('estate') }
is
${ currency(estate.asset.total()) }.PeriodicFinancialList
This is a subclass of FinancialList intended to collect a set of
financial items that have a periodic nature, such as an individual’s
income. Instead of each item being a Value, each item is a
PeriodicValue.
The PeriodicFinancialList has the following method:
.total(): tallies up the total annual value of allPeriodicValues in the list for which theexistsattribute isTrue.
If you have a PeriodicFinancialList called income, you can have a
single question that asks for the item name for a new item, and also
the value and period of the new item. Just write a question that sets
these three attributes:
income.new_item_nameincome.new_item_valueincome.new_item_period
In the context of a Mako template, a PeriodicFinancialList returns .total().
Income
This is a subclass of PeriodicFinancialList with no special
properties except the name.
Expense
Expense is a PeriodicFinancialList representing a person’s
expenses. It has no special properties except the name.
OfficeList
An OfficeList object is a type of DAList, the items of which are
expected to be Address objects. It is used in Organization
objects.
Classes for special purposes
RoleChangeTracker
The RoleChangeTracker class is provided to facilitate multi-user
interviews with docassemble’s roles system. It facilitates
sending e-mails to the participants to let them know when the
interview needs their attention. It keeps track of when these e-mails
have been sent to make sure that duplicative e-mails are not sent.
It has one method:
Here is an example that demonstrates its use:
objects:
- client: Individual
- advocate: Individual
- role_change: RoleChangeTracker
---
default role: client
code: |
if user_logged_in() and \
advocate.attribute_defined('email') and \
advocate.email == user_info().email:
user = advocate
role = 'advocate'
else:
user = client
role = 'client'
set_info(user=user, role=role)
---
event: role_event
question: You are done for now.
subquestion: |
% if 'advocate' in role_needed:
An advocate needs to review your answers before you can proceed.
Please remember the following link and come back to it when you
receive notice to do so:
[${ interview_url() }](${ interview_url() })
% else:
Thanks, the client needs to resume the interview now.
% endif
% if role_change.send_email(role_needed, advocate={'to': advocate, 'email': role_event_email_to_advocate}, client={'to': client, 'email': role_event_email_to_client}):
An e-mail has been sent.
% endif
decoration: exit
buttons:
- Exit: leave
---
template: role_event_email_to_advocate
subject: |
Client interview waiting for your attention: ${ client }
content: |
A client, ${ client }, has partly finished an interview.
Please go to [the interview](${ interview_url() }) as soon as
possible to review the client's answers.
---
template: role_event_email_to_client
subject: |
Your interview answers have been reviewed
content: |
An advocate has finished reviewing your answers.
Please go to [${ interview_url() }](${ interview_url() })
to resume the interview.The send_email() method’s first argument is the special variable
role_needed, a Python list that docassemble defines internally
whenever there is a mismatch between the current user’s role and the
role required by a question that needs to be asked.
The remaining arguments to send_email() are keyword arguments,
where each keyword is the name of a possible role. Each
keyword argument must be a Python dictionary containing the
following keys:
to: this needs to be aPerson(or a subclass, likeIndividual). The person’semailattribute is expected to be defined.email: this needs to aDATemplatecontaining the subject and body of the e-mail that will be sent.
BackgroundAction
The BackgroundAction class provides a simplified way of calling
background_action().
objects:
bg: BackgroundAction
---
code: |
answer = bg.run('bg_task', additional=value_to_add)
---
question: |
How much shall I add to 553?
fields:
- Number: value_to_add
datatype: integer
---
event: bg_task
code: |
background_response(553 + action_argument('additional'))
---
mandatory: True
question: |
The answer is ${ answer }.The interview logic requires answer to be defined, which runs this
code:
code: |
answer = bg.run('bg_task', additional=value_to_add)bg is defined by the objects block as a BackgroundAction object.
The interview logic needs a definition of value_to_add, so it asks
the question that defines value_to_add.
Once this is defined, then bg.run() can execute.
The first time bg.run() executes, it calls background_action()
on the provided positional and keyword arguments. Then it runs
command('wait'). This sends a response to the user’s web browser,
telling the browser to try to reload the screen after four
seconds. Code execution is interrupted, so answer does not get
defined. The user sees a spinner.
When the browser tries to reload the screen after four seconds, the
interview logic runs again, and bg.run() is called again. This time,
bg.run() does not call background_action() and instead checks to
see if the background task has finished executing. If the background
task has not finished executing yet, command('wait') is called
again, and the browser tries again four seconds later. This process
repeats until the background task completes. If the background task
has completed, .get() is called on the task object and the value is
returned. Thus, answer is defined as the value returned by the
background task via background_response().
Before returning the value, bg resets its state. Thus, if bg.run()
is called again, a new background task will be started. The fact that
bg resets its state when bg.run() returns a value means that you
need to be careful to write your interview logic so that bg.run() is
not run again unless you actually want a new background task to be
spawned.
In addition to .run(), BackgroundAction has the following methods:
.running()returnsTrueorFalseindicating the state of thebgobject. If it returnsFalse, then calling.run()will cause a background action to be spawned. If it returnsTrue, then calling.run()will either causecommand('wait')to run, or cause a response value to be returned..ready()returnsTrueif.running()isTrueand the underlyling background action has completed. It returnsFalseif.running()isTrueand the underlyling background action has not completed. Otherwise, it returnsNone.
The BackgroundAction can be customized through subclassing. One
attribute and several methods can be overridden:
.refresh_secondsis an attribute indicating the number of seconds the browser should be told to wait. The default value is4..initial_wait()is called afterbackground_action()is called to start the background action. The default method runscommand('wait', sleep=self.refresh_seconds)..wait()is called by.run()when the background task has started but has not completed. The default method runsset_save_status('ignore')and thencommand('wait', sleep=self.refresh_seconds)..process_response()is called by.run()when the background task has completed successfully. It takes one argument,result, which is the.result()of the background task. The default method returnsresult.value..on_failure()is called by.run()when the background task fails. It takes one argument,result, which is the.result()of the background task. The default method returnsresult.value.
Special object method using()
If you wanted to initialize the variable possession as a DAList
of Things, you could write
objects:
- possession: DAList
---
mandatory: True
code: |
possession.object_type = ThingThe DAObject class has a special object method, using(), which
can be used to accomplish the same thing in a more compact way, so
that you could instead write:
objects:
- possession: DAList.using(object_type=Thing)You can use using() when indicating an object_type:
objects:
- client: Individual
- possession: DAList.using(object_type=Thing.using(owner=client))The result of this will be that possession is a DAList of
Things, and each item in the list will be initialized so that the
owner attribute is set to client by default.
The result of .using() can be used in a number of contexts,
including objects initial blocks, as a parameter in the methods
initializeAttribute(), reInitializeAttribute(),
appendObject(), and gather(), or as the object_type
attribute of a DAList or DADict.
Methods for writing language programmatically
When you write questions in your YAML, you may find that you need
to phrase language differently depending on variables. For example:
question: |
% if defendants.number() > 0:
When did they first contact you?
% elif defendants[0].gender == 'male':
When did he first contact you?
% elif defendants[0].gender == 'female':
When did she first contact you?
% endifIn some situations, writing multiple if statements to make slight
language changes is repetitive and inefficient.
docassemble objects have a variety of methods that can simplify this process. For example, the above can be written:
question: |
When did ${ defendants.pronoun_subjective() } first contact you?All classes that inherit from DAObject support the methods
possessive(), object_possessive(), pronoun(),
pronoun_objective(), pronoun_subjective(), pronoun_possessive(),
is_are_you(), yourself_or_name(), itself(), is_user(),
do_question(), did_question(), were_question(),
have_question(), does_verb(), did_verb(),
subjective_pronoun_or_name(), pronoun_or_name(), which are
demonstrated below.
mandatory: True
objects:
- user: Individual
- person: Individual
- thing: Thing
---
mandatory: True
code: |
user.name.first = 'John'
user.name.last = 'Smith'
user.gender = 'male'
person.name.first = 'Thomas'
person.name.last = 'Montague'
person.gender = 'male'
thing.name.text = 'apple'
---
initial: True
code: |
set_info(user=user)
---
mandatory: True
question: |
Language functions
subquestion: |
#### `possessive()`
Don't eat the
${ thing.possessive('core') }.
${ person.possessive('résumé') }
is unimpressive.
#### `object_possessive()`
Do you understand
${ thing.object_possessive('intrinsic nature') }?
Have you met
${ person.object_possessive('dog') } yet?
#### `pronoun()`
Look at the ${ thing }, but do
not stare at ${ thing.pronoun() }.
Look at ${ person }, but do
not stare at ${ person.pronoun() }.
#### `pronoun_objective()`
Eat the ${ thing }, but not too
much of ${ thing.pronoun_objective() }.
May an abundance of ${ thing } be
granted unto ${ user.pronoun_objective() }.
Teach ${ person } well, but do not
bore ${ person.pronoun_objective() }.
#### `pronoun_subjective()`
If you polish the ${ thing },
${ thing.pronoun_subjective() }
will be shiny.
${ user.pronoun_subjective(capitalize=True) }
may win unlimited ${ thing } pie for life
if you accept this limited time offer.
If you are nice to ${ person },
${ person.pronoun_subjective() } will
probably not be nice to you in return.
#### `pronoun_possessive()`
You can squeeze the ${ thing }, but
${ thing.pronoun_possessive('juice') }
will get all over your hands.
You have many fireplaces, but all
${ user.pronoun_possessive('chimneys') }
are filled up with insulation.
${ person } drives, but
${ person.pronoun_possessive('car') }
is a piece of junk.
#### `is_are_you()`
${ thing.is_are_you(capitalize=True) }
sweet?
${ user.is_are_you(capitalize=True) }
sweet?
#### `yourself_or_name()`
Give the ${ thing } to
${ user.yourself_or_name() }.
Give the ${ thing } to
${ person.yourself_or_name() }.
#### `itself()`
The ${ thing } can speak for
${ thing.itself() }.
You can speak for
${ user.itself() }.
${ person } can speak for
${ person.itself() }.
#### `is_user()`
% for item in (thing, user, person):
% if item.is_user():
${ item } is the user.
% endif
% endfor
#### `do_question()`
${ thing.do_question('exist', capitalize=True) }?
${ user.do_question('exist', capitalize=True) }?
${ person.do_question('exist', capitalize=True) }?
#### `did_question()`
${ user.did_question('invest', capitalize=True) }
in real estate?
${ person.did_question('invest', capitalize=True) }
in real estate?
#### `were_question()`
${ user.were_question('present', capitalize=True) }
at the scene of the crime?
${ person.were_question('present', capitalize=True) }
at the scene of the crime?
#### `have_question()`
${ user.have_question('followed', capitalize=True) }
the news about the ${ thing } festival?
${ person.have_question('followed', capitalize=True) }
the news about the ${ thing } festival?
#### `does_verb()`
${ user.pronoun_subjective(capitalize=True) }
${ user.does_verb('eat') }
like a pig.
${ person.pronoun_subjective(capitalize=True) }
${ person.does_verb('eat') }
like a pig.
#### `did_verb()`
${ user.pronoun_subjective(capitalize=True) }
${ user.did_verb('go') }
to the park.
${ person.pronoun_subjective(capitalize=True) }
${ person.did_verb('go') }
to the park.
#### `subjective_pronoun_or_name()`
${ user.subjective_pronoun_or_name(capitalize=True) }
will not disappoint me again.
${ person.subjective_pronoun_or_name(capitalize=True) }
will not disappoint me again.
#### `pronoun_or_name()`
I gave the ${ thing } to ${ user.pronoun_or_name() }.
I gave the ${ thing } to ${ person.pronoun_or_name() }.Methods for group objects
The classes DAList, DADict, and DASet support these methods as
well. If a list has just one element, calling the method on the list
has the same effect as calling the method on the first element of the
list. Otherwise, appropriate words are used recognizing the plural
nature of the object.
Suppose plaintiffs is a DAList with two items, where the textual
representation is 'Dick and Jane'. Then:
plaintiffs.itself()returns'themselves'.plaintiffs.do_question('accept service')returns'do Dick and Jane accept service'plaintiffs.did_question('accept service')returns'did Dick and Jane accept service'plaintiffs.were_question('informed')returns'were Dick and Jane informed'plaintiffs.have_question('claimed')returns'have Dick and Jane claimed'plaintiffs.does_verb('claim')returns'Dick and Jane claim'plaintiffs.did_verb('claim')returns'Dick and Jane claimed'plaintiffs.pronoun_possessive('assertion')returns'their assertion'.plaintiffs.pronoun()returns'them'.plaintiffs.pronoun_objective()returns'them'(same aspronoun()).plaintiffs.pronoun_subjective()returns'they'.
The DAList, DADict, and DASet classes also support some
additional language methods.
plaintiffs.as_noun()returns'plaintiffs', but if there was only one plaintiff, it would return'plaintiff'.plaintiffs.as_noun('ox')returns'oxen', but if there was only one plaintiff, it would return'ox'.plaintiffs.as_singular_noun()returnsplaintiffregardless of how many elements are in the list.plaintiffs.number_as_word()returns'two'.plaintiffs.quantity_noun('ox')returns'two oxen', but if there was only one plaintiff, it would return'one ox'.
Point of view
The methods possessive(), is_are_you(),
yourself_or_name(), itself(), pronoun_possessive(),
pronoun(), pronoun_objective(), pronoun_subjective(),
do_question(), did_question(), were_question(),
have_question(), does_verb(), did_verb(),
subjective_pronoun_or_name(), pronoun_or_name() use the
“second person” point of view if the object represents the user. You
indicate whether the object represents the user by calling
set_info().
objects:
- client: Individual
---
initial: True
code: |
set_info(user=client)This must be done every time the screen loads (which is what initial:
True means) because the interview might be a multi-user interview and
who the user is may depend on who the current user is.
The point of view can also be controlled manually. Each of the above
methods accepts the keyword argument person, which can be set to
one of the following values:
'1'or1indicates “first person” (i.e. “I am”, “me”, “my apple”).'1p'indicates “first person plural” (i.e. “we are”, “us”, “our apple”).'2'or2indicates “second person” (i.e. “you are”, “you”, “your apple”).'2p'indicates “second person plural” (same as “second person” in English).'3'or3indicates “third person” (i.e. “George is”, “George,” “George’s apple”). This is the default.
For example, if client is an individual named John Smith:
client.pronoun_possessive('apple', person=1)returns'my apple'.client.pronoun_possessive('apple', person='1p')returns'our apple'.client.pronoun_possessive('apple', person=2)returns'your apple'.client.pronoun_possessive('apple', person='2p')returns'your apple'.client.pronoun_possessive('apple', person=3)returns'his apple'.
You can also set the special attribute _point_of_view on the object
itself to one of these values, and then that point of view will be
used as the default any time one of these language methods is called
on the object.
For example, if you write:
objects:
- company: Person.using(_point_of_view='1p')then company.pronoun_possessive('address') will return 'our
address'.
The following example demonstrates the different ways text can vary based on the object and its point of view.
mandatory: True
objects:
- helper: Thing.using(_point_of_view='1')
- user: Individual
- user_alias: Individual.using(_point_of_view='2')
- other_user: Individual
- company: Person
- other_company: Person
- thing: Thing
- single_list: DAList.using(object_type=Individual)
- multiple_list: DAList.using(object_type=Individual)
- users: DAList.using(_point_of_view='2p')
- helpers: DAList.using(_point_of_view='1p')
- single_dict: DADict.using(object_type=Thing)
- multiple_dict: DADict.using(object_type=Thing)
- single_set: DASet
- multiple_set: DASet
---
mandatory: True
code: |
helper.name.text = "Robot"
user.name.first = "Ursula"
user.name.last = "User"
user.gender = 'female'
user_alias.name.first = "Ursie"
user_alias.name.last = "User"
user_alias.gender = 'female'
other_user.name.first = "Harold"
other_user.name.last = "User"
other_user.gender = 'male'
users.clear()
users.append(user)
users.append(other_user)
users.gathered = True
company.name.text = "ABC, Inc."
other_company.name.text = "DEF, Inc."
thing.name.text = "apple tree"
single_list.clear()
single_list.appendObject()
single_list[0].name.first = "Fred"
single_list[0].name.last = "Smith"
single_list[0].gender = 'male'
single_list.gathered = True
multiple_list.clear()
multiple_list.appendObject()
multiple_list[-1].name.first = "Sally"
multiple_list[-1].name.last = "Jones"
multiple_list[-1].gender = 'female'
multiple_list.appendObject()
multiple_list[-1].name.first = "Peter"
multiple_list[-1].name.last = "Roberts"
multiple_list[-1].gender = 'male'
multiple_list.gathered = True
single_dict.clear()
single_dict.initializeObject('a')
single_dict['a'].name.text = 'Single thing in a dictionary'
single_dict.gathered = True
multiple_dict.clear()
multiple_dict.initializeObject('a')
multiple_dict['a'].name.text = 'First thing in a dictionary'
multiple_dict.initializeObject('b')
multiple_dict['b'].name.text = 'Second thing in a dictionary'
multiple_dict.gathered = True
single_set.clear()
single_set.add('single set item')
single_set.gathered = True
multiple_set.clear()
multiple_set.add('first item in a set')
multiple_set.add('second item in a set')
multiple_set.gathered = True
helpers.clear()
helpers.append(company)
helpers.append(other_company)
helpers.gathered = True
---
initial:
True
code: |
set_info(user=user)
---
mandatory: True
question: Test of language methods
subquestion: |
% for item in [helper, user, user_alias, other_user, company, thing, single_list, multiple_list, users, helpers]:
Variable name is ${ item.object_name() }.
${ item.object_possessive('string representation', capitalize=True) } is ${ item }.
${ item.is_are_you(capitalize=True) } going to the ball?
${ item.pronoun_possessive('favorite fruit', capitalize=True) } is apple.
The apple should be given to ${ item.pronoun() }.
The orange should be given to ${ item.pronoun_objective() }.
${ item.pronoun_subjective(capitalize=True) } ${ item.does_verb('belong') }
in an apple orchard and
${ item.did_verb('visit') }
an orange farm once.
${ item.possessive('favorite vegetable', capitalize=True) } is turnips.
% if isinstance(item, DAList):
Please fetch ${ item.quantity_noun('apple') }
for ${ item }, since there are
${ item.number_as_word() }.
% endif
% if item.is_user():
${ item } is the user.
% else:
${ item } is not the user.
% endif
${ item.do_question('eat', capitalize=True) } fruit?
${ item.did_question('eat', capitalize=True) } mushrooms last Tuesday?
${ item.were_question('present', capitalize=True) }
at the ball last month?
${ item.have_question('befriended', capitalize=True) }
the cows in the field?
The subject is ${ item.subjective_pronoun_or_name() }.
The object is ${ item.pronoun_or_name() }.
${ item.pronoun_subjective(capitalize=True) }
${ item.did_verb('return') }
the radishes to ${ item.yourself_or_name() }.
${ item }
${ item.did_verb('return') }
the potatoes to ${ item.itself() }.
% endforHow docassemble objects are different
For most purposes, docassemble objects behave just like Python objects. However, they have special properties that facilitate the automatic asking of questions. You may need to be mindful of these special properties if you do anything fancy in your code.
In contrast to Python objects in general, docassemble objects
are aware of their first-given names. All docassemble objects
have an .instanceName attribute. So if you do:
objects:
  - user: Individual
then user.instanceName will be 'user', and
user.name.instanceName will be 'user.name'.
You can also initialize user in standard Python fashion:
code: |
  user = Individual()
In this circumstance, docassemble uses some magic to set
.instanceName to user. However, the magic has its limits. For
example, the following does not work:
code: |
  (user, advocate) = (Individual(), Individual())
If you ever get an error message in docassemble referring to
variables with a name like qjAMyvGQYnyK, and you are sure you did
not create such a variable, then you have an object that was unable to
determine its given name.
If you want to initialize objects using expressions more complicated
than variable_name = ObjectName(), you can – you just need to
include the variable name as an argument to the object name. For
example:
code: |
  (user, advocate) = (Individual('user'), Individual('advocate'))
Attribute initialization does not have this limitation.
Always keep in mind that objects are given .instanceName attributes
as early as possible, and once an .instanceName is assigned, it will
not be overwritten unless you explicitly overwrite it. For example,
if you do:
code: |
  user.name = IndividualName()
then user.name.instanceName will return 'user.name', as you would
expect. But if you do:
code: |
  cool_name = IndividualName()
  cool_name.first = 'Groovy'
  cool_name.last = 'Jones'
---
code: |
  user.name = cool_name()
then user.name.instanceName will be 'cool_name', not 'user.name'.
You can manually correct this:
code: |
  user.name = cool_name()
  user.name.instanceName = 'user.name'
The .instanceName is not simply an internal attribute; it is used by
the .object_possessive() method to refer to the object in
human-readable format.
Writing your own classes
If you know how to write your own Python code, it is pretty easy to write your own classes.
For example, you could create your own package for interviews related to cooking.
You would start by using the package system to create a
docassemble package called cooking, the full name of which would
be docassemble.cooking (interview packages are subpackages of the
docassemble namespace package).
You would create a module file within this package called
objects.py. If you are using the Playground, you would create
this file in the Modules folder of the Playground. Otherwise, you
would create this file in the docassemble/cooking directory in your
package. You would set the contents of objects.py to the following:
from docassemble.base.util import DAObject
class Recipe(DAObject):
def summary(self):
return "#### Ingredients\n\n" + self.ingredients + "\n\n#### Instructions\n\n" + self.instructionsYour class Recipe needs to “inherit” from the basic docassemble
object called DAObject. If you did not do this, docassemble
would not be able to ask questions to define attributes of Recipe
objects.
The purpose of the summary() method is to summarize the contents of
the recipe. It makes use of the attributes ingredients and
instructions.
If you are not familiar with Python, \n inside quotation marks
indicates a line break and + in the context of text indicates that
the text should be strung together. In Markdown, #### at the
start of a line indicates that the line is a section name.
You can use your class in an interview like this:
modules:
- .objects
---
objects:
- submission: Recipe
---
mandatory: True
question: |
Recipe for ${ submission.name }
subquestion: |
${ submission.summary() }
---
generic object: Recipe
question: |
What do you want to cook?
fields:
- Food: x.name
---
generic object: Recipe
question: |
What are the ingredients in
${ x.name }?
fields:
- no label: x.ingredients
input type: area
---
generic object: Recipe
question: |
What are the instructions
for cooking ${ x.name }?
fields:
- no label: x.instructions
input type: areaNote that the modules block refers to .objects, which is a
relative module name. The . at the beginning means “in the
current package.” You could also have written
docassemble.cooking.objects. The relative module name works so
long as the interview file is in the same package as the module.
By the way, there is way to write the summary() method that is more
friendly to other interview developers:
from docassemble.base.util import DAObject, word
class Recipe(DAObject):
def summary(self):
return "#### " + word('Ingredients') + "\n\n" + self.ingredients + "\n\n#### " + word('Instructions') + "\n\n" + self.instructionsIf you use the word() function in this way, interview developers will
be able to translate the “cooking” interview from English to another
language without having to edit your code. All they would need to do
is include the words Ingredients and Instructions in a translation
YAML file referenced in a words directive in the docassemble
configuration.
Initializing object attributes
In the example above, all the attributes of the Recipe object were
plain text values. What if you want attributes of your objects to be
objects themselves?
Suppose you want the ingredients attribute to be a DAList.
There are several ways that ingredients can be initialized. In the
interview itself, you can do:
modules:
- docassemble.cooking
---
objects:
- dinner: Recipe
- dinner.ingredients: DAListOr, you could use sets in combination with initializeAttribute():
modules:
- docassemble.cooking
---
objects:
- dinner: Recipe
---
generic object: Recipe
sets: x.ingredients
code: |
x.initializeAttribute('ingredients', DAList)However, it is often cleaner to put the object initialization into the class definition itself:
class Recipe(DAObject):
def init(self, *pargs, **kwargs):
self.initializeAttribute('ingredients', DAList)
super().init(*pargs, **kwargs)Then, you would only need to write this in your interview file:
objects:
- dinner: RecipeThe init() function is a special
function that is called on all DAObject objects at the time they
are initialized. This is not to be confused with the __init__()
function, which is built in to Python; you should use init(), not
__init__().
When you write your own init() function for a class, you should (but
are not required to) include the super().init(*pargs,
**kwargs) line. This will ensure that Recipe objects are
initialized properly. For example, if you wrote:
dinner.initializeAttribute('recipe', Recipe, oven_temperature=300)then dinner.recipe would be a Recipe object and
dinner.recipe.oven_temperature would be 300. However, if you
included an init() function and failed to include
super().init(*pargs, **kwargs), then the oven_temperature variable
would not be set. Therefore, it is a good practice to always write
your init() methods in this way.
Before you use objects and inheritance, you should buy a Python book and learn how Python handles object orientation. Object oriented programming is an advanced topic and docassemble documentation is not a substitute for Python documentation.
Using global variables in your classes
Normally in Python you can use global variables to keep track of information that your methods need to know but that is not passed in arguments to the methods. For example, if you wanted to keep track of whether to use Celsius or Fahrenheit when talking about temperatures, you might be tempted to write:
from docassemble.base.util import DAObject
temperature_type = 'Celsius'
class Recipe(DAObject):
def summary(self):
return "#### Ingredients\n\n" + self.ingredients + "\n\n#### Instructions\n\n" + self.instructions
def get_oven_temperature(self):
if temperature_type == 'Celsius':
return str(self.oven_temperature) + ' °C'
elif temperature_type == 'Fahrenheit':
return str(self.oven_temperature) + ' °F'
elif temperature_type == 'Kelvin':
return str(self.oven_temperature) + ' K'(The str() function is a Python function that converts something to
text. Here, it is necessary because self.oven_temperature may be a
number, and Python will complain if you ask it to “add” text to a
number.)
Then to change the temperature_type from an interview, you might
write:
modules:
- docassemble.cooking.objects
---
initial: True
code: |
if user_is_scientist:
temperature_type = 'Kelvin'
elif user_country in ['United States', 'Great Britain']:
temperature_type = 'Fahrenheit'This would be effective at changing the temperature_type variable
because the modules block loads all the names from
docassemble.cooking.objects into the namespace of the interview,
including temperature_type.
However, this is not thread-safe and it will not work correctly 100%
of the time. If your server is under heavy load, users might randomly
be advised to turn their ovens to 350 degrees Celsius, which would
scorch the food. This is because the variable temperature_type
exists at the level of the web server process, and the process might
be supporting several users simultaneously (in different “threads” of
the process). Between the time one user sets temperature_type to
Fahrenheit and tries to use it, another user inside the same process
might set temperature_type to Celsius.
Therefore, it is important that you do not use global variables when
you write your own classes. The simplest way to get around this
problem is to use the set_info() and get_info() functions from
docassemble.base.util:
from docassemble.base.util import DAObject, get_info
class Recipe(DAObject):
def summary(self):
return "#### Ingredients\n\n" + self.ingredients + "\n\n#### Instructions\n\n" + self.instructions
def get_oven_temperature(self):
if get_info('temperature_type') == 'Celsius':
return str(self.oven_temperature) + ' °C'
elif get_info('temperature_type') == 'Fahrenheit':
return str(self.oven_temperature) + ' °F'
elif get_info('temperature_type') == 'Kelvin':
return str(self.oven_temperature) + ' K'Then from your interview you can run set_info() in initial
code:
modules:
- docassemble.cooking.objects
---
initial: True
code: |
if user_is_scientist:
set_info(temperature_type='Kelvin')
elif user_country in ['United States', 'Great Britain']:
set_info(temperature_type='Fahrenheit')
else:
set_info(temperature_type='Celsius')The values set by set_info() are forgotten after the user’s screen
is prepared. Therefore, it is necessary to run set_info() in an
initial code block so that values like temperature_type are put
in place before they are needed.
If you are an advanced programmer, you can do what
docassemble.base.util does and use Python’s threading module to
store global variables.
from docassemble.base.util import DAObject
import threading
__all__ = ['set_temperature_type', 'get_temperature_type', 'Recipe']
this_thread = threading.local
def set_temperature_type(type):
this_thread.temperature_type = type
def get_temperature_type():
return this_thread.temperature_type
class Recipe(DAObject):
def summary(self):
return "#### Ingredients\n\n" + self.ingredients + "\n\n#### Instructions\n\n" + self.instructions
def get_oven_temperature(self):
if this_thread.temperature_type == 'Celsius':
return str(self.oven_temperature) + ' °C'
elif this_thread.temperature_type == 'Fahrenheit':
return str(self.oven_temperature) + ' °F'
elif this_thread.temperature_type == 'Kelvin':
return str(self.oven_temperature) + ' K'We added an __all__ statement so that a module block including
docassemble.cooking.objects does not clutter the namespace with
extraneous names like threading. We also added functions for
setting and retrieving the value of the “temperature type.”
The temperature type is now an attribute of the object this_thread,
which is an instance of threading.local. This attribute needs to be
set in initial code that will run every time a screen refreshes.
Now in your interview you can do:
modules:
- docassemble.cooking.objects
---
initial: True
code: |
if user_is_scientist:
set_temperature_type('Kelvin')
elif user_country in ['United States', 'Great Britain']:
set_temperature_type('Fahrenheit')
else:
set_temperature_type('Celsius')Note that you do not need to worry about whether your global variables are thread-safe if they do not change from interview to interview.
For example, if you only wanted to allow people to change the temperature type from the docassemble configuration, you could do the following in your Python module:
from docassemble.base.util import DAObject
from docassemble.webapp.config import daconfig
temperature_type = daconfig.get('temperature type', 'Celsius')Then your interviews would not have to do anything with temperature_type.
Also, you could avoid the complication of global variables entirely if
you are willing to pass the temperature type as an argument to
get_oven_temperature:
from docassemble.base.util import DAObject
class Recipe(DAObject):
def get_oven_temperature(self, type):
if type == 'Celsius':
return str(self.oven_temperature) + ' °C'
elif type == 'Fahrenheit':
return str(self.oven_temperature) + ' °F'
elif type == 'Kelvin':
return str(self.oven_temperature) + ' K'Then you could have this in your interview:
question: |
What kind of temperature system do you use?
choices:
- Celsius
- Fahrenheit
- Kelvin
field: temperature_typeand then in your question text you could write:
Set your oven to ${ apple_pie.get_oven_temperature(temperature_type) }
and let it warm up.Extending existing classes
If you want to add a method to an existing docassemble class, such
as Individual, you do not need to reinvent the wheel or copy and
paste code from anywhere. Just take advantage of inheritance.
For example, if your package is docassemble.missouri_family_law, you
could create/edit the file
docassemble/missouri_family_law/objects.py and add the following:
from docassemble.base.util import Individual
class Attorney(Individual):
def can_practice_in(self, state):
if state in self.bar_admissions and self.bar_admissions[state] is True:
return True
return FalseHere you are defining the class Attorney as a subclass of
Individual. An object that is an instance of the Attorney class
will also be an instance of the Individual class. The Attorney
class is said to “inherit” from the Individual class. All of the
methods that can be used on an Individual can be used on an
Attorney.
This allows you to write an interview like the following:
modules:
- docassemble.demo.attorney
---
imports:
- us
---
objects:
- lawyer: Attorney
---
mandatory: True
question: |
% if lawyer.can_practice_in('MA'):
${ lawyer } can practice in Massachusetts.
% else:
Sorry, ${ lawyer } cannot practice in Massachusetts.
% endif
---
generic object: Attorney
question: |
In what state(s) ${ x.is_are_you() } admitted to practice?
fields:
- no label: x.bar_admissions
datatype: checkboxes
code: |
us.states.mapping('abbr', 'name')
---
generic object: Attorney
question: |
What is the attorney's name?
fields:
- First Name: x.name.first
- Last Name: x.name.lastNote that the lawyer object works just like an Individual
object. The is_are_you() method works on the Attorney object just
as it works on any Individual.
Note that the can_practice_in() method is only available for
Attorney objects. If you added the following to the above
interview:
objects:
- user: Individual
---
mandatory: True
question: |
% if user.can_practice_in('MA'):
You can take this case yourself.
% else:
You will need to hire a lawyer to take the case.
% endifthen you would get an error because can_practice_in() is not a valid
method for user, which is only an instance of the Individual class
and not an instance of the Attorney class.
When subclassing standard docassemble classes, keep in mind that
some standard docassemble classes have init() functions that
initialize attributes that are themselves standard docassemble
classes. For example, when an object of class Individual is
created, the attribute name is defined as an object of class
IndividualName.
Suppose that you wanted your Attorney objects to have a name
attribute that was an AttorneyName rather than an IndividualName.
One way to implement this would be to write:
from docassemble.base.util import Individual, IndividualName
class AttorneyName(IndividualName):
def full(self, middle='initial', use_suffix=True):
return super().full(middle=middle, use_suffix=use_suffix) + ', Esq.'
class Attorney(Individual):
def init(self, *pargs, **kwargs):
self.initializeAttribute('name', AttorneyName)
super().init(*pargs, **kwargs)Note that the init() method first initializes name and then calls
the parent class init() method. This works because the init()
method of the Individual class defines name with the
initializeAttribute() method, which returns without doing anything
if the attribute is already defined. So the init() method of
Individual will not overwrite the name.
There is a second way to customize standard docassemble classes
that initialize attributes. The Individual and Person classes
have a special class attribute NameClass that is set to
IndividualName for the Individual class and Name for the
Person class. Thus, all you need to do to to indicate that
your Attorney objects should use AttorneyName as the class for the
name is to set the class attribute NameClass to AttorneyName:
from docassemble.base.util import Individual, IndividualName
class AttorneyName(IndividualName):
def full(self, middle='initial', use_suffix=True):
return super().full(middle=middle, use_suffix=use_suffix) + ', Esq.'
class Attorney(Individual):
NameClass = AttorneyNameThese are the class attributes that standard docassemble objects use:
Address,Event, andPersonset the class attributeLatitudeLongitudeClasstoLatitudeLongitude. This is the class used for thelocationattribute.ThingandPersonset the class attributeNameClasstoName. This is the class used for thenameattribute.Eventsets the class attributeCityClasstoCity. This is the class used for theaddressattribute.Personsets the class attributeNameClasstoName. This is the class used for thenameattribute.Personsets the class attributeAddressClasstoAddress. This is the class used for theaddressattribute.Individualsets the class attributeNameClasstoIndividualName. This is the class used for thenameattribute.ChildListsets the class attributeChildClasstoIndividual. Theobject_typeattribute is set to this class during theinit()method.FinancialListsets the class attributeValueClasstoValue. Theobject_typeattribute is set to this class during theinit()method.PeriodicFinancialListsets the class attributePeriodicValueClasstoPeriodicValue. Theobject_typeattribute is set to this class during theinit()method.OfficeListsets the class attributeAddressClasstoAddress. Theobject_typeattribute is set to this class during theinit()method.Organizationsets the class attributeOfficeListClasstoOfficeList. This is the class used for theofficeattribute.
In docassemble.base.legal:
Casesets the class attributePartyListClasstoPartyList. This is the class used for theplaintiff,defendant,petitioner,respondent,appellee, andappellantattributes.Casesets the class attributeCourtClasstoCourt. This is the class used for thecourtattribute.
Using mixins
Sometimes it can be useful to define a method that can be used on multiple classes. Python allows you to do this with “multiple inheritance” and “mixin” classes.
Here is an example of overriding the possessive() method of
subclasses of Individual and Person. By using a “mixin,” you
can avoid writing the same method in two different places.
from docassemble.base.util import Person, Individual
class MyPersonMixin(object):
def possessive(self, target, **kwargs):
the_word = str(self)
if the_word[-1] == 's' and 'plural' not in kwargs:
kwargs['plural'] = True
return super().possessive(target, **kwargs)
class MyPerson(MyPersonMixin, Person):
def some_function(self):
return 2 + 2
class MyIndividual(MyPersonMixin, Individual):
def some_other_function(self):
return 2 + 6Preventing dependency satisfaction
docassemble’s dependency satisfaction process can be used from
inside methods. For example, you have an class Legume with a method
.is_tasty(), which references self.savory_index, running
.is_tasty() can trigger a question to be asked if the
savory_index attribute is needed and is not defined.
class Legume(Thing):
def is_tasty(self):
if self.sweet_index > 5 or self.savory_index > 6:
return True
else:
return FalseHowever, this feature can also cause confusion, because if you make a mistake when coding a method and refer to a non-existent name, docassemble will try to obtain a definition for that name in the interview itself. Although the namespace of a method is different from the namespace of the interview answers, docassemble doesn’t know the difference. The symptoms of this might be very confusing, because you might see strange behavior instead of an error message.
The automatic dependency satisfaction system can also be a problem when the code in your method needs to run idempotently. For example, if your code appends records to a database, you may find that mysterious duplicate entries are appearing in the database; this can happen if your method references an undefined variable that docassemble’s dependency satisfaction logic is able to define.
You can turn off docassemble’s dependency satisfaction logic for a
method by using the prevent_dependency_satisfaction decorator.
This decorator is defined in the docassemble.base.util module.
Here is an example module called legume.py that uses the
prevent_dependency_satisfaction decorator.
from docassemble.base.util import Thing, prevent_dependency_satisfaction
__all__ = ['Legume']
class Legume(Thing):
@prevent_dependency_satisfaction
def is_tasty(self):
if self.sweet_index > 5 or self.savory_index > 6:
return True
else:
return FalseHere is an interview that uses the legume module and the Legume class:
modules:
.legume
---
objects:
- bean: Legume
---
mandatory: True
code: |
bean.sweet_index
final_screen
---
event: final_screen
question: |
% if bean.is_tasty():
It is tasty.
% else:
It is not tasty.
% endifIf @prevent_dependency_satisfaction had not been applied to the
method, then the savory_index attribute would have been gathered
from the user. The prevent_dependency_satisfaction decorator
instead forces an exception to be raised.
The code for prevent_dependency_satisfaction is very simple; it
basically just wraps the method in a try/except and raises a
generic Exception if any exception is raised from inside the
method.
Convert to JSON
If you write a class that docassemble can’t convert to JSON,
has attributes that can’t convert to JSON, or converts to JSON
incorrectly, then you can implement your own .to_json() method
that will be used by docassemble instead.
Your .to_json() method should return a simplified representation
of the class using built-in Python types that can be easily and
logically converted to JSON, like str, int, float, list,
or dict.
from docassemble.base.util import DAObject
class ComplicatedDAObject(DAObject):
def to_json(self):
return "This object is too complicated to display."Special date/time class DADateTime
When you set a variable with datatype: date, or use one of the
date functions that returns a date, the variable is a special object
of the class DADateTime. This object is special to docassemble,
but it is not a DAObject. You cannot create these with an
objects block. (If you want to create one, use
as_datetime().)
The DADateTime object is a subclass of datetime.datetime,
which is a standard Python class for working with dates and times.
This means that anything that you can do with a datetime.datetime
object can also be done with a DADateTime object.
The DADateTime object also has some additional functionality that
the traditional datetime.datetime object does not have, such as
the attributes dow for day of week and week for the week of the
year.
If birthday is defined by as_datetime('4/1/2018'), then:
birthday.dayis 1birthday.monthis 4birthday.yearis 2018birthday.weekis 13birthday.dowis 7 (Sunday)birthday.houris 0birthday.minuteis 0birthday.secondis 0birthday.microsecondis 0
The
DADateTime object also has methods .plus() and .minus() that
allow you to add or subtract periods of time from a date.
birthday.plus(weeks=3)returns aDADateTimeobject representing April 29, 2018.birthday.plus(months=1)returns aDADateTimeobject representing May 1, 2018.birthday.minus(years=2)returns aDADateTimeobject representing April 1, 2020.
The available keyword arguments to .plus() and .minus() are:
yearsmonthsdaysweekshoursminutessecondsmicroseconds
The .plus() and .minus() methods use
dateutil.relativedelta.relativedelta to calculate dates and times.
The date_interval() function can be used to do similar
calculations. For example, birthday.plus(weeks=1) is equivalent to
doing birthday + date_interval(weeks=1).
The
DADateTime object also has methods for formatting dates and times.
birthday.format()is'April 1, 2018'.birthday.format_date()is'April 1, 2018'(identical to.format())birthday.format_date('MMM')is'Apr'birthday.format_time()is'12:00 AM'birthday.format_time('h:mm a z')is'12:00 AM EST', or whatever the current time zone is.current_datetime().format_time('h:mm')returns the current time, formatted like'12:00'.current_datetime().format_datetime()returns the current time, formatted like'January 1, 2018 at 12:00:00 AM EST'.
These functions have the same effect as the format_date(),
format_time(), and format_datetime() functions. In fact,
birthday.format_date('long') simply calls format_date(birthday,
format='long'). The .format() method is the same as
.format_date(). See the documentation for the date functions for
details. An interview-wide date/time format string can be set in the
interview metadata or through the set_parts()
function.
When a DADateTime is converted to text, for example when it is
included in a Mako template with ${ birthday }, the text
conversion is done using format_date().
The .replace() method returns a new
DADateTime object that is the same as the original object, except
with altered components. For example, birthdate.replace(year=2018)
will return the date of a person’s birthday in 2018. The available
parameters are year, month, day, hour (0 to 23), minute,
second, and microsecond. See datetime.datetime.replace().
A method that is similar to
.replace() is .replace_time(), which returns a DADateTime
object with all of the time-related values set to those of a given
datetime.time object. If you ask the user a question and you use
a field with datatype: time, the resulting variable is a
datetime.time object. You can combine datatype: date and
datatype: time objects using .replace_time():
question: |
When is your appointment?
fields:
- Date: appt_date
datatype: date
- Time: appt_time
datatype: time
---
code: |
appt_datetime = appt_date.replace_time(appt_time)If you only want to use the time portion
of a DADateTime, use the .time() method, which returns a
datetime.time object containing only the time-related information
of the original DADateTime object. See
datetime.datetime.time().
Special class SQLObject
The SQLObject is a special class that makes an ordinary DAObject
automatically synchronize with a SQL database.
Object instances that inherit from this class will have the full functionality of ordinary object instances, but with the added feature that particular attributes (or attributes of sub-objects) will synchronize with a SQL database.
The SQLObject is an expert feature. Using it requires:
- Knowing how SQL databases work;
- Knowing how to create a SQL database;
- Knowing how to use SQLAlchemy;
- Knowing how object oriented programming works;
- Knowing how to write custom classes in a Python module file; and
- Knowing how to use Alembic (potentially).
Here is an example of the use of SQLObject:
modules:
- .demodb
---
objects:
- customer: Customer
- bank: Bank
---
question: |
What is the customer's SSN?
fields:
- SSN: customer.ssn
default: 023-43-2412
validation code: |
customer.db_read()
---
question: |
What is the bank's routing number?
fields:
- Routing number: bank.routing
default: "234234223"
validation code: |
bank.db_read()
---
question: |
What is the name of the bank?
fields:
- Name: bank.name.text
---
question: |
What is the customer's name?
fields:
- First Name: customer.name.first
- Last Name: customer.name.last
---
question: |
What is the customer's address?
fields:
- Address: customer.address.address
address autocomplete: True
- City: customer.address.city
- State: customer.address.state
code: |
states_list()
- Zip: customer.address.zip
required: False
- County: customer.address.county
---
mandatory: True
code: |
customer.ssn
customer.name.first
customer.address.address
bank.routing
bank.name.text
bank.add_customer(customer)
---
mandatory: True
question: |
The bank is
${ bank }
and the customer is
${ customer }.
buttons:
- Restart: restartThe Customer and Bank classes are defined in the demodb.py file.
Customer is a subclass of Individual and SQLObject (using
multiple inheritance). Bank is a subclass of Person and
SQLObject. Behind every Customer is a row in a SQL table
listing customers. Behind every Bank is a row in a SQL table
listing banks. These tables are in a separate SQL database from the
database where docassemble’s interview answers are stored. This
SQL database can be any database capable of being accessed using
SQLAlchemy. The database tables can be pre-existing (e.g., a
database for a case management system) or created for the sole purpose
of storing data from interviews. If the tables do not exist,
SQLAlchemy will create them when the module loads.
In the interview, the user is first asked for a unique identifier
(SSN) about the customer. If the the SSN matches the SSN of a
record in the customer table in SQL, the attributes of the
customer object are populated with the values in SQL, and then the
interview doesn’t need to ask the user for the customer’s name and
address. If the SSN does not match the SSN of a record in the
customer table, a new row is added to SQL table, and the user is
asked for the customer’s name and address. After each screen, the
SQL table is updated with the information that is acquired.
Then the interview performs a similar process with the bank. The
unique identifier for a Bank is a routing number. The interview
needs to know the name of the bank.
Finally the interview makes the customer a customer of the bank by
adding an entry to a table in SQL that tracks relationships between
banks and customers. It does this with a custom method
add_customer(), the code for which is in demodb.py.
Here is the code for demodb.py.
# Import any DAObject classes that you will need
from docassemble.base.util import Individual, Person, DAObject
# Import the SQLObject and some associated utility functions
from docassemble.base.sql import alchemy_url, connect_args, upgrade_db, SQLObject, SQLObjectRelationship
# Import SQLAlchemy names
from sqlalchemy import Column, ForeignKey, Integer, String, create_engine
from sqlalchemy.ext.declarative import declarative_base
from sqlalchemy.orm import sessionmaker
# Only allow these names (DAObject classes) to be imported with a modules block
__all__ = ['Bank', 'Customer', 'BankCustomer']
# Create the base class for SQLAlchemy table definitions
Base = declarative_base()
# SQLAlchemy table definition for a Bank
class BankModel(Base):
__tablename__ = 'bank'
id = Column(Integer, primary_key=True)
routing = Column(String(250), unique=True)
name = Column(String(250))
# SQLAlchemy table definition for a Customer
class CustomerModel(Base):
__tablename__ = 'customer'
id = Column(Integer, primary_key=True)
ssn = Column(String(250), unique=True)
first_name = Column(String(250))
last_name = Column(String(250))
address = Column(String(250))
unit = Column(String(250))
city = Column(String(250))
state = Column(String(250))
zip = Column(String(250))
# SQLAlchemy table definition for keeping track of which Banks have which Customers
class BankCustomerModel(Base):
__tablename__ = 'bank_customer'
id = Column(Integer, primary_key=True)
bank_id = Column(Integer, ForeignKey('bank.id', ondelete='CASCADE'), nullable=False)
customer_id = Column(Integer, ForeignKey('customer.id', ondelete='CASCADE'), nullable=False)
# Form the URL for connecting to the database based on the "demo db" directive in the Configuration
url = alchemy_url('demo db')
# Build the "engine" for connecting to the SQL server, using the URL for the database.
conn_args = connect_args('demo db')
if url.startswith('postgres'):
engine = create_engine(url, connect_args=conn_args, pool_pre_ping=False)
else:
engine = create_engine(url, pool_pre_ping=False)
# Create the tables
Base.metadata.create_all(engine)
# Get SQLAlchemy ready
Base.metadata.bind = engine
DBSession = sessionmaker(bind=engine)()
# Perform any necessary database schema updates using alembic, if there is an alembic
# directory and alembic.ini file in the package.
upgrade_db(url, __file__, engine, version_table='auto', conn_args=conn_args)
# Define Bank as both a DAObject and SQLObject
class Bank(Person, SQLObject):
# This tells the SQLObject code what the SQLAlchemy model is
_model = BankModel
# This tells the SQLObject code how to access the database
_session = DBSession
# This indicates that an object is not ready to be saved to SQL unless the "name" column is defined
_required = ['name']
# This indicates that the human-readable unique identifier for the table is the column "routing"
_uid = 'routing'
def init(self, *pargs, **kwargs):
super().init(*pargs, **kwargs)
# This runs necessary SQLObject initialization code for the instance
self.sql_init()
# The db_get function specifies how to get attributes from the DAObject for purposes of setting SQL column values
def db_get(self, column):
if column == 'name':
return self.name.text
if column == 'routing':
return self.routing
raise Exception("Invalid column " + column)
# The db_set function specifies how to set attributes of the DAObject on the basis of non-null SQL column values
def db_set(self, column, value):
if column == 'name':
self.name.text = value
elif column == 'routing':
self.routing = value
else:
raise Exception("Invalid column " + column)
# The db_null function specifies how to delete attributes of the DAObject when the SQL column value becomes null
def db_null(self, column):
if column == 'name':
del self.name.text
elif column == 'routing':
del self.routing
else:
raise Exception("Invalid column " + column)
# This is an example of a method that uses SQLAlchemy to return True or False
def has_customer(self, customer):
if not (self.ready() and customer.ready()):
raise Exception("has_customer: cannot retrieve data")
# this opens a connection to the SQL database
db_entry = self._session.query(BankCustomerModel).filter(BankCustomerModel.bank_id == self.id, BankCustomerModel.customer_id == customer.id).first()
if db_entry is None:
return False
return True
# This is an example of a method that uses SQLAlchemy to add a record to the BankCustomer SQL table
# to indicate that a bank has a customer. Note that it is designed to be idempotent; it will not add
# a duplicate record.
def add_customer(self, customer):
if not self.has_customer(customer):
db_entry = BankCustomerModel(bank_id=self.id, customer_id=customer.id)
self._session.add(db_entry)
self._session.commit()
# This is an example of a method that uses SQLAlchemy to return a list of Customer objects.
# It uses the by_id() class method to return a Customer object for the given id.
def get_customers(self):
if not self.ready():
raise Exception("get_customers: cannot retrieve data")
results = []
for db_entry in self._session.query(BankCustomerModel).filter(BankCustomerModel.bank_id == self.id).all():
results.append(Customer.by_id(db_entry.customer_id))
return results
# This is an example of a method that uses SQLAlchemy to delete a bank-customer relationship
def del_customer(self, customer):
if not (self.ready() and customer.ready()):
raise Exception("del_customer: cannot retrieve data")
self._session.query(BankCustomerModel).filter(BankCustomerModel.bank_id == self.id, BankCustomerModel.customer_id == customer.id).delete()
self._session.commit()
class Customer(Individual, SQLObject):
_model = CustomerModel
_session = DBSession
_required = ['first_name']
_uid = 'ssn'
def init(self, *pargs, **kwargs):
super().init(*pargs, **kwargs)
self.sql_init()
def db_get(self, column):
if column == 'ssn':
return self.ssn
if column == 'first_name':
return self.name.first
if column == 'last_name':
return self.name.last
if column == 'address':
return self.address.address
if column == 'unit':
return self.address.unit
if column == 'city':
return self.address.city
if column == 'state':
return self.address.state
if column == 'zip':
return self.address.zip
raise Exception("Invalid column " + column)
def db_set(self, column, value):
if column == 'ssn':
self.ssn = value
elif column == 'first_name':
self.name.first = value
elif column == 'last_name':
self.name.last = value
elif column == 'address':
self.address.address = value
elif column == 'unit':
self.address.unit = value
elif column == 'city':
self.address.city = value
elif column == 'state':
self.address.state = value
elif column == 'zip':
self.address.zip = value
def db_null(self, column):
if column == 'ssn':
del self.ssn
elif column == 'first_name':
del self.name.first
elif column == 'last_name':
del self.name.last
elif column == 'address':
del self.address.address
elif column == 'unit':
del self.address.unit
elif column == 'city':
del self.address.city
elif column == 'state':
del self.address.state
elif column == 'zip':
del self.address.zip
class BankCustomer(DAObject, SQLObjectRelationship):
_model = BankCustomerModel
_session = DBSession
_parent = [Bank, 'bank', 'bank_id']
_child = [Customer, 'customer', 'customer_id']
def init(self, *pargs, **kwargs):
super().init(*pargs, **kwargs)
self.rel_init(*pargs, **kwargs)
def db_get(self, column):
if column == 'bank_id':
return self.bank.id
if column == 'customer_id':
return self.customer.id
raise Exception("Invalid column " + column)
def db_set(self, column, value):
if column == 'bank_id':
self.bank = Bank.by_id(value)
elif column == 'customer_id':
self.customer = Customer.by_id(value)
else:
raise Exception("Invalid column " + column)
# A db_find_existing method is defined here because the default db_find_existing() method for
# the SQLObject class tries to find existing records based on a unique identifier column indicated
# by the _uid attribute. Since the unique identifier for a bank-customer relationship record is
# not a single column, but rather the combination of bank ID and customer ID, there is no _uid
# column for the default db_find_existing() method to use. But we can write our own method for
# how to locate an existing record based on Python object attributes (.bank.id and .customer.id).
def db_find_existing(self):
try:
return self._session.query(BankCustomerModel).filter(BankCustomerModel.bank_id == self.bank.id, BankCustomerModel.customer_id == self.customer.id).first()
except:
return NoneThis example uses the alchemy_url() function to refer to a database
configuration called demo db. This assumes that there is a
directive called demo db in the Configuration that specifies a
connection to a SQL database, following the same layout of the db
directive.
demo db:
name: demo
user: jsmith
password: supersecretThe above module file contains the line:
Base.metadata.create_all(engine)This SQLAlchemy command creates database tables for any models that have been defined in Python code. Thus, the mere loading of this module causes database tables to come into existence if they do not already exist.
While the tables will be created automatically by SQLAlchemy if they
do not exist, the database itself (which in this example is named
demo) will need to be created beforehand. You also need to make sure
that the database user (in the above example, jsmith) has full
privileges to the database.
Note that while SQLAlchemy is capable of creating database tables,
it is not capable of modifying them if you edit the model classes
after the database tables have already been created. If you are the
only user of the module that uses SQLObject, you could get around
this problem by making the changes to your database tables
manually. However, if you have released your module to the public, and
someone who is using your module upgrades to your latest version, they
will encounter errors because your code will use the new version of
the model but the actual database table will be using the earlier
version of the model.
Alembic is a version control system for SQLAlchemy that solves
this problem. Using Alembic requires adding a configuration file and
an alembic folder to the package in which your SQLObject module
lives. Thus, you will need to prepare your package from the command
line. You cannot do this from within the Playground. If you do not
already have your package on your personal computer, you will need to
download it.
To get started, install alembic on your personal computer:
pip install alembicThen, go into the directory where your module file is located. For
example, if your package is called docassemble.foobar, do:
cd docassemble-foobar/docassemble/foobarFrom here, run the following command to initialize alembic:
alembic init alembicWhenever you want to create a revision to your database structure, you run a command like:
alembic revision -m "add column for phone"The Alembic directory structure will look something like this:
docassemble-foobar
|-- docassemble
| |-- foobar
| | |-- alembic.ini
| | |-- alembic
| | | |-- env.py
| | | |-- script.py.mako
| | | |-- versions
| | | | `-- 5627e6ca17d18_add_column_for_phone.py
| | |-- data
| | | |-- questions
| | | | `-- myinterview.yml
| | | |-- static
| | | | `-- logo.jpg
| | | |-- sources
| | | | `-- data.yml
| | | `-- templates
| | | `-- mytemplate.docx
| | |-- mydb.py
| | `-- __init__.py
| `-- __init__.py
|-- LICENSE
|-- README.md
|-- setup.cfg
`-- setup.pyIn this file listing, 5627e6ca17d18_add_column_for_phone.py is a
file that was created by running alembic revision. The code
5627e6ca17d18 represents a version. Each “version” file contains a
reference to the current version and the previous version, along with
code that indicates how to upgrade from the old version to the new
version, and how to downgrade from the new version to the old
version.
After running alembic revision, you need to edit the resulting
“version” file (in this example,
5627e6ca17d18_add_column_for_phone.py) and write SQLAlchemy code
in the upgrade() and downgrade() functions to modify the database
tables in the appropriate ways to effectuate the change you made to
the model.
Alembic keeps track of the current version using a table in the
database containing one row and one column. By scanning the files in
versions and looking at the current version, Alembic knows which
files in the versions directory it needs to run to perform an
upgrade.
The above module example contains code that calls Alembic.
upgrade_db(url, __file__, engine, version_table='auto', conn_args=conn_args)This function calls Alembic to perform any necessary upgrades. When
the version_table parameter is set to 'auto', that means that the
name of the table in the database that Alembic uses to track the
current version will be based on the name of the package. If
version_table is set to None, the default name of
alembic_version will be used. If the database you are using is
already serving as the db database of a docassemble server,
there will be a conflict because the docassemble server uses
Alembic with alembic_version as the name of its version table. You
can also set version_table to a string, in which case the name of
the version table will be that string.
For examples of what the Alembic-related files should look like, see
the docassemble.demo package and consult the Alembic
documentation. The docassemble.webapp package contains version
files that you can look at to get a sense of what the upgrade() and
downgrade() functions should look like.
How it works
The SQLObject facilitates synchronization of values between
“Python land” and “SQL land.” It is important to understand that
there are fundamental differences between these two “lands.”
In Python land, there are Python objects with attributes. These
can be arbitrarily nested; attributes can be objects themselves, which
have their own attributes, and so on. An attribute might be an alias
for an object that has an independent existence elsewhere, such as
when you declare case.plaintiff = client.
In SQL land, there are database tables made up of rows and columns, where a row represents a single record and the columns are named data values, each of which has a specific data type. SQL tables typically have a column that functions as a “key,” which typically contains an auto-incrementing integer. Columns in a SQL table often have “constraints.” In some columns, uniqueness is enforced; for example, it might be illegal for two rows in a table to have the same value for a column representing an e-mail address.
In Python land, you can add attributes to an object whenever you want. In SQL land, adding a column to a table is something you have to do in advance, and it has imporant implications for the future of your database. In Python land, you can nest objects arbitrarily. In SQL land, creating relationships among objects requires using separate tables: one table for the first object type, a second table for the second object type, and a third table that holds a mapping between first table and the second table.
There are many other differences between what is possible with docassemble interview answers represented as Python objects, and what is possible in SQL tables.
As a result of all of these differences, there is never going to be a perfect one-to-one correspondence between SQL tables and docassemble objects. Going between these two worlds is a process of translation. You need to specify exactly how you want this translation to happen.
The SQLObject system associates a particular Python class with a
particular SQL table. Any object of this class in the interview
answers will have a corresponding row in the SQL table. Each
separate Python class that inherits from SQLObject will get its
own separate SQL table. Columns in the SQL table are associated
with particular attributes of the object in Python land.
It is not a problem if the objects in Python land have attributes that do not map to columns in SQL land. Likewise, it is not a problem if the tables in SQL land have columns that do not map to information in Python land. The interview answers will still continue to save any “extra” attributes, and any “extra” columns in the SQL database will not disturb Python.
The synchronization process is hooked into docassemble’s existing
pickling system. When a screen loads, docassemble reads the
pickled interview answers from its database, unpickles them,
applies the interview logic to the interview answers, figures out
what question to ask, pickles the interview answers, saves the
pickled answers to the database again, and then shows the
question to the user. In the process of unpickling, if a
DAObject that is also a SQLObject is encountered,
docassemble will find the row in the SQL table associated with the
object type and use the values in each of the columns to change
information about the Python object. Likewise, when pickling,
docassemble will update the row in SQL if any changes to the
relevant information have been made.
When you first create a DAObject, it might have no attributes
except for an instanceName. This is enough for the object to be
saved in the interview answers, but it isn’t enough to create a new
record in SQL. It doesn’t make sense to create a new record in SQL if
all the columns are null. Until there is enough information to
populate the “required” columns, the object is said to be “nascent.”
The object will automatically become non-nascent when the information
for the “required” columns is known and the new record is created in
the SQL database.
Objects can also become non-nascent if information for the “unique ID”
column is gathered, and a record exists for that unique ID. The
object will automatically become non-nascent when the columns of the
record are read from the SQL database and used to populate
attributes of the DAObject. For example, in the interview above,
if you create a “customer” with a particular SSN during one interview
session, and then in a subsequent interview session you input the same
SSN, the remaining attributes of the DAObject will be populated.
In other words, all you have to do is create a “shell” object of type
Individual with the ssn attribute defined, and then, as part of
the automatic synchronization process, all of the other attributes of
the Individual will be populated.
For purposes of creating a new record in SQL, the “unique ID” column is treated as one of the “required” columns that must be defined before a new record can be created in the SQL database table. Thus, if you want to use an object in your interview answers but you don’t want it saved to SQL, and the object uses a “unique ID” column, just refrain from defining the information for the “unique ID” column, and it will never synchronize with the SQL table.
The “nascent” stage of an object allows you to use several screens to collect information about an item before writing anything to the SQL database; the information is stored in the interview answers but not in the SQL database. This allows you to use the interview answers as a kind of “staging area” for information before writing it to the SQL database.
If an object is stored both in the interview answers and on the SQL server, and then the columns in the SQL record change, then the next time the interview answers are retrieved, the attributes in the Python objects will be updated with the values in SQL.
However, if the item is deleted from SQL, then when the corresponding Python object is retrieved, it will become a “zombie” object. It will continue to have the attributes that were known the last time the object was synchronized with SQL, but it will be disconnected from the SQL database and will only exist as an ordinary Python object in the interview answers.
The “nascent” quality of an object is tracked internally using the
instance attribute _nascent (which will be True or False).
The “zombie” quality of an object is tracked using the instance
attribute _zombie (which will be True or False).
The “required” attributes are defined by setting the _required
attribute of the class. (Note that a class attribute is different
from an instance attribute; a class attribute is read-only and is
defined in the Python module file, whereas instance attributes can
be added, deleted, or modified at any time.) The “unique ID” of a
class is defined by setting the _uid attribute of the class. For
example, in the above Python module, the _required class
attribute was set to 'first_name' and the _uid attribute name
was set to 'ssn'.
The mapping between the DAObject characteristics and the values of
database columns is controlled by the db_get(), db_set(), and
db_null() methods of the class. The db_get() method takes a
column name and tries to obtain a value for it from Python land.
The db_set() method takes a column name and a value from SQL
land and saves that value in Python land. (Think of the verbs “get”
and “set” as applying to attributes of the Python object, not columns
in the SQL record.) For example, in the above Python module, the
first_name column is associated with .name.first attribute of the
Customer object. The db_null() method takes a column name and
tries to delete the object attribute in Python land that is
associated with the given column.
When you initialize an object, you can give it the unique ID, and if a record exists in SQL with that unique ID, then the object will be non-nascent from the start.
objects:
- customer: Customer.using(ssn='928-32-2832')In addition, every table in SQL has a column called id, which is a
unique integer that never changes. The id is set when the record is
created in SQL, using an auto-incrementing counter. If you know the
id of a record you can use it to initialize your object so that it
is non-nascent from the start. For example, here is a way to use a
URL parameter (or in the alternative, a question), to get the id
for a customer record:
objects:
- customer: Customer.using(id=customer_id)
---
question: |
What is the customer ID?
fields:
- ID: customer_id
datatype: integer
---
code: |
if 'id' in url_args:
customer_id = url_args['id']If you initialize an object as nascent, but later set its unique ID,
and then call db_read() or db_save(), docassemble will
look for a record in the database for that unique ID, and if it finds
it, it will run db_set() and update information in Python based on
the values of the columns in SQL.
For example, assume there is a customer in the SQL database with SSN 122-23-2322, whose first name is John and whose last name is Smith.
objects:
- customer: Customer
---
mandatory: True
code: |
customer.ssn = '122-23-2322'
# customer is still nascent
customer.db_read()
# customer is no longer nascent
customer.name.first
# this does not trigger the asking of a question, because
# customer.name.first is defined as 'John'For another example, assume there is not a customer in the SQL database with SSN 545-23-6552.
objects: |
customer: Customer
---
mandatory: True
code: |
customer.ssn = '545-23-6552'
# customer is still nascent
customer.db_save()
# this will return without doing anything, because a
# customer with that SSN does not exist, and the
# customer's first name is not yet known.
# The customer is still nascent.
customer.name.first = 'Jane'
customer.name.last = 'Smith'
customer.db_save()
# Since the required columns are now defined, the customer
# object is no longer nascent. The record now exists in the database.Note that db_read() is called every time the screen starts to
load, and db_save() is called as the screen finishes loading. So
in many cases, you don’t need to worry about calling these functions
manually. However, you will need to call them when results change
during the processing of a screen.
It may be helpful to call db_read() in the validation code of
a question.
---
objects:
- customer: Customer
---
question: |
What is the customer's SSN?
fields:
- SSN: customer.ssn
validation code: |
customer.db_read()Although the validation code here won’t raise a
validation_error() to make the user fix something, it is code that
runs after customer.ssn has been defined and before the interview
logic is evaluated. It “validates” the customer object by
populating customer with additional attributes from SQL if there
is a record in the SQL table where the ssn column is equal to
customer.ssn.
Instead of calling db_read(), you could call db_save(). The
difference is that if you set any Python attributes other than
ssn, db_save() will overwrite the SQL values with the values
that exist in Python. By contrast, db_read() will overwrite the
Python values with the values that exist in SQL.
If you call the method ready() on an object, it will try to
db_save() the object to SQL if the object is nascent. It will
then return False if the object is still nascent (or if it is a
zombie), and will return True otherwise.
If you want to test whether a record exists in the database for a
particular id or unique ID, you can use the class methods
id_exists() and uid_exists().
question: |
Look up a customer by SSN
fields:
- SSN: ssn
validation code: |
if not Customer.uid_exists(ssn):
validation_error("That customer does not exist")In this example, the _uid of a Customer object is ssn, so the
uid_exists() class method will search the ssn column.
Defining tables
For help on writing table definitions, consult the SQLAlchemy documentation.
Every table definition must contain a primary key called id. For
example:
id = Column(Integer, primary_key=True)SQLAlchemy has a feature by which you can define “relationships”
between tables. This is not supported by the SQLObject feature.
Representing relationships between two objects in docassemble is
best done by creating a separate object that represents the
relationship itself. While it is entirely possible in Python to write
plaintiff.father = witness[0] and witness[0].child[0] = plaintiff,
a problem arises when the user edits relationships. If the user
changes plaintiff.father, then you need to make sure that the old
plaintiff.father is modified to remove the witness[0].child[0]
reference. This is very complicated, while allowing the user to edit
the relationship object is simple because the relationship exists in
just one place.
If you don’t want to use a separate table, you can represent
relationships using class attribute declarations like bank_id =
Column(Integer, ForeignKey('bank.id', ondelete='CASCADE')). In this
case, the attribute in Python land will simply be an integer. You
can obtain a Python object from this integer using the by_id()
class method. But note that objects returned by by_id() will have
random instanceNames.
Writing classes
When writing DAObject classes that correspond to SQLAlchemy
tables, you must use a multiple inheritance class declaration where
the first class is a DAObject class and the second class is
SQLObject.
class Bank(Person, SQLObject):Note that the SQLObject is defined in the docassemble.base.sql
package, not in the docassemble.base.util package.
from docassemble.base.sql import SQLObjectFor a SQLObject to work, you need to define a few class attributes
and include an init() method. Always set _model to the object
representing the SQLAlchemy table definition. Always set _session
to the object you obtain by calling sessionmaker(bind=engine).
You can set _required to a Python list of column names that must
be set before the object can be saved to the SQL table. Until these
columns have definitions (as obtained from db_get()), the object
will remain nascent. The default value is an empty list.
Always include an init() method that calls init() on the
parent class and then calls sql_init().
def init(self, *pargs, **kwargs):
super().init(*pargs, **kwargs)
self.sql_init()Finally, you must define the methods db_get(), db_set(), and
db_null(), which handle getting, setting, and undefining information
for columns. For example, in the Bank class in the example, each
bank has two columns (not including the id column): name for the
name of the bank and routing for the routing number of the bank.
Each of these methods should contain if/else statements that perform the necessary operations depending on what the column name is.
def db_get(self, column):
if column == 'name':
return self.name.text
elif column == 'routing':
return self.routing
raise Exception("Invalid column " + column)
def db_set(self, column, value):
if column == 'name':
self.name.text = value
elif column == 'routing':
self.routing = value
else:
raise Exception("Invalid column " + column)
def db_null(self, column):
if column == 'name':
del self.name.text
elif column == 'routing':
del self.routing
else:
raise Exception("Invalid column " + column)As the name column demonstrates, a column value in SQL land can
correspond to the attribute of an attribute in Python land. In
Python land, a name is a Name object, but in SQL land, the
name is represented as a collection of attributes.
When the db_get() and db_null() methods are called from
SQLObject code, these calls are typically wrapped in
try/except, so that if your code triggers an exception (for
example because an attribute is not defined) then the SQLObject
code will know that the column information does not exist. You do not
need to use try/except logic of your own in these methods; just
follow the pattern above.
Pitfalls
Multiple Python objects associated with a single SQL record
When using SQLObject, make sure that your interview logic does not
create multiple separate Python objects associated with the same SQL
record. If you do that, then if you change the attributes of one
object, but not the other, the two objects will be in conflict with
one another. Which attributes are saved to the server will be random,
depending on which object is [pickle]d last.
The SQLObject maintains an object cache under the _internal
dictionary in the interview answers. When a SQLObject has an id, a
reference to that object will be created in the cache. Methods like
.filter(), .all(), and .by_id() and .by_uid() return
references to this cache if the object is in the cache, rather than
create new objects. The cache helps avoid the problem of multiple
separate Python objects existing in the interview answers.
Concurrency
Between the time when the screen starts loading (when data are copied from SQL data to Python) and the screen finishes loading (when data are copied from Python to SQL), no lock is placed on the SQL records. Suppose session A copies data from SQL to Python at time 0, session B copies data from the same SQL record to Python at time 1, session B writes changes to the SQL record at time 2, and session A writes changes to the SQL record at time 3. In this scenario, session A’s changes would overwrite the changes that session B made.
The same result would happen if a third-party application made changes to the SQL record instead of session B.
However, suppose session A copies data from SQL to Python at time 0, session B copies data from the same SQL record to Python at time 1, session B writes changes to the SQL record at time 2, and then at time 3 the interview logic of session A finishes without making any changes. In this scenario, session A would not overwrite the changes of session B, because from the perspective of session A, there is no need to take the time to write data to SQL, since nothing changed.
If you expect that SQL records might be altered concurrently, using
SQLObjects to synchronize between interview answers and a SQL
database might not be sufficiently robust.
Reference guide
Class attributes
The _model class attribute refers to a
SQLAlchemy class representing a SQL table.
The _session class attribute refers
to a SQLAlchemy object representing a SQL session generator, which
can be obtained by calling sessionmaker(bind=engine).
The _required class attribute
refers to a list of strings, where each string corresponds to the name
of a class attribute of the table definition (i.e. a column in the
SQL table). The SQLObject will be considered nascent until each
of these columns can be defined. The SQLObject will not trigger
the seeking of a definition of any undefined DAObject attributes;
your interview logic will need to trigger the asking of the necessary
questions or running the necessary code blocks. If you do not
specify a _required class attribute, the empty list will be used.
The _uid class attribute refers to a
string, where the string corresponds to the name of a class attribute
of the table definition (i.e. a column in the SQL table). If you do
not specify a _uid attribute, the default value of uid will be
used. If you have a column in your SQL table by the name of uid,
this will be used as the unique identifier.
Instance attributes
Behind the scenes, the SQLObject code uses attributes of the
object to track the state of the object and its relationship to the
current state of the SQL table.
If the object is nascent, the
_nascent attribute will be set to True. This attribute is True
when the object is first initialized, and it is set to False when
the object acquires an id.
When the object is connected with the SQL
table, the id attribute is set to the integer ID of the record in
the SQL table.
If the object has an id but there
is no corresponding id in the SQL table, the _zombie attribute
is set to True. This can happen if the object in Python land
still exists after the underlying record in the SQL table is
deleted. You should probably avoid this. Instead of deleting records
from SQL, you could use a boolean column called active that is set
to False when the record should no longer be used.
When you need to run SQLAlchemy
commands, use the _session attribute to access the SQLAlchemy
session object.
Instance methods
The db_get() method is called by
SQLObject code when it needs to read information from Python
land for purposes of populating column values in SQL land. The
first and only positional parameter is the name of the column. The
method should return the value from Python land that corresponds
with the given column name.
The db_set() method is called by
SQLObject code when it needs to populate information in Python
land based on the values in a row in a SQL table. The two
positional parameters are the column name and a data value. Based on
the column name, the method should write information to the
appropriate place in Python land.
The db_null() method is called by
SQLObject code when a value in a record is null for a particular
column. In the example code above, db_null() calls del on the
object attribute corresponding with the column. You may wish to
implement this by setting the value to None. When stored in SQL, a
None value will become a null value.
def db_null(self, column):
if column == 'spouse':
self.spouse = None
elif ...Then the attribute will be defined for Python purposes; referencing it in your interview will not result in the asking of a question.
Alternatively, you may want to handle this differently depending on whether the attribute was already defined in Python. For example, if your interview had asked the user for a value, but then later the value was nulled in the SQL database, you might not want your interview to ask the same question again. In that case you could write:
def db_null(self, column):
if column == 'spouse':
if hasattr(self, 'spouse'):
self.spouse = None
elif ...That way, the spouse attribute will remain undefined in Python
land and null in SQL land until you give it a value in Python
land. Then if it is later nulled in SQL land it will become None
in Python land.
If you are using a _uid
in your DAObject class definition, you don’t need to specify a
db_find_existing() method. The example above of the BankCustomer
class demonstrates a situation where a db_find_existing() method is
appropriate. The return value should either be None or a
SQLAlchemy row record.
The save_if_nascent() method
runs db_save() if _nascent is True.
The ready() method returns True if
the object is connected to a SQL record. It will first try to
connect the object to a SQL record if it can. Internally, this
method runs save_if_nascent() and then returns True if the object
is neither nascent nor a zombie.
The db_save() method tries to save
a Python object to SQL. If there is no SQL record yet, it will
create one if the “required” information is present. If there is an
existing SQL record, the values of the columns will be overwritten
with the information from Python if it is different.
The db_read() method tries to update
the Python object with information from SQL. If the object is
nascent, but there is enough information in Python to connect the
object with a SQL record, the Python information will be updated
from SQL and the object will be marked as non-nascent. If the
object is already non-nascent, but no record can be found in SQL,
the object is marked as a zombie.
The db_delete() method deletes the
underlying record from the database and marks the object as a zombie.
The sql_init() method needs to be
called from the init() method of each class after the call to
init() on the parent class.
Class methods
If you have the id of a SQL record
and you want to obtain a Python object corresponding to that ID,
you can call the by_id() class method. If your class name is Customer,
and the id is customer_id, you would call Customer.by_id(customer_id),
and the result would be a Customer object. If an object for this id
is already present in the interview answers, that object will be
returned. If the object does not already exist, a new object will be
returned, and its instanceName will be random. If no object could
be found, None is returned.
The by_uid() method is similar to
by_id(), except it uses the column indicated by _uid instead of
the id column. If there is no _uid column in the underlying
table, None is returned.
If you want to know whether an
object exists in SQL based on its id, you can call the
id_exists() class method. If your class name is Customer, and the
id is customer_id, you would call Customer.id_exists(customer_id).
The result will be True if a record exists in SQL, and False
otherwise.
The uid_exists() class method is
similar to id_exists(), except it uses the column indicated by
_uid instead of the id column. If there is no _uid column
in the underlying table, False is returned.
If you know the id of a row in
a SQL table and you want to delete that row, call delete_by_id()
with the id you want to delete.
The delete_by_uid() class
method is similar to the delete_by_id() class method, except it uses
the _uid of the table rather than the id.
