docassemble allows you to format your text using Markdown and to
use Mako to make your text “smart.” These mark up methods are
available for use in question text, field labels, interview
help text, the content of documents, and other text elements.
Markdown
The syntax of Markdown is explained well elsewhere.
When generating documents from Markdown, docassemble uses Pandoc to convert Markdown to PDF, RTF, and HTML. (Unless you are using Microsoft Word templates, in which case you will use the Jinja2 templating language in the Word document.)
Here are some examples of things you can do with Markdown.
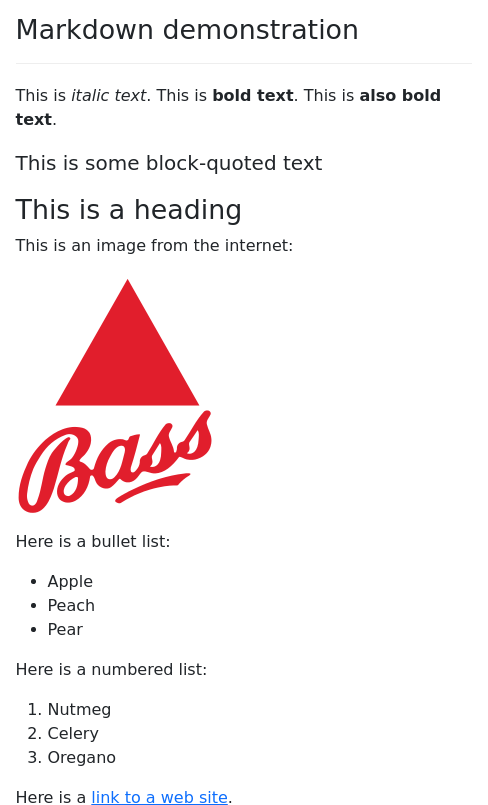
question: Markdown demonstration
subquestion: |
This is *italic text*.
This is **bold text**.
This is __also bold text__.
> This is some block-quoted
> text
### This is a heading
This is an image from the internet:

Here is a bullet list:
* Apple
* Peach
* Pear
Here is a numbered list:
1. Nutmeg
2. Celery
3. Oregano
Here is a
[link to a web site](http://google.com).
mandatory: trueAll of these types of markup will format text in questions as well as
text in assembled documents (with the exception of the ! image
insertion command, which does not work within PDF and RTF documents).
When Markdown is converted to HTML, external hyperlinks (as well as internal hyperlinks to documents) will open in a separate tab, but internal links will open in the same tab. To force an internal link to open in a separate tab, you can write the links this way:
Check out [other interviews](${ url_of('dispatch') }){:target="_blank"}.If you want to force an external hyperlink to open in the same window, write raw HTML like this instead of a Markdown hyperlink:
Check out <a target="_self" href="https://docassemble.org">the web site</a>When you don’t want text interpreted as Markdown
Markdown interprets characters like >, *, _, #, ., and
spaces at the beginning of a line as formatting marks. However,
sometimes you want to use these characters literally. For example:
# of itemsmeans “number of items,” not a section heading.> 18means “over eighteen,” not a block-quoted “18.”
Or you might want to write:
The fourth and sixth rules are the most stringent.

4. Brush your teeth before going to bed.

6. Don't run red lights.
and Markdown will give you:
- Brush your teeth before going to bed.
- Don’t run red lights.
If you don’t want text to be transformed by the Markdown formatter,
you can insert the escape character \ before a special character to
indicate that you do not want the Markdown formatter to interpret the
special character as a formatting mark.
\# of items`

\> 18`

The fourth and sixth rules are the most stringent.

4\. Brush your teeth before going to bed.

6\. Don't run red lights.
This will result in the text you want:
# of items
> 18
The fourth and sixth rules are the most stringent.
4. Brush your teeth before going to bed.
6. Don’t run red lights.
These are the rules of Markdown. When you are writing Markdown inside
of YAML, you need to account for the fact that YAML processes the
\ character in special ways in certain circumstances. Inside of a
YAML double-quoted string, you need to write \\#, \\>, and \\.
instead of \#, \>, and \.
question: What do you choose?
fields:
  - Item: the_item
    input type: radio
    choices:
      - "\\> 18": over_eighteen
      - "< 60": under_sixty
      - "\\# of items": number_of_items
      - "b \\*a\\* c": with_asterisks
      - "b \\_a\\_ c": with_underscores
Inside of a YAML block quote, or inside of single quotes, or when
you do not indicate a quoting method, you only need to use one \
character.
question: |
  Please choose b \_a\_ c
fields:
  - Item: the_item
    input type: radio
    choices:
      - 'b \_a\_ c': with_underscores
      - c \_a\_ a: also_with_underscores
Using quotation marks in YAML is usually a good idea, because YAML has a lot of complicated rules, and you never know when the punctuation in your text is going to trigger one of those rules.
Mixing Markdown with HTML
Markdown is not a syntax for formatting; it is a deliberately simplified format that supports only a few formatting features. If you want to customize the details of how the web interface works, you can mix HTML with Markdown.
docassemble’s Markdown-to-HTML converter uses the Markdown in
HTML extension. This means that by default, anything inside of an
HTML tag, like <span style="color: red;">**Hello, world!**</span>
will not be treated as Markdown.
However, if you want text that is inside of HTML tags to be processed
as Markdown, you can add attributes to your HTML tags to tell the
Markdown-to-HTML converter to treat the content as Markdown. If you
write <span style="color: red;" markdown="1">**Hello, world!**</span>
then the content of the paragraph will be translated as Markdown.
For more information about how this works, see the documentation for the Markdown in HTML extension.
Using Mako for logic and generated text
docassemble uses a templating system called Mako to allow developers to insert variables and code into questions and documents.
You can insert the values of variables into question text using Mako’s
${ ... } syntax.
mandatory: True
question: |
  A summary
subquestion: |
  You like ${ favorite_fruit }
  and ${ favorite_vegetable }.
---
code: |
  favorite_fruit = 'apples'
favorite_vegetable = 'potatoes'You can use Mako’s if/endif syntax to insert text conditionally:
mandatory: True
question: |
  Hello!
subquestion: |
  I hope you are having a good day.

  % if day_of_month == 1:
  Don't forget to change your wall calendar!
% endifYou can also express more complicated logic:
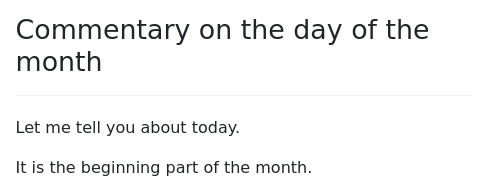
mandatory: True
question: |
  Commentary on the day of the month
subquestion: |
  Let me tell you about today.

  % if day_of_month < 3:
  The month just started!
  % elif day_of_month < 15:
  It is the beginning part of
  the month.
  % else:
  It is the latter part of the month.
% endifThe Mako syntax for if/then/else statements is based on
Python’s if statement, but is a little bit different.
The % at the beginning of the line signifies that you are doing
something special with Mako.
Python itself does not use endif – it only uses indentation to
designate where the if/then/else statement ends. Mako requires the
use of endif because it does not see indentation.
In Python, elif is short for “else if.” In the example above, the
if/then/else statement means:
If the day of the month is less than three, write “The month just started!”, but otherwise if the day of the month is less than 15, write “It is the beginning part of the month.”; otherwise, write “It is the latter part of the month.”
As with Python, it is critical that you include : at the end of
any line where you indicate a condition.
You can put if/endif statements inside of other if/endif
statements:
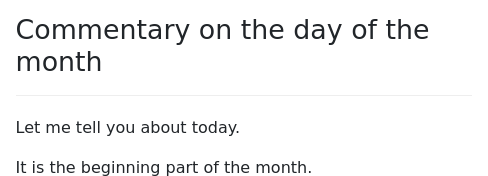
mandatory: True
question: |
  Commentary on the day of the month
subquestion: |
  Let me tell you about today.

  % if day_of_month < 3:
  The month just started!
  % elif day_of_month < 15:
  It is the beginning part of
  the month.
  % else:
    % if month_of_year == 12:
  It is almost New Year's!
    % else:
  It is the latter part of the month.
    % endif
% endifIn this example, the % if, % else, and % endif lines are
indented, but they do not have to be. Since nested if/then/else
statements can be hard to read, the indentation helps make the
statement more readable. Note that the the actual text itself is not
indented, even though the % lines are indented; this is because
indentation means something in Markdown. If you indent a line by
four spaces, Markdown will treat the line as a code block, which
might not be what you want.
Mako also allows you to work with lists of things
using % for and % endfor:
mandatory: True
question: |
  Foods I like
subquestion: |
  % for food in ['plums', 'pears', 'peas']:
  I like ${ food }.
% endforThis is based on Python’s for statement.
The for loop is useful for working with groups of objects:
modules:
  - docassemble.base.legal
---
objects:
  - witness: PartyList
---
mandatory: True
question: |
  The ${ witness.as_noun() }
subquestion: |
  % for person in witness:
  ${ person } is a witness.
  % endfor
---
question: |
  What is the name of the
  ${ ordinal(i) } witness?
fields:
  - First Name: witness[i].name.first
  - Last Name: witness[i].name.last
---
question: |
  Are there any other witnesses?
yesno: witness.there_is_anotherWithin for loops, Mako provides a useful object called loop,
which contains information about the current iteration of the loop.
mandatory: True
question: |
  Foods I like
subquestion: |
  % for food in ['apples', 'peaches', 'pears', 'plums', 'turnips', 'raspberries']:
    % if loop.first:
  First, I like ${ food }.
    % elif loop.last:
  Last but not least, I am a
  big fan of ${ food }.
    % elif loop.even:
  I also like ${ food }.
    % elif loop.odd:
  The ${ ordinal(loop.index) } food
  I like is ${ food }.
    % endif
% endforNote that loop.index is a number in a range that starts with zero.
The ordinal() function converts these numbers to words.
For more information about working with groups of things, see groups.
In addition to allowing you to insert Python expressions with the ${
... } syntax, Mako allows you to embed Python statements using
the <%/%> syntax:
mandatory: True
question: |
  <%
    a = 2
    b = 3
    the_answer = a + b
  %>
The answer is ${ the_answer }.Mako also allows you to insert special code that cuts short the text being rendered:
mandatory: True
question: |
  Apples
subquestion: |
  % if not likes_apples:
    Oh well, never mind.
    <% return STOP_RENDERING %>
  % endif
  Apples are red.

  They can also be green.

  They have stems and seeds.

They are juicy and sweet.The same thing could also be accomplished with an else statement,
but using STOP_RENDERING may be more readable.
For more information about Mako, see the Mako documentation. Note, however, that not all features of Mako are available in docassemble. For example, in normal Mako, you can write:
% if some_variable is UNDEFINED:
...
% endif
In docassemble, this will not work as intended. Instead, you
would use the defined() function:
% if not defined('some_variable'):
...
% endif
If you want to use the <%def> construct of Mako, see the
def initial block.
Formatting variables
When the variable you insert with ${ ... } is a number, the way that
it is formatted may not be to your liking. There are a variety of
ways to format numbers in Python.
code: |
  monthly_income = 43143.26/12
---
question: |
  Your monthly income
subquestion: |
  Your monthly income is
  ${ monthly_income }
  dollars per month.

  But it would be better to say
  your monthly income is
  ${ '%.2f' % monthly_income }
  dollars per month, or
  ${ '{:.2f}'.format(monthly_income) }
  dollars per month, or
  ${ '{:,.2f}'.format(monthly_income) }
  dollars per month, or
  ${ int(monthly_income) }
  dollars per month, or
  best of all,
  ${ currency(monthly_income) }
  per month.
mandatory: TrueInserting images
To insert an image that is located in the static folder of a custom
Python package, use the FILE command. This works within PDF, RTF,
and DOCX documents as well as within questions.
For example:
---
question: |
  Did your attacker look like this?
subquestion: |
  Please study the face below closely before answering.

  [FILE docassemble.crimesolver:mugshot.jpg]
yesno: suspect_identified
This example presumes that there is a Python package called
docassemble.crimesolver installed on the server, and there is a file
mugshot.jpg located within the static directory inside that
package.
If you omit the package name (e.g., [FILE mugshot.jpg]),
docassemble will assume you are referring to a file located in the
static directory of the package in which the question appears.
Optionally, you can set the width of the image:
[FILE docassemble.crimesolver:mugshot.jpg, 100%]or:
[FILE docassemble.crimesolver:mugshot.jpg, 150px]You can also set the alt text of the image:
[FILE docassemble.crimesolver:mugshot.jpg, 150px, Mugshot photograph]If you want to set the alt text without setting a width, use None
(with a capital N) as the width:
[FILE docassemble.crimesolver:mugshot.jpg, None, Mugshot photograph]You can use any characters in the alt text except for the right
bracket. If you need to use the right bracket in alt text, use one
of the other methods of inserting images, such as creating a
DAStaticFile object.
Instead of referring to a file name, you can refer to the name of an
image that is defined in an image sets or images block.
images:
  bills: money146.svg
  children: children2.svg
---
mandatory: True
question: Do you have children?
subquestion: |
  [FILE children, 100%]
yesno: has_children
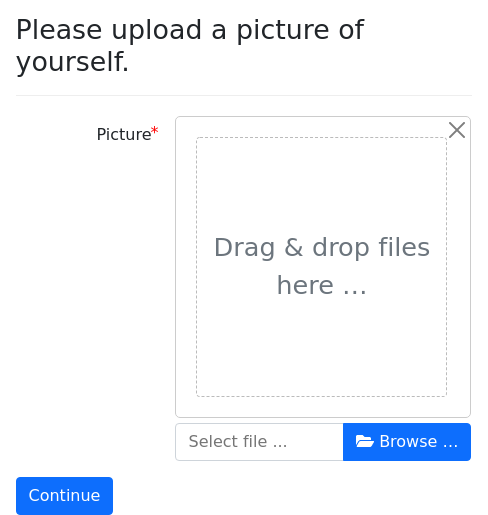
To insert an image that has been uploaded, or created using a signature field, simply refer to the variable using Mako. For example:
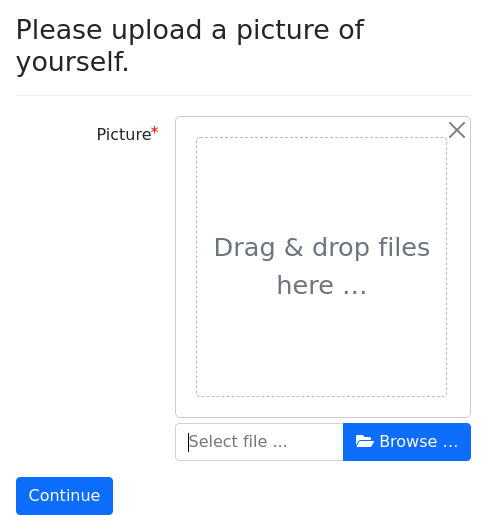
question: |
  Please upload a picture of yourself.
fields:
  - Picture: user_picture
    datatype: file
---
question: |
  You're so adorable, François!
subquestion: |
  ${ user_picture }
mandatory: TrueAlternatively, you can call the show() method on the file object:
question: |
  You're so adorable!
subquestion: |
  ${ user_picture.show() }
mandatory: TrueThe show() method takes an optional argument, width:
question: |
  You're so adorable!
subquestion: |
  ${ user_picture.show(width='250px') }
mandatory: TrueIn the above example, the picture will be shrunk or expanded so that its width is 250 pixels.
Inserting inline icons
If you have defined “decorations” in an image sets block (see
initial blocks), you can include these decorations as icons (having
the same size as the text) by referencing them “emoji-style,” putting
colons around the decoration name. This works not only in question
and subquestion areas, but also in question choices.
This works within PDF and RTF documents as well as within questions.
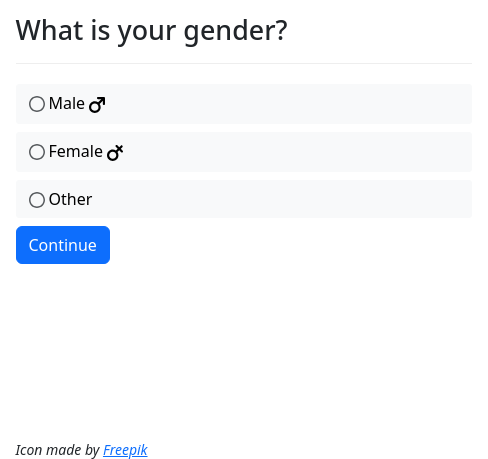
image sets:
  freepik:
    attribution: |
      Icon made by [Freepik](http://www.flaticon.com/authors/freepik)
    images:
      male: male244.svg
      female: female243.svg
---
question: |
  What is your gender?
field: user.gender
choices:
  - "Male :male:": male
  - "Female :female:": female
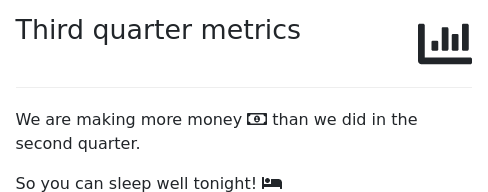
- "Other": otherBy default, if an “emoji-style” reference refers to an image that has
not been defined in an image sets or images block, the
reference will be treated as a reference to a Font Awesome icon.
mandatory: True
decoration: chart-bar
question: |
  Third quarter metrics
subquestion: |
  We are making more money
  :far-fa-money-bill-alt: than
  we did in the second quarter.

So you can sleep well tonight! :bed:As explained in the Configuration, only one “style” of Font
Awesome icon (by default, the “solid” style) can be used at one time.
If you need to use a different “style” for a particular icon, you need
to specify the CSS classes more explicitly. For example, you can
write :fab-fa-amazon: to get the amazon icon in the “brand” style
(fab).
If you want to apply additional formatting to an icon, you can include the raw HTML for the icon. For example:
---
question: |
  Social media usage
subquestion: |
  Do you use <i class="fab fa-facebook-f fa-spin"></i>?
yesno: user_is_on_facebook
---
Note that while ordinary inline icon references work in documents as well as on the web, Font Awesome references only work in questions, not in documents.
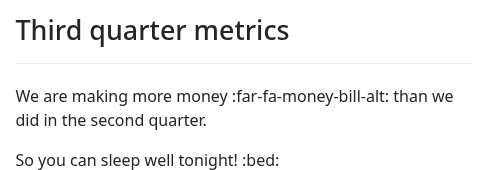
You can turn off inline icon conversion for a block of text by
writing [NO_EMOJIS] somewhere in the text.
mandatory: True
question: |
  Third quarter metrics
subquestion: |
  [NO_EMOJIS]
  We are making more money
  :far-fa-money-bill-alt: than
  we did in the second quarter.

So you can sleep well tonight! :bed:Inserting audio and video
In addition to using the audio and video
question modifiers, you can
insert audio and video into your Mako text in questions.
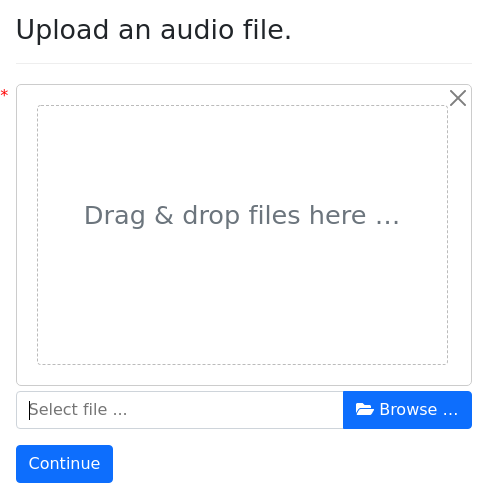
question: Upload an audio file.
fields:
  - no label: my_file
    datatype: microphone
---
mandatory: True
question: Listen to this!
subquestion: |
  Best song ever:

  ${ my_file }

Don't you think so?Or, if you have a file in data/static, you can write:
---
question: Listen to this!
subquestion: |
  This excerpt of whalesong will give you goosebumps.

  [FILE whale_song.mp3]
---
It works the same with videos.
---
question: Watch this!
subquestion: |
  This video of otters sunbathing is going to go viral.

  [FILE awesome_otters.mp4]
---
You can also embed YouTube and Vimeo videos (which is far
preferable to working with video files, which are enormous). For
example, if you want to embed a YouTube video for which the URL is
https://www.youtube.com/watch?v=RpgYyuLt7Dx or
https://youtu.be/RpgYyuLt7Dx, you would write this:
---
question: Are you traveling to New York City?
yesno: going_to_nyc
video: |
  New York is such a happening place.  Check it out:

  [YOUTUBE RpgYyuLt7Dx]
---
See question modifiers for more information about including audio and video.
Inserting QR codes
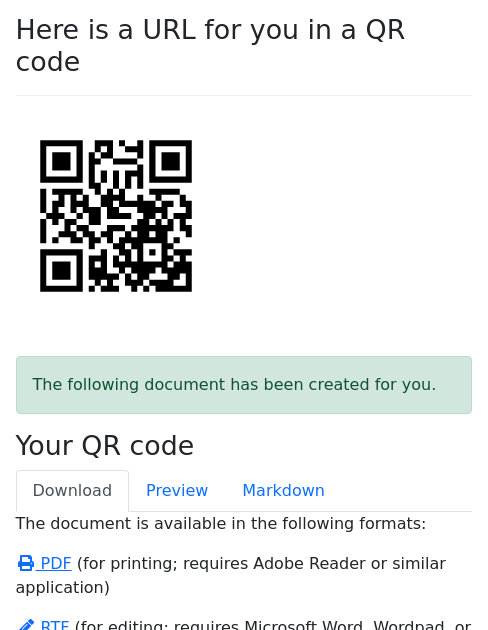
You can also display or insert QR codes using [QR ...], where ...
is the text you want to encode. This works like [FILE ...] in that
you can give the image a width and alt text. The QR code images can
be displayed on the screen or inserted into a document.
This works within PDF and RTF documents as well as within questions.
For example, this interview provides a QR code that directs the user to Google News:
mandatory: True
question: Here is a URL for you in a QR code
subquestion: |
  [QR https://news.google.com, 200px, Google News]
attachment:
  name: Your QR code
  filename: your_code
  content: |
    Use the QR reader on your smartphone to take a picture of this:

[QR https://news.google.com]See also the qr_code() function, which allows you to insert the
[QR ...] markup using Python.
Inserting other types of files
Just as you can insert images with [FILE
docassemble.crimesolver:mugshot.jpg] or ${ user_picture }, you can
also insert other types of files.
If you insert a text file (MIME type text/plain), the raw contents
of the file will be inserted.
If you insert a Markdown file (MIME type text/markdown), the
contents of the file will be treated as a DATemplate.
The behavior when you insert a PDF file depends on the context:
- In a
question, the user will see a thumbnail of the first page of the document, and clicking the thumbnail will open the PDF file. - In a document created by converting Markdown to PDF, the PDF pages will be inserted into the document.
- When assembling documents in other formats, the pages of the PDF will be converted to images and inserted into the document in the same way images are inserted.
However, PDF thumbnail conversion does not work with static PDF files; it only works with generated or uploaded PDF files.
When you insert a word processing file, the file will be converted to
PDF and inserted into the document the way a PDF file is inserted.
However, if you include a DOCX file inside a DOCX file created using
docx template file, the result is like that of calling
include_docx_template().
Inserting tables
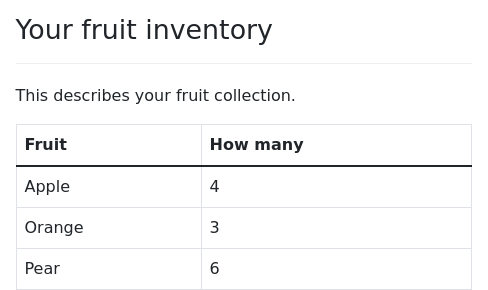
Tables can be inserted in the format known as PHP Markdown Extra.
mandatory: true
question: |
  Your fruit inventory
subquestion: |
  This describes your fruit
  collection.

  Fruit  | How many
  -------|---------
  Apple  | 4
  Orange | 3
Pear | 6If you want to construct a table based on information in a list, the
best practice is to collect the list information into an object and
then use the table block to create a template for the table.
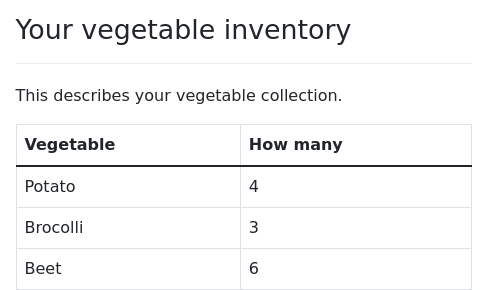
If you want to write tables in Markdown manually, note that the alignment characters do not have do be perfectly aligned from row to row.
mandatory: true
question: |
  Your vegetable inventory
subquestion: |
  This describes your vegetable
  collection.

  Vegetable|How many
  ------|----
  Potato|4
  Brocolli|3
Beet|6Under the Markdown rules, the text for each row needs to be all on
the same line in your Markdown text. If you want to include a line
break within a cell, use the [BR] tag, which is documented in the
document markup section.
Exactly how your text is converted from Markdown into an actual table depends on the output format. If you are including a table that is viewed on the screen, see tables in HTML for the details. If you are including a table that is inserted into an attachment, see tables in attachments.
If you want to have fine-grained control over the formatting of
tables, Markdown will disappoint you. If you want a very specific
type of table, you can use raw HTML for a table that displays in a
question or raw LaTeX for a table that displays in a PDF-only
attachment.
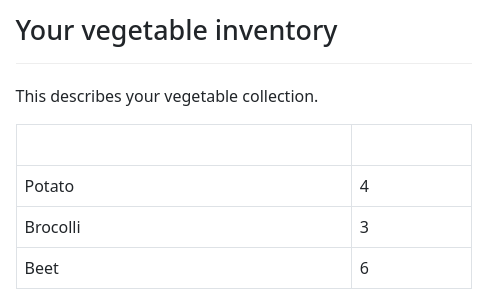
The PHP Markdown Extra format requires that you include a header in your table, even if you do not want one. You can try to make the header row blank with the following trick.
mandatory: true
question: |
  Your vegetable inventory
subquestion: |
  This describes your vegetable
  collection.

      |
  ---------|------
  Potato   |4
  Brocolli |3
Beet |6The styling of tables converted from Markdown to HTML can be
customized using table css class.
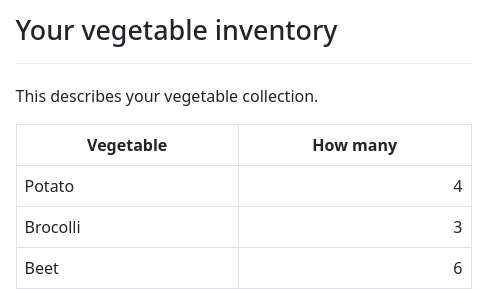
When using tables in HTML, text in each cell is aligned left by
default. Although PHP Markdown Extra has a feature for changing the
alignment of columns using the : character in the header separation
line, this feature is not supported when inserting tables in
HTML. Instead, you can change the CSS class of each cell individually
using the following markup.
mandatory: true
question: |
  Your vegetable inventory
subquestion: |
  This describes your vegetable collection.

  Vegetable { .text-center } | How many { .text-center }
  ---------------------------|--------------------------
  Potato                     | 4 { .text-end }
  Brocolli                   | 3 { .text-end }
Beet | 6 { .text-end }The CSS classes text-center and text-end come from Bootstrap 5.
If you want a simple two-column table that fills the width of the
page, note that there are special document markup tags for this
special case: you can write [BEGIN_TWOCOL] (text of first column)
[BREAK] (text of second column) [END_TWOCOL].
Embedding fields
In a fields block, you can use the markup syntax [FIELD ...] to
embed fields within the subquestion text. For more
information about this feature, see the section on
Embedding fields within a paragraph.
Embedding areas for interim information
If you include the markup [TARGET ...] within text, you will create
an invisible area where text can be placed by code. For more
information about this feature, see the section on
Processing interim user input.
