Here is a simple interview file that says “Hello, world!” to the user.
---
question: Hello, world!
buttons:
  - Exit: exit
mandatory: True
---
To run this, first set up your server using Docker.
To get docassemble up and running in your web browser, visit http://localhost if you are running docassemble locally (i.e., using Docker Desktop on your computer), or else navigate to your docassemble server URL).
Once docassemble is up and running in your web browser, click “Log in” in the upper right hand corner. The default username and password are:
- E-mail: [email protected]
- Password: password
The default password (“password”) will need to be changed. Change it to something that is at least eight characters long with at least one lowercase letter and one number. You should also change the e-mail address by going to User List and clicking “Edit” next to the [email protected] user.
Then, from the menu, select Playground. The Playground is a “sandbox” area where you can develop interviews and test them, all inside the web browser.

Then, click the
button to create a new interview. Call it “hello.yml.” (.yml is the
file extension for the data format known as YAML.)

Then, copy and paste the interview code above into the editor:

Then, click the Save button, followed by the Save and Run button.
You should see:

(If you do not have a server yet, you can try it out here.)
Adding a question
Now let’s change the interview so that it asks the user a question. Edit the interview and change the contents to:
---
question: Hello, ${ planet }!
buttons:
  - Exit: exit
mandatory: True
---
question: |
  What is your planet's name?
fields:
  - Your Planet: planet
---
(If you do not have your own server yet, you can try it out here.)
It should now ask you “What is your planet’s name?” and then greet your world by its name.
Try clicking in the navigation bar. This toggles the display of information that will help you understand how a question came to be asked. This can be helpful for “debugging” your interview. Information about the readability of your interview question is also displayed.

Note that end users will not see the tab; it will only be shown to users if the interview is in the Playground, or if the server is configured as a development server.
In this example, the information explains that the interview tried to
show a mandatory question, but couldn’t, because it needed the
definition of the variable planet. Therefore it looked for a
question that offered to define planet, and asked that question of
the user.
Adding some Python code
Now let’s extend the interview by adding a code block that makes a
calculation based on a number provided by the user.
Change the interview code to the following:
---
question: Hello, ${ planet }!
subquestion: |
  I surmise that you have no more than ${ inhabitant_count }
  inhabitants.
buttons:
  - Exit: exit
mandatory: True
---
question: |
  What is your planet's name?
fields:
  - Your Planet: planet
---
code: |
  if favorite_number == 42:
    inhabitant_count = 2
  else:
    inhabitant_count = 2000 + favorite_number * 45
---
question: What is your favorite number?
fields:
  - Number: favorite_number
    datatype: number
---Note that the order in which the question and code blocks appear
in the YAML does not determine the order in which questions are
asked. This is because docassemble only asks questions as needed
and when needed. The path of this interview is driven by the single
mandatory question. In order to say “Hello, ______”,
docassemble needs to know what planet is, so it asks the
question “What is your planet’s name?” Then, in order to say “I
surmise that you have no more than ____ inhabitants,”
docassemble needs to know what inhabitant_count is, so it runs
the code that computes inhabitant_count. However, in order to
compute that, docassemble needs to know favorite_number, so it
asks “What is your favorite number?” Then it knows everything it
needs to know in order to display the mandatory question.
The code block contains Python code. The syntax follows the
rules of Python. For example, the == syntax tests whether the
favorite_number is 42 or not. The + performs addition and the *
performs multiplication. The = sets the value of a variable.
Creating a document
Now let’s provide the user with a document by adding an attachment.
---
question: Hello, ${ planet }!
subquestion: |
  I surmise that you have no more than ${ inhabitant_count }
  inhabitants.
attachment:
  name: A letter for the inhabitants of ${ planet }
  filename: hello
  metadata:
    SingleSpacing: True
  content: |
    Dear ${ planet } residents,

    Hello to all ${ inhabitant_count } of you.

    Goodbye,

    Your friend
buttons:
  - Exit: exit
mandatory: True
---
question: |
  What is your planet's name?
fields:
  - Your Planet: planet
---
code: |
  if favorite_number == 42:
    inhabitant_count = 2
  else:
    inhabitant_count = 2000 + favorite_number * 45
---
question: What is your favorite number?
fields:
  - Number: favorite_number
    datatype: number
---This creates a document “from scratch” that is available in PDF or RTF
format. The content of the document is contained in the content
specifier within the attachment specifier.
Let’s also try modifying this interview to use a DOCX template in order to generate a document that will be available to the user in PDF or DOCX format.
To do this, first open a word processing application capable of saving files in DOCX format (e.g., Microsoft Word). Create a file that looks like the following:
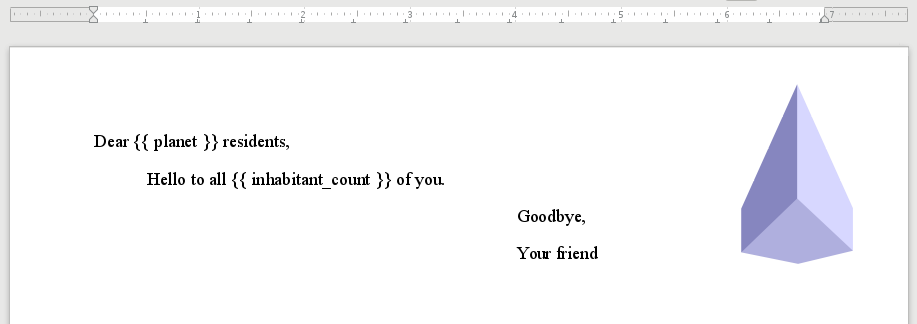
You can format this file
however you like; in this example, we have indented some text and
inserted an image. The important thing is that the variable names
planet and inhabitant_count are spelled correctly and are enclosed
in double curly brackets.
Save the file as a DOCX file (e.g., hello_planet.docx).
Now you need to make this DOCX file available to your interview by putting the DOCX file in the Templates folder of your Playground.
To do this, go to the Folders menu and select “Templates.”

Then, go to “Upload a template file” and click “Choose Files.”

Locate your DOCX file on your computer and select it. Then click Upload.
Now you should see the DOCX file listed as one of your Templates.

Then, click Back or Back to Playground to go back to the main page of the Playground.
Now you need to edit the interview so that it uses the DOCX file.
In the block with the attachment, replace the content
specifier with a docx template file specifier that references the
file you uploaded. The interview should look like this:
---
question: Hello, ${ planet }!
subquestion: |
  I surmise that you have no more than ${ inhabitant_count }
  inhabitants.
attachment:
  name: A letter for the inhabitants of ${ planet }
  filename: hello
  docx template file: hello_planet.docx
buttons:
  - Exit: exit
mandatory: True
---
question: |
  What is your planet's name?
fields:
  - Your Planet: planet
---
code: |
  if favorite_number == 42:
    inhabitant_count = 2
  else:
    inhabitant_count = 2000 + favorite_number * 45
---
question: What is your favorite number?
fields:
  - Number: favorite_number
    datatype: number
---For more information about assembling downloadable documents, see the documents section.
Decorate with an image
Now let’s try decorating one of the questions with an image.
First you need to upload the image you want to use.
From the Playground, go to the Folders menu and select “Static files.” (The files are called “static” because they do not change, unlike templates, which can produce different files every time.)

Then, go to “Upload a static file” and click “Choose Files.”

After you select the file (or files) on your computer that you want to upload, click Upload. You should now see the file listed as one of the “Static files.”

In this example, the file is globe.svg, a picture of a globe.
Now, click Back or Back to Playground and add the following to your interview:
---
image sets:
  freepik:
    images:
      earth: globe.svg
    attribution: |
      Icon made by [Freepik](https://www.flaticon.com/authors/freepik)
---
The file globe.svg is a copyrighted image obtained from Freepik
with an attribution-only license. The image sets block
facilitates the use of such images. It defines a set of images,
called freepik, that share a common attribution. All the images you
obtain from this source can be added to this image set, and an
appropriate attribution line will be added to the screen whenever the
image is used.
Under images, we indicate that the shorthand name we will give our
image is earth.
Now, edit the “What is your planet’s name?” question and add a
decoration line referencing earth:
---
question: |
  What is your planet's name?
fields:
  - Your Planet: planet
decoration: earth
---
Now, when you run the interview, you can see that the image “decorates” the question:

For more ideas about how you can extend your interview, check out the examples area of the Playground.
Testing your interview
Any time you develop an interview, you will want to test it on multiple devices, and ask other people to test it out and give you feedback.
The “Save and Run” button is not the only way to start using an interview in your Playground. Any interview in the Playground can be started by visiting its hyperlink. To get this hyperlink, right-click on the Share button and copy the URL to your clipboard. You can share this URL with other people, or bookmark it in your browser. When people visit this URL, they will start an interview session. (Note that this only works if the server you are using is accessible to the user’s device; if you are using a personal computer, your computer’s firewall might prevent other people from accessing it.)
Packaging your interview
So far, we have been running our interview from the Playground, which is a testing area where we can test things, break things, and “play” with different possibilities. If our interview has reached a point where it is flawless and we want to put it into “production” to that users can use it, we need to move it out of the Playground and install it in a more “permanent” place.
To do this, we bundle our interview into a “package.” Packages can be installed on the same system, or another system, or they can be shared with other developers or posted on GitHub.
Go to the Folders menu and select “Packages.”

This will take you to the “Packages” folder, where you can create and edit packages.

If there is an existing package, click the button to create a new package. Otherwise, edit the “New” package.
Call your new package “helloworld.”

On this screen, you can define the characteristics of your package and indicate which resources from the Playground should be included in the package.
Under “Interview files,” select your hello.yml file.

Under “Static files,” select your globe.svg file.

Under “Template files,” select your hello_planet.docx file.

If you were creating an actual package for distribution, you would type a careful description of your package and the contents of a “README” file here. But since this is only a tutorial, you can skip that.
At the bottom of the screen, you will see some buttons:
Click the Save button to save your package.
Then, once your package is saved in the system, you will see the following buttons at the top of the screen.

You will see the following buttons at the bottom of the screen.
Click the Install button. This will take a snapshot of your package, bundle it all up into a Python package, and install that Python package on the computer.
Now, users can run the interview using a different URL. If your
server is interview.example.com, users will be able to run the
interview by visiting a URL like:
https://interview.example.com/interview?i=docassemble.helloworld:data/questions/hello.yml
Previously, the URL to your interview ended with something like
?i=docassemble.playground1:hello.yml. That is a link to the
“bleeding edge” version of your interview as it exists in the
Playground. The link that ends with
?i=docassemble.helloworld:data/questions/hello.yml is a link to the
snapshot that you installed. This will be the “stable” version of your
interview. The “filename” of your interview is
docassemble.helloworld:data/questions/hello.yml, which tells the
server “go into the Python package docassemble.helloworld, then go
into the data directory in that package, then go into the
questions subdirectory under data, and access the file hello.yml
in that subdirectory.”
Alternatively, you can use a more presentable URL, which is like a shorthand version of the above URL:
https://interview.example.com/start/helloworld/hello/
When you run this interview, the URL in the location bar will switch
to https://interview.example.com/run/helloworld/hello/. The
difference between start and run is that the start URL will
always start a new interview, while the run version will resume an
interview session that has already started.
It is also possible to make these URLs even shorter by using the
dispatch Configuration directive.
Now that your interview is installed, you can continue to make changes to the Playground version, while your users are using the snapshot that you installed. When you have made further modifications and you have a new version you want to make available again, you can just click the “Install” button again.
For serious deployment of interviews, it is recommended that you use separate “development” and “production” servers.
Another thing you can do from the “Packages” folder is click the
Download
button. This will download the package as a ZIP file called
docassemble-helloworld.zip.
If you unpack the contents of the ZIP file, you will have a folder
called docassemble-helloworld. You can make changes to the files,
then re-ZIP the docassemble-helloworld folder, and install the
revised package on a docassemble server using the Package
Management tool. Or, if you want to edit the revised contents of your
package in the Playground again, click the
button to upload the contents of your ZIP file into the Playground.
Storing on PyPI
A docassemble package is really just a regular Python package. It follows all of the conventions of Python software package distribution. That means you can share your package on PyPI, the central repository for Python software. Other people can then install your package on their servers using pip, just as they would install any Python software.
This section of the tutorial will explain how to upload the
docassemble.helloworld package to PyPI, but keep in mind that if
you try this yourself on a package called docassemble.helloworld,
you will probably get an error because package names on PyPI are
unique and the docassemble.helloworld package has already been
uploaded (namely, by me, when I was creating this tutorial). However,
these instructions will work if you use a package name of your own
invention.
First, you need to create an account on PyPI and obtain an API
key. The API key has the form pypi- followed by a series of
alphanumeric characters.
The docassemble configuration on your server will need to be set
up to allow publishing to PyPI. To configure this, log in as a user
with admin privileges, go to “Configuration” on the menu, and add
the following to the configuration:
pypi: TrueIf this configuration has been made, you can go to “Profile” from the
menu and scroll down to the “PyPI Username” and “PyPI Password”
fields. Fill in these fields with __token__ as the username and
your API key as the password. (This is how authentication works with
twine.)

Then, go to the “Packages” folder of the docassemble
Playground and open your docassemble-helloworld package that you
created above. At the bottom of the screen you will see
a message about whether the package is published on PyPI and/or
GitHub.

Press the PyPI button to publish the package to PyPI.
When the publishing is done, you will see an informational message with the output of the uploading commands. Check this message to see if there are any errors.
If the publishing was successful, then at the bottom of the page describing your package, you should see a message that the package now exists on PyPI. (However, sometimes the PyPI server is slow to reflect the existence of the package, so you may need to give it a minute or two.)

If you click the link, you can see what the package looks like on the PyPI web site.

Now, on the docassemble menu (of this server or another server), you can go to Package Management and install the package by specifying a “Package on PyPI.”

For more information about uploading packages to PyPI, see the PyPI subsection of the packages section.
Storing on Github
You can also share your package on GitHub, a popular version control system that facilitates collaboration.
You will need an account on GitHub. If you do not have one, you can create one.
Your docassemble configuration will need to be configured to allow GitHub integration. The instructions for setting that up are in the installation section.
Once your server allows GitHub integration, you can go to “Profile” on the menu, open “Other settings,” and click the link for “GitHub integration.” Follow the instructions to connect your GitHub account with your docassemble account.
Once you have connected your GitHub account with your
docassemble account, go to the “Packages” folder of the
docassemble Playground and open your docassemble-helloworld
package that you created above. At the bottom of the
screen you will see a message about whether the package is published
on GitHub.

Press the GitHub button.
You will be asked for a “commit message.” This is a brief, one-line message that describes the changes made to your package since the last time you “committed” changes. Each “commit” is like a snapshot, and the history of “commit” messages is a record of the development of your project. You can give your first commit a simple name:

However, your subsequent “commits” should have meaningful names that describe succinctly how that snapshot is different from the previous snapshot. You should also use the README text box to describe to other people the history of all of your changes.
When you press the “Commit” button, your package will be “pushed” to a “repository” in your GitHub account. If a repository does not already exist on GitHub with the name of your package, a new repository will be created.
When the uploading is done, you will see an informational message with the output of the uploading commands. Check this message to see if there are any errors.
If the publishing was successful, then at the bottom of the page describing your package, you should see a message that the package now exists on GitHub.

If you click the link, you can see what the package looks like on GitHub:

Now, on the docassemble menu, you can go to Package Management and install the package using its GitHub URL.

For more information about uploading packages to GitHub, see the GitHub subsection of the packages section.