Usually, your interview code runs whenever the user is “between screens.” The process goes like this:
- The user submits information from a docassemble screen (e.g., by pressing the “Continue” button).
- The user’s device sends information to the docassemble server.
- The server updates the interview variables based on that information.
- The server then evaluates the interview, using the updated interview variables, which may cause code to be run.
- The server sends a new screen back to the user’s device.
- The user sees the new screen.
You may find this process too limiting for you as an interview developer if you want your code to run at other times.
For example:
- If your code takes a very long time to run, the user will have to wait, looking at a spinner. For example, your code may trigger a factual investigation process that retrieves information from a variety of sources on the internet, which takes a long time to retrieve and process. The user may think the interview crashed when in fact it is hard at work. It would be better if the code could run in the background while the user continues to interact with the interview.
- You may want to process the user’s input before the user presses the “Continue” button. For example, when you conduct an interview in real life, you can interrupt the interviewee if he or she goes off on a tangent. You may want to do the same in an electronic interview. If your interview processes information that users type into a large text box, your users might spend a great deal of time typing their life story into the text box, when the first sentence of the user’s narrative would suffice. If your interview could process the user’s input as they are typing it, similar to the way Google gives you search suggestions as you are typing, you could return feedback to the user as they are typing, letting them know that they can stop typing.
- If your interview guides a user through a process that lasts several months, you might want your interview to send an e-mail to the user on a particular date in the future to remind them about something.
- You may want your interview to take an action triggered not by the user logging in, but by the receipt of an e-mail.
There are features in docassemble that address each of these needs.
- If you have
codethat takes a long time to run, you can run it in a background process. - If you want to process user input before the user submits it, you can cause the user’s web browser to check in with the server every few seconds and update the user’s screen with the results.
- If you want to schedule
codeto run at times when the user is not using docassemble, you can create a scheduled task. - If you want to allow people to send e-mails to your interview, you can provide users with a special e-mail address that processes e-mail messages and saves the results as an interview variable.
The following sections explain these features.
Background processes for time-consuming code
If you include code in your interview that takes a long time to run, such as code that looks up information in an on-line database, the screen will take a long time to load and the user may think that the application has “crashed” when it is actually just working normally.
To get around this problem, docassemble allows interview developers to run code in “background processes.” While the user is answering other questions, or looking at a user-friendly screen that instructs the user to wait, the docassemble server can be hard at work carrying out time-consuming tasks for the user.
These processes can even operate in parallel. For example, if your interview searches the user’s name in four different on-line databases, all of these searches can be carried out simultaneously, which will return a result to the user much faster than if the searches were carried out one after the other.
docassemble runs these background tasks using Celery, a “distributed task queue” system. Celery is highly scalable. If you are running docassemble on a single server and an interview starts 100 tasks at the same time, Celery will will queue the tasks and handle them in order, working on several of them at a time. And if background tasks are particularly important for your application, you can install multiple servers dedicated to handling these tasks.
To run code in the background, use the background_action()
function in combination with background_response() or
background_response_action(). When code runs in the background,
it runs inside of a Celery task, and any log messages or error
messages are written to the worker.log file.
The next subsections explain how these functions work.
background_action()
Here is an example that uses a background task to add a user-supplied number to 553 and return the result. (Of course, adding two numbers is not time-consuming and does not need to run in the background – this is just a demonstration!)
mandatory: True
code: |
  the_task
  if the_task.ready():
    final_screen
  else:
    waiting_screen
---
code: |
  the_task = background_action('bg_task', additional=value_to_add)
---
question: |
  How much shall I add to 553?
fields:
  - Number: value_to_add
    datatype: integer
---
event: bg_task
code: |
  # This is where time-consuming code
  # would go.
  background_response(553 + action_argument('additional'))
---
event: waiting_screen
question: |
  Hang tight.
  Still waiting for an answer.
subquestion: |
  This screen will reload every
  ten seconds until the answer
  is available.
reload: True
---
event: final_screen
question: |
  The answer is ${ the_task.get() }.
Briefly, here is what happens in this interview.
- The interview tries to evaluate the
mandatoryblock. The variablethe_taskis undefined, so the interview tries to define it by runningbackground_action(). However, the interview finds thatvalue_to_addis undefined, so it asks the user “How much shall I add to 553?” - The next time the interview is evaluated,
background_action()runs successfully becausevalue_to_addis now defined. Thebackground_action()function starts an action running in the background that addsvalue_to_addto the number 553. The variablethe_task, representing the status of the background task, is defined. - The call to
the_task.ready()returnsFalsebecause the task has not been completed yet, so thewaiting_screenis shown. - Since the
waiting_screenhas thereloadmodifier set, the screen reloads after ten seconds. - In the meantime, the
bg_taskaction is running in the background and finishes the calculation. - The next time the screen loads,
the_task.ready()will returnTrue, and thefinal_screenwill be shown. Thefinal_screenquestion callsthe_task.get()to retrieve the calculated value.
Starting a background process involves calling the
background_action() function.
---
code: |
  the_task = background_action('bg_task', additional=value_to_add)
---
The first argument to background_action(), bg_task, is the name
of an action available in the interview. Notice that the next block
is identified with event: bg_task; this is the block that contains
the code you want to run in the background.
There is an optional second argument to background_action(), not
used in this example, which indicates how the result of the action
should be communicated to the user. Omitting the second argument or
setting it to None means no communication (more on this setting
below).
The keyword argument, additional, is passed to the action (and
the value can be retrieved using action_argument()). You can
include as many keyword arguments as you want, called anything you want.
You can also have no keyword arguments at all.
The background_action() function returns an object that represents a
Celery “task.” In this example, the object is saved to a variable
called the_task. This variable can be used in the following ways:
the_task.ready()returnsTrueif the task has been completed yet, andFalseif not.the_task.failed()returnsTrueif the task raised an exception, andFalseif not.the_task.wait()will wait until the background task completes and then returnTrue.the_task.get()returns the result of the task. If the task has not been completed yet, the system will wait until the task is completed and then return the result of the task.the_task.result()is like.get(), except it returns an object containing details about the result of the task. This is useful primarily if the task ended prematurely because an exception was raised. The attributes of the object are:error_type- the name of the exception object (e.g.,IndexError).error_message- the error message (in plain text).error_trace- a traceback message (in plain text), which can be useful when debugging errors.variables- a list of variable names that the interview had been seeking, in order from most recent to least recent. This is useful if the task failed because a necessary variable was undefined; in that case, the first item in this list will be the name of this undefined variable.
the_task.revoke()will terminate the task. If you only want to remove the task from the queue if it has not started running yet, you can set the optional keyword argumentterminatetoFalse.
Celery will start trying to run the bg_task action as soon as
possible after background_action() is called. If a lot of other
tasks are already running, the task will go into a queue and will be
run as soon as a Celery “worker” is available.
Regardless of how long the bg_task action takes to finish, the
background_action() function will always return a response right
away. This means that when your interview starts a time-consuming
background task, the server will immediately present the user with a
new screen instead of making the user wait. The bg_task action
will run in the background, independently of whatever goes on between
the user and the interview. It will continue running even if the user
exits the browser.
The bg_task action runs in much the same way as an action
invoked by the user clicking on a hyperlink generated by
url_action(). (The parameters to background_action() will be
familiar to you if you have ever used url_action().)
---
event: bg_task
code: |
  # This is where time-consuming code
  # would go
  background_response(553 + action_argument('additional'))
---
The code in a background action can use the action_argument() and
action_arguments() functions to access the action parameters
(i.e., the keyword arguments passed to background_action()).
It can use the user_logged_in(), user_has_privilege(), and
user_info() functions to determine information about the current
user (i.e. the user who caused the background_action() function to
be called). In this respect, background actions are different from
scheduled tasks, which always run as the special “cron user.” In
addition, background tasks are different from scheduled tasks in
that you can run background tasks regardless of whether multi_user
is set to True or False.
There are two important things to understand about actions invoked
through background_action():
- Background actions are not capable of asking the user any
questions. Before calling
background_action(), you need to make sure that all of the variables the action needs have been defined. - Any changes made to variables by a background action will not be
remembered after the action finishes. In order to communicate back
to the interview, you need to use
background_response()orbackground_response_action()(discussed below).
Your background action is prevented from saving changes to the variables because background actions are intended to run at the same time the user is answering questions in the interview. For example, if the background process starts at 3:05 p.m. and finishes at 3:10 p.m., but the user answers five questions between 3:05 p.m. and 3:10 p.m., the user’s changes would be overwritten if the background process saved its changes at 3:10 p.m.
The background_response() function is the simplest way to return a
value to the interview, but you may want to use
background_response_action() if you want to make permanent changes
to the interview variables based on the code that is run in the background.
Also, even if you are not interested in obtaining any results from the
background action, and are only interested in the action’s side
effects, it is important that you end the action with a call to
background_response() (with no arguments). Otherwise, the result of
the background action is likely to be an exception (if the interview
asks the user a question, this counts as an exception).
Note that any log messages or error messages generated by code that
runs in the background are written to the worker.log file, not the
docassemble.log file or the error.log file.
background_response()
The background_response() function terminates a background process
and returns information. In can be called both from background
tasks and from check in code (which is explained later). It does
different things depending on the context.
When called from a background task, the information you give it can
be accessed from foreground code by using the .get() method on the
“task” that was created.
For example, in the interview above, the task is created like this:
the_task = background_action('bg_task', additional=value_to_add)There is now a variable the_task in the interview, which is used to
keep track of the status of the bg_task action, which is running in
the background.
The bg_task action does not permanently change any of the variables
in the interview, but it passes its result back to the interview using
background_response().
background_response(553 + action_argument('additional'))The response value is the sum of 553 and whatever number was provided
in the additional parameter. Note that this value is not saved to
any variable. (Even if a background action tried to make a change
to variables in the interview’s dictionary, those changes would be
forgotten once the action completes.)
The interview can retrieve the value passed to background_response()
by calling the .get() method on the the_task variable. For
example,
question: |
  The answer is ${ the_task.get() }.
Note that once you call background_response(), your code block
stops executing. No lines of code that come after your call to
background_response() will ever be run.
Your background task code should always end with a call to
background_response(). Even if you don’t need to return any
response to the foreground code, calling background_response() with
no arguments will safely wrap up your background task. If your
code does not conclude with background_response(),
docassemble will attempt to run the initial and mandatory
blocks in your interview. Depending on the context, this might be
harmless, or it might cause unwanted side effects. At the very least,
you will probably get a warning message in the logs if your
background task concludes with an attempt to present a question
to the user.
The background_response() function is also used in the context of
processing interim user input (described below). In
this context, it terminates code that runs on the server while the
user is looking at and interacting with a screen.
In this context, background_response() can be called in a variety of
ways. (All of these methods are explained with examples in the
section on processing interim user input.)
The first way that it can be used is to populate [TARGET ...] areas
on the screen. If you only want to populate a single target area
(e.g., [TARGET mytarget]), run:
background_response(target='mytarget', content='Hello, world!')If you want to populate multiple target areas (e.g., [TARGET top_area] and
[TARGET bottom_area]), provide a list of dictionaries:
background_response([{'target': 'top_area', 'content': "Hello, world!"}, {'target': 'bottom_area', 'content': 'Goodbye, world!'}])Instead of writing HTML to areas of the screen, you can set the values
of input fields by calling background_response() with a dictionary
of field values, followed by 'fields':
background_response({'favorite_fruit': 'apple', 'likes_vegetables': True}, 'fields')The background_response() function can also be used to run
literal JavaScript in the user’s browser:
background_response('alert("hello world!")', 'javascript')It can also be used to show an informational message at the top of the user’s screen:
background_response('Hello, world', 'flash')It can also cause a refresh of the user’s screen:
background_response('refresh')When using these, make sure to avoid a situation where your code gets
into an infinite loop and the check in task runs multiple times per
second. A check in call happens frequently: when the screen loads,
when a change event is triggered on an input element, and every six
seconds. If your background_response() triggers a check in call,
which then runs background_response() again, there will be an
infinite loop. Make sure to use the JavaScript console in your
browser when testing your use of background_response().
background_response_action()
It is possible for long-running tasks to save information to the
interview’s dictionary, but they need to do so by sending the
information to a separate “action,” the purpose of which is to save
the information to the interview’s dictionary. The action is
triggered by calling the background_response_action() function.
Information can be passed to this action in the form of arguments.
event: bg_task
code: |
  # This is where time-consuming code
  # would go
  value = 553 + action_argument('additional')
  background_response_action('bg_resp', ans=value)
---
event: bg_resp
code: |
  answer = action_argument('ans')
  background_response()
---
event: final_screen
question: |
  The answer is ${ answer }.
In this example, the action that runs in the background is bg_task
and the action that changes the interview’s dictionary is bg_resp.
---
event: bg_task
code: |
  value = 553 + action_argument('additional')
  background_response_action('bg_resp', ans=value)
---
event: bg_resp
code: |
  answer = action_argument('ans')
  background_response()
---
The bg_task action finishes by calling
background_response_action('bg_resp', ans=value).
(background_response_action(), like other functions including
background_response(), message(), command(), and
response(), tells docassemble to stop whatever it is doing.
docassemble will not process any code that follows
background_response_action() in a code block.)
The first argument to background_response_action() is the name of
the action to be run, and the remainder of the arguments are keyword
arguments that are sent to the action. In the above example, The
bg_resp action retrieves the argument ans and changes the variable
answer in the interview’s dictionary to the value of the ans argument.
The idea here is that bg_task is a long-running task, while
bg_resp is a short-running task devoted only to saving specific
results of the long-running task. The brief action does not
interfere with the ongoing interview; it simply retrieves the
dictionary from storage, makes some specific changes, and then saves
the dictionary to storage.
When the code for the bg_resp action runs, it runs separately from
the bg_task action. If bg_task changes a variable in the
interview’s dictionary, the bg_resp action will not be able to see
those changes. The only way the bg_task action can send information
to the bg_resp action is by passing arguments to it via the
background_response_action() function.
In computer programming terminology, the bg_resp action is similar to a
callback function.
The bg_resp action ends with background_response() to indicate that
the action has run successfully and nothing further needs to be done.
It is important that the action end with a call to
background_response() because if it did not end with this, the
interview code would continue to be processed (just as it would with a
regular action), which may generate an error or cause unwanted side
effects.
If you call background_response() with an argument, the value of the
argument will be available in your interview as the result of
the_task.get(). You probably will not need to pass values this way,
since you can communicate results by setting interview variables.
background_error_action()
If your long-running background process ends with an error, such as a
Python computation error, or a situation where a necessary variable
is undefined, an error will be printed to the worker.log file. But
you might want your interview to do something special in response to
this circumstance. For example, you might want an e-mail to be sent
to an administrator so that someone can fix a problem right away. Or
you might want to make a record in the interview dictionary regarding
what went wrong with the background task.
One way to intercept errors is to use Python’s try/except
logic. However, this can be tricky because docassemble uses
Python’s exception system to execute code blocks and process
templates, so some error types should not be intercepted
(e.g. NameError). You can use try/except to trap specific
error types, if you know what errors are likely to happen. But if you
don’t know what errors your code will encounter, this might not be
feasible.
Another way to handle errors gracefully in a background process is to
use the background_error_action() function. This function allows
you to specify an action that should be run in case the background
process fails for any reason. For example, the following code will
run the bg_failure action if the background task runs into an error.
In this case, there will be a “divide by zero” error if the user sets
the “Denominator” to zero.
question: |
  Give me some numbers.
fields:
 - Numerator: b
   datatype: number
 - Denominator: c
   datatype: number
---
code: |
  need(b, c)
  task = background_action('bg_task')
---
mandatory: True
code: |
  if task.ready():
    show_result
  else:
    show_waiting_screen
---
event: show_waiting_screen
reload: True
question: |
  Waiting for result...
---
event: show_result
question: |
  Result of task
subquestion: |
  % if computation_ok:
  The result was ${ answer }.
  % else:
  There was an error.
  % endif
---
event: bg_task
code: |
  # This is where time-consuming code
  # would go.
  background_error_action('bg_failure')
  a = b / c
  background_response_action('bg_success', answer=a)
---
event: bg_success
code: |
  computation_ok = True
  answer = action_argument('answer')
  background_response()
---
event: bg_failure
code: |
  computation_ok = False
  background_response()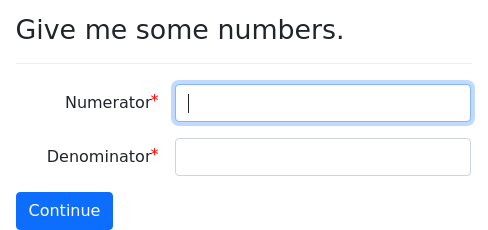
In this example, background_error_action() is called, before the
bg_task block does its work, in order to tell docassemble that
if the bg_task action results in an error, the bg_failure
action should be run. If bg_task succeeds in running to
completion, it ends with a call to background_response_action(),
which will run the bg_success action.
The bg_success and bg_failure actions are effectively two
callback functions, one of which runs on success and one of which
runs on failure. The ways that each operates are very similar. While
the changes that bg_task makes to the interview’s dictionary will
not be saved, the changes that bg_success and bg_failure make will
be saved. While bg_task may take a long time, bg_success and
bg_failure should be designed to finish their work promptly.
When you call background_error_action(), you can specify arguments,
much as you can specify arguments when you call
background_response_action(). You might wish to use arguments to
indicate in what context an error took place.
Another similarity with background_response_action() is that
within an action specified by background_error_action(), you can
use background_response() to return a response value back to the
interview. This value can be retrieved using the .get() method on
the task object.
One difference between an action specified by
background_error_action() and an action specified by
background_response_action() is that when an “error” action is
run, docassemble will pass additional arguments to the action,
which contain information about the error. These arguments are:
error_type- contains the name of the exception object (e.g.,IndexError).error_message- contains the error message (in plain text).error_trace- contains a traceback message (in plain text) that can be useful in debugging.variables- contains a list of variable names that the interview had been seeking, in order from most recent to least recent.
(These arguments will override any existing arguments, so don’t use
these names when indicating arguments in your call to
background_error_action().)
The following interview illustrates these features.
mandatory: True
code: |
  if the_task.ready():
    if the_task.failed():
      error_screen
    else:
      final_screen
  else:
    waiting_screen
---
code: |
  the_task = background_action('bg_task', additional=value_to_add)
---
question: |
  How much shall I add to 553?
fields:
  - Number: value_to_add
    datatype: integer
---
event: bg_task
code: |
  # This is where time-consuming code
  # would go
  background_error_action('bg_fail', stage='calculation')
  value = 553 + action_argument('additional') / 0
  background_response_action('bg_resp', ans=value)
---
event: bg_resp
code: |
  answer = action_argument('ans')
  background_response()
---
event: bg_fail
code: |
  errmess = "Failure at the " \
            + action_argument('stage') \
            + " stage due to a " \
            + action_argument('error_type') \
            + " error"
  background_response('handled_error')
---
event: error_screen
question: |
  There was an error.
subquestion: |
  The saved error message was
  ${ errmess }.

  The value was
  `${ the_task.get() }`.

  The error was
  `${ the_task.result().error_type }`.

  The trace was

  ${ indent(the_task.result().error_trace) }

  The message was

  ${ indent(the_task.result().error_message) }

  The variables were
  `${ repr(the_task.result().variables) }`.
---
event: final_screen
question: |
  The answer is ${ answer }.
---
event: waiting_screen
question: |
  Hang tight.
  Still waiting for an answer.
subquestion: |
  This screen will reload every
  ten seconds until the answer
  is available.
reload: True
Timing issues
As soon as background_action() is called, a task goes into the
celery task queue. If celery has an available “worker,” the task
will start running right away.
If the task starts running while the interview is still running code, the background task will wait for the interview code to save its work before retrieving the interview dictionary and running the action code.
Likewise, if the task finishes while the interview is still running
code, and the task ends with a call to
background_response_action(), the “background response action”
will not run until the interview code is done processing.
This waiting is necessary to prevent concurrent processes from stepping on each others’ toes. Note, however, that the waiting will “time out” after four seconds. For this reason, your interview code and your “background response actions” should be designed to always finish in well under four seconds.
This waiting also imposes some limitations on what you can do in your
interview code. For example, if you are using
background_response_action() or background_error_action(),
your interview code should never wait for the background task to
finish. This means you should never:
- Call
.wait()on the task object; or - Call
.failed(),.get()or.response()on the task object unless.ready()isTrue.
It is safe to wait for the background task to finish if you know that
your interview’s background tasks do not use
background_response_action() or background_error_action().
Instead of using code to wait for a background task to finish, you can
use the reload modifier on a question, or some other technique
where the waiting takes place while code is not running.
Also, because of timing issues, you cannot use methods on a task
object from code that runs in the background. (All
code blocks indicated by background_action(),
background_response_action(), and background_error_action()
run in the background.)
Communicating results to the user interface
docassemble can automatically alert the user when a background job finishes. There are three ways this can be done.
The first way is to “flash” a message at the top of a user’s screen.
The second way is to cause the user’s screen to reload the interview
when the job finishes. If you used background_response_action()
to change the interview’s dictionary on the basis of work done by the
background process, then the user may see a different screen after the
interview reloads. However, it is important to be mindful of the
users’ perspective when using this feature; you would not want to
annoy users by refreshing their screens while they are in the middle
of entering information.
The third way is to cause the user’s browser to run JavaScript code produced by your background process.
The fourth way, if the screen has input fields in it, is to populate those fields with values.
You can cause these responses by setting the second argument to
background_action() to 'flash', 'refresh', 'javascript', or
'fields'. Setting the second argument to None means that no
notification of any kind will be sent to the user’s browser.
In the following example, the value provided to
background_response() (e.g., “The answer is 555.”), is
“flashed” at the top of the screen.
code: |
  the_task = background_action('bg_task', 'flash', additional=value_to_add)
---
question: |
  How much shall I add to 553?
fields:
  - Number: value_to_add
    datatype: integer
---
event: bg_task
code: |
  the_answer = str(553 + action_argument('additional'))
  background_response("The answer is " + the_answer + ".")
You can also “flash” messages when you use
background_response_action() to run a separate action
that saves changes to the interview’s dictionary. In your action that
sets variables, conclude your code with a call to
background_response() containing the message you want to flash.
code: |
  the_task = background_action('bg_task', 'flash', additional=value_to_add)
---
question: |
  How much shall I add to 553?
fields:
  - Number: value_to_add
    datatype: integer
---
event: bg_task
code: |
  value = 553 + action_argument('additional')
  background_response_action('bg_resp', ans=value)
---
event: bg_resp
code: |
  answer = action_argument('ans')
  background_response("The answer is " + str(answer) + ".")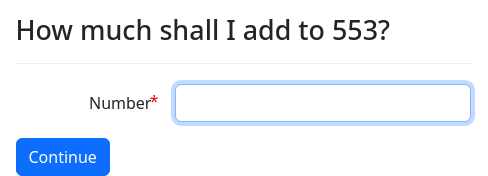
In the next example, when the background process finishes, the user’s
screen refreshes. Since the background_response_action() function
was used to save the result of the background process to a variable
(answer), the result can be displayed by referring to ${ answer }.
code: |
  the_task = background_action('bg_task', 'refresh', additional=value_to_add)
---
question: |
  How much shall I add to 553?
fields:
  - Number: value_to_add
    datatype: integer
---
event: bg_task
code: |
  value = 553 + action_argument('additional')
  background_response_action('bg_resp', ans=value)
---
event: bg_resp
code: |
  answer = action_argument('ans')
  background_response()
The next example is like the first, except the notification takes
place through JavaScript code created by the background process,
which in this case uses the built-in JavaScript function
alert() to send a message to the user.
code: |
  the_task = background_action('bg_task', 'javascript', additional=value_to_add)
---
question: |
  How much shall I add to 553?
fields:
  - Number: value_to_add
    datatype: integer
---
event: bg_task
code: |
  the_answer = str(553 + action_argument('additional'))
  background_response("alert('The answer is " + the_answer + ".');")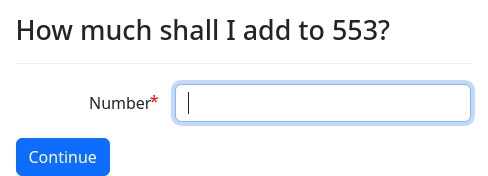
Note that the user interface does not respond immediately when the
background task finishes. The user’s browser polls the server every
six seconds (edit checkin interval to adjust this). Therefore,
users may experience up to a six-second delay after the background
process finishes before they receive notification.
The next example is like the previous, except that it populates fields on the screen.
code: |
  the_task = background_action('bg_task', 'fields', additional=value_to_add)
---
question: |
  How much shall I add to 553?
fields:
  - Number: value_to_add
    datatype: integer
---
event: bg_task
code: |
  the_answer = 553 + action_argument('additional')
  background_response({'the_number': the_answer})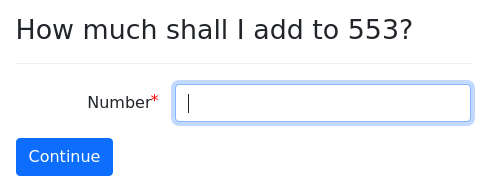
The following example shows how to assemble a document in the background and then refresh the user’s screen when the document has been assembled.
mandatory: True
code: |
  need(sweetheart)
  if the_task.ready():
    final_screen
  else:
    waiting_screen
---
question: |
  What is the name of your
  sweetheart?
fields:
  - Name: sweetheart
---
code: |
  the_task = background_action('assembly_task', 'refresh')
---
event: assembly_task
code: |
  background_response_action('assembly_done', document=the_document)
---
attachment:
  name: A letter
  filename: letter
  variable name: the_document
  content: |
    ${ sweetheart }, will you
    marry me?
---
event: assembly_done
code: |
  the_letter = action_argument('document')
  background_response()
---
event: waiting_screen
question: |
  Please wait...
---
event: final_screen
question: |
  Document created
subquestion: |
  Don't read this letter, just send
  it to ${ sweetheart } immediately.
attachment code: the_letter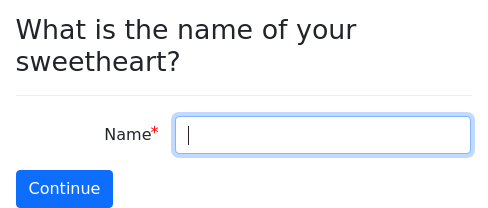
Note that the variable the_document only comes into existence in the
background task, not in the interview itself. The name of the file
that the interview uses is the_letter. The name the_document
refers to a DAFileCollection object, which is passed from the
background task to the user interview, and in the user interview, the
object is known as the_letter.
Comparison with scheduled tasks
docassemble also has a scheduled tasks feature, which is similar to the background processes feature in that the code runs in the background, without any direct interaction with the user. The scheduled tasks are different in that they are triggered at monthly, weekly, daily, or hourly intervals, rather than being triggered by the user.
Another difference is that scheduled tasks are always run by a special user, and this requires that server-side encryption be disabled in the interview. These restrictions do not apply to background processes.
Processing interim user input
Communicating interim information to the interview
If you set the check in modifier on a question, the user’s
browser will “check in” with the interview every few seconds and run
the given action. The arguments to the action (which can be
retrieved with action_argument()) will be the current values of
the fields on the screen.
mandatory: True
code: |
  counter = 0
  drafts = set()
---
question: |
  What is your favorite food?
fields:
  - Favorite food: favorite_food
check in: track_drafts
---
event: track_drafts
code: |
  counter += 1
  if action_argument('favorite_food'):
    drafts.add(action_argument('favorite_food'))
---
mandatory: True
question: |
  Your favorite food
subquestion: |
  Your favorite food is ${ favorite_food }.

  You checked in ${ counter } times.

  Your draft choices were
  ${ comma_and_list(drafts) }.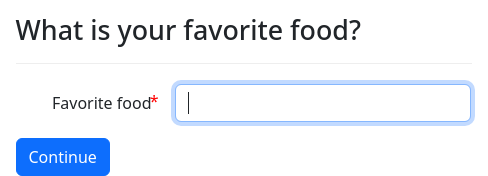
The value of check in is the name of the action that should be run
(in this case, track_drafts). Any changes made to the interview
variables during the action are saved.
The “check in” process takes place:
- Every six seconds, as well as
- Every time a change event takes place on an input element. For text inputs, this happens when the “focus” leaves the text box, as it does when the user clicks outside the text box or presses the tab key. The change event is not triggered from every keypress.
In the above example, a counter is incremented each time the browser
“checks in.” In addition, the current value of favorite_food is
tracked in a Python set called drafts. The actual variable
favorite_food is not set until the user presses “Continue,” but the
track_drafts code discovers the “draft” value by calling
action_argument().
Note that the values returned by action_argument() and
action_arguments() are raw, unprocessed strings that come directly
from the values of the HTML input elements, such as `‘23.2’, ‘True’,
‘False’, and ‘’. The values might not meet input validation
requirements.
Two special values can be retrieved with action_argument():
_initialwill beTruefor the firstcheck inrequest, and for all other requests will beFalse._changedwill beNonefor any periodiccheck inrequests, and will be set to the name of a field for anycheck inrequests that happen because a field was changed.
The action_arguments() dictionary does not contain these values;
they are only available by calling action_argument().
Note that unlike background tasks, code that runs from check
in can directly make permenent changes to the interview answers.
Because it has this privilege, code that runs from check in must
run quickly (in less than four seconds).
Updating the screen
You can also use check in to communicate information back to the
screen.
Template blocks
In the example above, check in referred to a code block. In
the example below, check in refers to a template block. The
content of the template is inserted into the user’s screen in an
area designated by the template’s target.
question: |
What is your favorite food?
fields:
- Favorite food: favorite_food
under: |
[TARGET feedback]
check in: question_food
---
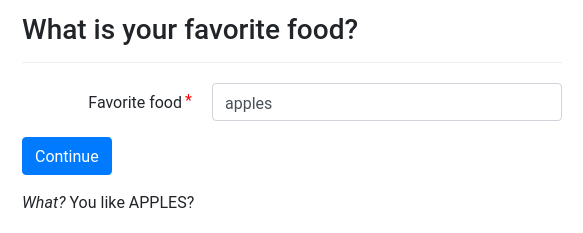
template: question_food
content: |
% if action_argument('favorite_food'):
_What?_ You like
${ action_argument('favorite_food').upper() }?
% endif
target: feedback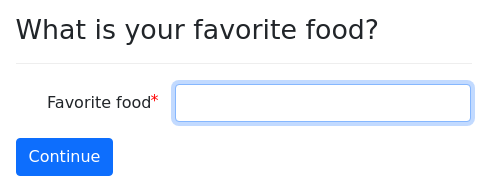
If the user types “apples,” the following message will appear:
The timeline for this process is as follows:
- When the screen is drawn, the
[TARGET feedback]markup in theundertext area of the question (the area underneath the “Continue” button) is converted into an invisible placeholder area identified by the keywordfeedback. - The user types “apples” into the “Favorite food” field.
- The browser “checks in” with the server, sending the values of all the fields on the page.
- On the server, docassemble seeks a definition for
question_food. It finds atemplatethat offers to definequestion_food. Thistemplatehas atarget, so it will behave differently than ordinarytemplates. Instead of setting the variablequestion_foodto aDALazyTemplateobject, docassemble will return thecontentto the browser, indicating that it is “targeted” for the area on the screen calledfeedback. - The web browser takes the content and plugs it into the invisible
placeholder area identified by the keyword
feedback.
If you want to run code and then use a template to communicate
results back to the user, just include a reference to the template
at the end of your code:
question: |
  What is your favorite food?
fields:
  - Favorite food: favorite_food
under: |
  [TARGET feedback]
check in: question_food
---
event: question_food
code: |
  if action_argument('favorite_food'):
    the_food = action_argument('favorite_food').upper()
  else:
    the_food = 'nothing'
  food_message
---
template: food_message
content: |
  _What?_  You like ${ the_food }?
target: feedback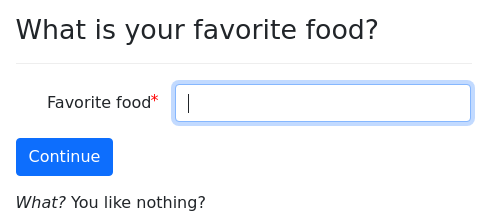
Populating targets with background_response()
Another way to send messages to the user’s screen is to use code
to plug raw HTML into [TARGET ...] areas:
question: |
  What is your favorite food?
fields:
  - Favorite food: favorite_food
under: |
  [TARGET feedback]
check in: question_food
---
event: question_food
code: |
  food = action_argument('favorite_food')
  if food:
    content = "What? You like " + food.upper() + "?"
  else:
    content = ''
  background_response(target='feedback',
                      content=content)
---
mandatory: True
question: |
  Your favorite food is ${ favorite_food }.
Calling background_response() with the keyword arguments target
and content will result in the content being plugged into the
user’s screen in the [TARGET ...] area designated by the target
argument. Unlike the method that uses templates, this method does
not convert Markdown to HTML; rather, the content is inserted as
raw HTML.
If you want to plug text into more than one [TARGET ...] area, you
can do so by calling background_response() with a list of
dicts, where each dict has the keys target and content.
check in: question_food
question: |
  What is your favorite food?  [TARGET feedback_one]
fields:
  - Favorite food: favorite_food
under: |
  [TARGET feedback_two]
---
event: question_food
code: |
  food = action_argument('favorite_food')
  if food:
    content_one = "  (Please don't be gross.)"
    content_two = "What? You like " + food.upper() + "?"
  else:
    content_one = ''
    content_two = ''
  background_response([{'target': 'feedback_one',
                      'content': content_one},
                      {'target': 'feedback_two',
                      'content': content_two}])
Populating fields with background_response()
Another way to communicate results to the user’s screen is to populate
input elements. If you call background_response() with a
dictionary as the first parameter and 'fields' as the second
parameter, the fields on the screen will be populated with the values
indicated in the dictionary. The keys of the dictionary should be
variable names currently displaying on the screen (e.g., as they are
defined in the fields specifier). The values of the dictionary
should be the values that you want the fields to have. For example:
question: |
  Let's calculate some stuff.
fields:
  - A: var_a
    datatype: number
  - B: var_b
    datatype: number
  - C: var_c
    datatype: number
check in: add_numbers
---
mandatory: true
question: |
  % if var_c == var_a * var_b:
  The correct answer is ${ var_c }.
  % else:
  That answer is not right!
  % endif
---
event: add_numbers
code: |
  if action_argument('var_a') != '' and action_argument('var_b') != '':
    answer = float(action_argument('var_a')) * float(action_argument('var_b'))
    background_response({'var_c': answer}, 'fields')
  background_response()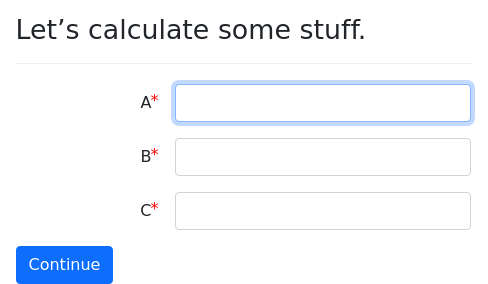
Populating dropdown choices with background_response()
You can also use the 'fields' form of background_response() to
change the options in a dropdown list of a field on the screen. To do
this, call background_response() as though you are setting the value
of the dropdown field, but in place of the value, substitute a Python
dictionary with the keys choices and value. The choices key
should refer to a data structure containing the options that the
dropdown list will have. The value key is optional, but if it is
included it will cause the indicated value to be selected.
question: |
  Where do you live?
fields:
  - Country: country
    code: countries_list()
  - State: state
    code: |
      states_list(country_code=showifdef('country', 'US', prior=True)) \
      or \
      ['N/A']
    js enable if: val('country')
check in: update_states_list
---
event: update_states_list
code: |
  if action_argument('_changed') == 'country':
    background_response(
      {
        'state':
          {
            'choices': \
              states_list(country_code=action_argument('country')) \
              or \
              ['N/A']
          }
      }, 'fields')
  background_response()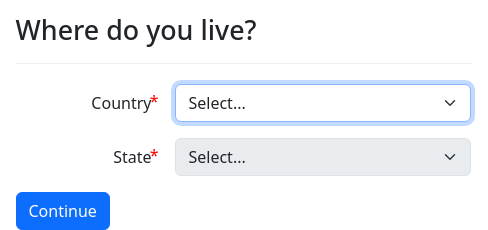
The data structure indicated by choices can be:
- a list of strings, in which case each string will be used as both the label and the value;
- a dictionary mapping values to labels;
- a list of single-item dictionaries mapping values to labels;
- a list of two-item lists, where the first item is the value and the second item is the label.
In this example, choices is being set to the output of
states_list(), which returns a Python dict that maps state
abbreviations to state names. Since there are some countries that do
not have states, it is possible that the Python dict will be
empty. If a dropdown field is required but has no choices, the user
will not be able to continue. In this example, the Python code
or {'N/A': country_name(action_argument('country'))} follows after
the call to states_list(), ensuring that there always at least one
choice.
When designing a screen like this, it is important to keep in mind the different scenarios in which the screen might be shown, and to ensure that the screen displays correctly in each context. The contexts include:
- The user arrives at the screen for the first time, and the Python
variables
countryandstateare undefined. - The user arrives at the screen by clicking the Back button on the
next screen. In this scenario, the Python variables
countryandstateare undefined, but docassemble will use the values the user previously entered as default values for the fields. - The user arrives at the screen as part of a review process, and the
Python variables
countryandstateare defined.
When the screen first loads, the “State” dropdown field is populated with:
states_list(country_code=showifdef('country', 'US', prior=True)) or ['N/A']Obtaining the country code with showifdef() is important because
the country may or may not be defined. If the Python variable
country is not defined, the list of states for the country 'US' is
used. If states_list() returns an empty dictionary, the or ['N/A']
ensures that there is at least one choice. It is important that the
the “State” dropdown is populated with one or more choices when the
screen first loads, because docassemble’s standard behavior when a
dropdown has no choices is to omit the field from the screen and
define the variable as None when the user presses “Continue.”
When the user arrives at the screen for the first time, and the
“Country” field is not populated, the State dropdown will be disabled
due to js enable if: val('country'). When the user selects a
country, the change event on the Country field will be triggered,
causing the State dropdown to become enabled and the check in action
to run with the _changed argument set to 'country'. When the
check in action returns a response to the browser, the list of
choices for the “State” field will be updated. Thus, it does not
matter what the initial choices of the “State” field are, since the
user will not see them. But it is important that there are initial
choices, because otherwise docassemble will assume that the field
should be omitted from the screen entirely.
The call to showifdef() uses the special prior=True keyword
parameter, which means that if the user arrived at the screen after
pressing the Back button, showifdef() will return the value of
country that the user had previously entered. This is important
because when the user arrives at the screen by pressing the Back
button, docassemble will populate the “Country” field with the
value of country that the user previously entered, and the list of
states should correspond with that country.
Note that check in code runs whenever any field on the screen
changes, and also runs every six seconds. To avoid unnecessary changes
to the screen, the check in code only returns a substantial response
if action_argument('_changed') == 'country'. It is important that
screen updates only happen at the particular times when you want them
to happen, because otherwise screen elements may update while the user
is interacting with them, resulting in a glitchy user experience.
As you can see from the above example, updating screens by making asynchronous calls to the server is complicated. By using separate screens to gather related variables, you can save yourself a lot of time that could be put to a more productive use.
Showing messages with background_response()
By setting the second parameter of background_response() to
'flash' and the first parameter to a message, you can “flash” a
message at the top of the user’s screen. In this example, a message
is flashed as soon as the user enters a favorite fruit.
question: |
  What is your favorite food?
fields:
  - Favorite food: favorite_food
  - Favorite drink: favorite_drink
check in: criticize_food
---
code: |
  favorite_food_interim = ''
---
event: criticize_food
code: |
  if action_argument('favorite_food') and action_argument('favorite_food') != favorite_food_interim:
    favorite_food_interim = action_argument('favorite_food')
    background_response("What? You like " + favorite_food_interim.upper() + "?", 'flash')
  background_response()
Running JavaScript with background_response()
Another way to communicate results to the user’s screen is to use
JavaScript. If you call background_response() with some
JavaScript code (as text) as the first parameter and 'javascript'
as the second parameter, the JavaScript code will be run in the browser.
question: |
  Let's calculate some stuff.
fields:
  - A: var_a
    datatype: number
  - B: var_b
    datatype: number
  - C: var_c
    datatype: number
check in: add_numbers
---
mandatory: true
question: |
  % if var_c == var_a * var_b:
  The correct answer is ${ var_c }.
  % else:
  That answer is not right!
  % endif
---
event: add_numbers
code: |
  if action_argument('var_a') != '' and action_argument('var_b') != '':
    answer = float(action_argument('var_a')) * float(action_argument('var_b'))
    background_response('flash("Hint: C should be " + ' + str(answer) + ', "success")', 'javascript')
  background_response()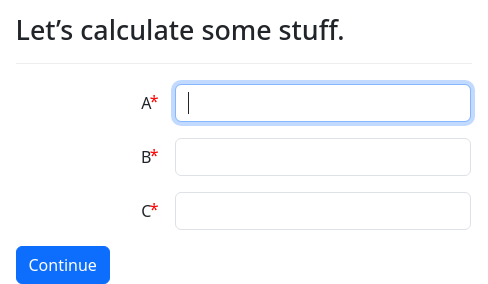
This example uses the flash() function in JavaScript to display
a message for the user.
See the Javascript functions section for more information about things you can do with JavaScript.
Refreshing the screen with background_response()
Another strategy is to use check in code to cause a refresh of the
user’s screen. If your check in code ends with
background_response('refresh'), the user’s screen will reload the
question from the server. The following example shows how you can
use this to dynamically update the list of choices in a radio button
list.
mandatory: True
code: |
  number_of_things = 3
---
question: |
  Tell me which thing you want.
fields:
  - "How many things are there?": number_of_things
    datatype: integer
    min: 1
    max: 10
  - "Which thing do you want?": thing
    input type: radio
    code: |
      range(1, number_of_things + 1)
check in: set_number_of_things
---
event: set_number_of_things
code: |
  if action_argument('number_of_things') and number_of_things != int(action_argument('number_of_things')):
    number_of_things = int(action_argument('number_of_things'))
    if number_of_things < 1:
      number_of_things = 1
    elif number_of_things > 10:
      number_of_things = 10
    background_response('refresh')
  background_response()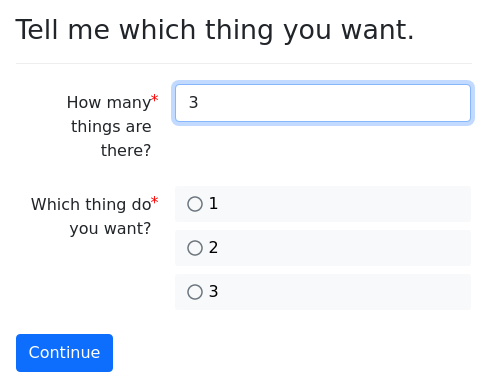
It is important that your check in code does not call
background_response('refresh') every single time it runs.
Otherwise, you will cause an infinite loop of screen refreshing. In
this example, background_response('refresh') is only called when
necessary (when the value of number_of_things changes).
Scheduled tasks
The “scheduled tasks” feature of docassemble allows your interviews to do things when the user is not using the interview.
For example, if your interview guides a user through a legal process that requires the user to file a document in court if the opposing party does not respond within 20 days, your interview can send an e-mail to the user after that 20 day period has expired, reminding the user to resume the interview so that he or she can prepare the appropriate legal document.
mandatory: True
code: |
  allow_cron = True
  multi_user = True
---
initial: True
code: |
  process_action()
---
question: |
  When was the document filed?
fields:
  - Filing Date: filing_date
    datatype: date
---
question: |
  What is your e-mail address?
fields:
  - E-mail: email_address
    datatype: email
---
mandatory: True
question: |
  Ok, I'll e-mail you at ${ email_address} 20 days
  from ${ format_date(filing_date) }.
buttons:
  Leave: leave
---
template: reminder_email
subject: |
  Hey, it's been 20 days.
content: |
  Don't forget about that thing you need to do!
---
event: cron_daily
code: |
  if task_not_yet_performed('20 day reminder') and date_difference(starting=filing_date).days > 20:
    send_email(to=email_address, template=reminder_email, task='20 day reminder')
  response()
---
Let’s go through this example step-by-step.
First, we set allow_cron to True, which allows scheduled tasks to
run, and we set multi_user to True, which disables
server-side encryption. (We need to disable this feature so that
the computer can access the interview when the user is not logged in.
The user’s data is still secure; it just does not have the layer of
additional security provided by server-side encryption.)
---
mandatory: True
code: |
  allow_cron = True
  multi_user = True
---
Next, there are three standard questions that gather the
filing_date and email_address variables and present a “final”
screen to the user. Note that on the final screen, there is no
exit button, only a leave button. If the user clicked an
exit button, the interview session would be erased from the
server. By contrast, clicking leave keeps the interview session
on the server. This is important because we want the interview to
persist on the server. We need the interview to exist twenty days
after the filing_date so that it can send the reminder e-mail.
---
question: |
  When was the document filed?
fields:
  - Filing Date: filing_date
    datatype: date
---
question: |
  What is your e-mail address?
fields:
  - E-mail: email_address
    datatype: email
---
mandatory: True
question: |
  Ok, I'll e-mail you at ${ email_address} 20 days
  from ${ format_date(filing_date) }.
buttons:
  Leave: leave
---
After this, we define the template for the e-mail that will be sent.
---
template: reminder_email
subject: |
  Hey, it's been 20 days.
content: |
  Don't forget about that thing you need to do!
---
Finally, we get to the “scheduled task.” The event line
designates the special variable cron_daily. This
code will run once per day.
---
event: cron_daily
code: |
  if task_not_yet_performed('20 day reminder') and date_difference(starting=filing_date).days > 20:
    send_email(to=email_address, template=reminder_email, task='20 day reminder')
  response()
---
The first thing the code does (wisely) is question whether the e-mail
reminder has already been sent. If the e-mail has already been sent,
it would be annoying to send the same e-mail again, every single day,
so we prevent that from happening. (The task_not_yet_performed()
function is part of docassemble’s task system.)
Next, the code evaluates whether the 20 day period has passed, using
the date_difference() function. If at least 20 days have passed,
the e-mail is sent. The send_email() function marks the “task” as
“performed” if the e-mail successfully sends.
The response() function is necessary to indicate that the task has
finished. If this is not included, the interview logic will be
evaluated after the code block finishes. In some cases, this will
be what you want, but in most cases this is not what you want.
In the context of the web application, the response() function
stops code execution and returns an HTTP response to the browser, but
in the context of a scheduled task, it merely stops code execution.
If you pass text to response(), the text will be printed to the
output.
By default, any changes made to the interview answers will be saved.
Thus, your scheduled task can affect what the user sees in the web
application. However, if your code does not change the answers, or
you do not need the answers to be saved, you can call
response(null=True). This will tell docassemble not to save the
answers. Doing this can help conserve system resources. This
behavior of the response() function only works in the context of
scheduled tasks.
If you are using Docker and you want to access the log of output of
scheduled tasks, use docker exec to enter the container and look
at the file /var/spool/mail/mail. The log consists of e-mail
messages. You can also view these messages using the mail command.
Enabling scheduled tasks
Scheduled tasks need to be triggered by some external source.
If you run docassemble on Docker, you do not have to worry about how the scheduled tasks are triggered; the tasks operate automatically. The tasks enabled in the Docker setup are:
cron_hourlycron_dailycron_weeklycron_monthly
If you are not using Docker, you will have to set up a system of
running the docassemble.webapp.cron module at regular intervals.
On Linux, the trigger can be a script installed as part of the cron
system. For example, a script in /etc/cron.daily could run:
python -m docassemble.webapp.cron -type cron_dailyA script in /etc/cron.weekly could run:
python -m docassemble.webapp.cron -type cron_weekly(And so on.)
The details of how exactly this command should be invoked depend on how you have installed docassemble. For example, the command should run under the same user as the web server, and if you have installed Python using a virtualenv, you need to invoke Python appropriately.
Note that you can use any variable name you want in the -type
argument to the docassemble.webapp.cron module. The variable name
is passed to the interview exactly as though it were the name of an
action given by url_action().
What the “cron” module does
The docassemble.webapp.cron module does two things:
- It cleans out inactive interviews if
-typeiscron_daily. - It runs scheduled tasks in interviews, invoking them as actions.
Deleting interviews after a period of inactivity
If the type of scheduled task is cron_daily, the
docassemble.webapp.cron module will delete interviews that have
been inactive for 90 days or longer. (This period can be
configured.) Activity is measured by whether the interview answers
have been updated within the period. This applies to all interviews
stored in the system that have not yet been deleted.
Note that interviews can be deleted from the system two other ways:
- When the user clicks an
exitbutton; and - If the user goes to the Interviews page and clicks a “Delete” button next to a listed interview, or clicks “Delete all.”
Running scheduled tasks
The docassemble.webapp.cron looks at every interview in the system
for which server-side encryption has been turned off. (Disabling
server-side encryption is performed by setting the multi_user
variable in the interview to True). The module then inspects the
interview data to see if allow_cron is set to True. If is, it
will see if the interview uses the variable given with the -type
argument. For example, if the type is cron_weekly, the module
will check if the interview has a block that offers to define the
variable cron_weekly. If there is such a block, the module will
run the interview with the action cron_weekly (and no action
arguments). Any changes made to the interview variables will be
saved.
Interviews containing scheduled tasks will run regularly, and the interview variables will be updated. This means that even if there is no activity from the original user, there will appear to be regular activity in the interview, which means that the interview deletion feature will never delete such interviews. Usually, it is a good thing that the interview deletion feature does not automatically delete interviews with scheduled tasks; you might have an interview that does something after a period of several months have passed.
However, you might not want your interviews to run scheduled tasks
indefinitely. For example, in the example interview above, the
interview will persist after the e-mail sends, and will stay on the
server forever. The cron_daily code will run on a daily basis
forever, doing nothing useful.
To get around this problem, you can instruct your scheduled task to delete the interview when it is no longer necessary to keep the interview alive. For example, you can include the following:
---
event: cron_monthly
code: |
  if last_access_days() > 365:
    command('exit')
---
This will run on a monthly basis, and will use the
last_access_days() function to check whether interview has been
accessed by a real user (that is, a user other than the cron user)
in the past year. If it has not, the interview will exit, meaning
that the interview will be deleted from the server.
The cron user
Scheduled tasks do not run as the user who started the interview; they
always run using the special “cron user.” Therefore, if you want your
scheduled task to send an e-mail to “the user,” make sure you collect
the real user’s e-mail address into a variable beforehand. During the
operation of a scheduled task, a call to user_info() will retrieve
information about the “cron user,” which is not what you want.
If your interview is a multi-user interview, make sure that the
“cron user” is not inadvertently kicked out of your interview before
process_action() is run. For example, an interview with this code
could prevent scheduled tasks from running:
---
default role: organizer
code: |
  multi_user = True
  role = 'organizer'
  if introduction_made and participants_invited:
    if user_logged_in():
      if user_info().email == first_person_email:
        role = 'first_person'
      elif user_info().email == second_person_email:
        role = 'second_person'
---
initial: True
code: |
  if role != first_person' and not ready_for_other_people:
    say_goodbye_to_user
---
initial: True:
code: |
  process_action()
---
event: cron_daily
code: |
  do_something_important()
---
When the “cron user” accesses this interview, it will not be able to
run the cron_daily action, because it will immediately be presented
with the say_goodbye_to_user screen.
One way to get around this problem is to move the initial
code block that runs process_action() so that it
appears before the block that runs say_goodbye_to_user:
---
initial: True:
code: |
  process_action()
---
initial: True
code: |
  if role != first_person' and not ready_for_other_people:
    say_goodbye_to_user
---
However, this opens up the possibility that someone in the role of
second_person could run actions without being screened. If this
is a problem, you could alternatively do:
---
initial: True
code: |
  if (role != first_person' and not user_has_privilege('cron')) and not ready_for_other_people:
    say_goodbye_to_user
---
The “cron user” is the only user on the system with the privilege of
cron, so you can use the user_has_privilege() function to detect
whether the user is the “cron user.”
Long-running scheduled tasks
If your scheduled tasks take more than a couple of seconds to run (for example if they download information from the internet), then they should run the long-running code as a background task. While the scheduled task is running, the task holds the interview variables in memory and writes them to the SQL server when it finishes. If a user accesses the interview through the web interface at the same time as the schedule task is running, the user’s changes to the interview could be wiped out. (The web interface will wait for four seconds if it sees that the interview variables are in use, but after four seconds have elapsed, it will assume the task that was using the interview variables has failed, and it will start using the interview variables.)
To run code in the background from within a scheduled task, just
combine what you have learned in the scheduled tasks section with
what you learned in the background tasks section.
event: cron_daily
code: |
  background_action('long_task', None)
  response()
---
event: long_task
code: |
  result = do_something_time_consuming()
  background_response_action('finalize_long_task', result=result)
---
event: finalize_long_task
code: |
  the_status = action_argument('result')
  response()
E-mailing the interview
An interview can allow users to send e-mails to it.
Here is how it works:
- The interview calls
interview_email()to obtain a unique e-mail address for the interview session, such as[email protected], and shares that e-mail address with the user. - When an e-mail is sent to
[email protected], the server stores the e-mail. - The interview uses
get_emails()to retrieve a list of e-mails that have been sent to[email protected].
question: |
  E-mailing to the interview
subquestion: |
  When you press continue, you will be
  provided with an e-mail address to
  which you can send an email.
field: intro_seen
---
need: intro_seen
mandatory: true
question: |
  E-mails sent to case
subquestion: |
  Send an e-mail to
  ${ interview_email() }
  and click Refresh.

  Be patient, though.  It takes a
  few seconds for e-mails to travel
  and be processed.

  % for item in get_emails():
    % if len(item.emails):
  Subject lines of all e-mails sent
  to ${ item.address }:

      % for mail_item in item.emails:
  * ${ mail_item.subject }
      % endfor
    % endif
  % endfor
buttons:
  - Refresh: refresh
In order for this feature to work, your server must be configured to receive e-mails. If you are using Docker, this involves:
- Disabling any e-mail server already running on the Docker host.
- Including
-p 25:25 -p 465:465in thedocker runstatement when you start your Docker container, so that communications to your server on port 25 and port 465 are forwarded to the Docker container; - Setting the MX record for your domain to point to your server.
(If you are using a multi-server arrangement, make sure to point
it specifically to the machine that operates with the
mailcontainer role); - Ensuring that the firewall rules (a/k/a “security groups”) protecting your server allow incoming connections on port 25 and/or port 465.
- Setting the
incoming mail domaindirective in the configuration to the e-mail domain you want to use, unless the domain you want to use for e-mailing is the same as the domain used for your web server (external hostname).
See the e-mail setup section of the installation instructions for details about how the e-mail receiving feature works.
Running code in the background when an e-mail arrives
If you want, you can set up your interview to run code in the
background whenever an e-mail is sent to one of your interview’s
sessions. This can be helpful if an e-mail arrives at a time when the
user is not using the interview, but the user may need to take action
based on the e-mail.
When an e-mail arrives, docassemble will attempt to run a
background action within the interview session. The name of the
“action” will be incoming_email and it will have one keyword
argument, email, which will be a DAEmail object representing the
e-mail that was received.
Below is an example that uses a background action to process an
incoming e-mail. The background action simply sets the interview
variable email to the e-mail itself (which is a DAEmail object).
mandatory: true
code: |
  multi_user = True
  email = None
---
mandatory: true
code: |
  intro_seen
  if email is None:
    waiting_screen
  else:
    all_done
---
question: |
  E-mailing to the interview
subquestion: |
  When you press continue, you will be
  provided with an e-mail address to
  which you can send an email.
field: intro_seen
---
event: waiting_screen
question: |
  E-mailing to the interview
subquestion: |
  Send an e-mail to:

  > ${ interview_email() }

  Once the e-mail is received and processed,
  you can click refresh to see the e-mail.
buttons:
  - Refresh: refresh
---
event: all_done
question: |
  E-mails received
subquestion: |
  The latest e-mail was:

  * Subject: ${ email.subject }
  * To: ${ email.to_address }
  * From: ${ email.from_address }
  * Reply to: ${ email.reply_to }
  * Return path: ${ email.return_path }
  % if email.body_text:
  * Body text: ${ email.body_text }
  % endif
  % if email.body_html:
  * Body HTML: ${ email.body_html.slurp() }
  % endif
  % if len(email.attachment):
  * Attachment: ${ email.attachment[0] }
  % endif
---
event: incoming_email
code: |
  # Time-consuming code that processes the
  # e-mail can go here.
  background_response_action('save_email', email=action_argument('email'))
---
event: save_email
code: |
  email = action_argument('email')
  background_response()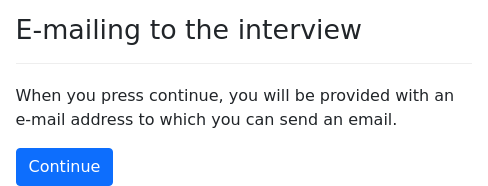
Note that:
- Your interview must set
multi_usertoTrue. Disabling server-side encryption for the interview session is necessary because if the user is not currently using the interview when the e-mail arrives, docassemble has no access to the user’s password, which is the key that decrypts the interview variables. (The same limitation applies to scheduled tasks.) - Your interview needs a
codeblock that will respond to an action by the name ofincoming_emailthat has a keyword argumentemail. - If it is necessary to make permanent changes to the interview
variables as a result of processing the e-mail, the
codethat runs the action needs to usebackground_response_action()to call a separate action, the sole purpose of which is to save values to variables. When docassemble runs theincoming_emailaction, it is as thoughbackground_action()was called, which means that the only way to make permanent changes to the interview variables is throughbackground_response_action(). This is helpful because thecodethat processes the incoming e-mail might take a long time to run. For example, the code might callocr_file()on each of the attachments.
If your interview uses roles, note that the incoming_email
action will be run using the privileges and user identity of the user
who originally obtained the e-mail address from interview_email().
This is different from scheduled tasks, which are run using the
privileges and user identity of the cron user.